Principles of Tooth Preparations1
Lecture 1: Principles of Tooth Preparations2
Presented by Dr Cheryl Fu
Learning Outcomes
Educational Objectives3
- Understand basic terminology for crown preparations
- Understand indications of crowns
- Understand the importance of the mechanical, biological, and aesthetic principles of tooth preparation
Required Reading
- Fundamentals of Fixed Prosthodontics: Chapter 9, Principles of Tooth Preparations
- Contemporary Fixed Prosthodontics: Chapter 7, Principles of Tooth Preparations
Indications for Crown Restorations
Clinical Considerations
Building upon foundational knowledge of direct restorations (Composite, GIC, and Amalgam), crown restorations are indicated based on several clinical factors.
Factors for Crown Consideration4
- Destruction of tooth structure
- Aesthetics
- Plaque Control / Moisture Control
- Retention
- Finance
- Other prosthodontic requirements (e.g., survey crowns for Removable Partial Dentures)

Mechanical Resistance
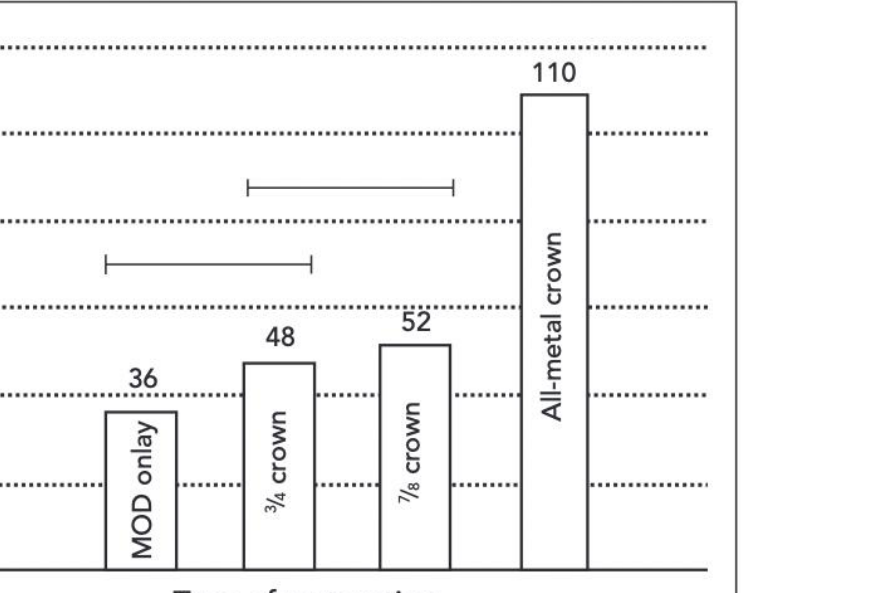
Clinical data comparing resistance to removal forces indicates varying performance across different crown types, including MOD (mesio-occlusodistal) configurations.
Primary Indications5
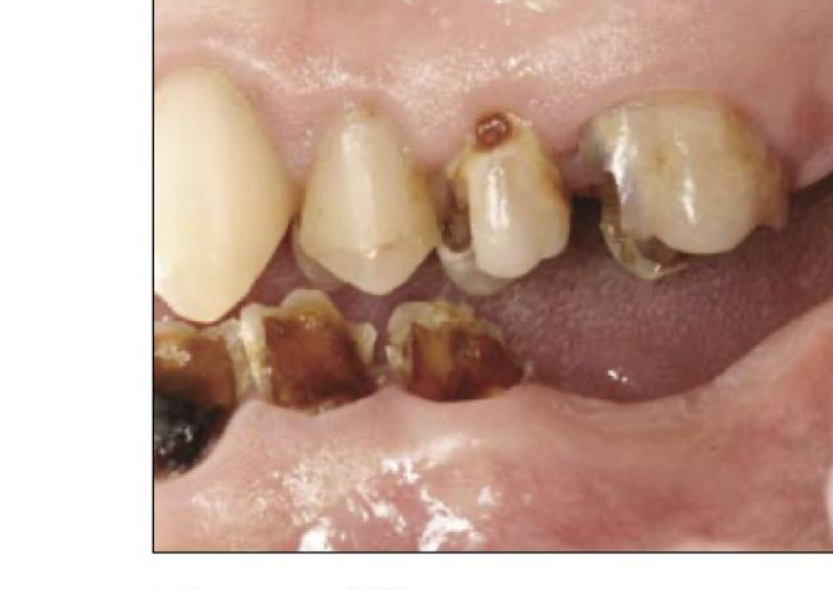
- Destruction of tooth structure
- Aesthetics
- Longevity
- Retention
 |  |
 |
Clinical Examples
Patients presenting with rampant caries, such as those associated with methamphetamine abuse, often require extensive crown restorations to address significant tooth destruction.
Research Context
Studies on the longevity of the tooth/restoration complex emphasize that the choice of material and technique significantly impacts the long-term success of the restoration.
Clinical Factors6
- Destruction of tooth structure
- Aesthetics
- Plaque Control / Moisture Control
- Retention
Risks of Indirect Restorations
A systematic review and meta-analysis regarding pulp necrosis and periapical pathosis following indirect restorations revealed the following:
- Incidence Rates: The overall incidence of pulp necrosis is approximately 5.02%, and periapical pathosis is 3.63%.
- Risk Factors for Pulp Necrosis:
- Presence of pre-operative caries or existing restorations.
- Treatment of anterior teeth.
- Temporization exceeding two weeks.
- Use of eugenol-free temporary cement.
- Final impressions taken with polyether.
- Permanent cementation with glass ionomer cement.
- Longer follow-up periods (>10 years).
- Treatment provided by undergraduate students or general practitioners.
- Risk Factors for Periapical Pathosis:
- Teeth restored with fixed partial dentures.
- Bone level < 35%.
- Follow-up periods exceeding 10 years.
While the overall incidence remains low, these factors must be integrated into the treatment planning process for vital teeth.
Indications for Treatment7
- Destruction of tooth structure
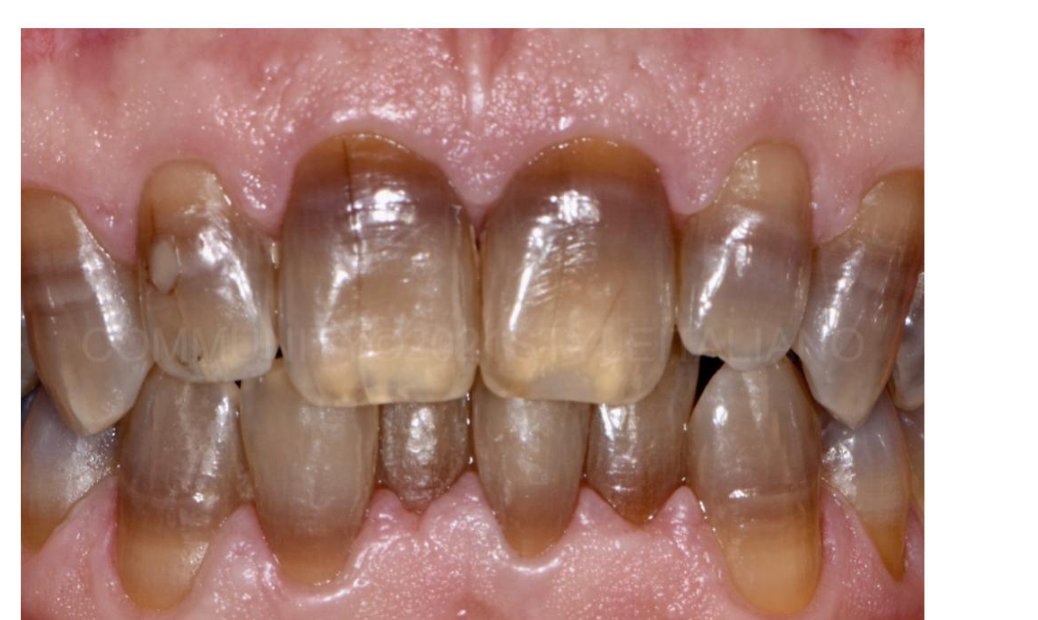
- Aesthetics (e.g., addressing tetracycline staining)
- Longevity
- Retention
 |  |
 |
Complex Cases
Full mouth rehabilitation may be necessary for patients presenting with severely worn dentition, often utilizing Porcelain-Fused-to-Metal (PFM) crowns to restore function and appearance.
Comparison of Indirect and Direct Restorations
Comparative Annual Failure Rates8
Research indicates that indirect restorations often demonstrate lower annual failure rates compared to direct restorations:
- Ceramic (Indirect): 1.9%
- Composite (Direct): 2.2%
- Amalgam (Direct): 3.0%

Primary Modes of Failure
- Ceramic Restorations: Predominantly fail due to bulk fracture.
- Composite Restorations: Predominantly fail due to marginal breakdown (secondary caries or deterioration) or fracture.
Survival Analysis
Comparative survival curves show that indirect adhesive inlays generally maintain higher success rates over time (measured in months) when compared to direct amalgam and composite restorations.
Clinical Summary9
- Mechanical Properties: When utilized correctly, indirect restorations may be superior to direct restorations regarding mechanical properties and longevity.
- Practical Constraints: Indirect procedures are more technically demanding for the clinician and significantly more expensive for the patient (e.g., approximately 400 for direct restorations).
Ethical and Clinical Decision Making
Clinicians must balance the pros and cons of each approach by considering:
- Is this the best option for the specific patient?
- Have all aspects of the clinical scenario and patient details been considered?
- Would the same treatment be recommended if the patient were a family member?
Summary of Findings10
- Indirect restorations offer potential superiority in mechanical properties and longevity if executed correctly.
- The transition from direct to indirect restorations involves increased technical difficulty and higher financial costs for the patient (1500+).
Final Considerations
- Maintain a careful balance between the advantages and disadvantages of the chosen restoration type.
- Ensure the treatment is the optimal choice for the individual patient.
- Perform a thorough review of all clinical and patient-specific factors.
- Apply the “family member” standard to treatment recommendations.
Clinical Workflow and Manufacturing
Clinical Procedures Overview
Clinical Sequence11
-
Initial Phase
- Clinical examination
- Primary Impression
- Tooth preparation and Temporisation
-
Impression and Data Acquisition
- Definitive Impression
- Intraoral scanning
-
Laboratory Fabrication Paths
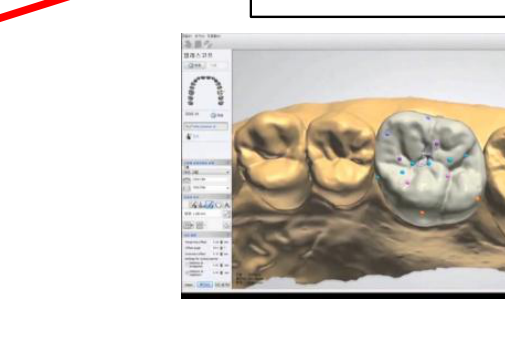
- CAD All-ceramic: Milling
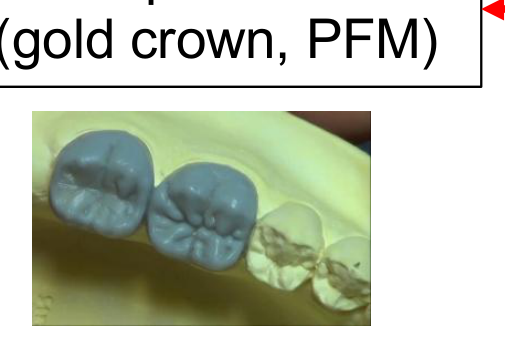
- Wax up (Gold crown, PFM): Casting and veneering
-
Final Phase
- Try-in
- Cementation
- Review
 |  |  |
 |  |  |
 |
Conventional vs CAD-CAM Workflows12
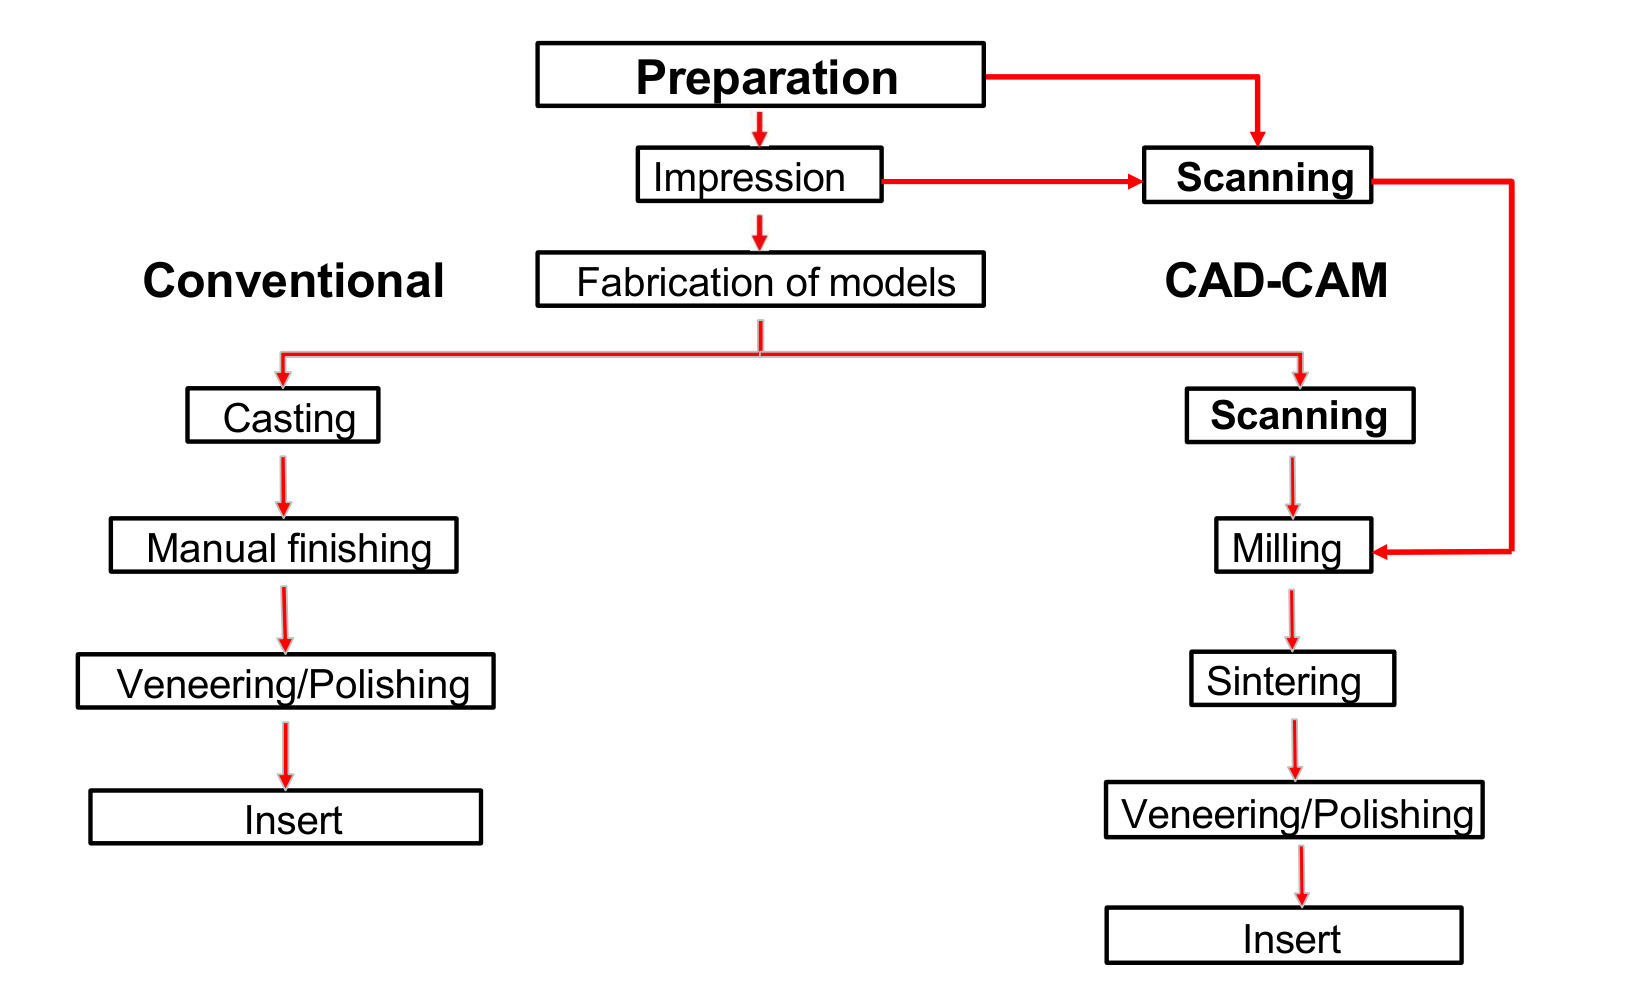
Workflow Comparison13
- Preparation
- Impression
- Fabrication of models
- Scanning
Conventional Process
- Casting
- Manual finishing
- Veneering/Polishing
- Insert
CAD-CAM Process
- Scanning
- Milling
- Sintering
- Veneering/Polishing
- Insert
Clinical and Laboratory Steps14
- Preparation
- Impression
- Fabrication of models

Conventional Pathway
- Casting
- Manual finishing
- Veneering/Polishing
- Insert
CAD-CAM Pathway
- Scanning
- Milling
- Sintering
- Veneering/Polishing
- Insert
Integrated Workflow Diagram15
- Preparation leads to either Impression or Scanning.
- Impression leads to Fabrication of models or Scanning.
Conventional Branch
- Fabrication of models
- Casting
- Manual finishing
- Veneering/Polishing
- Insert
CAD-CAM Branch
- Fabrication of models → Scanning (Lab)
- Scanning (Intraoral) → Milling
- Milling
- Sintering
- Veneering/Polishing
- Insert
Workflow Logic16
- Preparation
- Impression → Fabrication of models
- Scanning

Conventional Path
- Fabrication of models
- Casting
- Manual finishing
- Veneering/Polishing
- Insert
CAD-CAM Path
- Scanning
- Milling
- Sintering
- Veneering/Polishing
- Insert
Workflow Stages17
- Preparation
- Impression
- Fabrication of models
This process branches into two paths:
Conventional
- Casting
- Manual finishing
- Veneering/Polishing
- Insert
CAD-CAM
- Scanning
- Milling
- Sintering
- Veneering/Polishing
- Insert
Crown Preparation Terminology18
The completed preparation is characterized by the following features:
- A smooth, even chamfer margin
- A 6-degree taper
- Gradual transitions between all prepared surfaces

Restorative Materials
Each restorative material may require different preparation techniques. Common materials include:
All-Ceramic19
- Zirconia
- Glassy Ceramics (e.g., Lithium Silicate or Lithium Disilicate)

Metal
- Varying alloys
Porcelain Fused to Metal (PFM)
- Combination of metal substructure with porcelain overlay
Margin Configurations
Supragingival and Subgingival Placement
Clinical Advantages of Supragingival Margins
- Easily prepared
- Easier to take impressions
- Easily maintained by patient
- Easily evaluated at recalls
- Preserve periodontium
Indications for Subgingival Margins
- Subgingival dental caries, erosion, fracture line, or restoration
- Additional retention is needed
- Aesthetic margins
- Coverage of root surface
- Modification of axial contour
Feather Edge Margins
Characteristics of Feather Edge Margins
- Advantages: Conservation of tooth structure
- Disadvantages: Fail to provide adequate bulk at margins
CONTRA-INDICATED IN MOST CASES!
Bevel Margins
Clinical Applications and Benefits
Bevel margins are commonly used for cast restorations.
- Advantages:
- Allow the margin of the crown to be burnished against tooth structure
- Protect the unprepared tooth structure from chipping by removing unsupported enamel
- May reduce marginal discrepancy when a complete crown fails to seat completely (Note: This does not work for oversized crowns)
- Disadvantages:
- Can lead to subgingival extension
Shoulder Margins
Clinical Considerations for Shoulder Margins
- Advantages:
- Easy to prepare and finish well
- Easy to judge on impressions
- Disadvantages:
- More aggressive preparation
Material Compatibility and Geometry
- Can be used for all materials.
- Internal angle is ROUNDED, NOT a SHARP 90 degrees.
Chamfer Margins
Clinical Advantages and Usage
- Advantages:
- Conserves tooth structure whilst providing distinct finish lines
- Easy to read in impressions
- Commonly used for metal or ceramic crowns
Instrumentation
- Use a tapered diamond bur with a round tip.
Shoulder with Bevel Margins
Clinical Application
- Sometimes used for PFM crowns with a metal labial margin (hidden in the sulcus).
- A shoulder or chamfer is generally preferred for biologic and aesthetic considerations.
- Uncommonly used.
Technical Specifications and Fit
- 52° Bevel
- Properly seated castings should have minimal marginal gap widths.
Effect on Marginal Fit
- If the internal cross section of a crown is the same as or less than that of the prepared tooth, a 45-degree bevel decreases the marginal discrepancy by 70%.
- If the internal diameter is slightly larger than the prepared tooth, beveling increases the marginal discrepancy.
- In practice, crowns are made slightly larger than the prepared tooth to allow for the luting agent.
Principles of Tooth Preparation
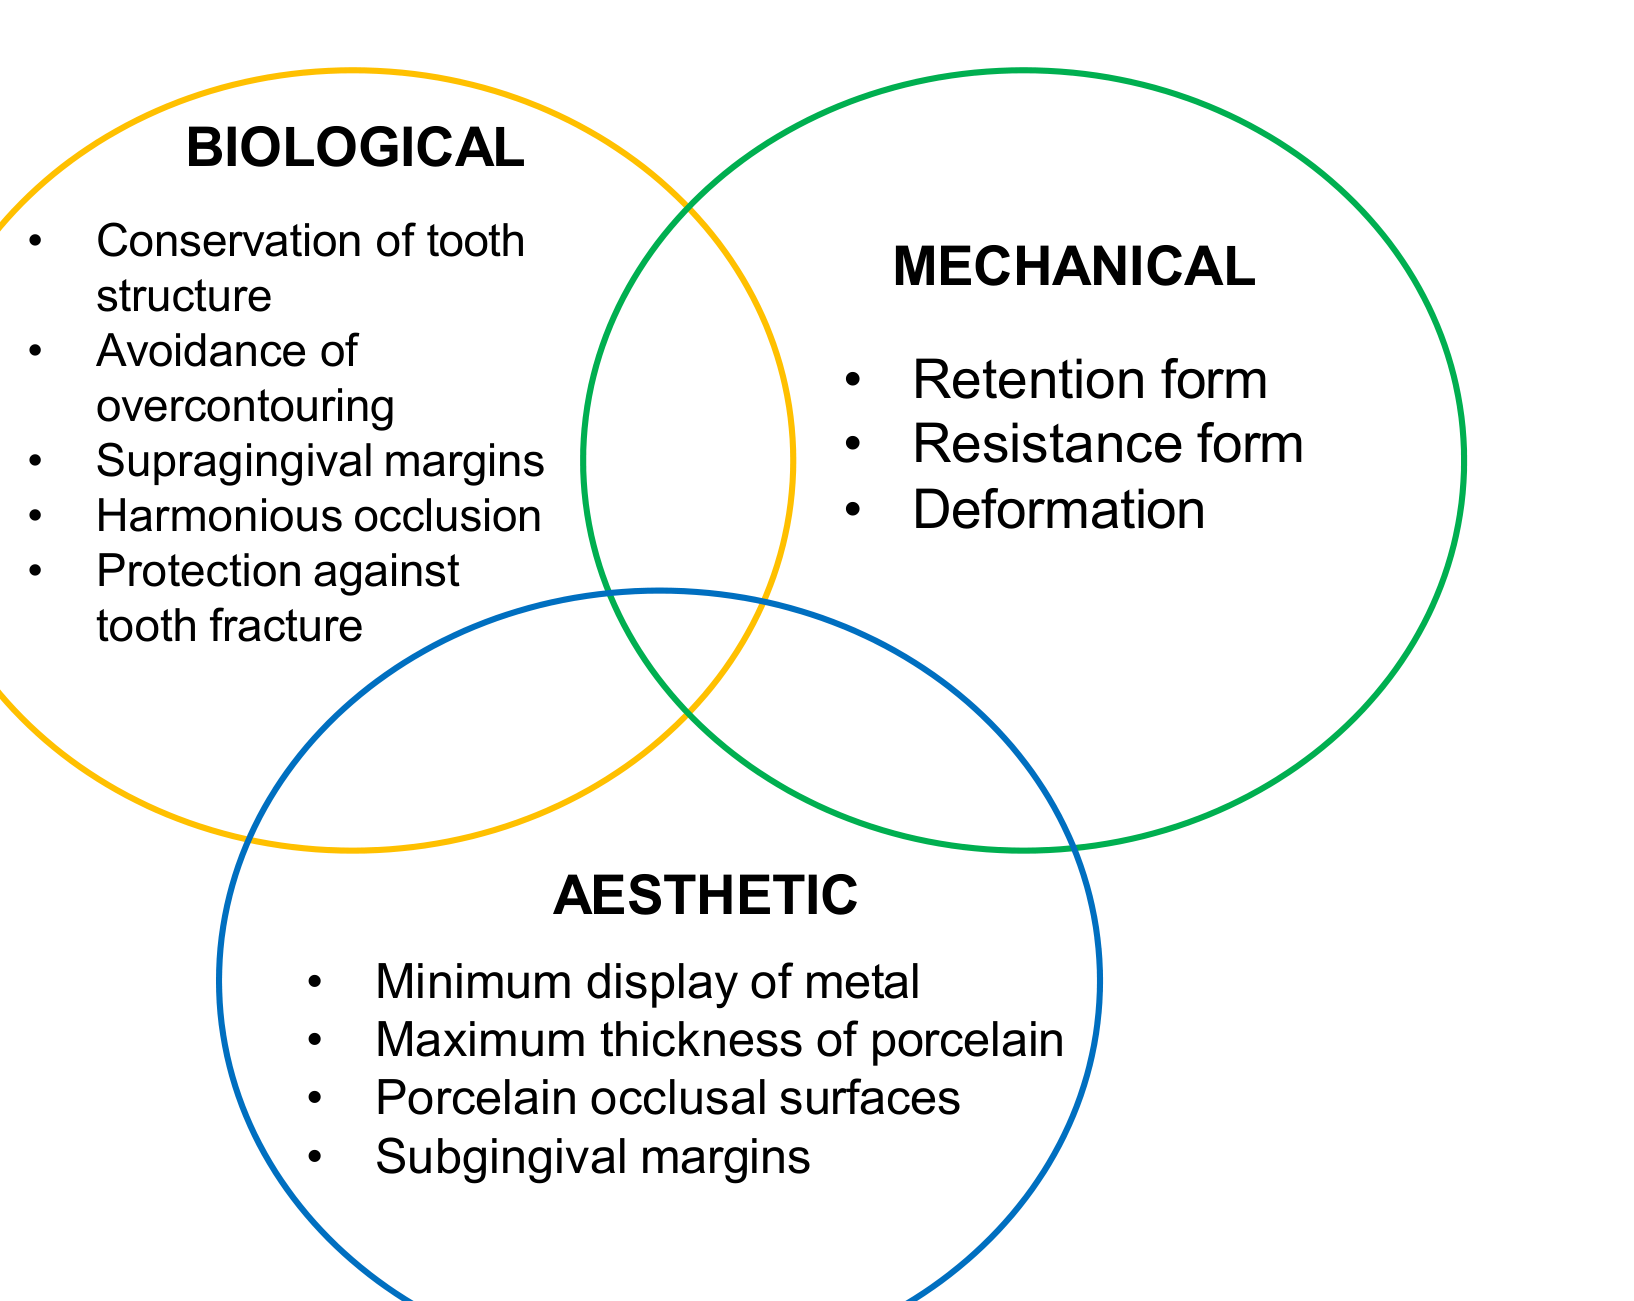
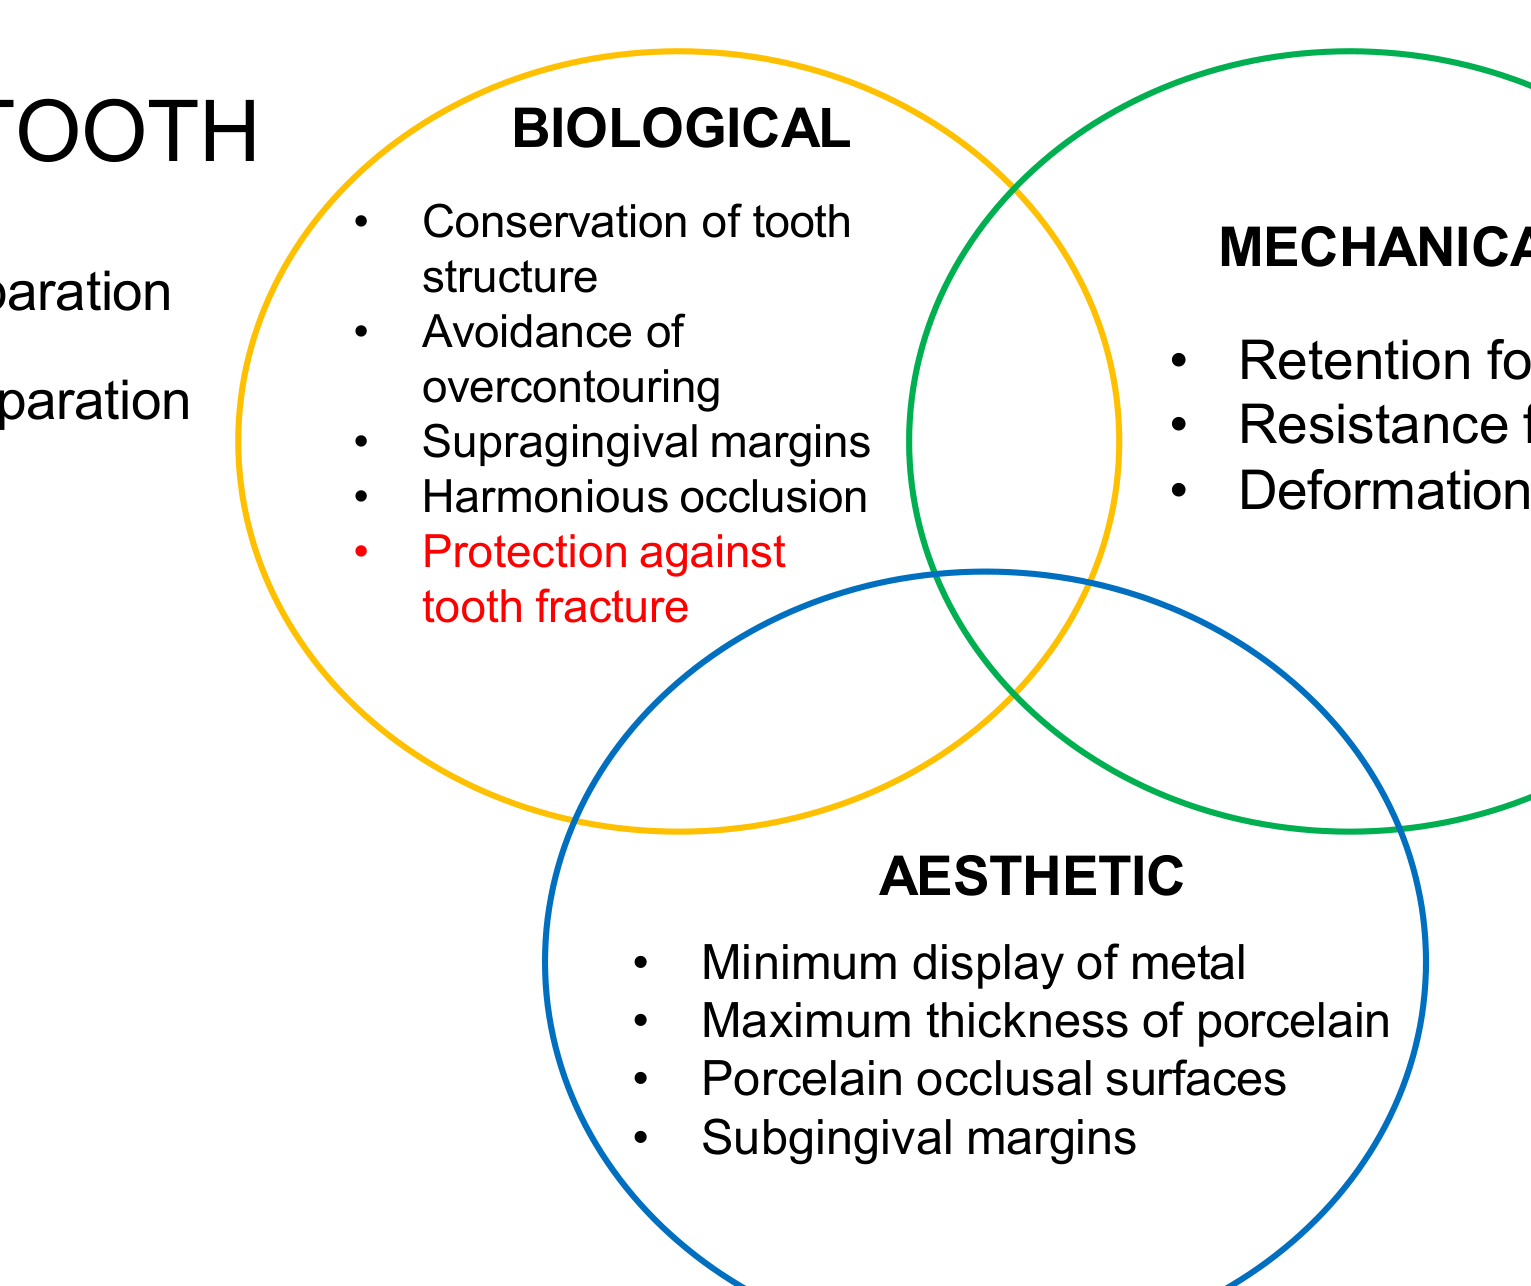
Biological Considerations20
- Conservation of tooth structure
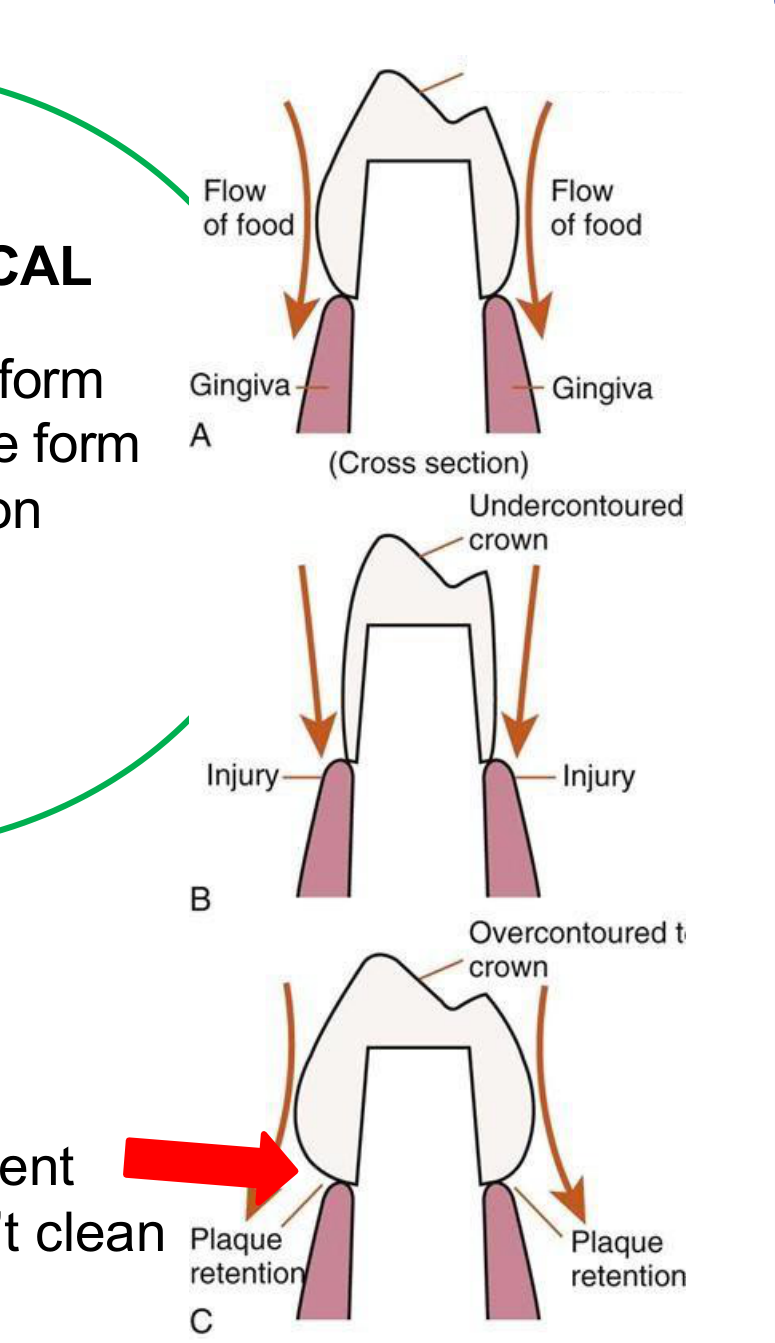
- Avoidance of overcontouring
- Supragingival margins
- Harmonious occlusion
- Protection against tooth fracture
Mechanical Considerations
- Retention form
- Resistance form
- Deformation
Aesthetic Considerations
- Minimum display of metal
- Maximum thickness of porcelain
- Porcelain occlusion surfaces
- Subgingival margins
Preparation Categories21
- Principles of tooth preparation
- Partial or complete preparation

Biological Principles
- Conservation of tooth structure
- Avoidance of overcontouring
- Supragingival margins
- Harmonious occlusion
- Protection against tooth fracture
Mechanical Principles
- Retention form
- Resistance form
- Deformation
Aesthetic Principles
- Minimum display of metal
- Maximum thickness of porcelain
- Porcelain occlusal surfaces
- Subgingival margins

Clinical Research Reference
Occlusal onlays as a modern treatment concept for the reconstruction of severely worn occlusal surfaces
- Source: Quintessence international (Berlin, Germany: 1985) - January 2018
- DOI: 10.3290/j.qi.a40482
- Authors: Daniel Edelhoff (Ludwig-Maximilians-University of Munich) and M. Oliver Ahlers (University Medical Center Hamburg - Eppendorf)
Fig 1: Approximately 70% of the volume of the clinical crown of a posterior tooth is removed for a full-crown preparation (internal contour), whereas only about 30% is lost for an occlusal onlay, unless more tissue has already been lost.
Volumetric Analysis of Tooth Reduction22
Initial State (Cylindrical Model):
- Radius (r): 5
- Height (h): 10
- Formula:
- Volume ():
Prepared State (Reduced Model):
- Radius (r): 4
- Height (h): 8
- Volume ():
Clinical Implications:
- This represents almost a 50% decrease in volume.
- The loss is even more significant if the pulp chamber space is included.
- Limitations: This model is a simplification as a tooth is not a perfect cylinder and contains a pulp chamber; therefore, this model provides an underestimate of actual tissue loss.
 |  |
Preparation Overview23
- Principles of tooth preparation
- Partial or complete preparation

Biological Factors
- Conservation of tooth structure
- Avoidance of overcontouring
- Supragingival margins
- Harmonious occlusion
- Protection against tooth fracture
Mechanical Factors
- Retention form
- Resistance form
- Deformation
Aesthetic Factors
- Minimum display of metal
- Maximum thickness of porcelain
- Porcelain occlusal surfaces
- Subgingival margins
Research Context
Occlusal onlays as a modern treatment concept for the reconstruction of severely worn occlusal surfaces
Fig 1: Approximately 70% of the volume of the clinical crown of a posterior tooth is removed for a full-crown preparation (internal contour), whereas only about 30% is lost for an occlusal onlay, unless more tissue has already been lost.
- Publication: Quintessence international (January 2018)
- DOI: 10.3290/j.qi.a40482
- Authors: Daniel Edelhoff and M. Oliver Ahlers
Preparation Types24
- Principles of tooth preparation
- Partial or complete preparation
 |  |
Biological and Mechanical Categories
- Conservation of tooth structure
- Avoidance of overcontouring
- Supragingival margins
- Harmonious occlusion
- Protection against tooth fracture
- Retention form
- Resistance form
- Deformation
Aesthetic Categories
- Minimum display of metal
- Maximum thickness of porcelain
- Porcelain occlusal surfaces
- Subgingival margins
Visual Documentation
- CORVID DIAGRAM
- DETAILED CROSS-SECTION ILLUSTRATION
Biological Principles
Abutment Tooth Considerations25
- Principles of tooth preparation
- Partial or complete preparation

Biological Principles
- Conservation of tooth structure
- Avoidance of overcontouring
- Supragingival margins
- Harmonious occlusion
- Protection against tooth fracture
Mechanical Principles
- Retention form
- Resistance form
- Deformation
Aesthetic Principles
- Minimum display of metal
- Maximum thickness of porcelain
- Porcelain occlusal surfaces
- Subgingival margins
Biologic Width and Margin Location2627
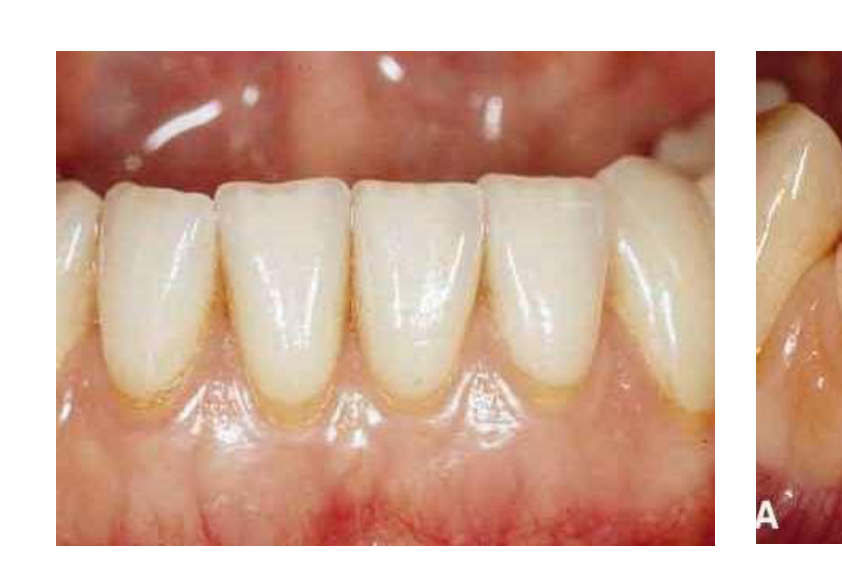
Sub-gingival preparation is aesthetic, but carries specific biological risks.
Biologic width! (Essential concept to know).
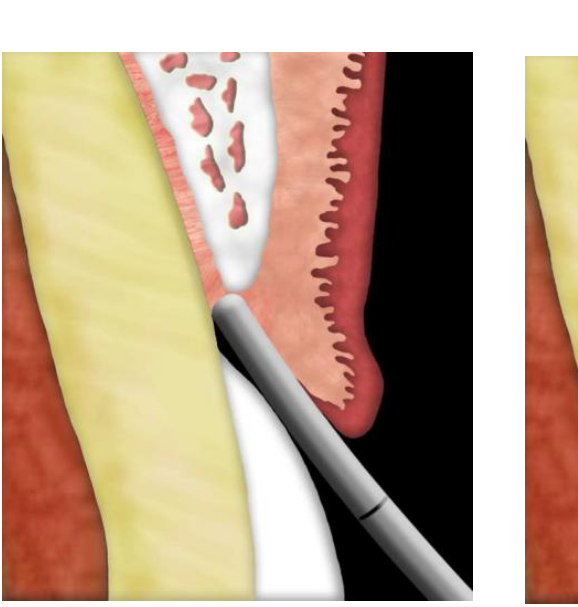
Components of Biologic Width
- Connective tissue: 1.07 mm
- Junctional epithelium: 0.97 mm
- Gingival sulcus: 0.5-1 mm
- Total Biologic Width: 2 - 2.25 mm
Margin Placement Guidelines
- If the margins must be subgingival, they should only be placed intracrevicularly.
- Maximum depth should be around 0.7mm.
 |  |
 |  |
Clinical Rule2829
If you place a margin within 2mm of the crestal bone you will get inflammation, followed by bone loss as the biological width tries to re-establish itself.
 |  |  |
 |  |
Crest Classifications
- Normal Crest: 3 mm (approx. 4 mm)
- High Crest: < 3 mm (approx. 4 mm)
- Low Crest: > 3 mm (approx. 4 mm)
Recommended Reading
Mulla SA, Patil A, Mali S, Jain A, Sharma D, Jaiswal HC, Saoji HA, Jakhar A, Talekar S, Singh S. Exploring the Biological Width in Dentistry: A Comprehensive Narrative Review. Cureus. 2023 Jul 18;15(7).
If you place a margin within 2mm of the crestal bone you will get inflammation, followed by bone loss as the biological width tries to re-establish itself.
- Normal Crest: 3 mm (approx. 4 mm)
- High Crest: < 3 mm (approx. 4 mm)
- Low Crest: > 3 mm (approx. 4 mm)
Mulla SA, Patil A, Mali S, Jain A, Sharma D, Jaiswal HC, Saoji HA, Jakhar A, Talekar S, Singh S. Exploring the Biological Width in Dentistry: A Comprehensive Narrative Review. Cureus. 2023 Jul 18;15(7).
Margin Positioning by Sulcus Depth
- Sulcus depth ≤ 1.5 mm: Margins can be positioned 0.5 mm below the gingival tissue crest.
- Sulcus depth > 1.5 mm: Margins should be inserted in the sulcus at a depth that is half its probing depth.
- Sulcus depth > 2 mm: A gingivectomy may be enacted to extend the tooth and design a 1.5 mm sulcus.
Clinical Rule
If you place a margin within 2mm of the crestal bone you will get inflammation, followed by bone loss as the biological width tries to re-establish itself.
We risk violation of biologic width!
Clinical Rule
If you place a margin within 2mm of the crestal bone you will get inflammation, followed by bone loss as the biological width tries to re-establish itself.
Harmonious Occlusion and Cuspal Protection30
- Conservation of tooth structure
- Avoidance of overcontouring
- Supragingival margins
- Harmonious occlusion
- Protection against tooth fracture
Mechanical Principles
- Retention form
- Resistance form
- Deformation
Aesthetic Principles
- Minimum display of metal
- Maximum thickness of porcelain
- Porcelain occlusal surfaces
- Subgingival margins
Cuspal Protection
Cuspal Protection is the coverage of one or more cusps by an indirect or direct restorative material.
Objectives
- Prevention of fracture or uncontrolled tooth structure loss
- Redistribution of stresses
Preparation Requirements
- Removal of tooth structure less than 2mm thick
- Removal of any low quality or undermined enamel on the cusps
Clinical Considerations
- Address structures below 2mm thick
- Avoid occlusal contacts on the margin of the preparations
Mechanical Principles
Tooth preparation involves balancing three primary categories of principles: biological, mechanical, and aesthetic.
Biological Principles31
- Conservation of tooth structure
- Avoidance of overcontouring
- Supragingival margins
- Harmonious occlusion
- Protection against tooth fracture

Mechanical Principles
- Retention form
- Resistance form
- Deformation
Aesthetic Principles
- Minimum display of metal
- Maximum thickness of porcelain
- Porcelain occlusal surfaces
- Subgingival margins
Retention and Resistance Form
Definitions
- Retention: Prevents removal of restoration/crown from coming off the prepared tooth when a force is applied parallel to the path of insertion.
- Resistance: Prevents dislodging of restoration/crown when apical or oblique forces are applied, and stops movement of restoration during chewing.
Clinical Scenarios
-
Good Retention But Bad Resistance
-
Bad Retention and Bad Resistance
-
Retention: Prevents removal of restoration/crown from coming off the prepared tooth when a force is applied parallel to the path of insertion.
-
Resistance: Prevents dislodging of restoration/crown when apical or oblique forces are applied, and stops movement of restoration during chewing.
Resistance Form Analysis
- Bad Resistance Form: Excessive rounding of preparation can decrease resistance form.
- Good Resistance Form: Proper preparation geometry maintains stability between the tooth and crown.
Taper and Convergence Angle
Factors Influencing Retention and Resistance
- Taper
- Length of axial walls
Research Context
Evaluation of the degree of taper and convergence angle of full ceramo-metal crown preparations by different specialists centers at Assir Region, Saudi Arabia (Al-Moalem et al., 2015).
Glossary of Terms
- Convergence Angle: The angle, measured in degrees as viewed in a given plane, formed by the axial walls when a tooth or machined surface on a metal or ceramic material is prepared for a fixed dental prosthesis.
- Total Occlusal Convergence: Applies to the angle formed between two opposing axial walls.
- Taper: In dentistry, the angle, measured in degrees as viewed in a given plane, formed between an external wall and the path of placement of a tooth preparation or machined surfaces on a metal or ceramic material.
The Glossary of Prosthodontic Terms (Ninth Edition)
- Convergence Angle: The angle, measured in degrees as viewed in a given plane, formed by the axial walls when a tooth or machined surface on a metal or ceramic material is prepared for a fixed dental prosthesis.
- Usage Notes:
- The term total occlusal convergence applies to the angle formed between two opposing axial walls.
- The term taper applies to the angle formed between an axial wall and the path of placement onto the tooth or machined surfaces.
Comparison of Information Sources
General Search Results (e.g., Google)
- Often cites Shillingburg’s 6-degree ideal taper.
- Discusses minimum taper achievable clinically while affording adequate retention.
Professional Standards (The Glossary of Prosthodontic Terms)
- Convergence Angle: The angle, measured in degrees, between two opposing axial walls when viewed in a given plane.
- Taper: The angle formed between an axial wall and the path of placement onto the tooth.
Impact of Taper on Retention
- Retention (measured in g/mm²) decreases as the taper (measured in degrees) increases.
- Clinical evaluations of ceramo-metal crown preparations focus on the relationship between taper and the total convergence angle.
Clinical Examination for Undercuts
- To examine a preparation for undercuts, one eye should be closed.
- If both eyes are open when the preparation is viewed, undercuts may remain undetected due to binocular vision.
- Preparations in the mouth are viewed through a mouth mirror using one eye to ensure a proper path of insertion.
Axial Wall Length and Geometry
Impact of Axial Wall Length
- Wall Height: A preparation with longer walls interferes with the tipping displacement of the restoration better than a short preparation.
- Tooth Diameter: A preparation on a tooth with a smaller diameter resists pivoting movements better than a preparation of equal length on a tooth of larger diameter.
Enhancing Retention and Resistance
- Supplemental Features: Grooves and boxes can be used to increase retention and resistance.
- Precaution: These features should be used with care to maintain structural integrity.
Additional Influencing Factors
- Magnitude of the dislodging force.
- Geometry of tooth preparation: This is the most important factor as the clinician has a direct impact on it.
- Roughness of the fitting surface of the restoration.
- Material being cemented.
- Properties of the luting agent.
Abutment Tooth Considerations
- Principles of tooth preparation
- Partial or complete preparation
Summary of Preparation Principles
- Biological: Conservation of tooth structure, avoidance of overcontouring, supragingival margins, harmonious occlusion, protection against tooth fracture.
- Mechanical: Retention form, resistance form, deformation.
- Aesthetic: Minimum display of metal, maximum thickness of porcelain, porcelain occlusal surfaces, subgingival margins.
Aesthetic Principles
Abutment Tooth Preparation Overview32
Tooth preparation for abutments involves balancing biological, mechanical, and aesthetic requirements. Preparations may be categorized as partial or complete.
Biological Principles33
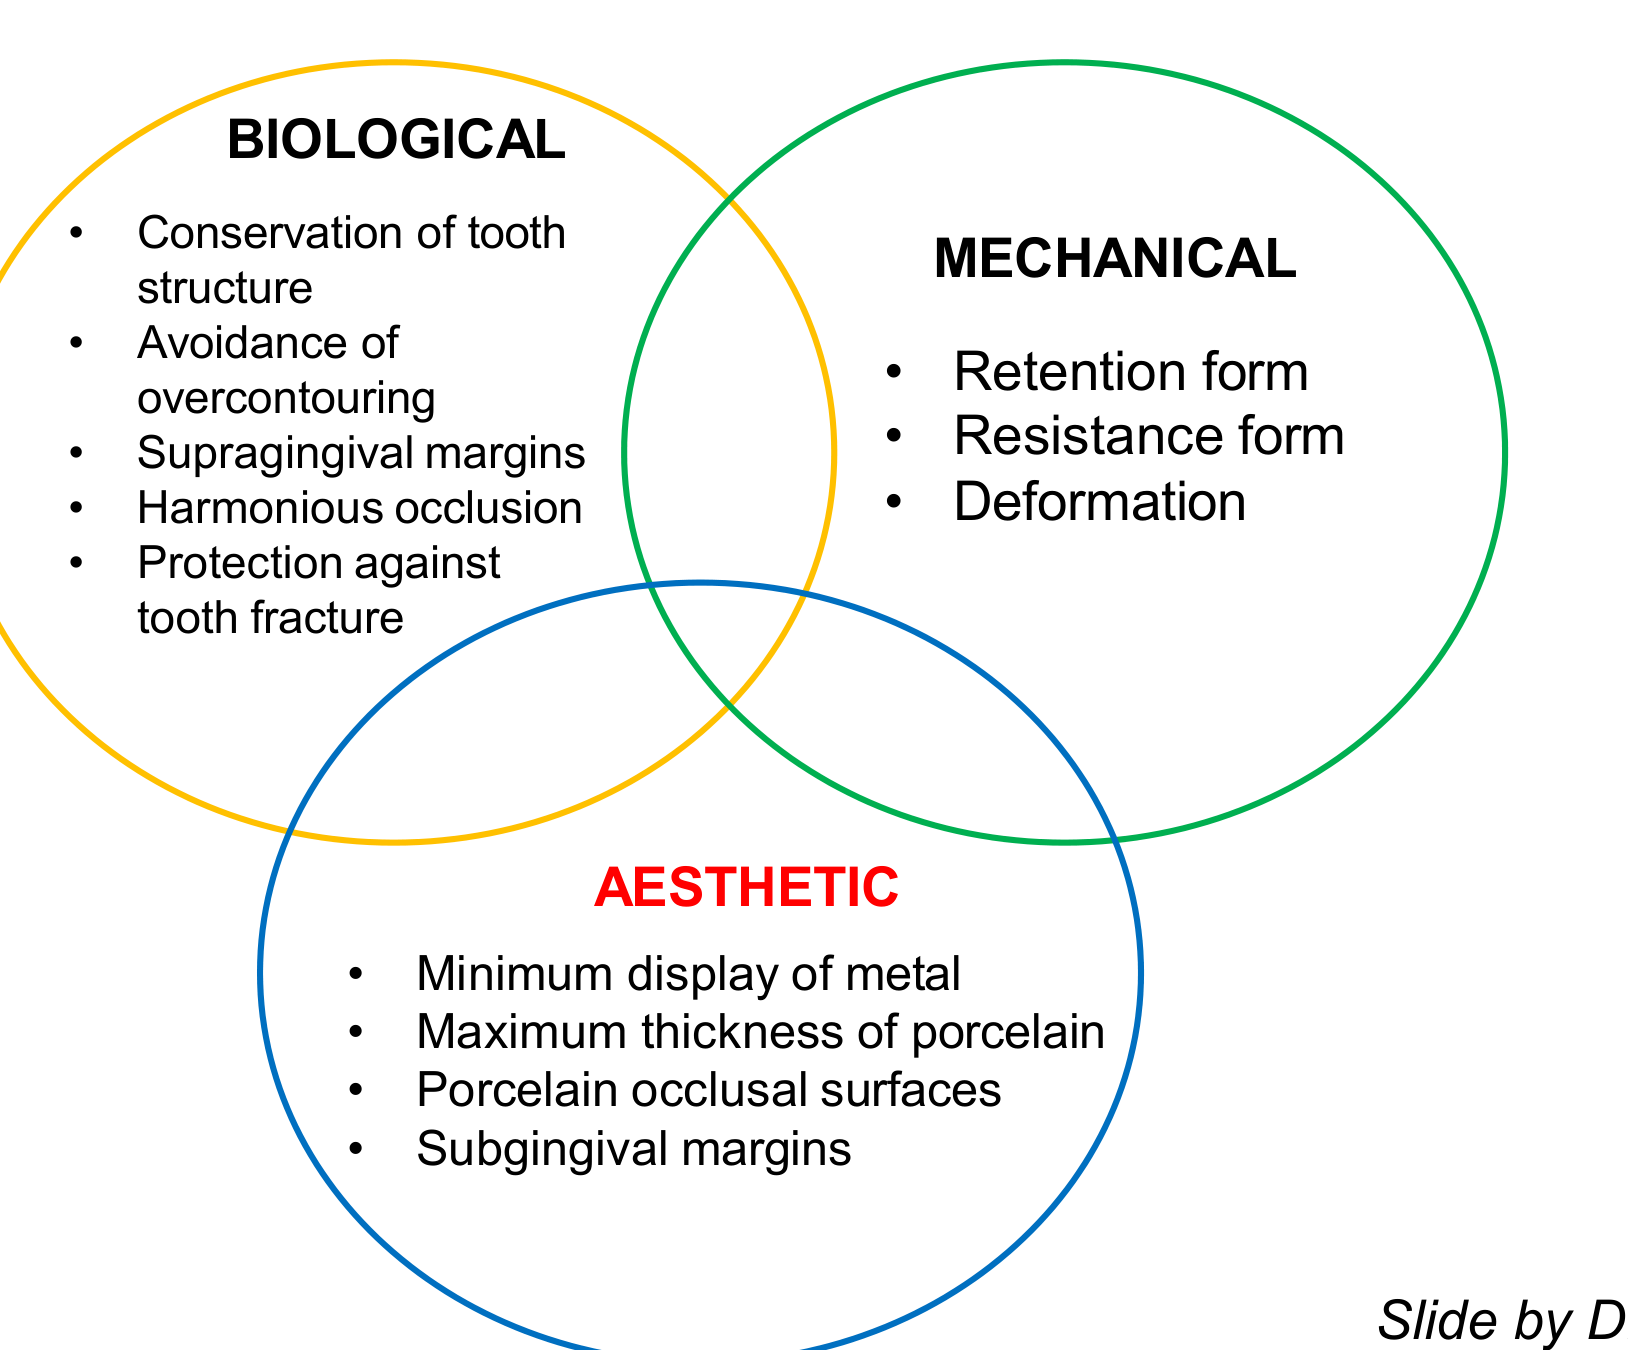
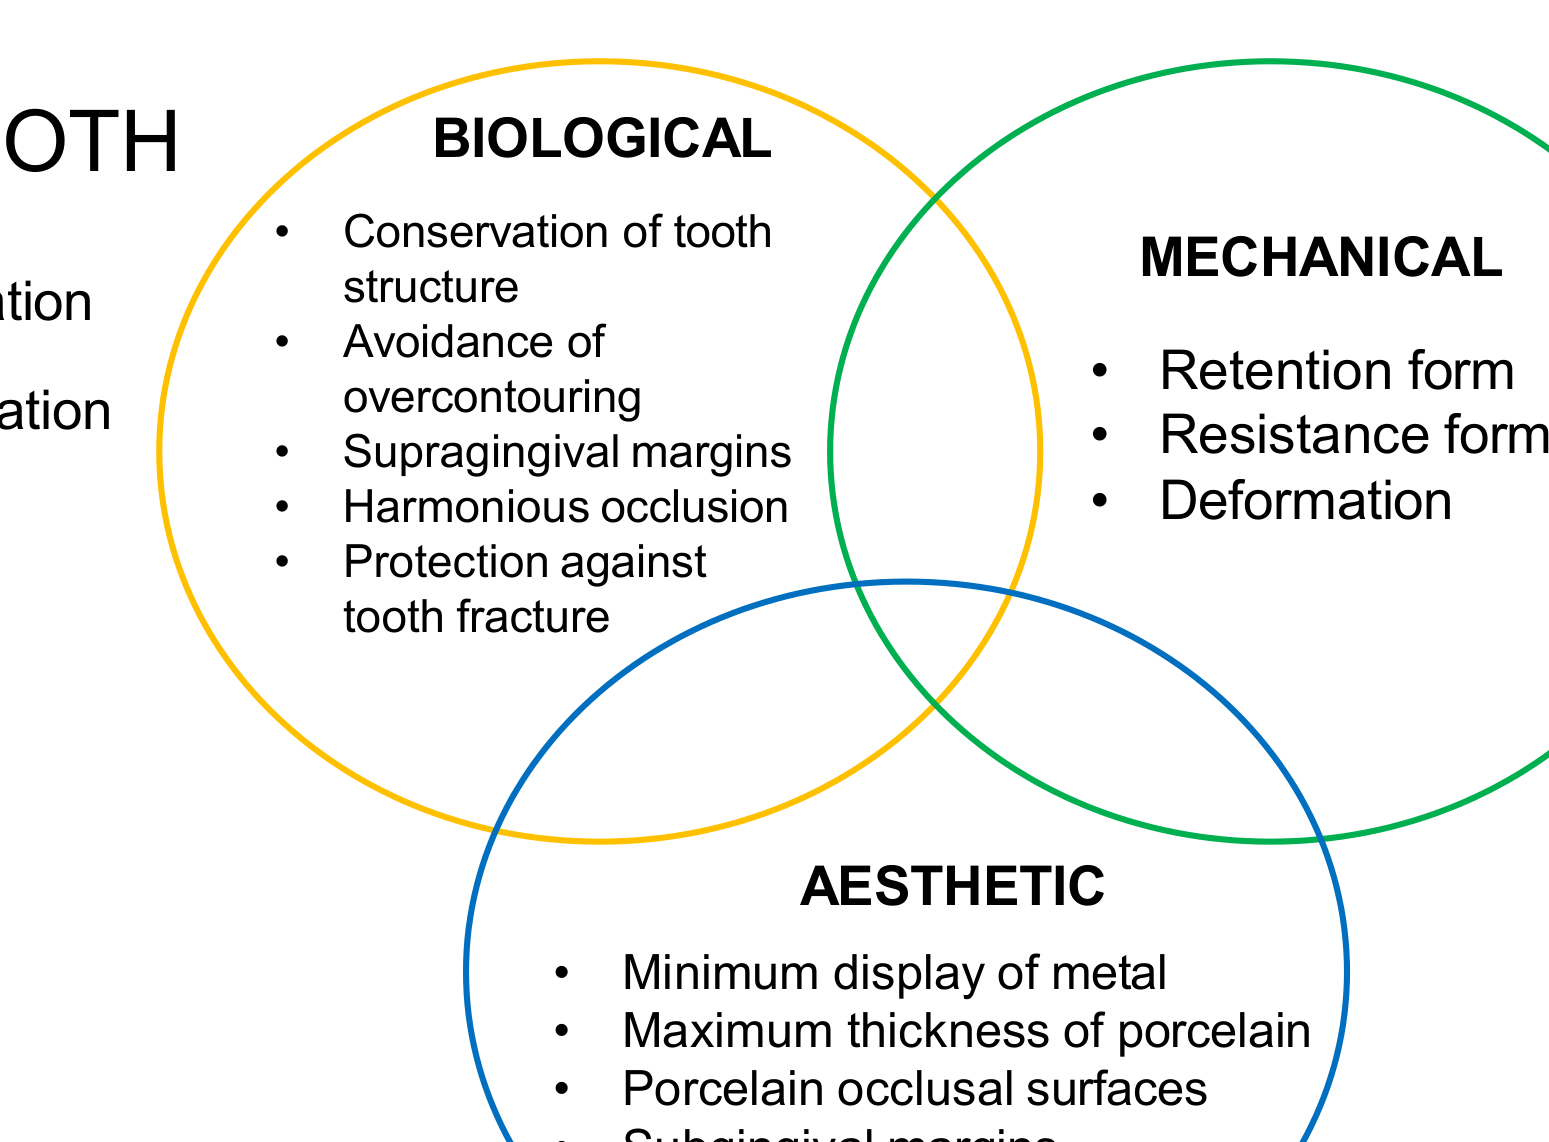
- Conservation of tooth structure
- Avoidance of overcontouring
- Supragingival margins
- Harmonious occlusion
- Protection against tooth fracture
Mechanical Principles
- Retention form
- Resistance form
- Prevention of deformation
Aesthetic Considerations
- Minimum display of metal
- Maximum thickness of porcelain
- Porcelain occlusal surfaces
- Subgingival margins
Footnotes
-
Original PDF page 2: DMD2 L1 Principles of tooth prep, p.2 ↩
-
Original PDF page 1: DMD2 L1 Principles of tooth prep, p.1 ↩
-
Original PDF page 3: DMD2 L1 Principles of tooth prep, p.3 ↩
-
Original PDF page 4: DMD2 L1 Principles of tooth prep, p.4 ↩
-
Original PDF page 5: DMD2 L1 Principles of tooth prep, p.5 ↩
-
Original PDF page 6: DMD2 L1 Principles of tooth prep, p.6 ↩
-
Original PDF page 7: DMD2 L1 Principles of tooth prep, p.7 ↩
-
Original PDF page 8: DMD2 L1 Principles of tooth prep, p.8 ↩
-
Original PDF page 9: DMD2 L1 Principles of tooth prep, p.9 ↩
-
Original PDF page 10: DMD2 L1 Principles of tooth prep, p.10 ↩
-
Original PDF page 11: DMD2 L1 Principles of tooth prep, p.11 ↩
-
Original PDF page 13: DMD2 L1 Principles of tooth prep, p.13 ↩
-
Original PDF page 12: DMD2 L1 Principles of tooth prep, p.12 ↩
-
Original PDF page 14: DMD2 L1 Principles of tooth prep, p.14 ↩
-
Original PDF page 15: DMD2 L1 Principles of tooth prep, p.15 ↩
-
Original PDF page 16: DMD2 L1 Principles of tooth prep, p.16 ↩
-
Original PDF page 17: DMD2 L1 Principles of tooth prep, p.17 ↩
-
Original PDF page 18: DMD2 L1 Principles of tooth prep, p.18 ↩
-
Original PDF page 19: DMD2 L1 Principles of tooth prep, p.19 ↩
-
Original PDF page 26: DMD2 L1 Principles of tooth prep, p.26 ↩
-
Original PDF page 27: DMD2 L1 Principles of tooth prep, p.27 ↩
-
Original PDF page 28: DMD2 L1 Principles of tooth prep, p.28 ↩
-
Original PDF page 29: DMD2 L1 Principles of tooth prep, p.29 ↩
-
Original PDF page 30: DMD2 L1 Principles of tooth prep, p.30 ↩
-
Original PDF page 31: DMD2 L1 Principles of tooth prep, p.31 ↩
-
Original PDF page 32: DMD2 L1 Principles of tooth prep, p.32 ↩
-
Original PDF page 33: DMD2 L1 Principles of tooth prep, p.33 ↩
-
Original PDF page 35: DMD2 L1 Principles of tooth prep, p.35 ↩
-
Original PDF page 36: DMD2 L1 Principles of tooth prep, p.36 ↩
-
Original PDF page 40: DMD2 L1 Principles of tooth prep, p.40 ↩
-
Original PDF page 39: DMD2 L1 Principles of tooth prep, p.39 ↩
-
Original PDF page 56: DMD2 L1 Principles of tooth prep, p.56 ↩
-
Original PDF page 43: DMD2 L1 Principles of tooth prep, p.43 ↩