Clinical Steps for Indirect Restorations1
Lecture 11: Clinical Steps
By Dr Cheryl Fu
Based on slides by Dr Matsubara
Occlusion Review and Definitions
Centric Occlusion and Relation
Best Evidence Consensus Statement: Treatment Positions for Complete Mouth Rehabilitation2
Purpose and Methodology This consensus statement evaluated the relationship between Centric Occlusion (CO) and Maximal Intercuspal Position (MIP) to determine their roles in complete mouth rehabilitation. The study analyzed 313 relevant articles, including systematic reviews and clinical trials, from an initial search of over 15,000 records.
Key Findings and Conclusions
- Coincidence of CO and MIP: In most dentate and partially dentate patients, CO and MIP do not coincide.
- Clinical Recommendation: For patients requiring complete mouth rehabilitation, restoring the patient in centric occlusion is supported as the preferred relationship.
- Clinical Risks: Discrepancies between CO and MIP are associated with occlusal instability and temporomandibular joint (TMJ) disorders.
- Safety: There is no conclusive evidence of adverse outcomes when rehabilitating in either CO or MIP in healthy populations.
Standardized Definitions
- Centric Relation (CR): A maxillomandibular relationship, independent of tooth contact, where the condyles articulate in the anterior-superior position against the posterior slopes of the articular eminences. It is a repeatable, purely rotary reference position.
- Centric Occlusion (CO): The occlusion of opposing teeth when the mandible is in centric relation. This may or may not coincide with the maximal intercuspal position.
- Maximal Intercuspal Position (MIP): The complete intercuspation of opposing teeth independent of condylar position (the “best fit” of teeth).
Comparative Definitions and Historical Perspectives3
General Definitions
- Centric Occlusion: A position of maximal, bilateral, balanced contact between the cusps of the maxillary and mandibular arches.
- Centric Relation: The most retruded, unstrained position of the mandibular condyle within the glenoid fossa of the temporomandibular joint.
Condylar vs. Interocclusal Positions According to Donald J. Rinchuse, CR and CO are not directly comparable terms because:
- CR denotes a condylar position.
- CO denotes an interocclusal dental position.
Evolution of Terms (Glossary of Prosthodontic Terms)
Third Edition (1968)
- Centric Jaw Relation: The most retruded physiologic relation of the mandible to the maxilla from which lateral movements can be made; occurs around the terminal hinge axis.
- Centric Occlusion: The centered contact position of the lower occlusal surfaces against the upper ones; the reference position for all eccentric horizontal positions.
Fifth Edition (1987)
- Centric Occlusion: The occlusion of opposing teeth when the mandible is in centric relation. Noted as a “term in transition to obsolescence.”
- Centric Relation: A relationship where condyles articulate with the thinnest avascular portion of their disks in an anterior-superior position. Discernible when the mandible is restricted to purely rotary movement about a transverse horizontal axis.
Posselts Envelope of Motion
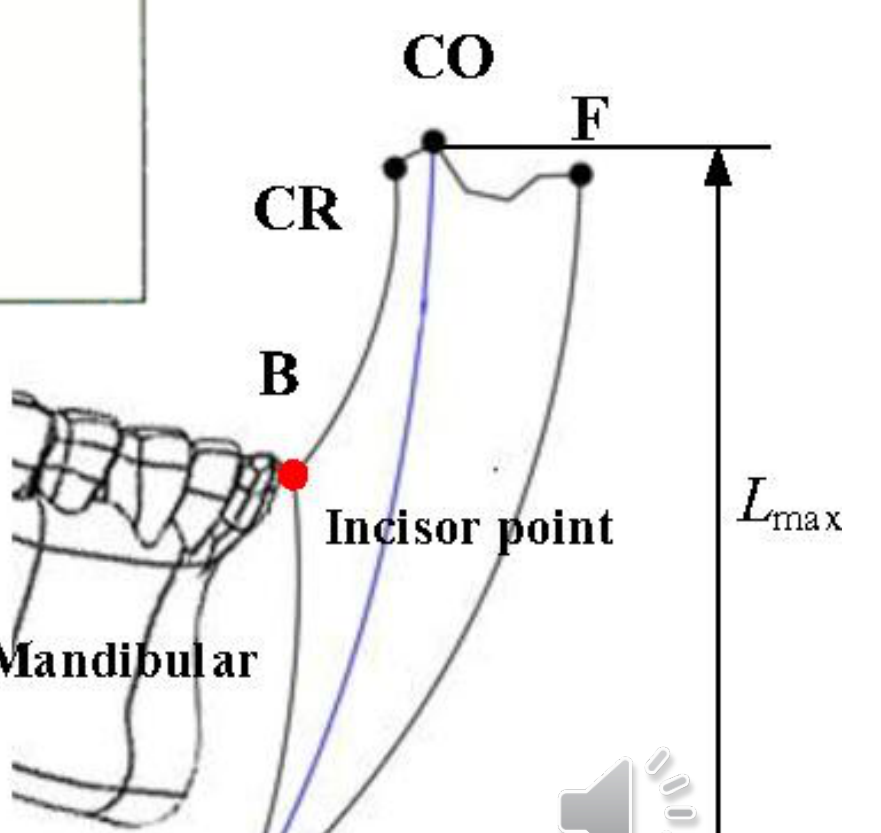
Sagittal Plane Components (Posselt’s Envelope)4
- Retruded Contact Position (RCP): The initial tooth contact during terminal hinge movement.
- Intercuspal Position (ICP): The position of maximum tooth interdigitation.
- Edge-to-Edge Occlusion: Contact between the incisal edges of anterior teeth.
- Anterior Biting: Movement to a reversed vertical overlap.
- Protruded Contact Position: The most forward contact position.
- Transition Phase (II): Movement from the posterior terminal hinge to further opening.
- Maximal Opening (III): The point of greatest mandibular descent.
 |  |
 |  |
Terminology and Abbreviations
- CO: Centric Occlusion
- CR: Centric Relation
- THA: Terminal Hinge Axis
- RAT: Rotation
- MMO: Maximum Mouth Opening
- MRL: Mid-Retrusive Line
- ER: Early Rotational
- MP: Maximum Protrusion
- MLL: Mid-Lateral Line
View-Specific Reference Points
A. Sagittal View
- RCP: Retruded Contact Position
- ICP: Intercuspal Position
- MP: Maximum Protrusion
- PP: Protrusive Position
- E: Edge-to-edge
- MRO: Maximum Retrusive Opening
- MTO: Maximum Terminal Opening
B. Frontal View
- RLP: Right Lateral Protrusion
- LLP: Left Lateral Protrusion
- ICP: Intercuspal Position
- PP: Protrusive Position
- MTO: Maximum Terminal Opening
C. Horizontal View
- RCP: Retruded Contact Position
- PP: Protrusive Position
- RLP: Right Lateral Protrusion
- LLP: Left Lateral Protrusion
- MP: Maximum Protrusion
Diagram Labels
- B: Biting edge
- F: Forward/Protruded position
- E: Maximum extension/opening
- Lmax: Maximum length/opening height
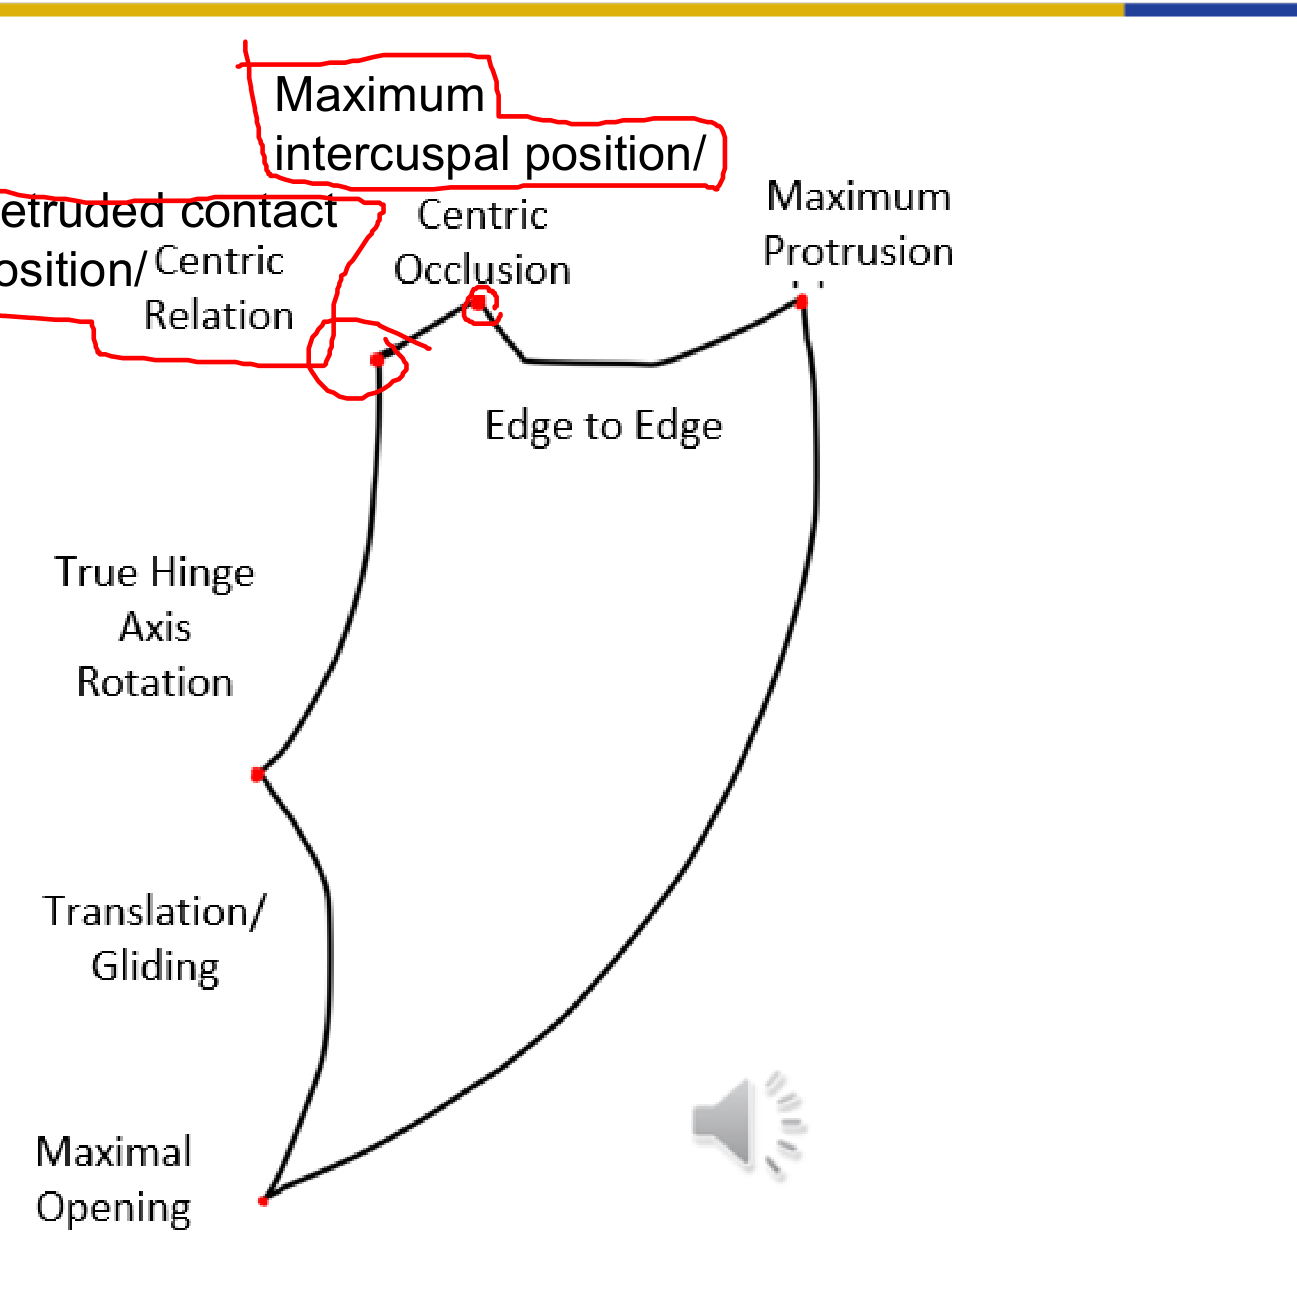
Key Mandibular Positions and Movements5
- Retruded contact position
- Maximum intercuspal position
- Centric Relation
- Centric Occlusion
- Maximum Protrusion
- Edge to Edge
- True Hinge Axis
- Rotation
- Translation / Gliding
- Maximal Opening
Treatment Planning and Preparation
Overview of Indirect Restorations6
- The “big picture” of indirect restorations
- Clinical steps for treatment planning, preparation stage, and insertion
- Assessing the permanent crown
No reading for this lecture!

Clinical Workflow Overview
The “Big Picture” Clinical Workflow7
- Clinical Examination
- Primary Impression
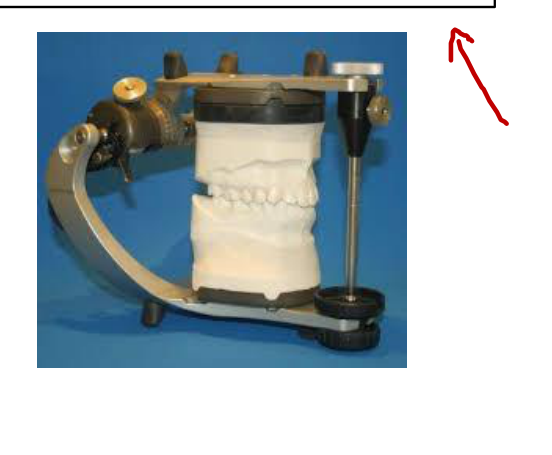
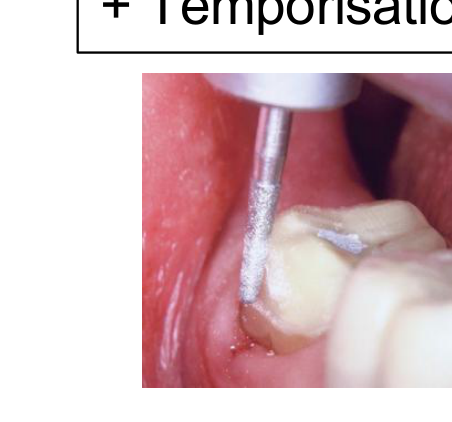
- Tooth Preparation + Temporisation
- Impression Phase
- Definitive Impression (leading to Wax up for gold crown or PFM)
- Intraoral Scanning (leading to CAD All-ceramic and Milling)
- Try-in
- Cementation
- Review
 |  |  |
 |  |  |
 |  |
Assessing the Tooth and Abutment8
Assessing the tooth, the entire dentition, and the patient as part of the comprehensive treatment planning process.
Rationale for Crown Placement9
When determining if a tooth requires a crown, the following factors must be considered:
- Destruction of tooth structure: Extent of existing damage or decay.
- Aesthetics: Visual requirements of the restoration.
- Plaque Control / Moisture Control: Ability to maintain hygiene and isolation.
- Retention: Necessity for long-term stability of the restoration.

Clinical Evidence and Longevity
- Resistance to Removal: Comparison of resistance to removal forces for various crown types (e.g., MOD, mesio-occlusodistal).
- Reference: Terry E. Donovan (2006) Longevity of the Tooth/Restoration Complex: A Review.
Principles of Tooth Preparation
Abutment Tooth Considerations10
- Principles of tooth preparation
- Selection between partial or complete preparation
 |  |
Biological Principles
- Conservation of tooth structure: Minimizing unnecessary reduction.
- Avoidance of overcontouring: Maintaining natural tooth profiles.
- Supragingival margins: Preferring margins above the gumline when possible.
- Harmonious occlusion: Ensuring proper bite alignment.
- Protection against tooth fracture: Strengthening the remaining structure.
Mechanical Principles
- Retention form: Preventing removal of the restoration along the path of insertion.
- Resistance form: Preventing dislodgement by forces directed apically or obliquely.
- Deformation: Ensuring the restoration maintains its shape under functional loads.
Aesthetic Principles
- Minimum display of metal
- Maximum thickness of porcelain for depth of color
- Porcelain occlusal surfaces
- Subgingival margins (where aesthetically necessary)
Preserving Pulp Vitality11
Research indicates that between 3% and 25% of teeth prepared for full coverage crowns will lose vital pulp functions within 15–20 years. Teeth that are previously compromised exhibit higher failure rates than those that are more intact.
Pre-operative Evaluation
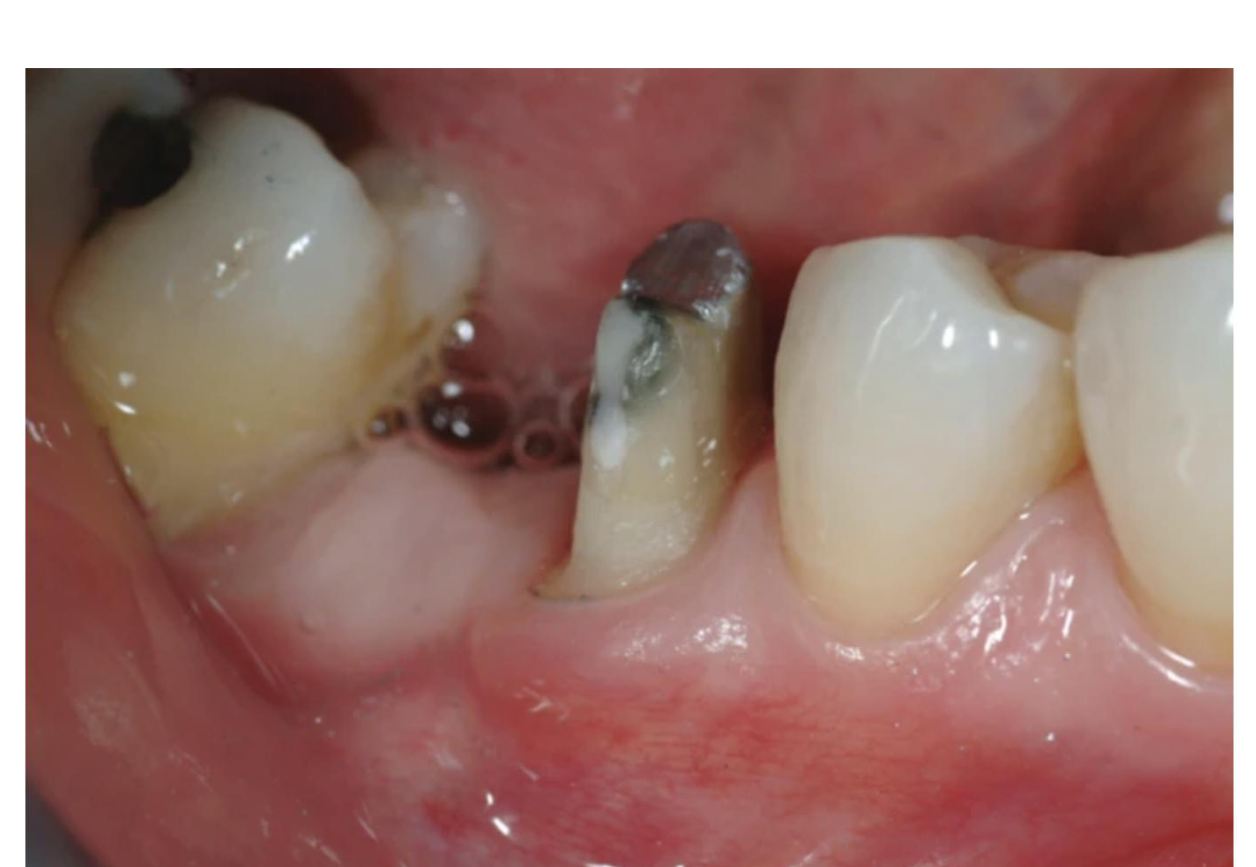
Many teeth requiring extra-coronal restorations have already undergone multiple cycles of disease and direct restoration. Careful evaluation is required before preparation to minimize the risks of unexpected pulp breakdown.
Clinical Example:
- A prepared lower premolar featuring multiple amalgam restorations and a buccal composite repair acting as the core.
Preparation Stage Procedures
Pre-Appointment Planning12
- Material Selection: Decide on the material of choice and justify why that specific material is the best option for the case.
- Treatment Plan: Ensure the treatment plan has been approved.
- Diagnostic Aids: Complete a wax-up of the tooth if any modifications to the existing tooth are required, and prepare a putty key.
 |  |
Clinical Procedure Workflow
- Patient Reception: Confirm the treatment plan with the patient and ensure they are fully informed of the procedure.
- Anesthesia and Preliminary Steps:
- Administer local anesthetic (LA).
- Update records: If restorative work has been performed since the diagnostic model was made, take a new impression for an up-to-date opposing model.
- If a putty key has not been made previously, create one at this stage.
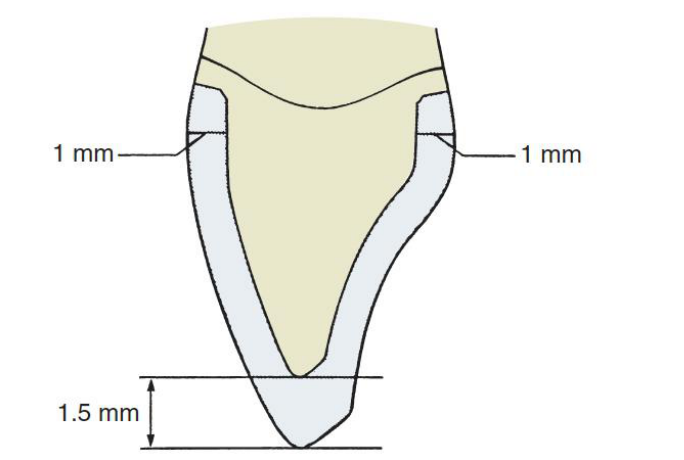
- Tooth Preparation: Prepare the tooth according to the specific guidelines for the chosen material. Verify the absence of undercuts and ensure there is sufficient occlusal clearance.
- Provisionalization and Impressions:
- Fabricate the provisional restoration.
- Apply retraction cord and Expasyl.
- Take final impressions.
- Crucial: Remove the retraction cord.
- Place the temporary restoration.
Try-In Procedure: Evaluation on the Die
Systematic Evaluation Approach13
The evaluation of indirect restorations involves a systematic approach to seating, fitting, and contact points, following these steps:
- Evaluation of the crown on the die
- Seating the crown on the prepared tooth
- Assessment of the seated crown
Laboratory Quality Control14
Upon receiving the crown from the dental laboratory, a thorough inspection of the restoration must be performed.
Objectives of Pre-Clinical Evaluation15
- Detection of fabrication errors: Identify laboratory-related issues prior to the clinical appointment.
- Efficiency: Save critical chair time by anticipating problems before the patient arrives.
- Quality Assurance: Utilize good lighting and magnification during inspection.
- Communication: Consult with the dental laboratory immediately if problems are identified.
 |  |
Assessment of Die and Opposing Model16
Inspect the models for the following defects:
- Poor pouring
- Overtrimming
- Fractures
- Scratches
- Wear

Internal Surface and Marginal Fit on Die
Internal Surface Inspection17
- Casting Problems: Check for air bubbles, casting nodules, or blebs.
- Seating Principles: Ideally, the casting should touch the die at the margins only.
- Die Spacer: Verify the appropriate application and space for luting agents.

Overall Fit and Resistance18
- Stability: Check for looseness or excessive gaps.
- Proximal Contacts: Evaluate the accuracy of proximal contact areas.
Marginal Integrity
- Marginal Fit: Inspect for open margins.
- Contour Errors: Identify any overhangs or underextensions.
External Surface and Articulator Occlusion
External Surface Characteristics19
- Restoration Design: General appearance and anatomical form.
- Contour: Proper emergence profile and axial contours.
- Esthetics: Shade matching.
- Finish: Surface texture (rough vs. smooth/polished).

Articulator Occlusion Assessment
- Centric Contacts: Verification of static occlusion.
- Eccentric Contacts: Evaluation of lateral and protrusive movements.
- Interferences: Identification of any occlusal discrepancies.
Try-In Procedure: Seating the Crown
Appointment Preparation and Initial Steps20
- Bring patient in, administer local anesthetic if required
- Remove temporary crown
- Attempt to wiggle it off first
- If not possible, carefully section the temporary crown and break it
- Clean off temporary cement with an ultrasonic scaler
- Proceed to Try-In
Removal of Provisional Restoration21
Methods and Tools for Removal22
- Hand Instruments: Excavator, sickle probe
- Grasping Instruments: Hemostat, Backhaus forceps, pliers
- Crown Removers:
- Back-action crown remover
- Automatic crown remover
- Richwill crown remover
Procedure Note
- How to remove a PFM crown
Characteristics of an Ideal Crown23
- Easily seated
- Stable
- Accurate occlusal contact
- Adequate proximal contacts
- Accurate marginal fit
- Aesthetic
Seating Requirements and Troubleshooting24
- The crown should seat on the prepared tooth without forcing
- If a single crown is not seating, possible causes include:
- Proximal contacts
- Internal fit
- Inaccurate margins or over-extensions
- Retained temporary cements
- Trapped gingival tissue

Adjusting Proximal Contacts25
 |  |
Sequence of Evaluation26
- Proximal contact
- Internal fit
- Marginal fit
Assessment and Adjustment of Proximal Contacts27
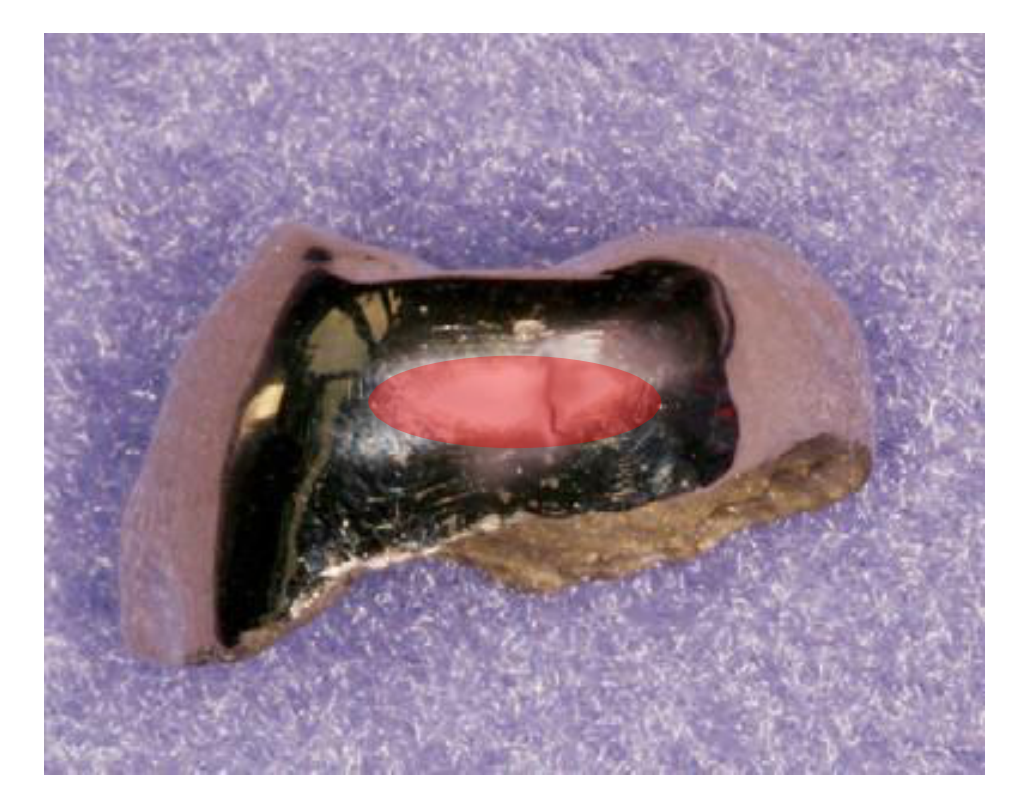
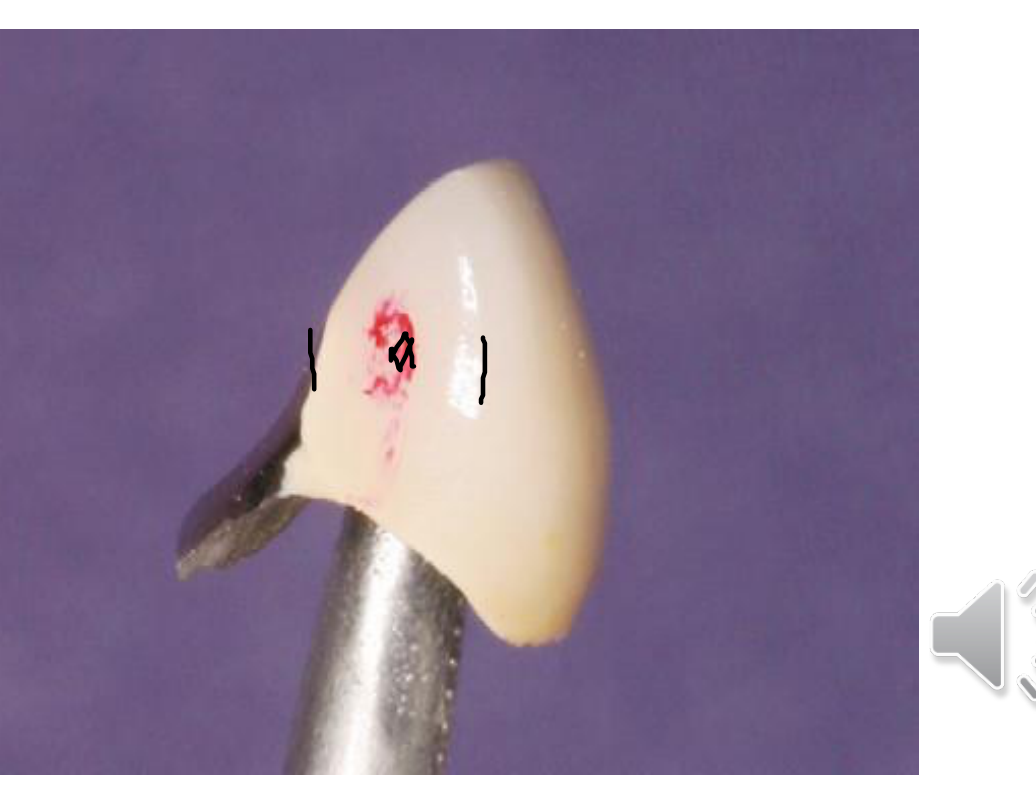
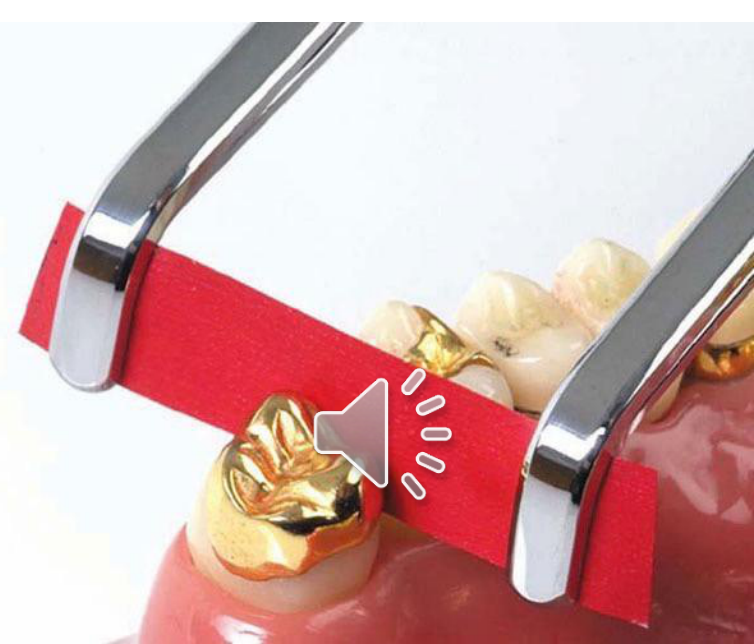
- Assess tightness with dental floss; there should be some tightness but it should not be too difficult to pass
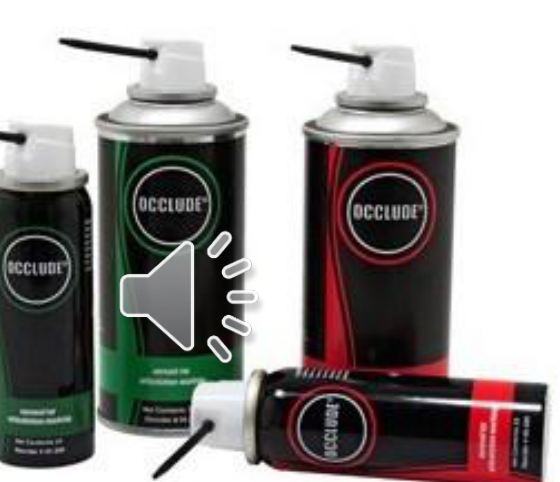
- Use articulating paper (20 μm), marking liquid (Accufilm), or sprays (Occlude) to identify contact points
- Shim stock (8 μm) should just pass through the contact
- Perform minor adjustments one at a time
- If contacts are open, return the restoration to the laboratory for material addition
 |  |
Proximal contacts28
 |  |
 |
Evaluating Internal Fit
Evaluation and Adjustment of Internal Fit29
- The restoration should seat completely without interference from the occlusal or axial surfaces
- Check the fitting surface and adjust accordingly using:
- Disclosing medium (Fit Checker, light body impression material)
- Aerosol indicator spray (Occlude)
- Relief can be achieved using a diamond bur
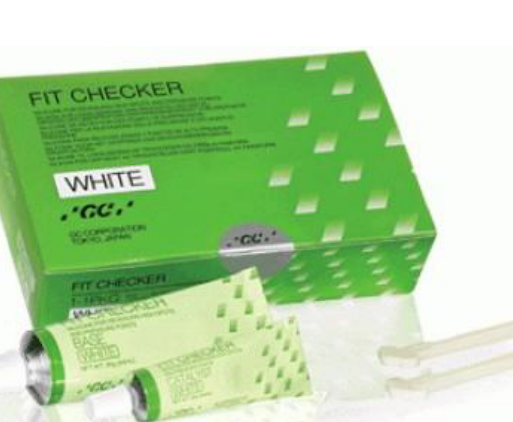 |  |
Fit Checker Application30
- Penetrated areas of the medium indicate high spots
- Adjust high spots accordingly
Troubleshooting Discrepancies31
If the crown fits the model well but does not seat in the mouth, consider problems with the impression.
Causes:
- Early impression removal
- Distortion of impression
- Latex contamination
Action: Take a new impression
Evaluating Marginal Fit
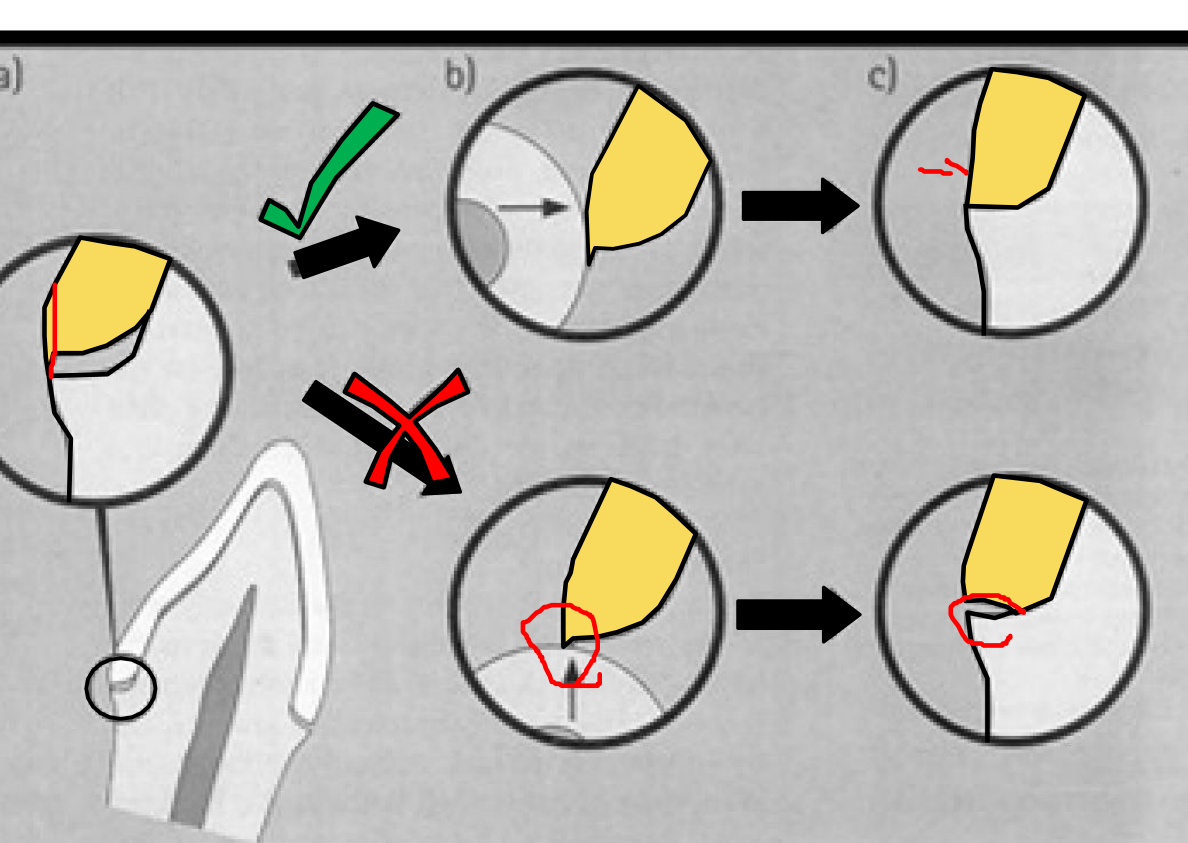
Marginal Adaptation Standards32
- Fit should be as accurate as possible
- Poor marginal adaptation includes:
- Gap (100 microns is the borderline for acceptability)
- Overhang
- Under-extension
- Ledge
Marginal Fit Classifications33
- Ideal
- Overextended
- Underextended
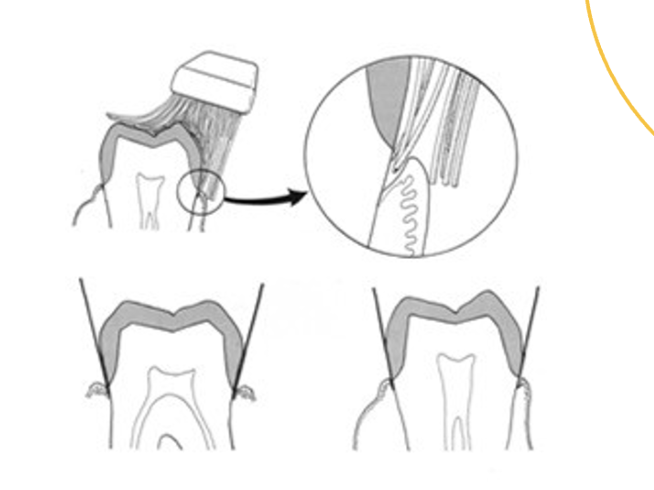
- Overhang
- Open margin

Clinical Effects of Open Margins34
- Sensitivity
- Dissolution of cement
- Plaque retention
- Caries
- Gingival inflammation
Causes and Corrective Actions35
- Poor marginal fit may be due to the technician’s inability to read the finish line
- Overhangs/Overextension: Can be adjusted
- Under-extension: May require a remake
- Gap: Requires a remake
Directions of Evaluation36
- Gingivo-occlusal direction
- Occluso-gingival direction
- Both
 |  |
 |
Adjustment Technique37
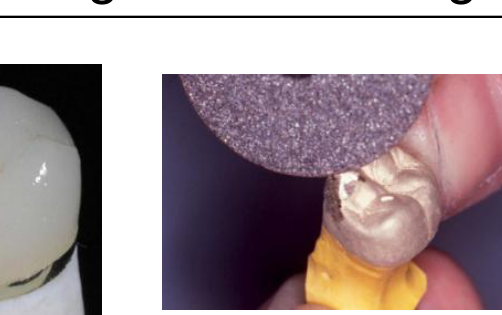
- Adjust overextended margins or overhangs from the external surface, not the fitting surface
Try-In Procedure: Assessment of the Seated Crown
Aims of Assessment38
Check the following to confirm suitability for cementation:
- Stability
- Contour
- Occlusion
- Aesthetics
Stability and Contour
Stability Requirements39
- The restoration should not rotate when force is applied.
- Instability causes failure in function, primarily during cementation.

Internal Surface Misfit
- Instability is often caused by internal surface misfit resulting from distortion in the impression or the fabrication process.
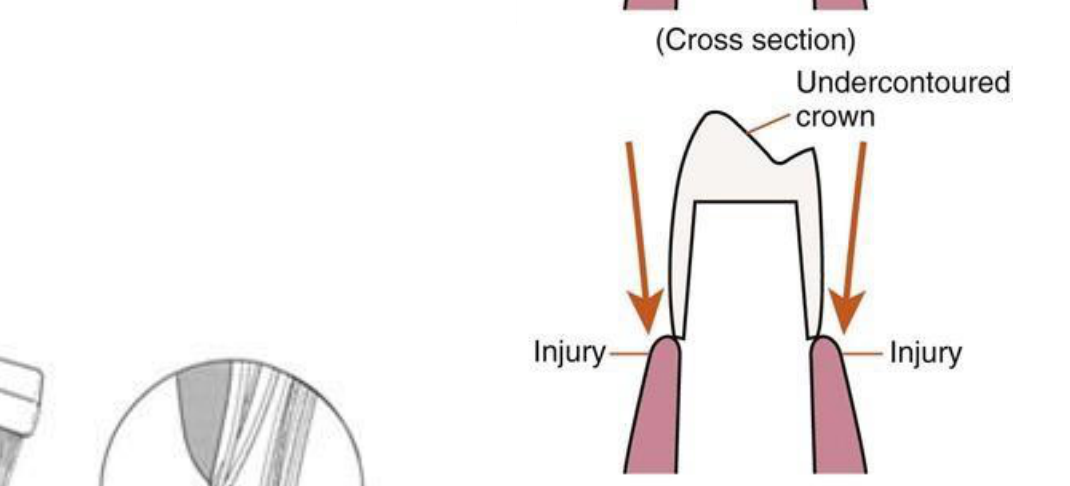
Gingival Health and Appearance40
- Improper contour may impair gingival health and affects the natural appearance.
- Contours must be adjusted before cementation.
 |  |
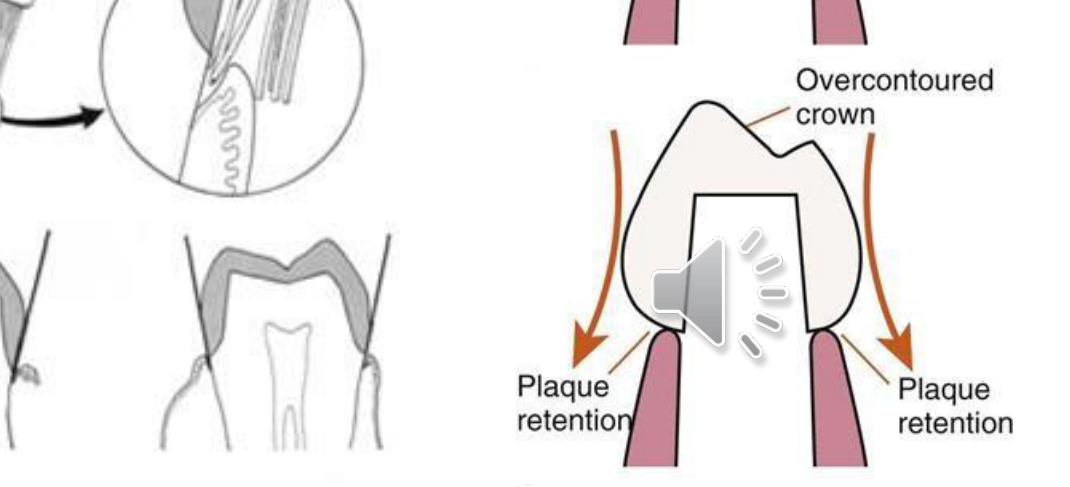 |
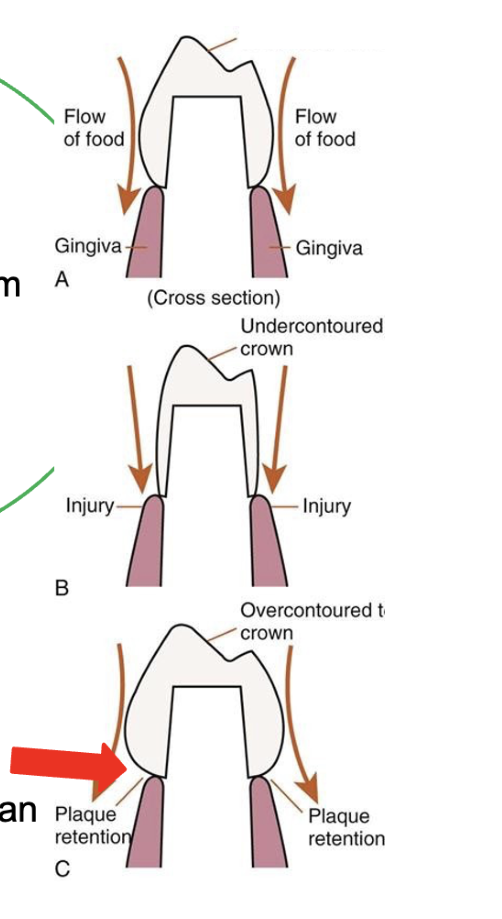
Effects of Improper Contouring
- Undercontoured crown: May lead to food impaction and potential injury to the gingiva.
- Overcontoured crown: Often results in plaque retention and gingival inflammation.
Occlusal Assessment and Adjustment
General Principles41
- The crown should be fully seated.
- Major adjustments should be done prior to cementation.
- Minor adjustments can be completed after cementation.
Causes of Inadequate Occlusal Contacts
- Poor occlusal recording
- Poor articulation
Shim Stock Assessment42
- Use shim stock (8 µm thick) to determine if an occlusal contact is present.
- Assess the occlusion on all teeth with and without the prosthesis.
- Assess the occlusion specifically on the crown.

Active Oral Tactile Sensitivity43
Research indicates that individuals with complete natural dentition can perceive differences in thickness from 12 μm. This sensitivity is critical for:
- Occlusal adjustment in dental rehabilitation.
- Dental implant prosthesis design.
- Survival of prosthetic rehabilitation.
Note: 8 μm thick shim stock is used for clinical assessment.
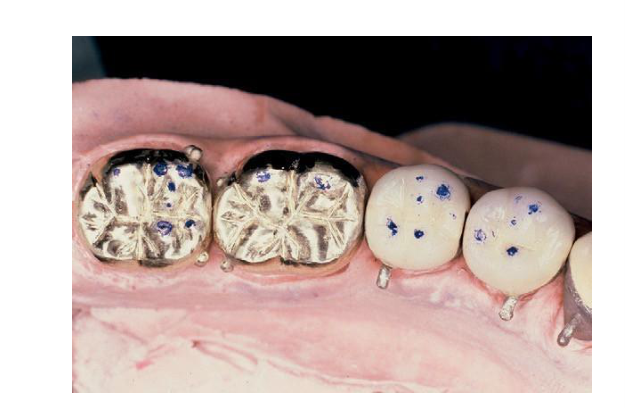
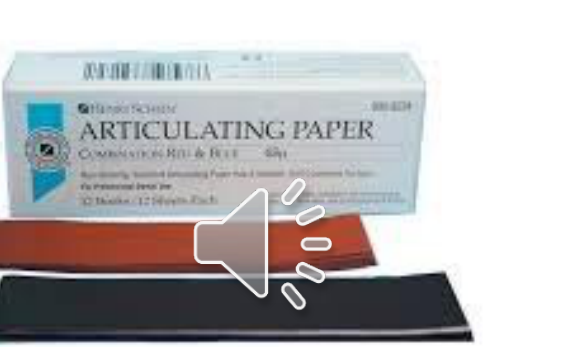
Articulating Paper Assessment44
- Mark heavy contacts or interferences in centric and eccentric movements.
- Articulating paper is used to locate the specific contact area.
- Use different colors to distinguish between different movements.
 |  |
 |
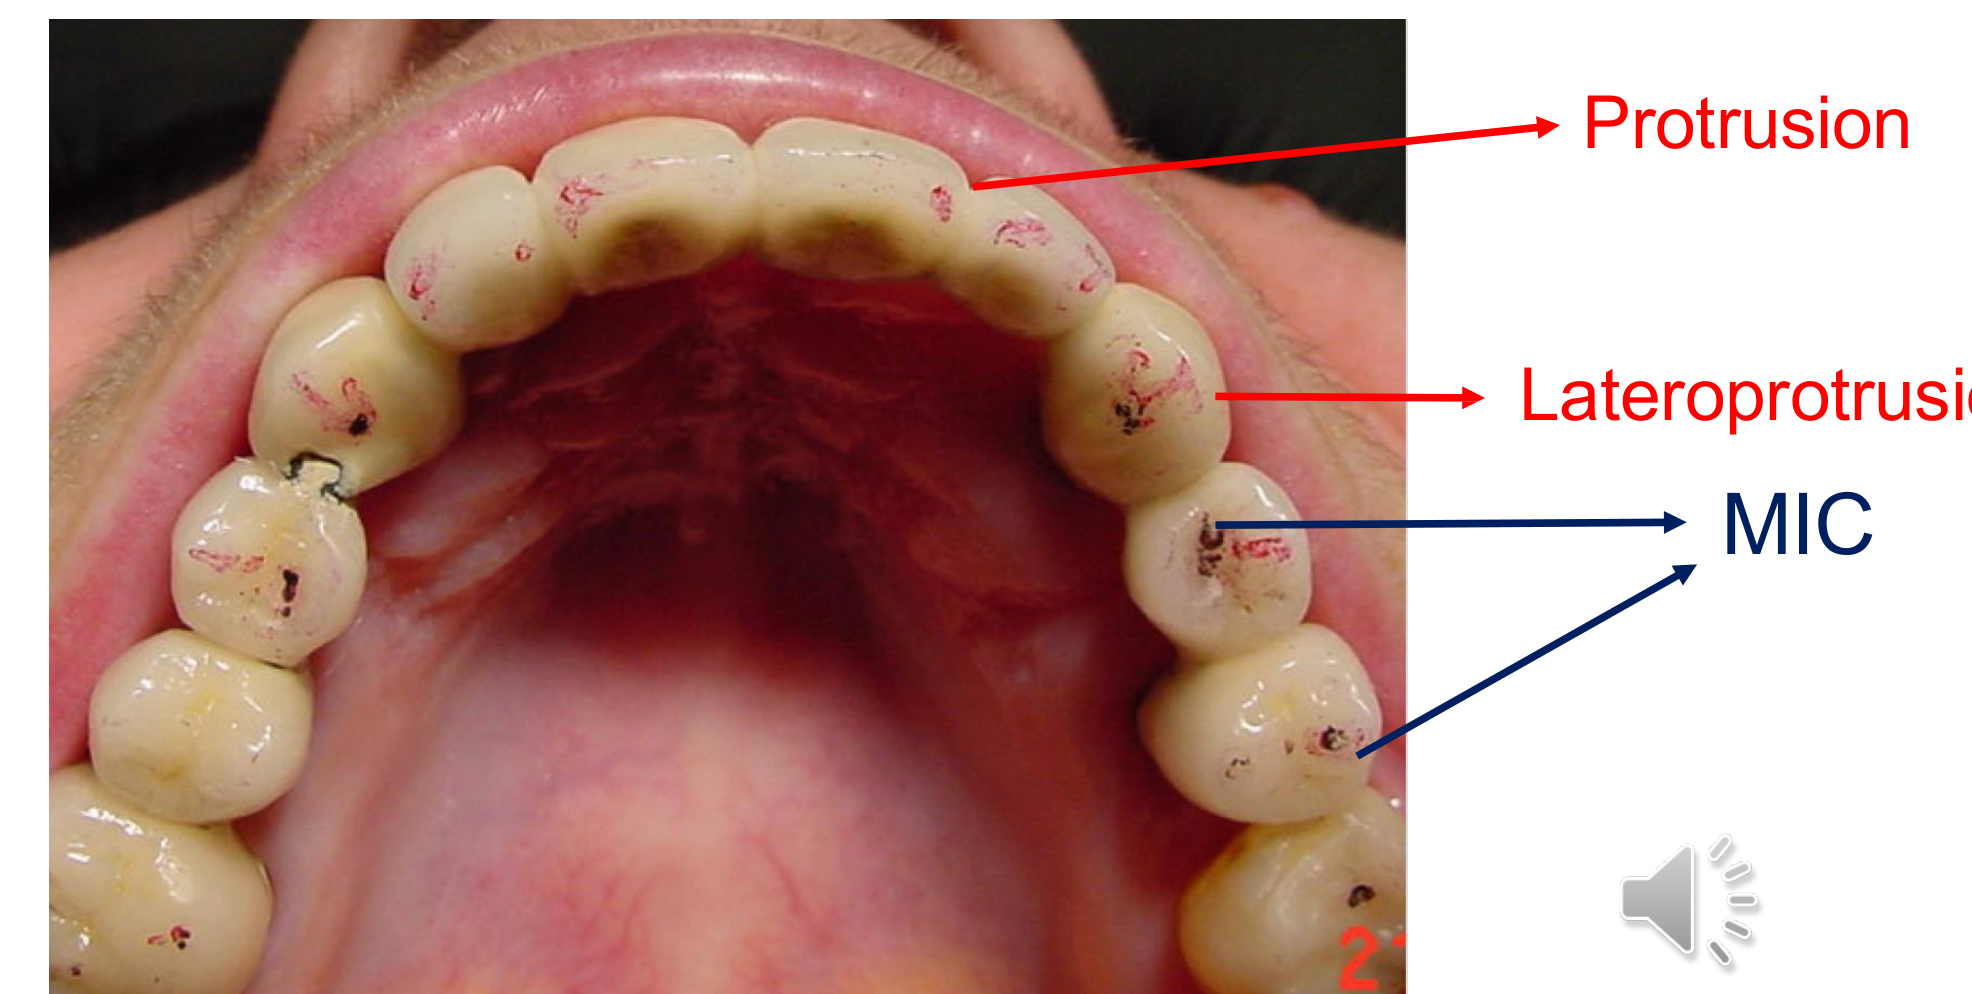
Movement Marking Protocols45
- Centric Relation (CR) or Maximal Intercuspation (MIC): Use dark articulating paper (e.g., blue).
- Eccentric Positions (Protrusion/Lateroprotrusion): Use lighter articulating paper (e.g., red).
Adjustment Guidelines46
- Premature contact (centric):
- Adjust grooves or cusp inclines.
- Never adjust the tip of the cusp.
- Interferences (eccentric):
- Adjust cusp inclines.
- Adjust the tip of cusps only if necessary.

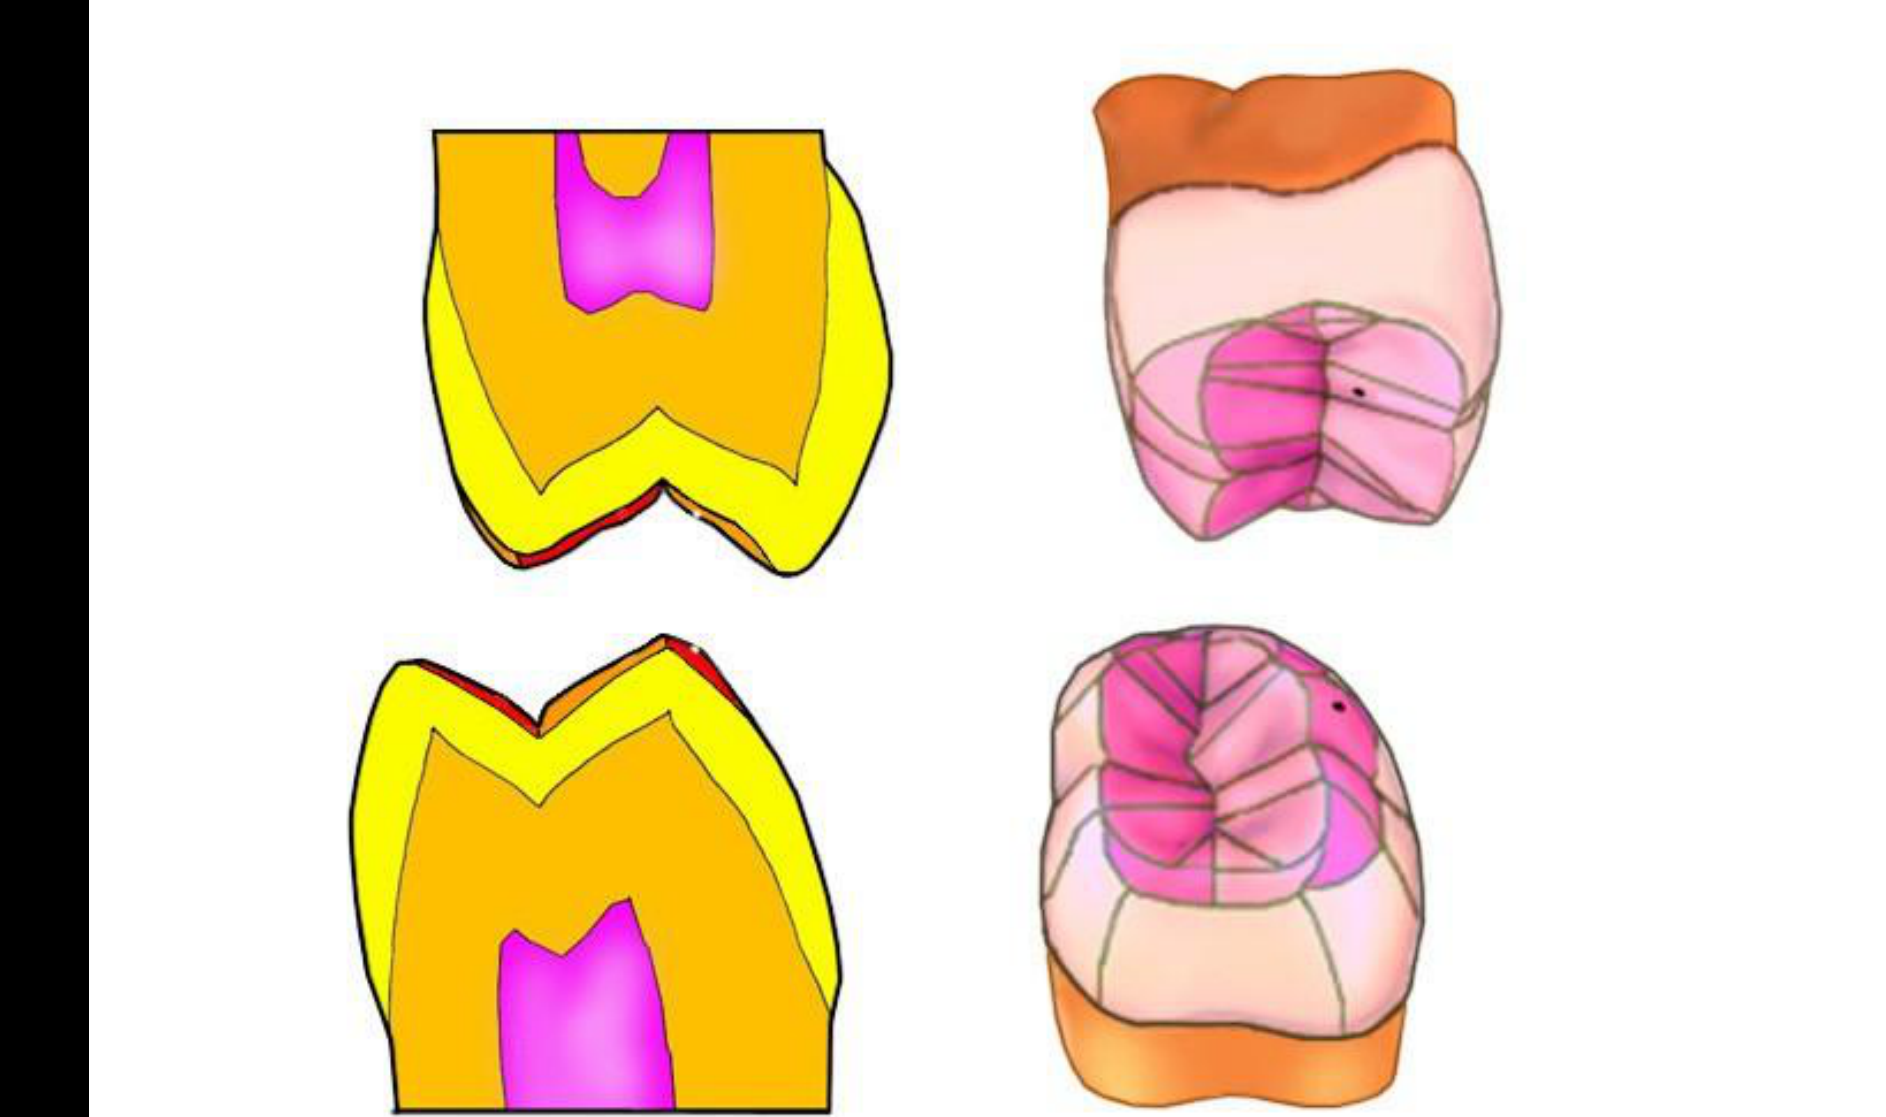
Measurement and Opposing Teeth47484950515253545556575859606162
- The prosthesis thickness should be measured using a Thickness Gauge (Svensen Gauge).
- In some cases, the opposing tooth can be adjusted to achieve proper occlusion.
 |  |  |
 |  |  |
 |  |  |
 |
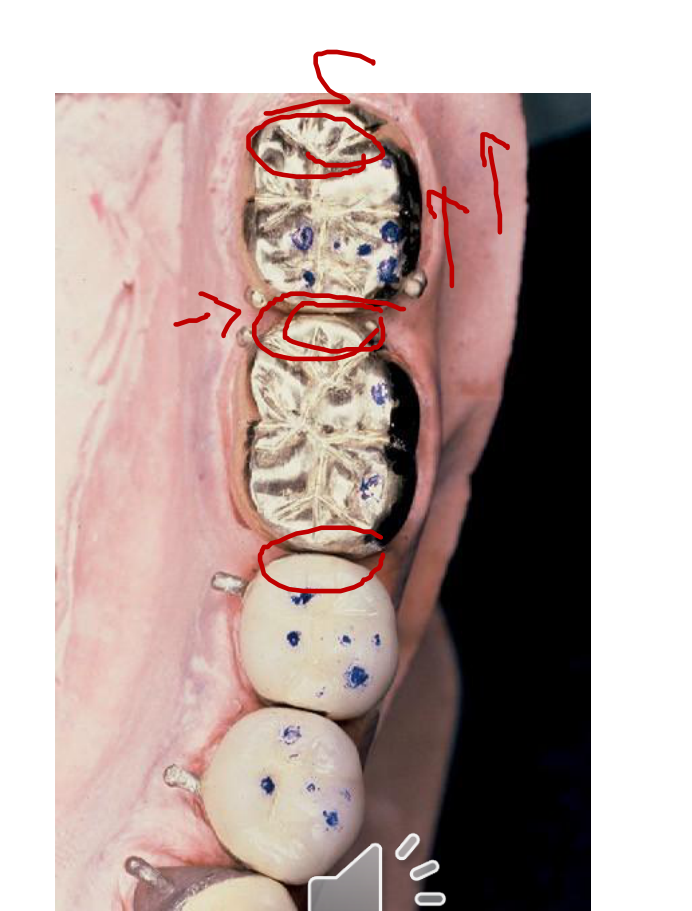
Criteria for Completed Adjustment63
- Well distributed occlusal contacts.
- Posterior teeth: The prosthesis and the remaining dentition should have the same occlusal contact and hold shim stock.
- Anterior teeth: The prosthesis should lightly hold shim stock if other anterior teeth do.
Aesthetics and Patient Approval
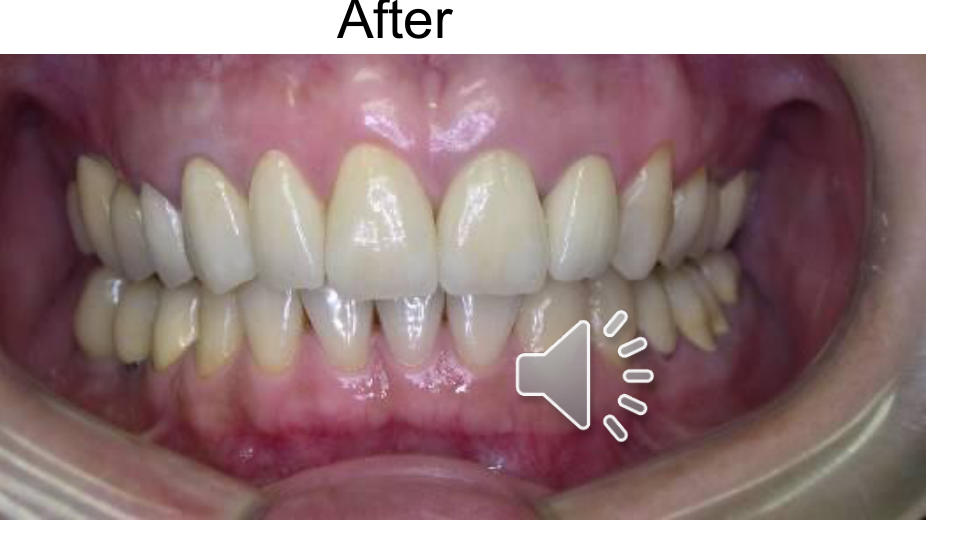
Patient Approval64
- Patient approval should be obtained prior to cementation.
 |  |
Shade and Morphology
- Shade Adjustments:
- Lighter shade: Can be stained and glazed.
- Darker shade: Should be cut back followed by new ceramic application.
- Morphology Adjustments:
- Modify with diamond burs and Sof-Lex discs.
- Send back to the laboratory for glazing after modification.
Clinical Consideration
- Consider temporary cementation to evaluate aesthetics in function.
Finishing and Polishing
Material-Specific Protocols65
- Metal: Use rubber polishing wheels and points.
- Ceramic: Rough ceramic will wear the opposing teeth. Options include:
- Composite finishing rubber burs.
- Rubber cup and diamond polishing paste.
- Sending to the laboratory for reglazing.
Polishing Procedures66
- Metal: Rubber polishing wheels and points.
- Ceramic: It is essential to polish as rough ceramic wears opposing teeth.
- Use composite finishing rubber burs.
- Use rubber cup with diamond polishing paste.
- Alternatively, return to the laboratory for professional reglazing.
Summary and Conclusion
Footnotes
-
Original PDF page 1: DMD2 L2 Clinical Steps of Indirect Restoration, p.1 ↩
-
Original PDF page 2: DMD2 L2 Clinical Steps of Indirect Restoration, p.2 ↩
-
Original PDF page 3: DMD2 L2 Clinical Steps of Indirect Restoration, p.3 ↩
-
Original PDF page 4: DMD2 L2 Clinical Steps of Indirect Restoration, p.4 ↩
-
Original PDF page 5: DMD2 L2 Clinical Steps of Indirect Restoration, p.5 ↩
-
Original PDF page 6: DMD2 L2 Clinical Steps of Indirect Restoration, p.6 ↩
-
Original PDF page 7: DMD2 L2 Clinical Steps of Indirect Restoration, p.7 ↩
-
Original PDF page 8: DMD2 L2 Clinical Steps of Indirect Restoration, p.8 ↩
-
Original PDF page 9: DMD2 L2 Clinical Steps of Indirect Restoration, p.9 ↩
-
Original PDF page 10: DMD2 L2 Clinical Steps of Indirect Restoration, p.10 ↩
-
Original PDF page 11: DMD2 L2 Clinical Steps of Indirect Restoration, p.11 ↩
-
Original PDF page 12: DMD2 L2 Clinical Steps of Indirect Restoration, p.12 ↩
-
Original PDF page 13: DMD2 L2 Clinical Steps of Indirect Restoration, p.13 ↩
-
Original PDF page 14: DMD2 L2 Clinical Steps of Indirect Restoration, p.14 ↩
-
Original PDF page 15: DMD2 L2 Clinical Steps of Indirect Restoration, p.15 ↩
-
Original PDF page 16: DMD2 L2 Clinical Steps of Indirect Restoration, p.16 ↩
-
Original PDF page 17: DMD2 L2 Clinical Steps of Indirect Restoration, p.17 ↩
-
Original PDF page 18: DMD2 L2 Clinical Steps of Indirect Restoration, p.18 ↩
-
Original PDF page 19: DMD2 L2 Clinical Steps of Indirect Restoration, p.19 ↩
-
Original PDF page 20: DMD2 L2 Clinical Steps of Indirect Restoration, p.20 ↩
-
Original PDF page 23: DMD2 L2 Clinical Steps of Indirect Restoration, p.23 ↩
-
Original PDF page 21: DMD2 L2 Clinical Steps of Indirect Restoration, p.21 ↩
-
Original PDF page 22: DMD2 L2 Clinical Steps of Indirect Restoration, p.22 ↩
-
Original PDF page 24: DMD2 L2 Clinical Steps of Indirect Restoration, p.24 ↩
-
Original PDF page 28: DMD2 L2 Clinical Steps of Indirect Restoration, p.28 ↩
-
Original PDF page 25: DMD2 L2 Clinical Steps of Indirect Restoration, p.25 ↩
-
Original PDF page 26: DMD2 L2 Clinical Steps of Indirect Restoration, p.26 ↩
-
Original PDF page 27: DMD2 L2 Clinical Steps of Indirect Restoration, p.27 ↩
-
Original PDF page 29: DMD2 L2 Clinical Steps of Indirect Restoration, p.29 ↩
-
Original PDF page 30: DMD2 L2 Clinical Steps of Indirect Restoration, p.30 ↩
-
Original PDF page 31: DMD2 L2 Clinical Steps of Indirect Restoration, p.31 ↩
-
Original PDF page 32: DMD2 L2 Clinical Steps of Indirect Restoration, p.32 ↩
-
Original PDF page 33: DMD2 L2 Clinical Steps of Indirect Restoration, p.33 ↩
-
Original PDF page 34: DMD2 L2 Clinical Steps of Indirect Restoration, p.34 ↩
-
Original PDF page 35: DMD2 L2 Clinical Steps of Indirect Restoration, p.35 ↩
-
Original PDF page 36: DMD2 L2 Clinical Steps of Indirect Restoration, p.36 ↩
-
Original PDF page 37: DMD2 L2 Clinical Steps of Indirect Restoration, p.37 ↩
-
Original PDF page 38: DMD2 L2 Clinical Steps of Indirect Restoration, p.38 ↩
-
Original PDF page 39: DMD2 L2 Clinical Steps of Indirect Restoration, p.39 ↩
-
Original PDF page 40: DMD2 L2 Clinical Steps of Indirect Restoration, p.40 ↩
-
Original PDF page 41: DMD2 L2 Clinical Steps of Indirect Restoration, p.41 ↩
-
Original PDF page 42: DMD2 L2 Clinical Steps of Indirect Restoration, p.42 ↩
-
Original PDF page 43: DMD2 L2 Clinical Steps of Indirect Restoration, p.43 ↩
-
Original PDF page 44: DMD2 L2 Clinical Steps of Indirect Restoration, p.44 ↩
-
Original PDF page 45: DMD2 L2 Clinical Steps of Indirect Restoration, p.45 ↩
-
Original PDF page 46: DMD2 L2 Clinical Steps of Indirect Restoration, p.46 ↩
-
Original PDF page 47: DMD2 L2 Clinical Steps of Indirect Restoration, p.47 ↩
-
Original PDF page 48: DMD2 L2 Clinical Steps of Indirect Restoration, p.48 ↩
-
Original PDF page 49: DMD2 L2 Clinical Steps of Indirect Restoration, p.49 ↩
-
Original PDF page 50: DMD2 L2 Clinical Steps of Indirect Restoration, p.50 ↩
-
Original PDF page 51: DMD2 L2 Clinical Steps of Indirect Restoration, p.51 ↩
-
Original PDF page 52: DMD2 L2 Clinical Steps of Indirect Restoration, p.52 ↩
-
Original PDF page 53: DMD2 L2 Clinical Steps of Indirect Restoration, p.53 ↩
-
Original PDF page 54: DMD2 L2 Clinical Steps of Indirect Restoration, p.54 ↩
-
Original PDF page 55: DMD2 L2 Clinical Steps of Indirect Restoration, p.55 ↩
-
Original PDF page 56: DMD2 L2 Clinical Steps of Indirect Restoration, p.56 ↩
-
Original PDF page 57: DMD2 L2 Clinical Steps of Indirect Restoration, p.57 ↩
-
Original PDF page 58: DMD2 L2 Clinical Steps of Indirect Restoration, p.58 ↩
-
Original PDF page 59: DMD2 L2 Clinical Steps of Indirect Restoration, p.59 ↩
-
Original PDF page 60: DMD2 L2 Clinical Steps of Indirect Restoration, p.60 ↩
-
Original PDF page 61: DMD2 L2 Clinical Steps of Indirect Restoration, p.61 ↩
-
Original PDF page 62: DMD2 L2 Clinical Steps of Indirect Restoration, p.62 ↩
-
Original PDF page 63: DMD2 L2 Clinical Steps of Indirect Restoration, p.63 ↩
-
Original PDF page 64: DMD2 L2 Clinical Steps of Indirect Restoration, p.64 ↩
-
Original PDF page 65: DMD2 L2 Clinical Steps of Indirect Restoration, p.65 ↩
-
Original PDF page 66: DMD2 L2 Clinical Steps of Indirect Restoration, p.66 ↩