Luxator Use for Atraumatic Tooth Extraction
Overview
Luxators are thin, sharp surgical instruments used to sever periodontal ligament fibers, dilate the socket, and facilitate atraumatic tooth removal prior to forceps application. When used correctly they reduce the force required for extraction, preserve alveolar bone, minimize contact with adjacent teeth, and generally produce less swelling, inflammation, and postoperative infection risk.
Instrument Selection
Choose the luxator size and blade configuration to match the root anatomy and access required.
- Sizes:
- 3 mm — for narrower roots
- 5 mm — for wider roots
- Blade configuration:
- Straight — when direct access along the long axis of the root is available
- Curved — when roots are curved or posterior access is restricted
Table: Recommended luxator choice by clinical situation
| Clinical feature | Recommended luxator |
|---|---|
| Narrow root diameter | 3 mm |
| Wide root diameter | 5 mm |
| Straight root, good access | Straight blade |
| Curved root, posterior tooth | Curved blade |
Grip and Hand Positioning
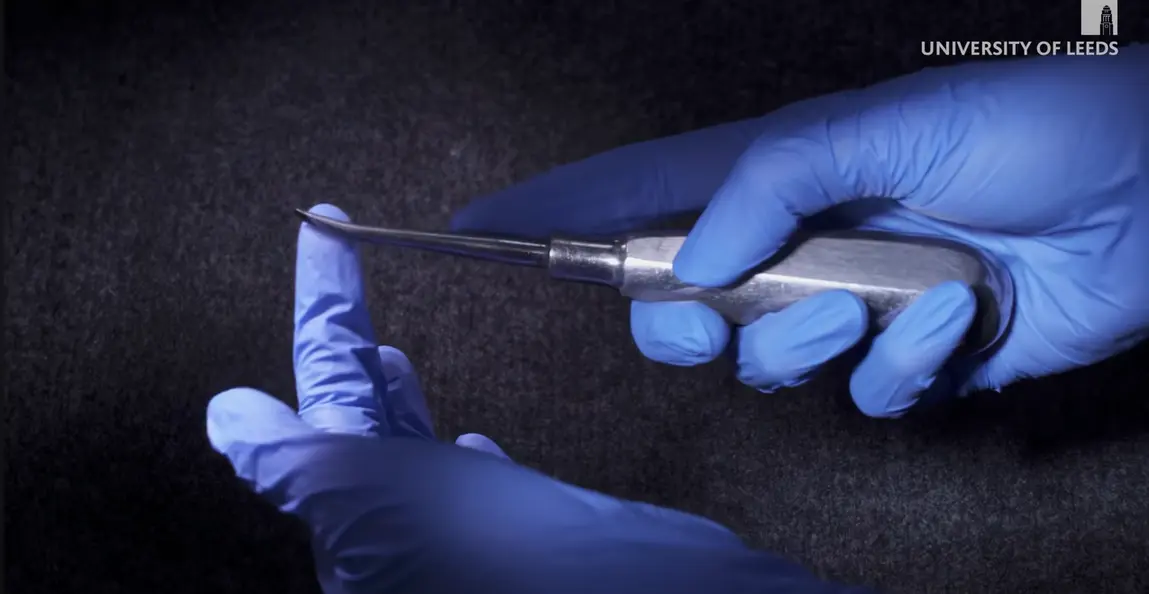 Proper handling is essential to control the instrument, prevent slipping, and protect soft tissues.
- Hold the luxator in the dominant hand with the handle resting in the palm and secured by the fingers and thumb.
- Index finger options:
- Place the index finger on the handle for general control.
- Extend the index finger along the shank toward the tip when finer control of the tip is needed (recommended for less experienced operators).
- Use the non-dominant (supportive) hand to:
- Retract lips and soft tissues.
- Protect the patient’s soft tissues from accidental slipping.
- Provide counter-support (place the middle finger under the mandible if needed for stability).
- Maintain continuous apical pressure when advancing both luxator and forceps.
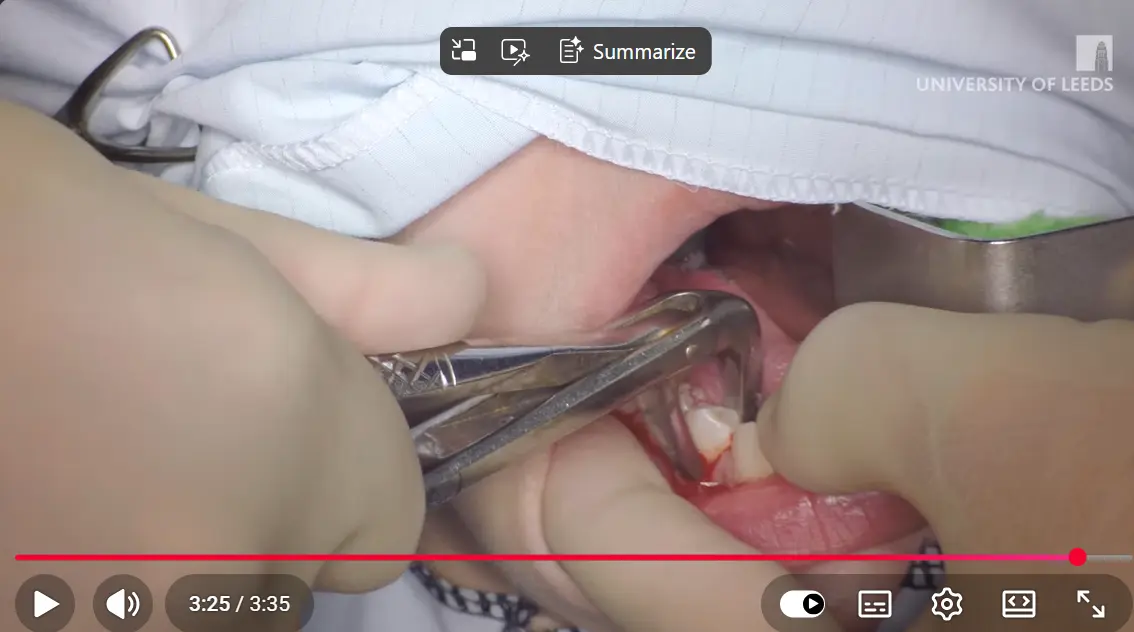
Technique — Step-by-Step
- Anaesthetize the tooth and surrounding tissues using appropriate local anesthesia.
- Select the luxator size and blade orientation to match the root.
- Insert the tip of the luxator into the gingival margin with the blade angled along the long axis of the root surface.
- Advance the luxator into the periodontal ligament space using a combined rotation (gentle rocking) motion and apical pressure:
- Work down the full length of the root to sever periodontal fibers and expand the socket.
- As the blade advances, air ingress may further dilate the socket.
- Circumferentially insert the luxator around as much of the root surface as possible (mesial, mid-buccal, distal) to maximize socket expansion.
- Once adequate luxation is achieved, apply the appropriate forceps and deliver the tooth using controlled rotational movements and continued apical pressure.
- Re-check the alveolar plates (APCs) and soft tissues after extraction.
Clinical example (upper premolar):
- Use a 3 mm straight luxator placed between the gingiva and the second upper premolar.
- Move the tip vertically down along the root surface with gentle rocking to cut periodontal fibers and detach from the alveolus distally, then repeat mesially and at the mid-buccal position.
- Apply upper premolar forceps and deliver the tooth with rotational movements.
Advantages Over Traditional Elevators
- Minimal or no contact with adjacent teeth — reduces risk to neighboring dentition.
- Less dramatic force required — preserves alveolar bone.
- Reduced postoperative swelling and inflammation.
- Lower risk of infection due to less traumatic manipulation.
Precautions and Contraindications
- Avoid luxating upper teeth toward the palate to prevent palatal damage.
- Avoid lingual use of luxators when possible to reduce risk to the lingual nerve.
- Prevent instrument slippage by:
- Correct grip and hand positioning.
- Using the supportive hand to stabilize and protect soft tissues.
- Placing the middle finger under the mandible for additional support if needed.
- Maintain continuous apical pressure when using both luxator and forceps.
Key Points and Practical Tips
- Choose luxator diameter to match root width (3 mm vs 5 mm).
- Choose blade curvature according to root anatomy and access.
- Index finger placement is a personal/skill preference; place where it provides best tip control.
- Luxators should be used prior to forceps to facilitate less forceful, more atraumatic extractions.
- Always protect soft tissues with the supportive hand and plan to avoid palatal or lingual damage.
This technique, when performed with appropriate instrument selection and careful handling, improves clinical outcomes and patient experience during extractions.