Clinical Guide: The Inferior Alveolar Nerve Block (IANB)
The inferior alveolar nerve block is the most frequently utilized local anesthesia technique in dentistry.
 Despite its prevalence, it maintains a failure rate of approximately 15% to 20%, even when following standard protocols. Success depends heavily on precise anatomical identification and proper needle positioning.
1. Anatomical Landmarks and Patient Positioning
To ensure the highest success rate, the clinician must first correctly identify the patient’s internal anatomy:
- Mouth Opening: The patient must maintain maximum mouth opening throughout the procedure.
- Anterior Border of the Ramus: Palpate the anterior border of the mandibular ramus with your index finger.
![[School/Reference/Visual Transcript Attachments/ALVEOL
1.MP4|ALVEOL1]]] The finger should be positioned parallel to and approximately 1 cm above the occlusal plane. - Pterygomandibular Raphe: Identify the raphe as it extends from the retromolar trigone toward the hamulus of the medial pterygoid plate.

![[School/Reference/Visual Transcript Attachments/ALVEOL2.MP4|ALVEOL2]]
2. Determining the Puncture Point
The puncture point is determined by drawing an imaginary horizontal line from the center of the fingertip (on the ramus) to the deepest part of the pterygomandibular raphe.
- Horizontal Division: Divide this imaginary line into four equal segments.
- Insertion Site: The needle should enter at a point approximately three-quarters (3/4) of the distance from the anterior border of the ramus toward the raphe.
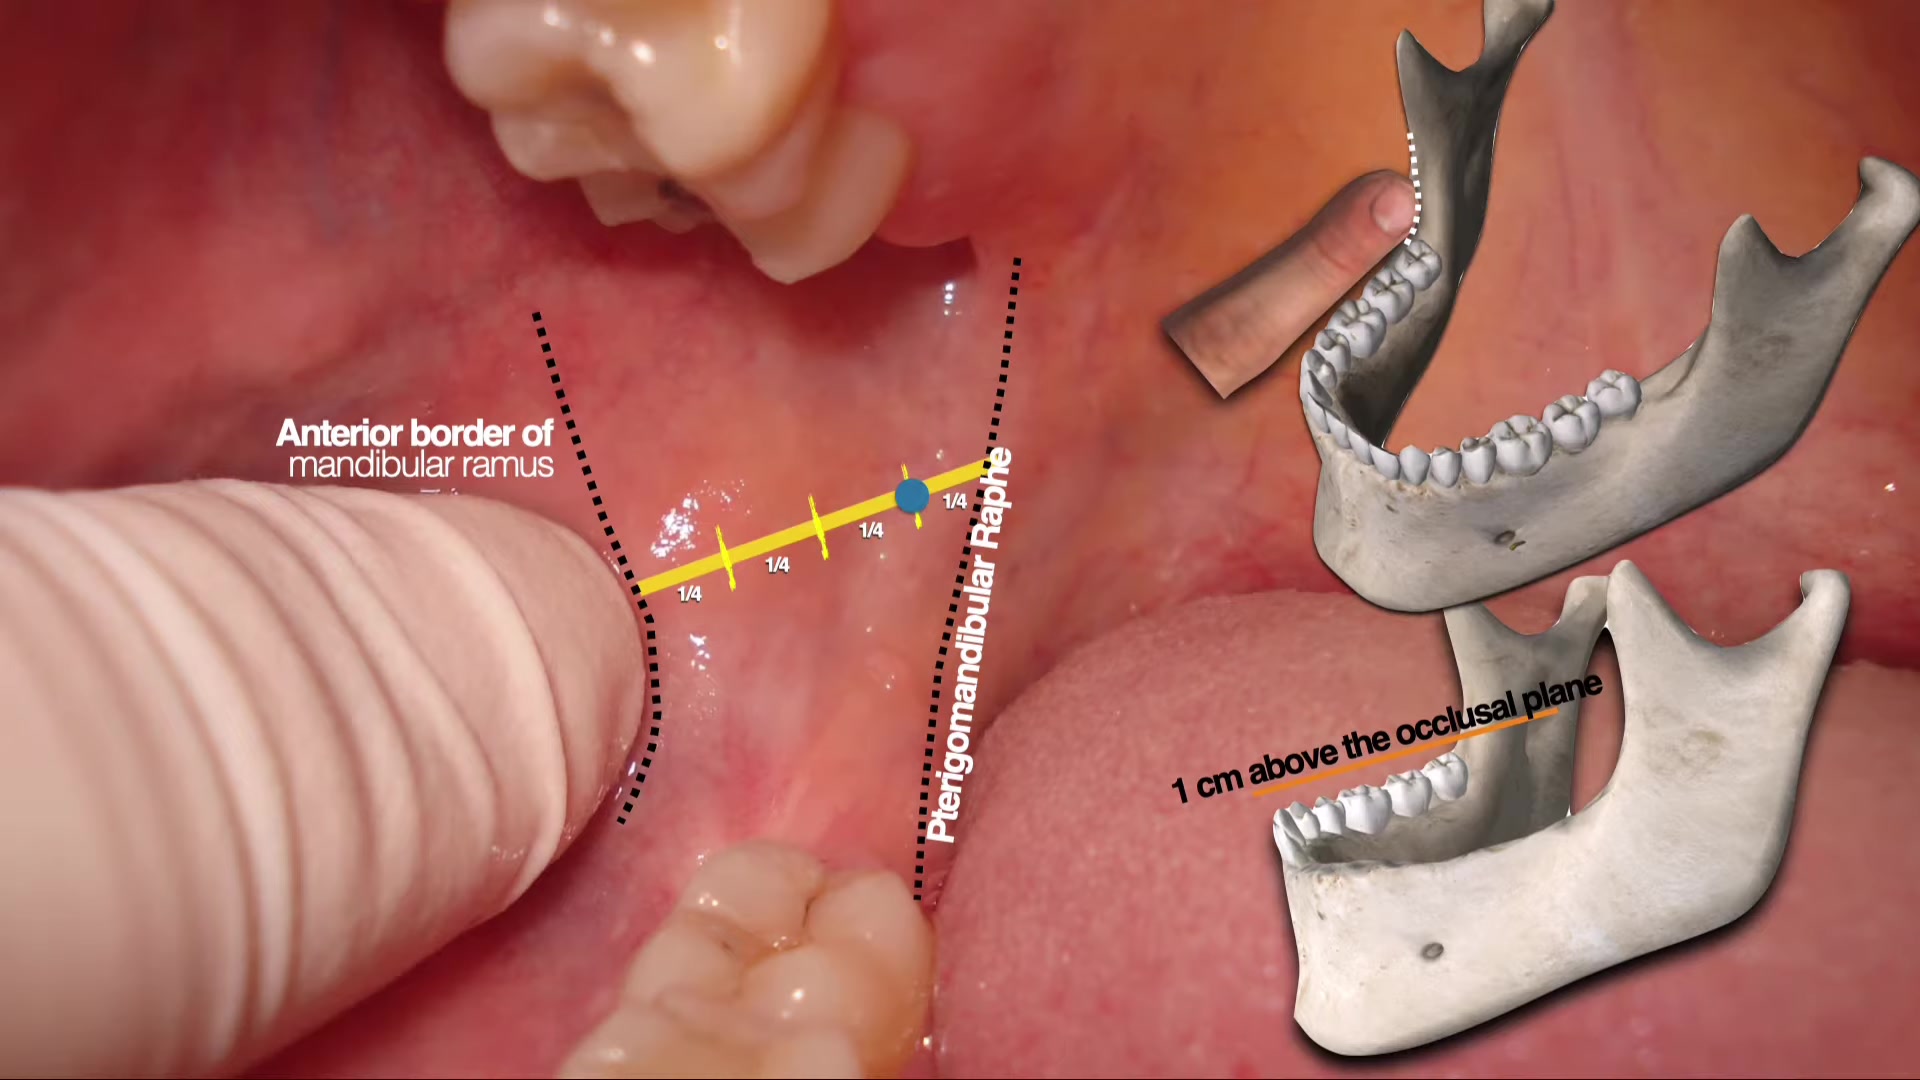
- Common Error: A puncture point that is too anterior will cause the needle to contact bone prematurely, preventing the anesthetic from reaching the mandibular foramen.
3. Syringe Orientation and Needle Selection
Proper angulation is critical for navigating the anatomy of the mandible:
- Syringe Body Position: The barrel of the syringe should generally rest over the premolars on the opposite side of the mouth.
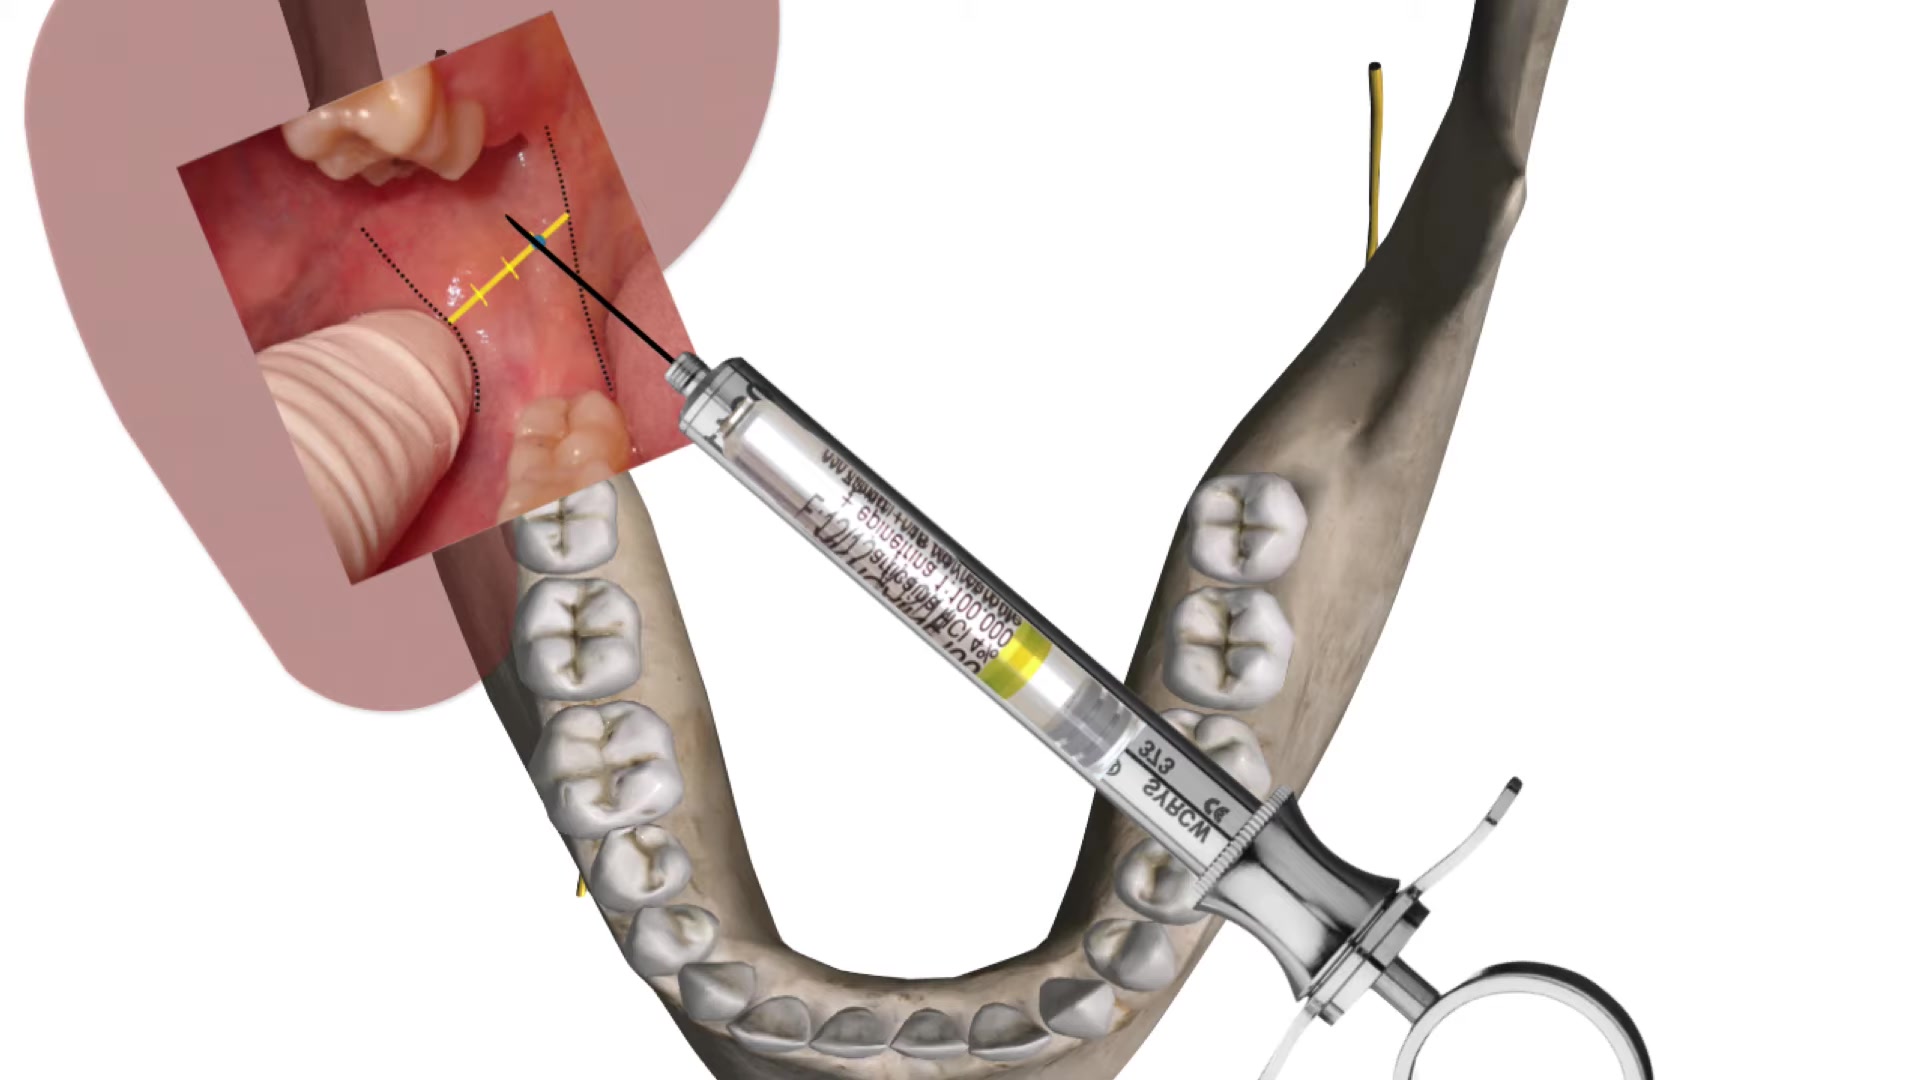
- Anatomical Variations: If the patient has a highly divergent mandible, the syringe may need to be positioned further back, over the contralateral molars.
- Needle Specifications: Use a 25 or 27-gauge long needle.
- Safety Margin: Do not insert the needle to the hub. A small segment should remain visible. In the event of a needle fracture (which typically occurs at the hub), this remaining segment allows for easier retrieval.
4. The Injection Procedure
Step 1: Advancing to Bone
Insert the needle until bone resistance is felt.
Transclude of Alveol-5If bone is not contacted, the needle is likely too posterior or the syringe angle is too shallow. Once bone is contacted, retract the needle 1 mm. This prevents depositing the solution directly into the mandibular foramen or against the periosteum.
Step 2: Aspiration
Perform an aspiration maneuver.
This is vital to prevent intravascular injection, which can lead to:
- Systemic toxicity or overdose reactions.
- Anesthetic failure, as the solution is carried away by the bloodstream rather than bathing the nerve.
Step 3: Slow Deposition
Administer the solution slowly and steadily. A full cartridge should ideally take approximately one minute to inject. Rapid injection increases patient discomfort and reduces the efficacy of the block.
Step 4: The Lingual Nerve
Do not deposit the entire cartridge at the primary site.
- Leave approximately 0.1 ml of solution in the cartridge.
- Withdraw the needle halfway and deposit the remaining solution to anesthetize the lingual nerve, which sits anterior to the inferior alveolar nerve.
5. Post-Injection Protocol
The most common clinical mistake is beginning the dental procedure too early.
| Phase | Duration | Clinical Sign |
|---|---|---|
| Initial Numbness | 2–3 Minutes | Tingling or numbness of the lower lip. |
| Ideal Wait Time | 5–10 Minutes | Full diffusion of anesthetic to the nerve trunk. |
| Maximum Efficacy | 10–15 Minutes | Complete pulpal anesthesia established. |
Note: Soft tissue numbness (the lip) does not always guarantee pulpal anesthesia. Always wait at least 10 minutes to ensure the patient is fully comfortable before starting invasive work.