Optimizing Marginal Ridge Height in Class 2 Restorations
Achieving the correct marginal ridge height is a common challenge in Class 2 restorations. Often, clinicians find the final restoration is too high, necessitating extensive and tedious grinding. This document outlines the common pitfalls of traditional techniques and provides a step-by-step guide to achieving accurate anatomical results using composite resin.
Common Causes of High Marginal Ridges
There are three primary reasons why Class 2 restorations often result in excessive height:
- Incorrect Matrix Selection: Historically, systems like Tofflemire matrices provided a “one-size-fits-all” height.
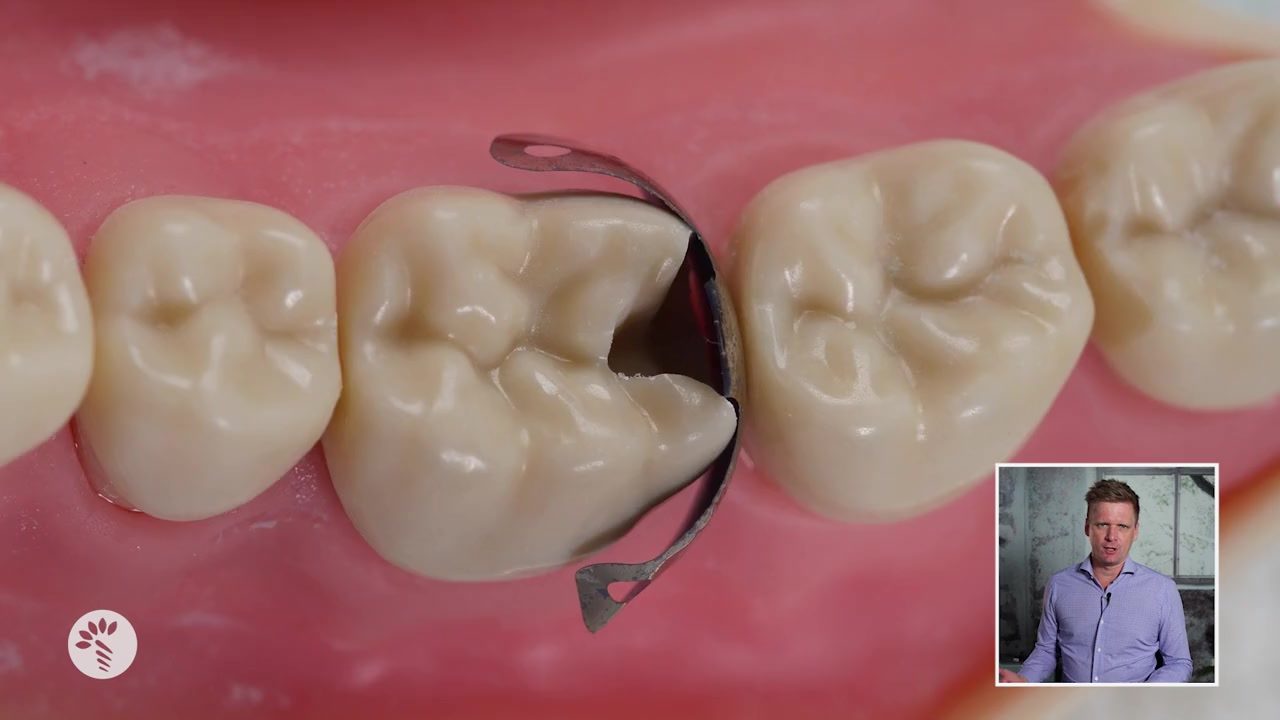 This led to a habit of overbuilding the restoration and carving it back—a technique that worked for amalgam but is inefficient for composite.

- Overfilling the Cavity: Clinicians often fill the composite right to the top edge of the matrix band. Because the matrix usually sits higher than the adjacent tooth’s anatomy, this results in a restoration that is significantly overbuilt.
- Misunderstanding Anatomy: There is a common misconception that the marginal ridge should run in a straight line from the buccal cusp to the lingual cusp. In reality, the ridge should form a “valley” that sits much lower than the adjacent cusp tips.

The Consequences of Poor Technique
When a restoration is built too high (often by 2mm or more), the clinician faces several issues:
- Tedious Finishing: Grinding down cured composite is time-consuming.
- Bur Inefficiency: Small burs often lack the surface speed necessary to cut composite efficiently, prolonging the procedure.
- Structural Integrity: If left high, the restoration is prone to chipping or fracture under occlusal load.

Best Practices for Accurate Restoration
To ensure the marginal ridge is at the correct height from the start, follow these clinical steps:
1. Matrix Selection and Placement
- Height Alignment: Choose a matrix (such as a Palodent sectional matrix) that allows for proper height adjustment.

- The “Tab” Rule: Use the tab on the sectional matrix as a guide. It should be folded over and sit level with the marginal ridge of the adjacent tooth.

- Stability: Secure the matrix with a wedge and a ring to ensure tight proximal contact.

2. Managing the Composite Base
- Flowable Adaptation: Start with a layer of flowable composite at the base of the cavity to ensure adaptation and prevent voids.
- The “Uncured Drop” Technique: Place a small drop of flowable composite but do not cure it yet. Immediately inject the paste resin into this uncured flowable.
This allows the material to flow into sharp line angles and margins, eliminating air bubbles.
3. Building the “Composite Matrix” Wall
Instead of filling the entire cavity at once, focus on converting the Class 2 into a Class 1:
- Create the Wall: Use a micro-brush to push the paste resin against the matrix and down toward the floor.
This pressure forces the resin to “roll” up the matrix, creating a rounded wall.

- Anatomical Trimming: Before curing, use a probe to sweep from the center of the matrix toward the lingual and then toward the buccal.
- Reference the Neighbor: Use the adjacent tooth’s marginal ridge as a visual height guide. Trim the composite until it matches that “valley” height.
4. Finalizing the Restoration
- Matrix Removal: Once the proximal wall is cured, you have essentially created a “composite matrix.”
 You can now remove the ring and the sectional matrix.
- Wedge Retention: Leave the wedge in place during this transition to maintain gingival compression and prevent bleeding.
- Class 1 Completion: With the proximal wall established at the correct height, complete the rest of the restoration as you would a standard Class 1 cavity.
Summary Checklist for Success
| Step | Action | Objective |
|---|---|---|
| 1 | Align matrix tab with adjacent ridge | Ensure correct vertical starting point. |
| 2 | Use uncured flowable under paste | Eliminate bubbles at the margins. |
| 3 | Build and trim the proximal wall | Match the “valley” anatomy of the natural ridge. |
| 4 | Convert to Class 1 | Simplify the final occlusal sculpting. |

By following these steps, you will significantly reduce the need for post-operative grinding, improve the structural integrity of the restoration, and achieve a more natural anatomical result.