DMD2 Dental Photography1
Learning Outcomes and Course Overview23
Topics
- Learning outcomes
- Photography Theory
- Processing
- Clinical Hints/Tips
- Demonstration of Techniques
- Practice in the clinic
- Submit a “Dental Photography Essay” via LMS
Lecture Learning outcomes
- Understand and outline photographic theory as it applies to dental photography.
- Understand concepts in using an SLR camera for dental photography.
- Describe the equipment and items needed to take dental photographs in a clinical setting.
- Understand concepts in photographic editing along with file and image management.
In-Clinic practical session:
- Observe a demonstration in extra-oral and intra-oral techniques for dental photography.
- Practice taking photographs on a patient, as an assistant and a patient
- Developing empathy by experiencing photography from the patient’s perspective during practical sessions.
Photography Theory4
- Why photo?
- Why is dental photography so unique?
- Limitations
- Equipment
- Photographic parameters
Clinical Applications and Rationale567891011121314151617
Why Photo?
Like Dental Radiography, Dental Photography is an integral diagnostic, record-keeping & communication tool.
Photographic images complement Radiographic images.
- Provides color, depth, and different angles to complement radiographic findings.
- Used to demonstrate aesthetic expectations and illustrate oral hygiene needs to patients.
“A picture is worth a thousand words”
“One look is worth a thousand words” – Frederick R Barnard 1921
Source: https://www.phrases.org.uk/meanings/a-picture-is-worth-a-thousand-words.html
In words…
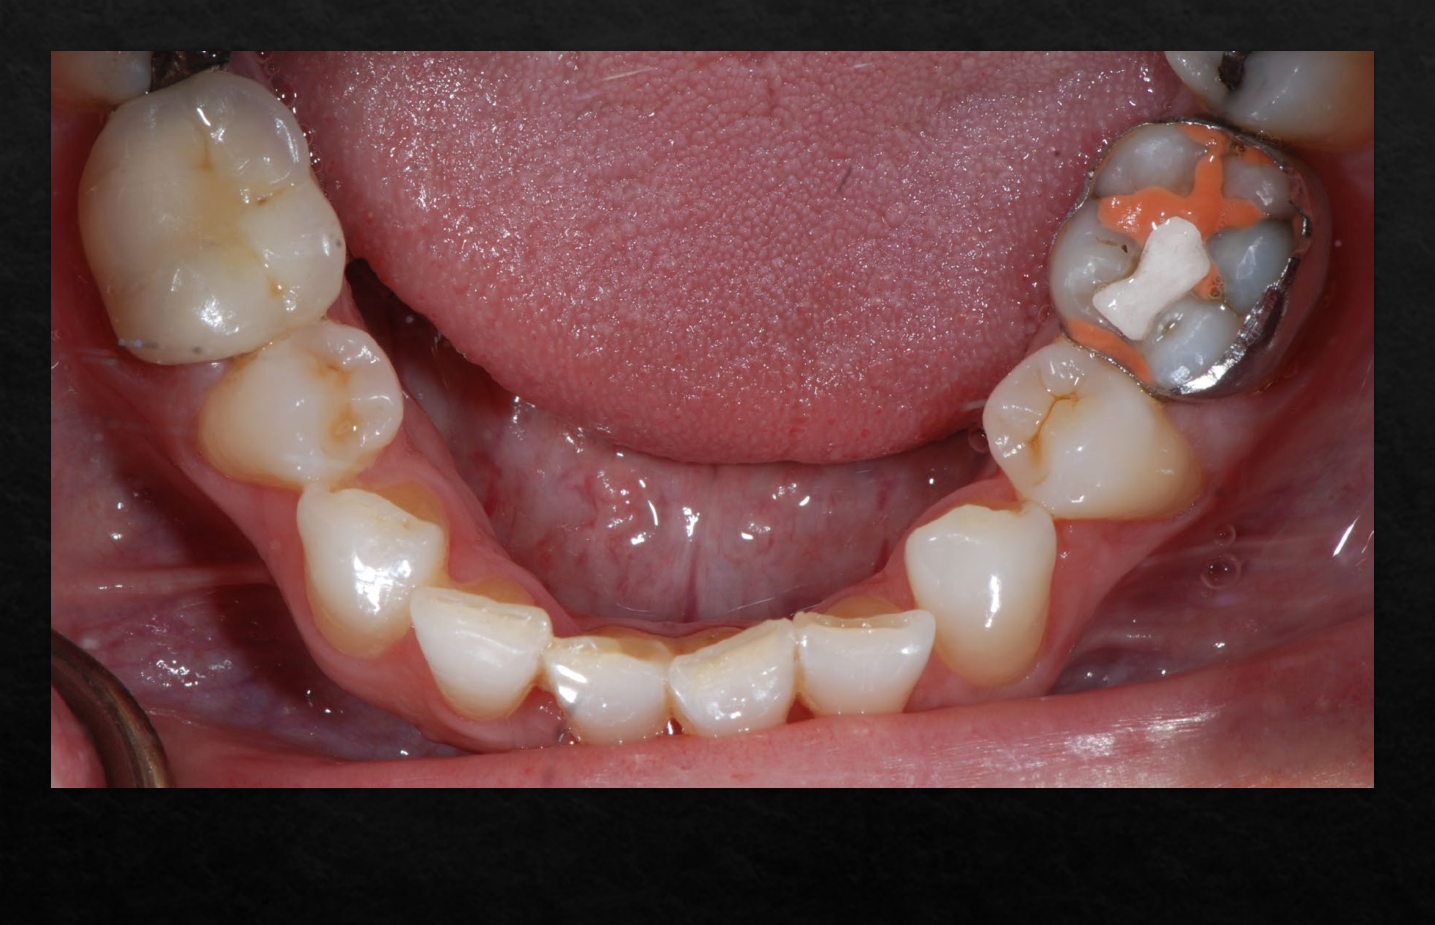
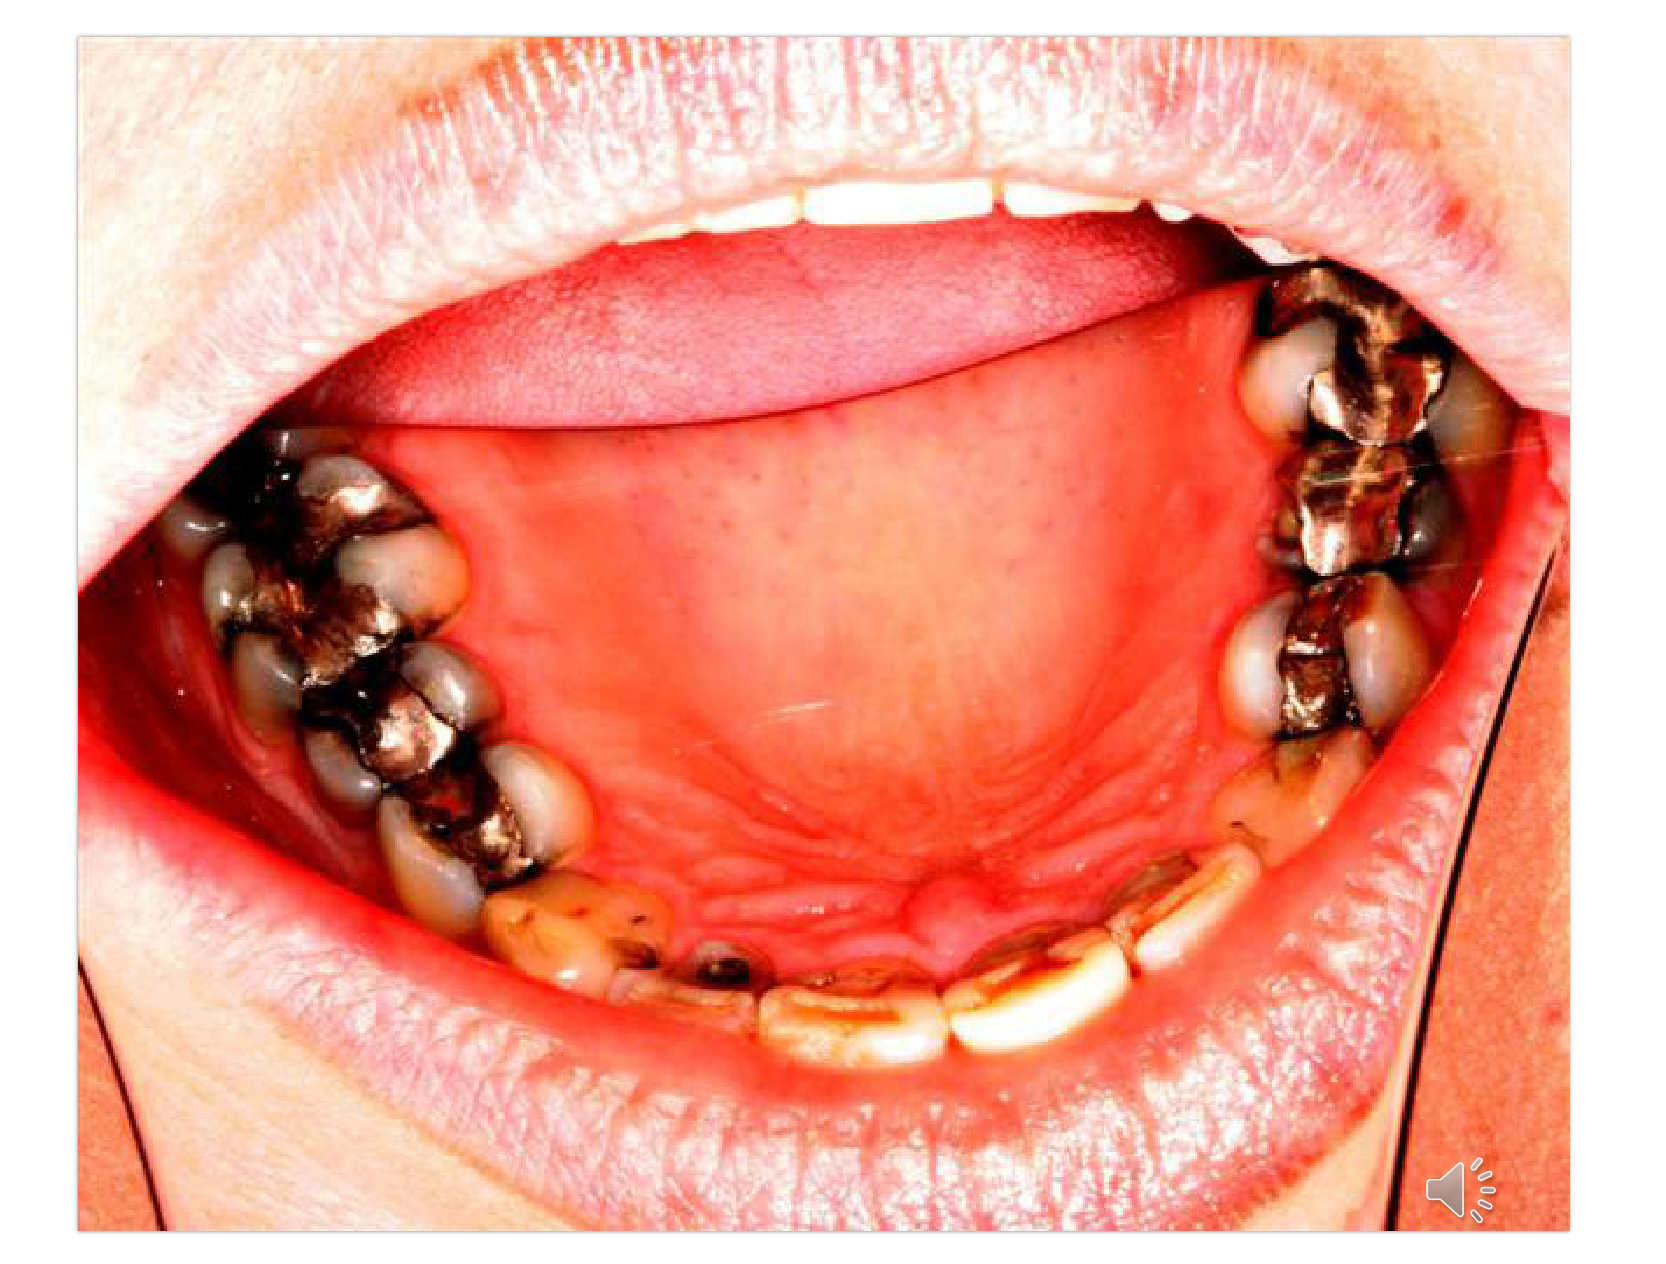
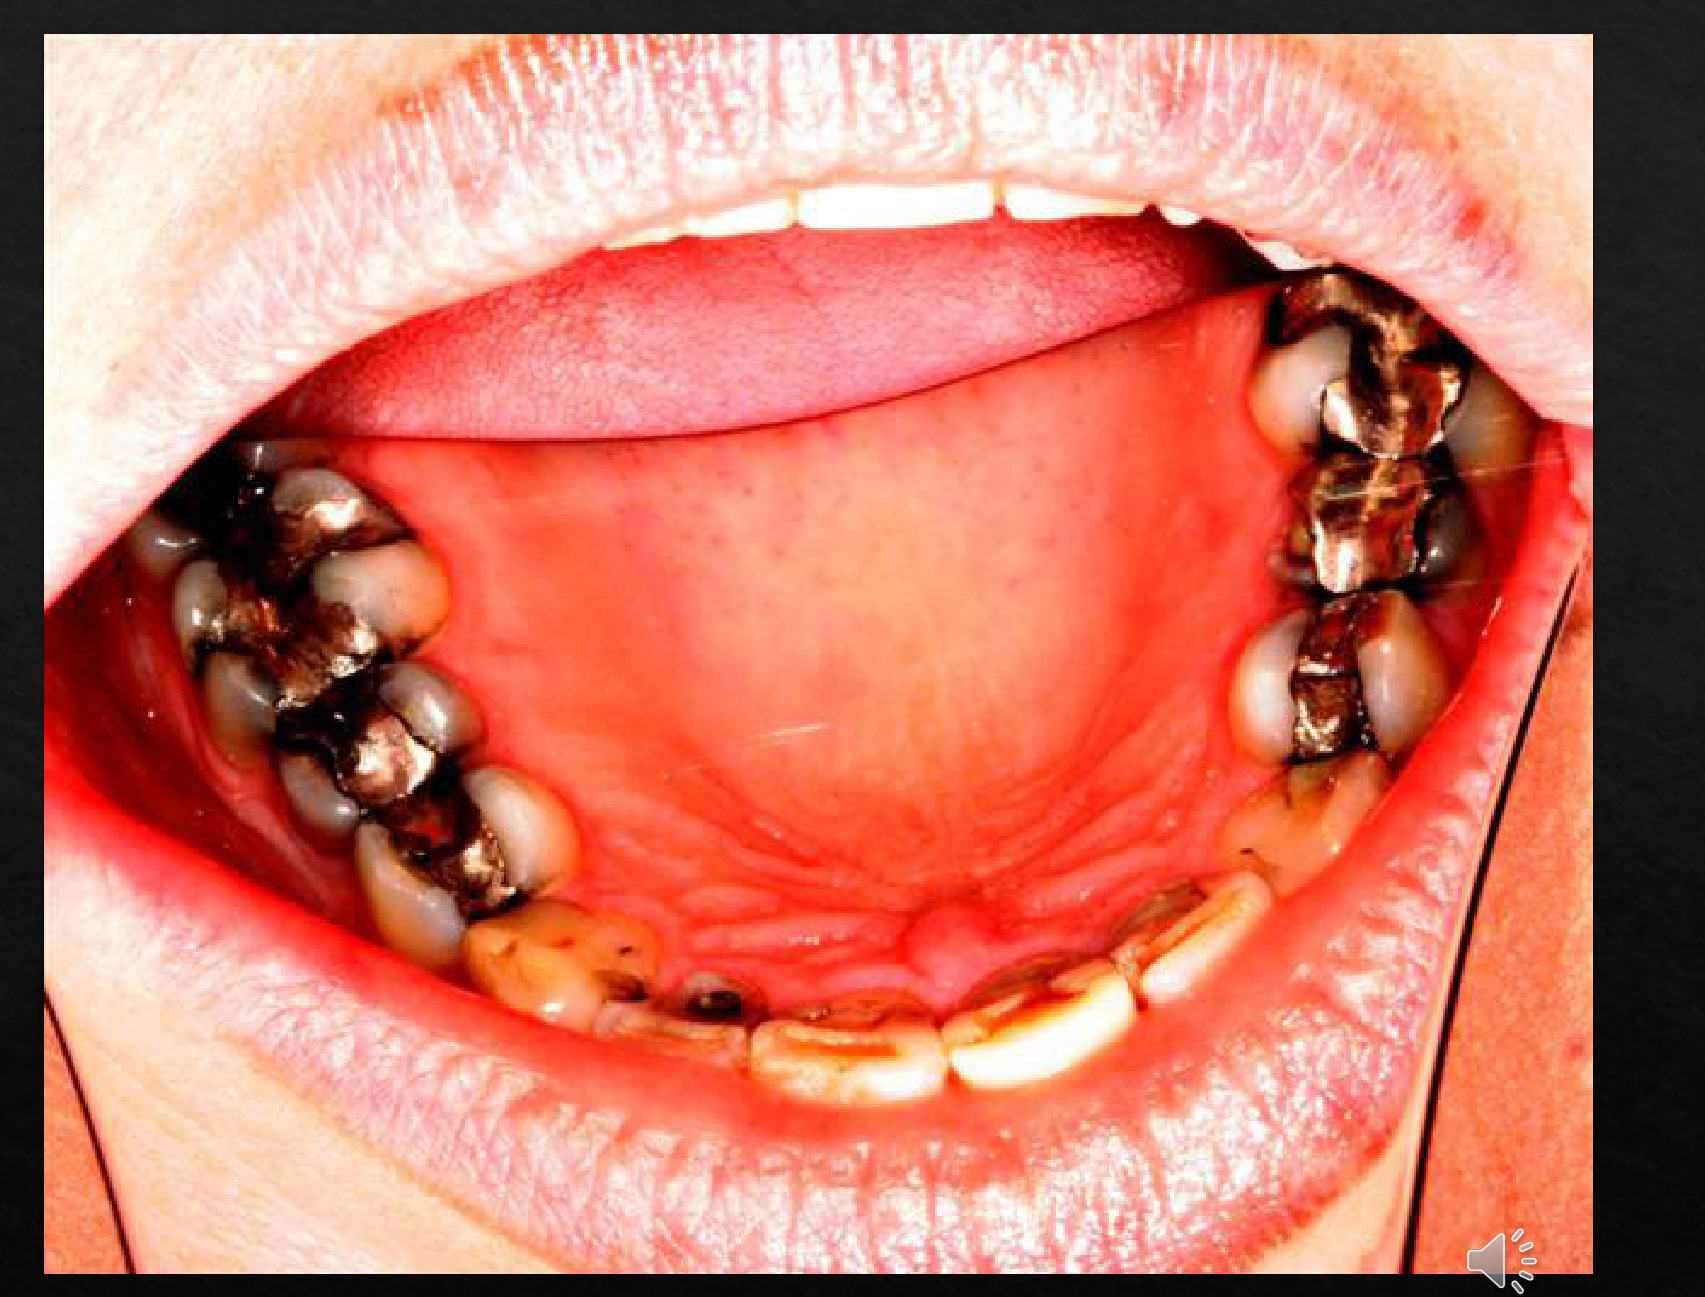
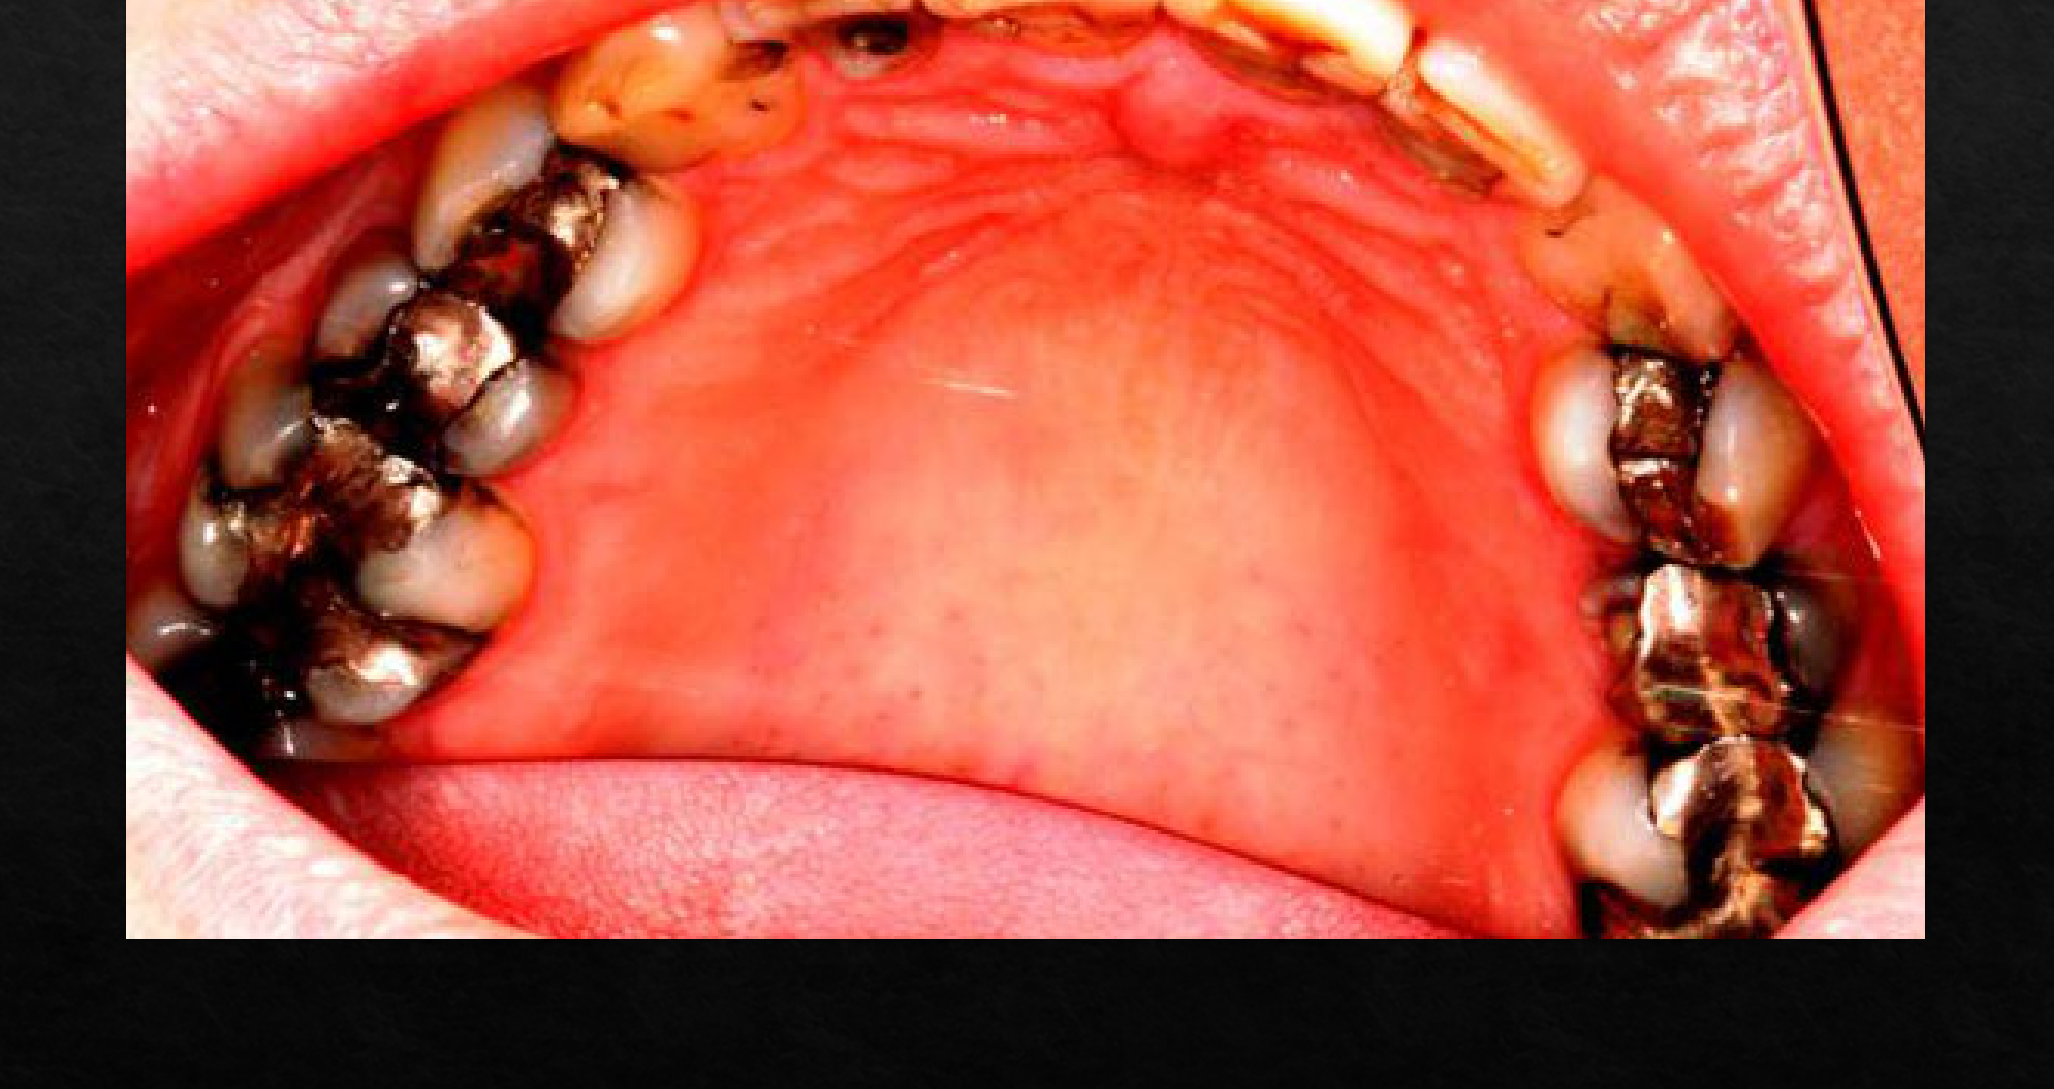
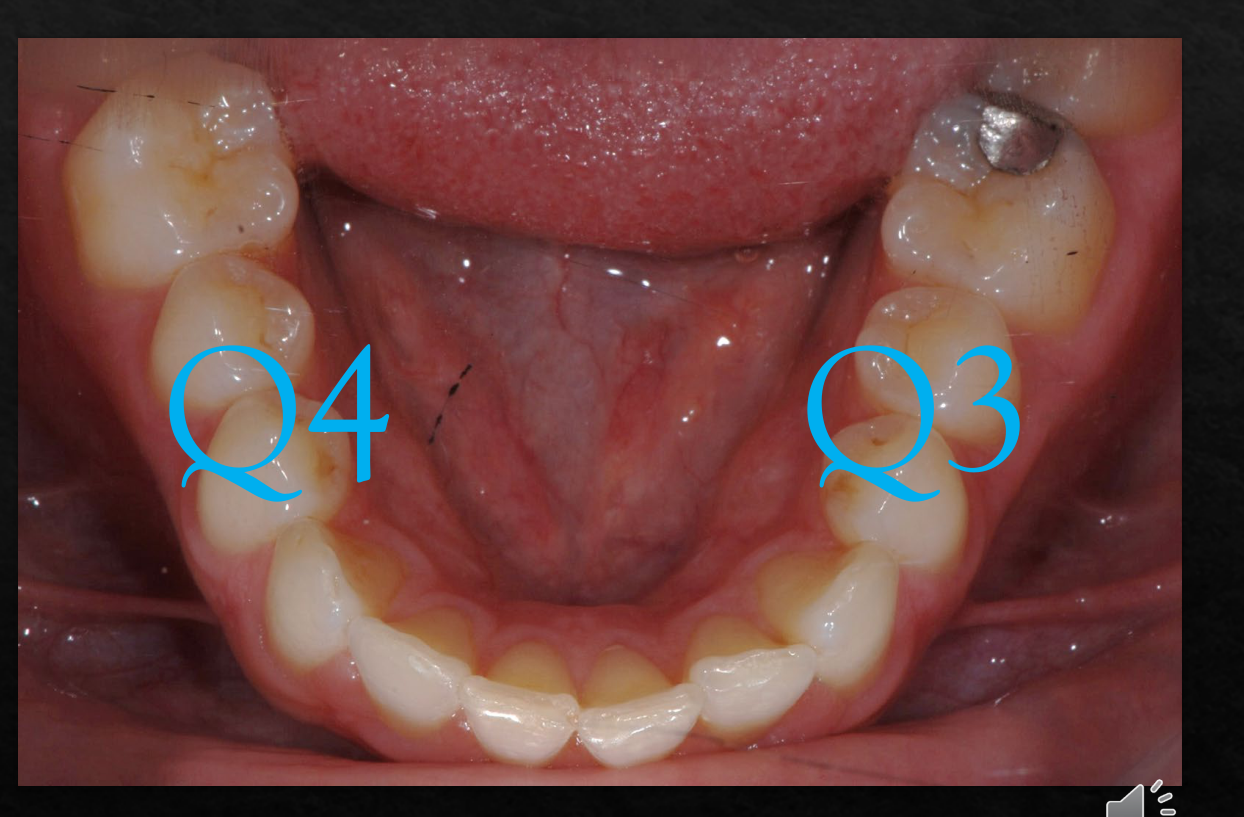
This is an intra-oral photograph depicting the mandibular arch…
- Tooth 37 partially in view has an amalgam restoration
- Tooth 36 has a stainless steel orthodontic band, pink/orange restoration likely Fuji VII. There is an occlusal access cavity type restoration in the mesial two-thirds
- Tooth 35 is tilted mesial
- Tooth 34 is missing and the space is closed, likely from previous orthodontic treatment.
- Tooth 33 is lingually displaced and rotated
- There is mild mandibular anterior crowding in the incisors and mild incisal wear.
- Tooth 44 is missing and the space is closed, likely from previous orthodontic treatment.
- Tooth 45 is tiled mesially
- Tooth 46 appears to be a full coverage ceramic crown,
- Tooth 48 partially in view has an amalgam restorations
- The frenal attachments are in view
- The anterior dorsal aspect of the tongue is visible and appears healthy and pink with normal papilla
Why photo?
- Communication
- Patients
- Education
- Motivation
- Other clinicians
- Treatment planning
- Allows for rapid communication with specialists and academic staff.
- Treatment planning
- Patients
Why photo?
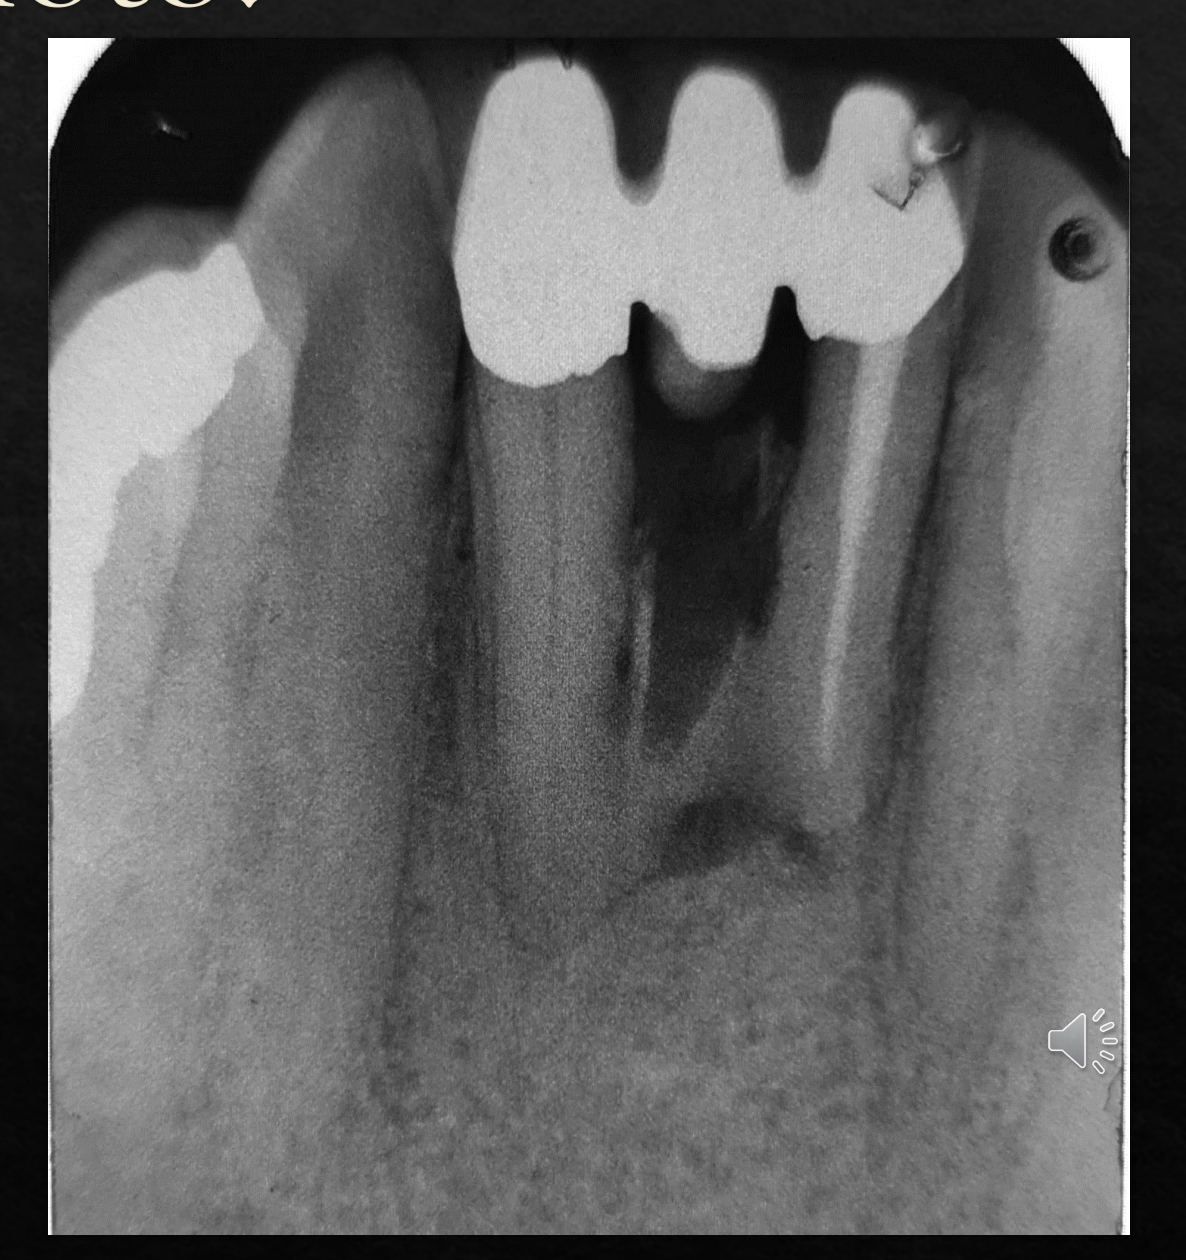
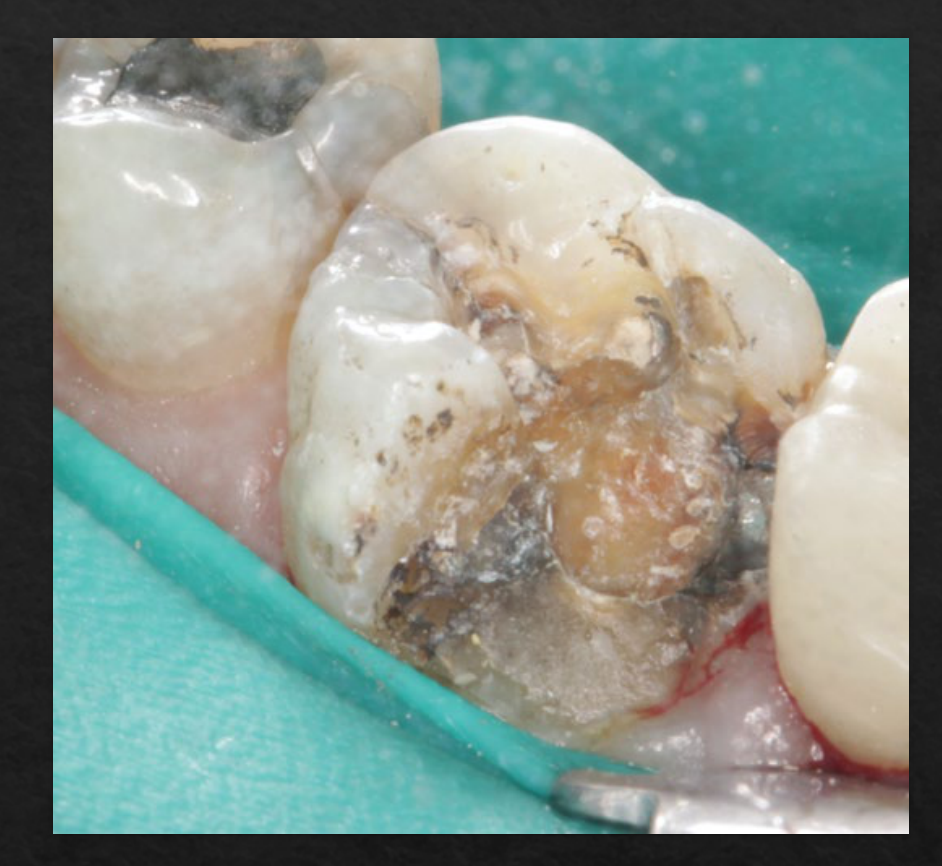
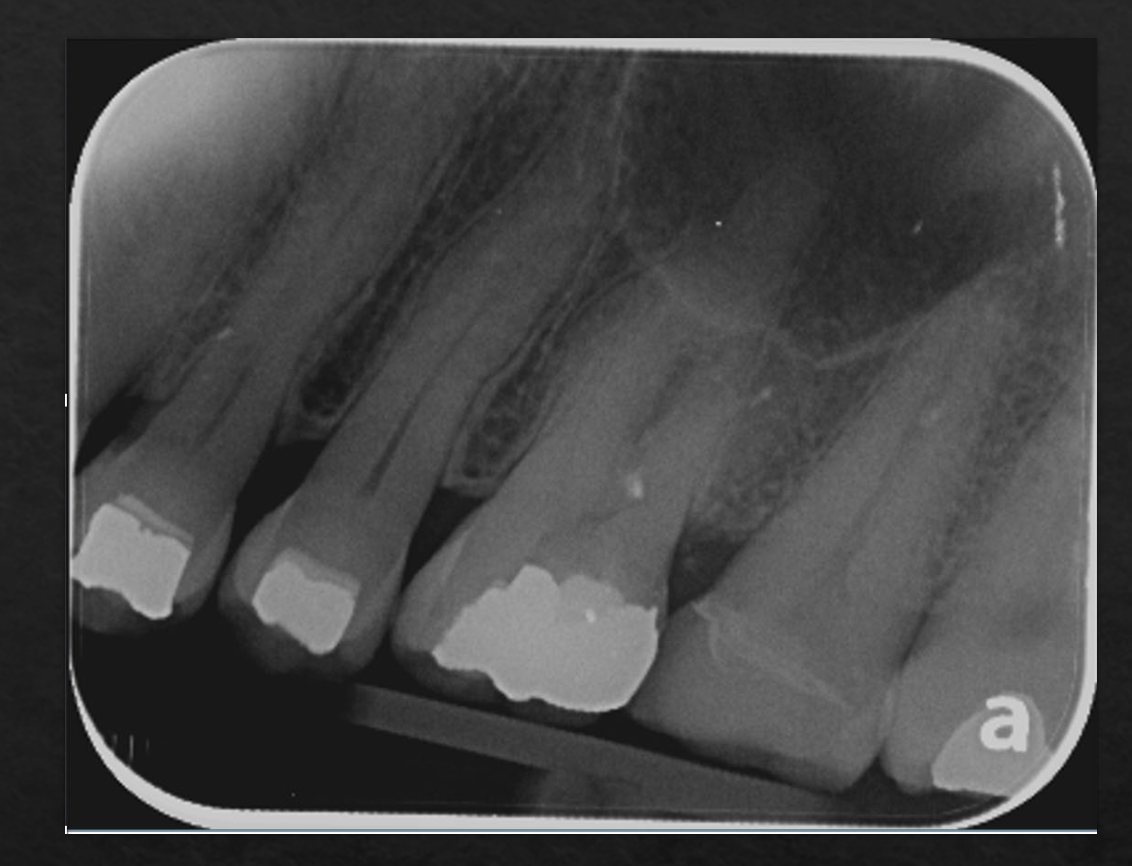
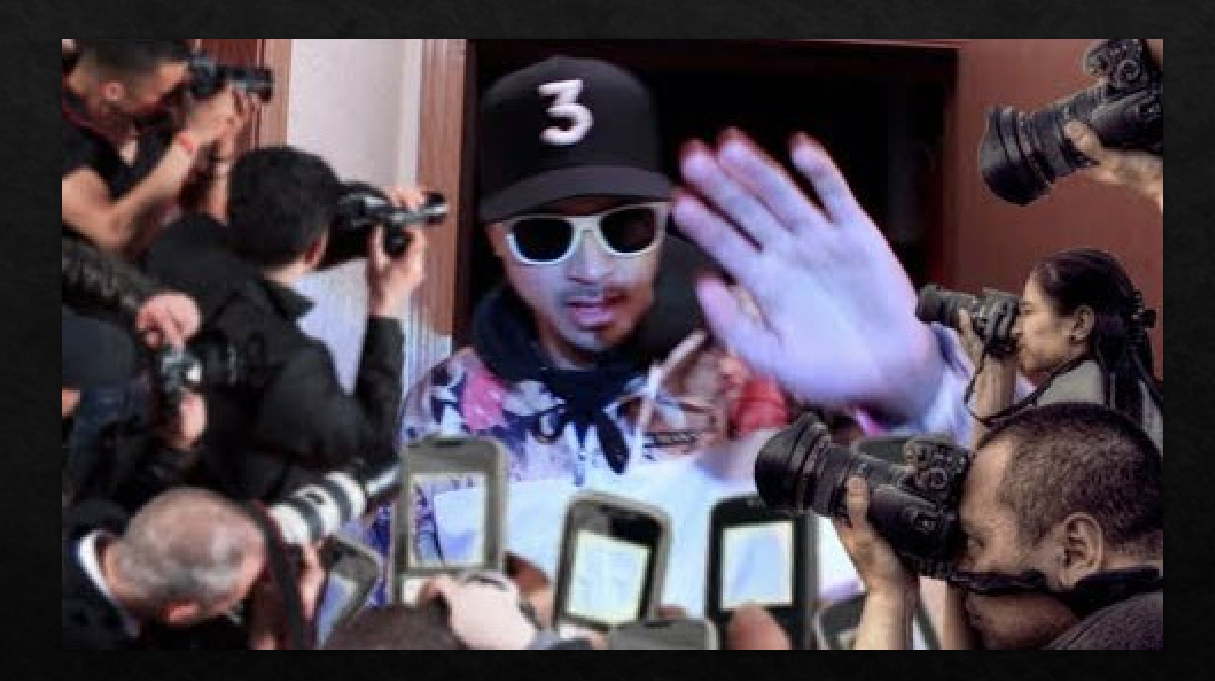
- Records
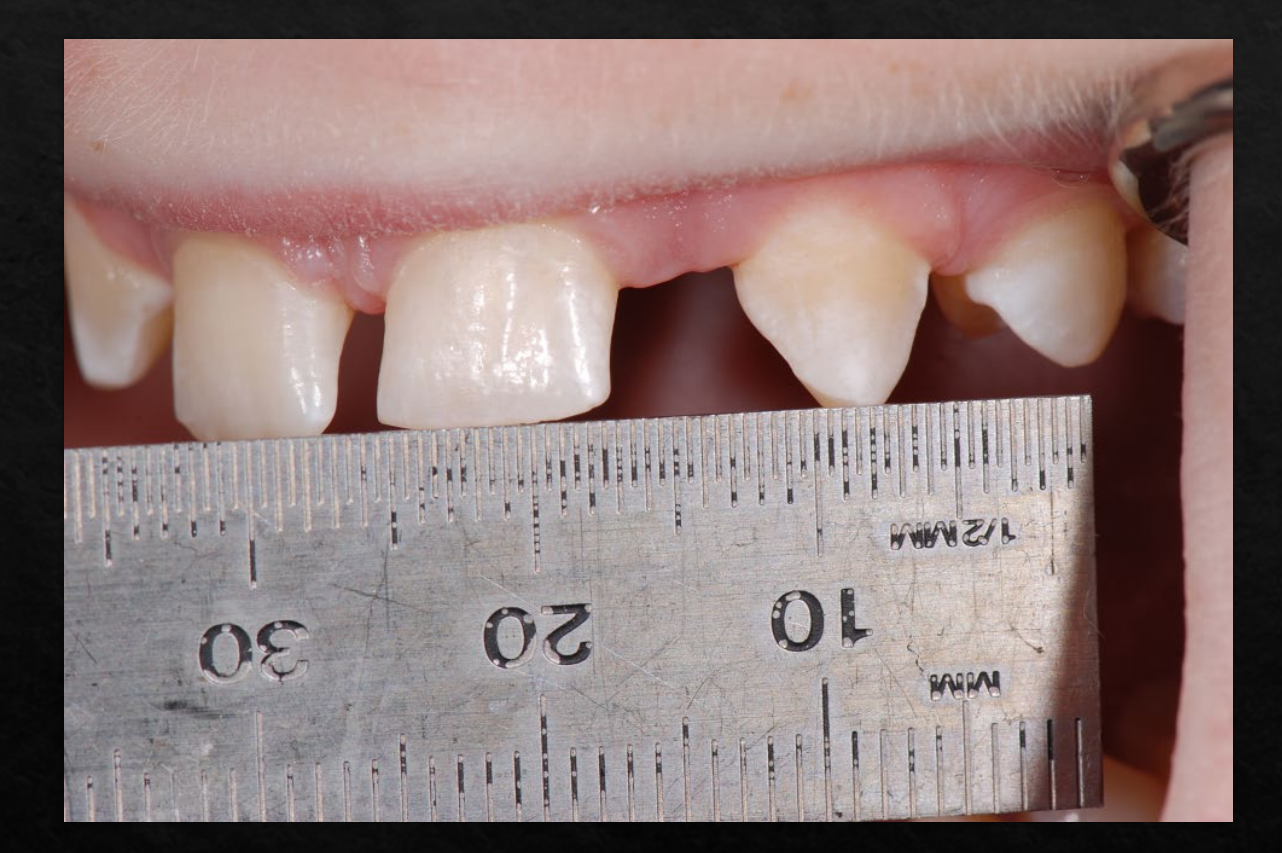
- Monitoring
- Used to track changes over time, such as mesio-distal spacing using a stainless steel ruler as a reference.
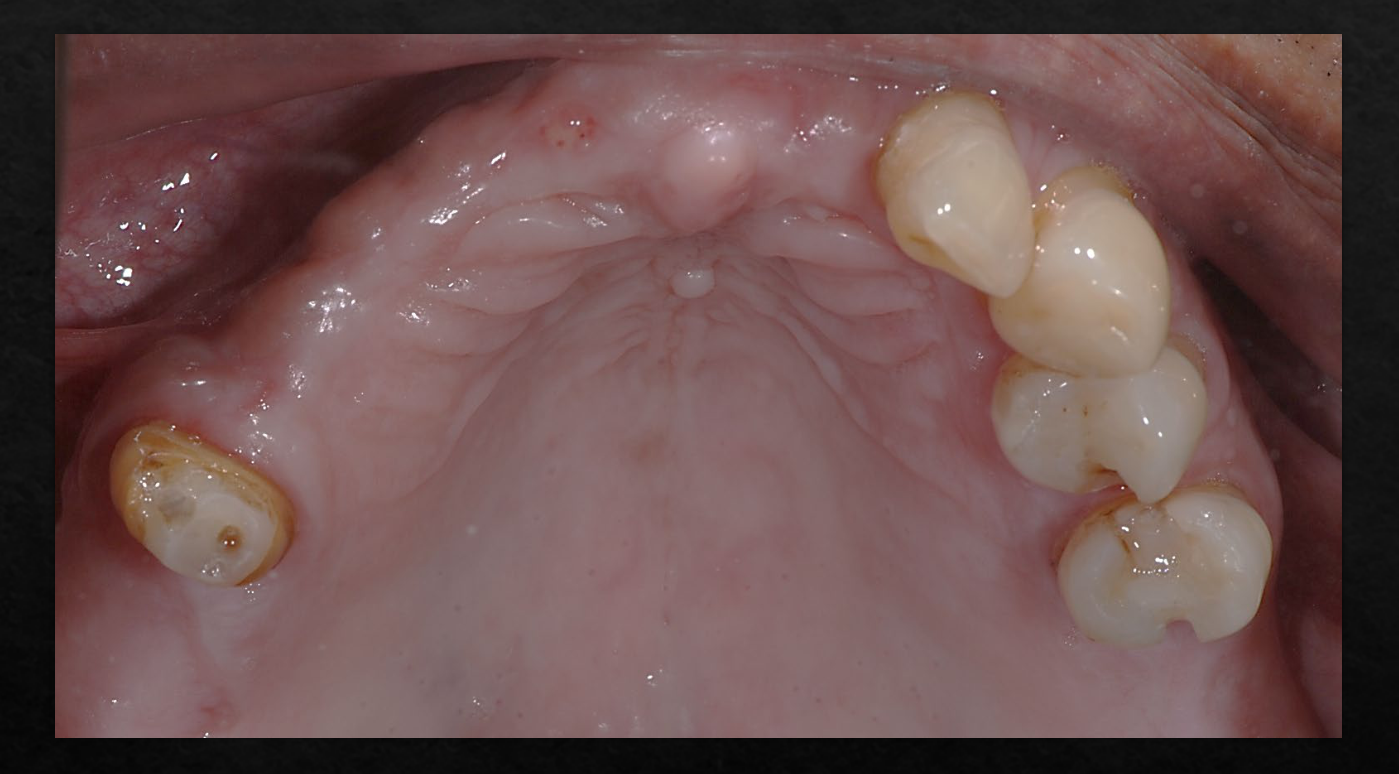
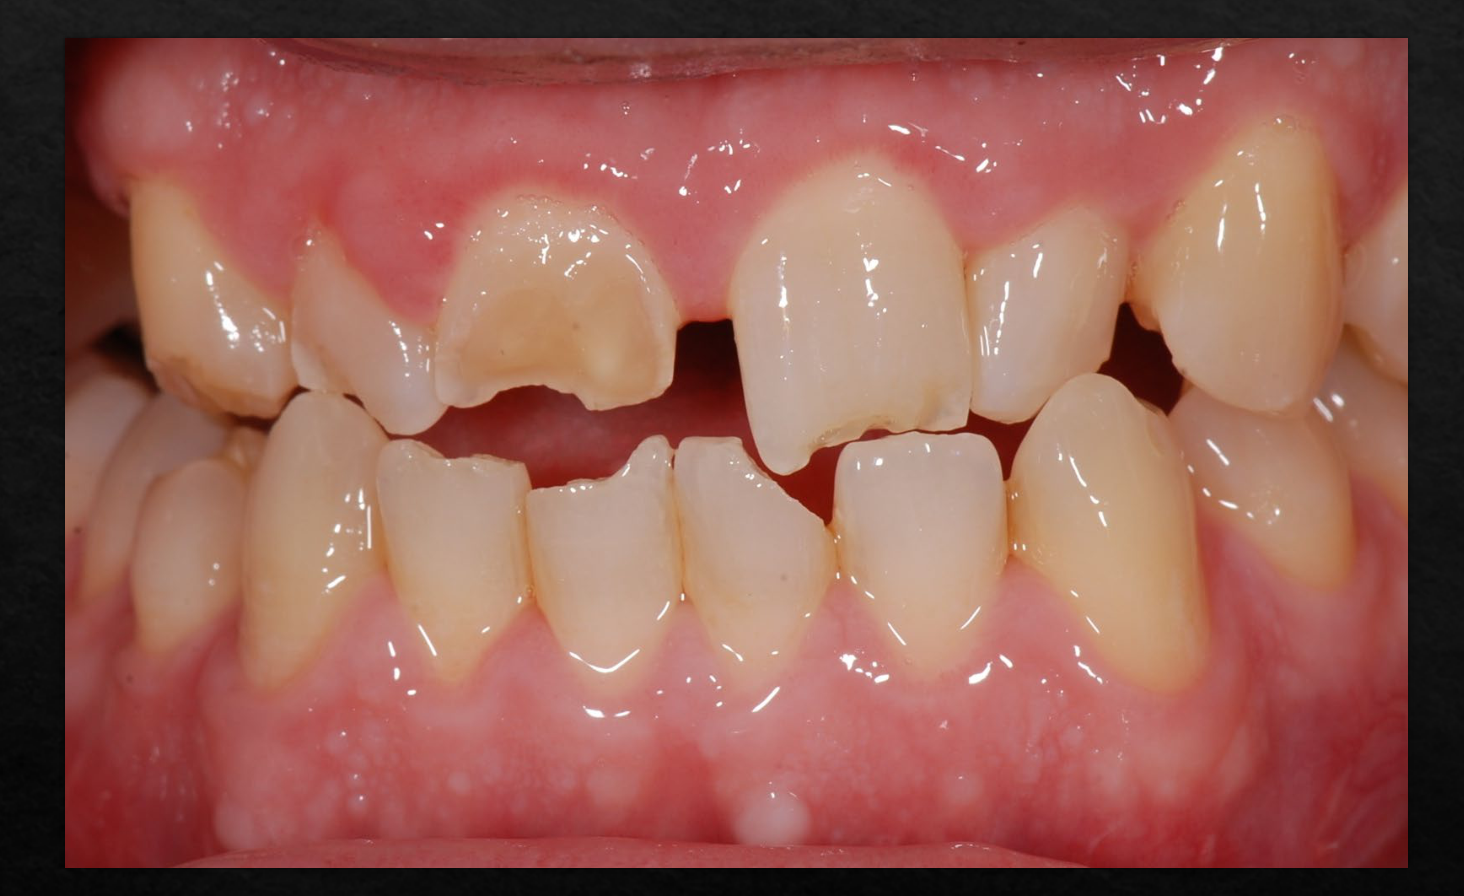
- Medico-legal
- Trauma
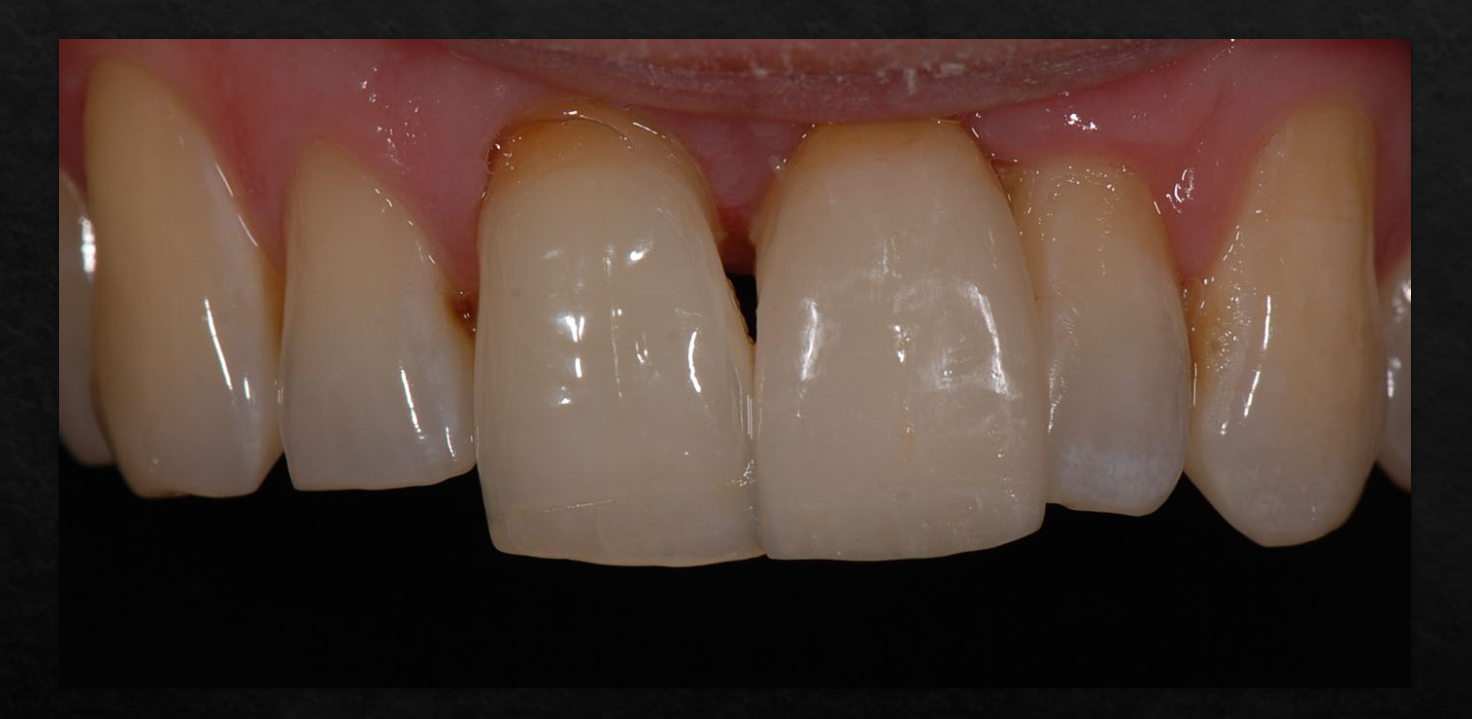
What about the tooth caused by trauma?
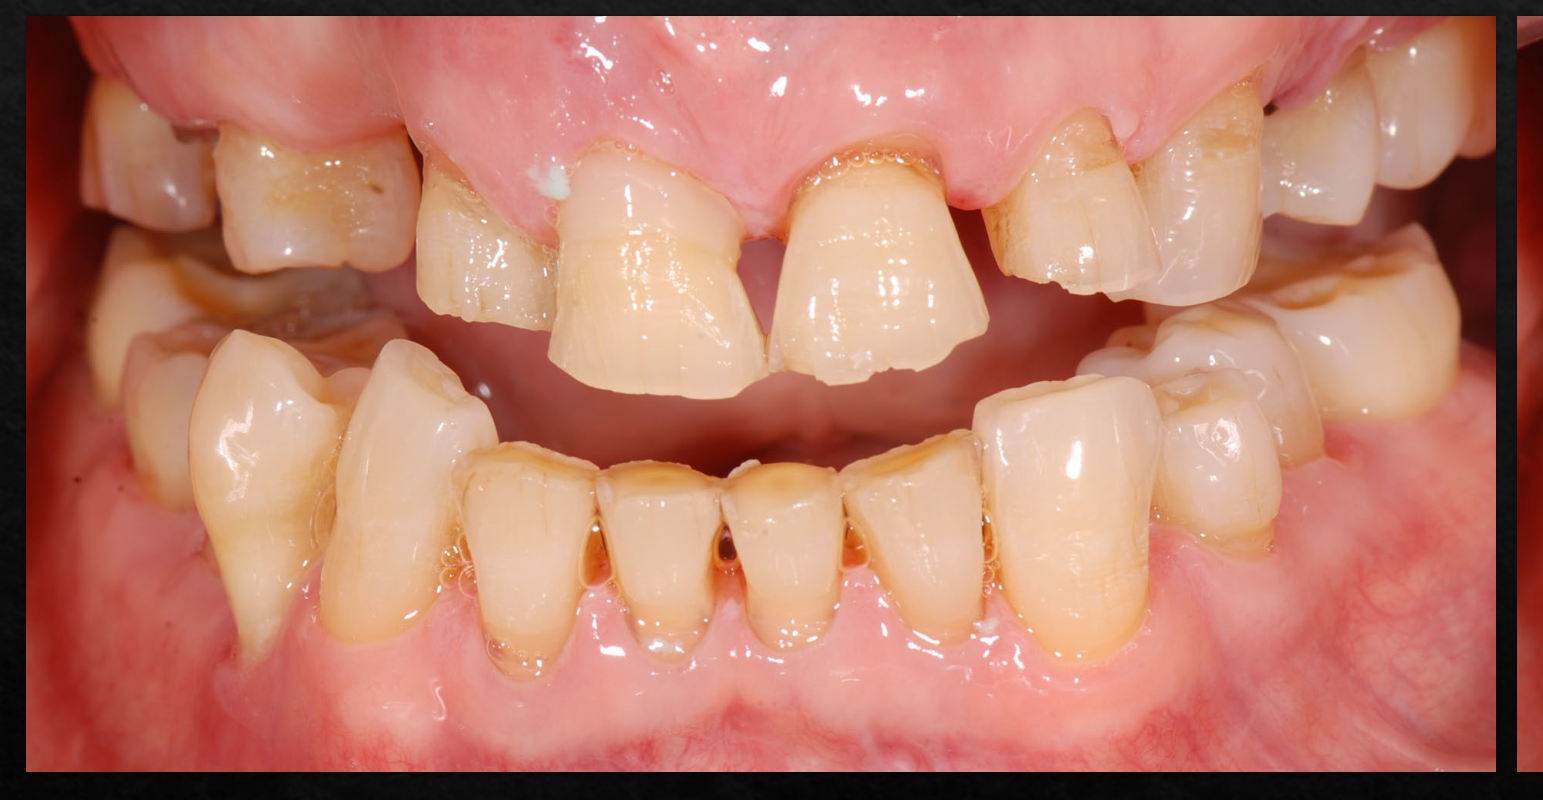
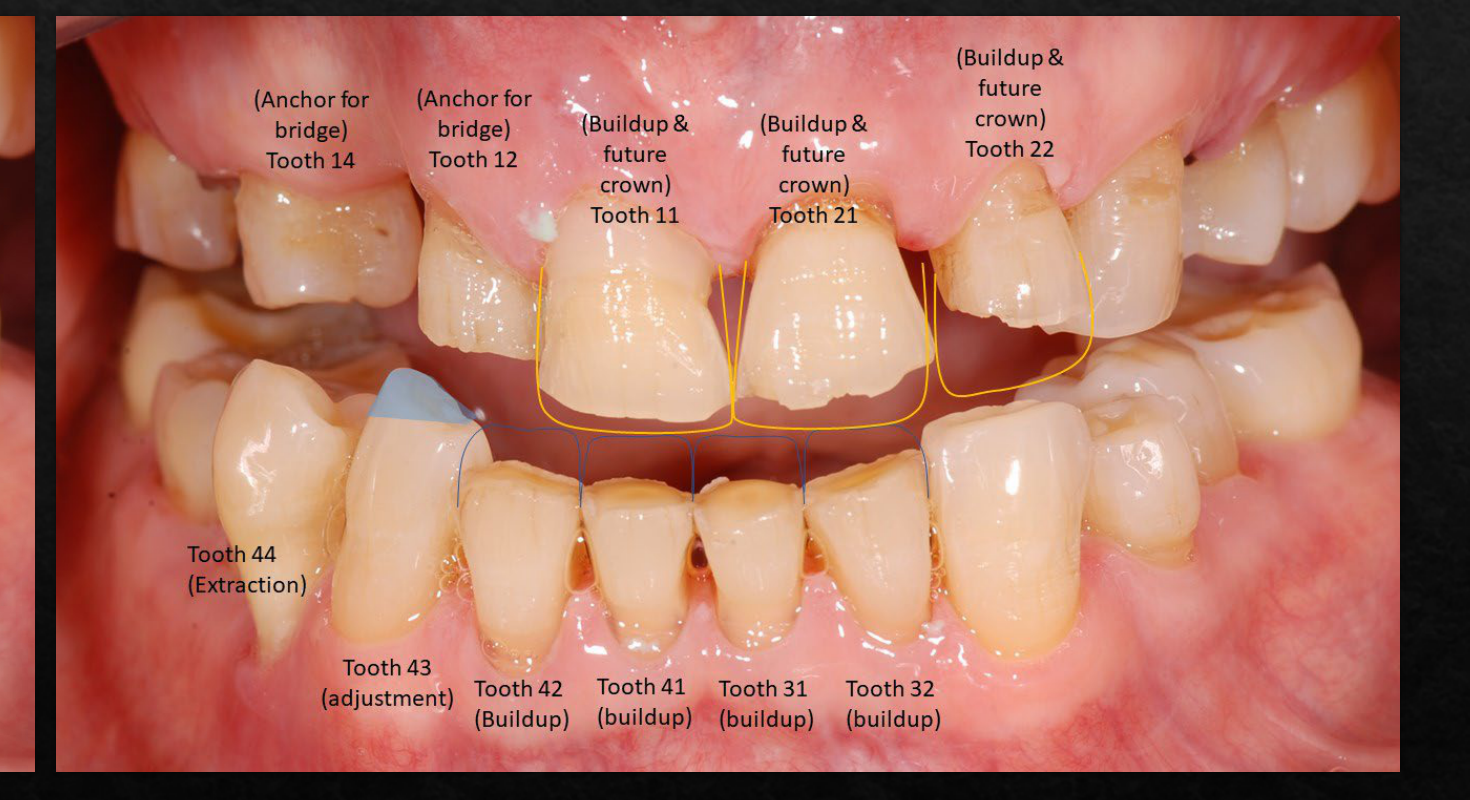
Communicate treatment planning
- (Anchor for bridge) Tooth 14
- (Anchor for bridge) Tooth 12
- (Buildup & future crown) Tooth 11
- (Buildup & future crown) Tooth 21
- (Buildup & future crown) Tooth 22
- Tooth 44 (Extraction)
- Tooth 43 (adjustment)
- Tooth 42 (Buildup)
- Tooth 41 (buildup)
- Tooth 31 (buildup)
- Tooth 32 (buildup)
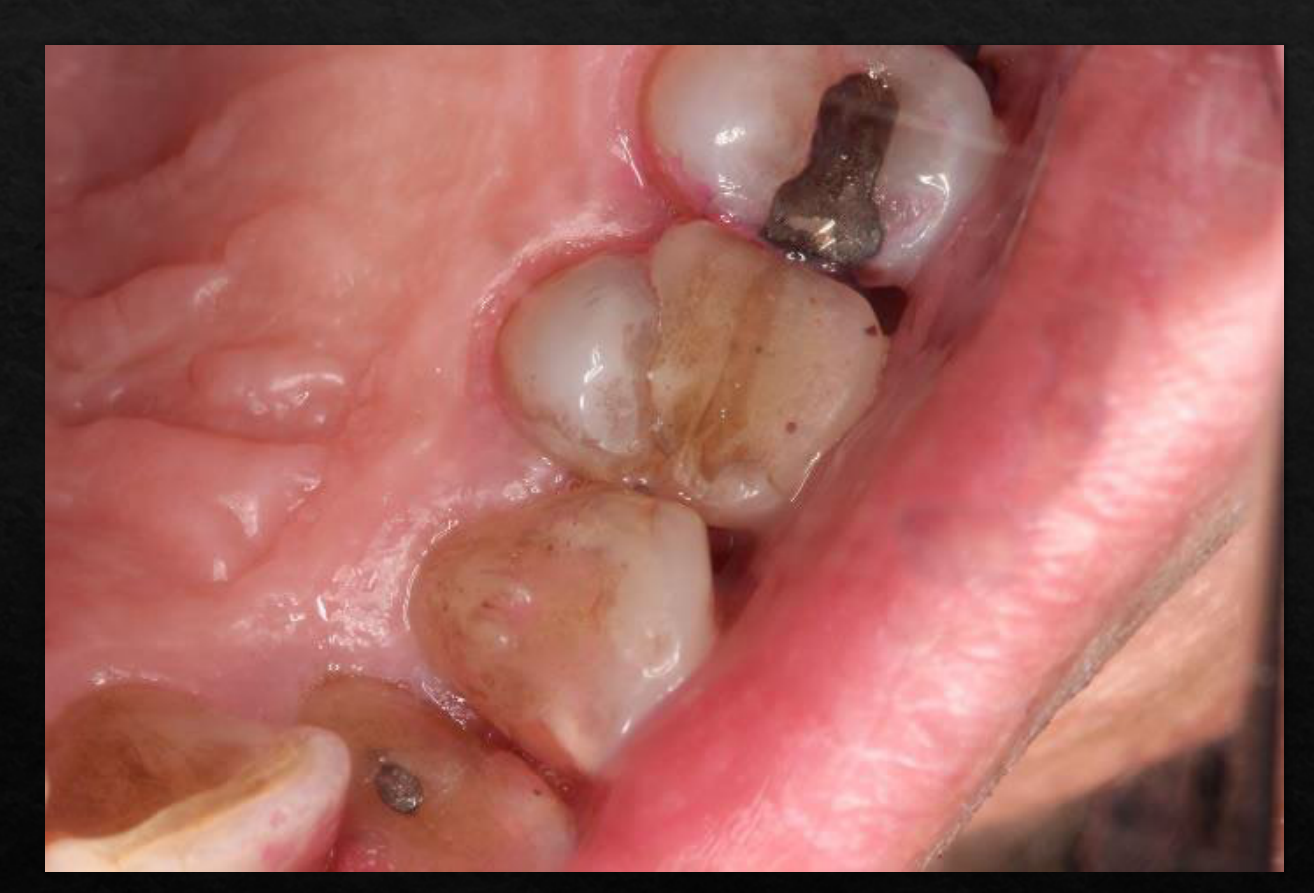
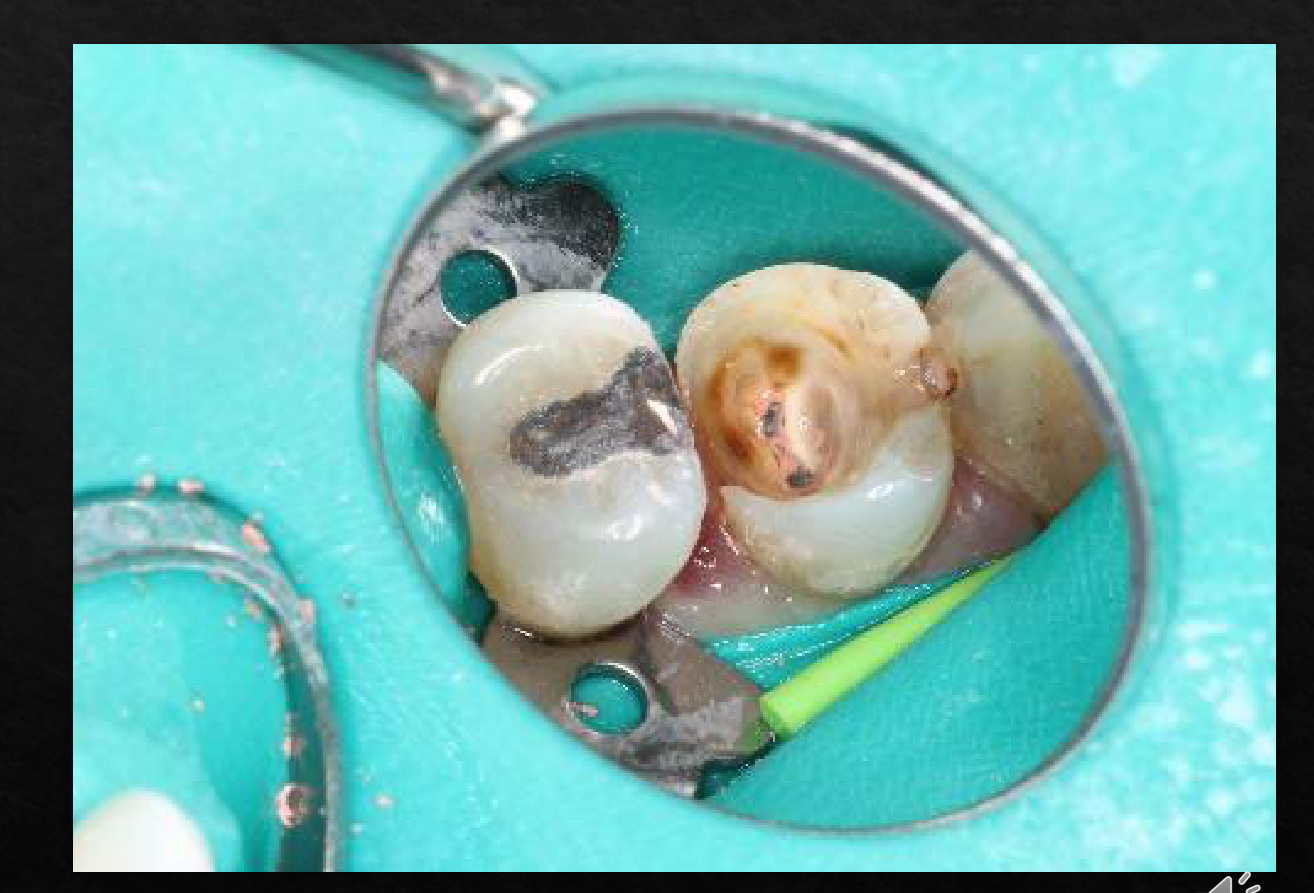
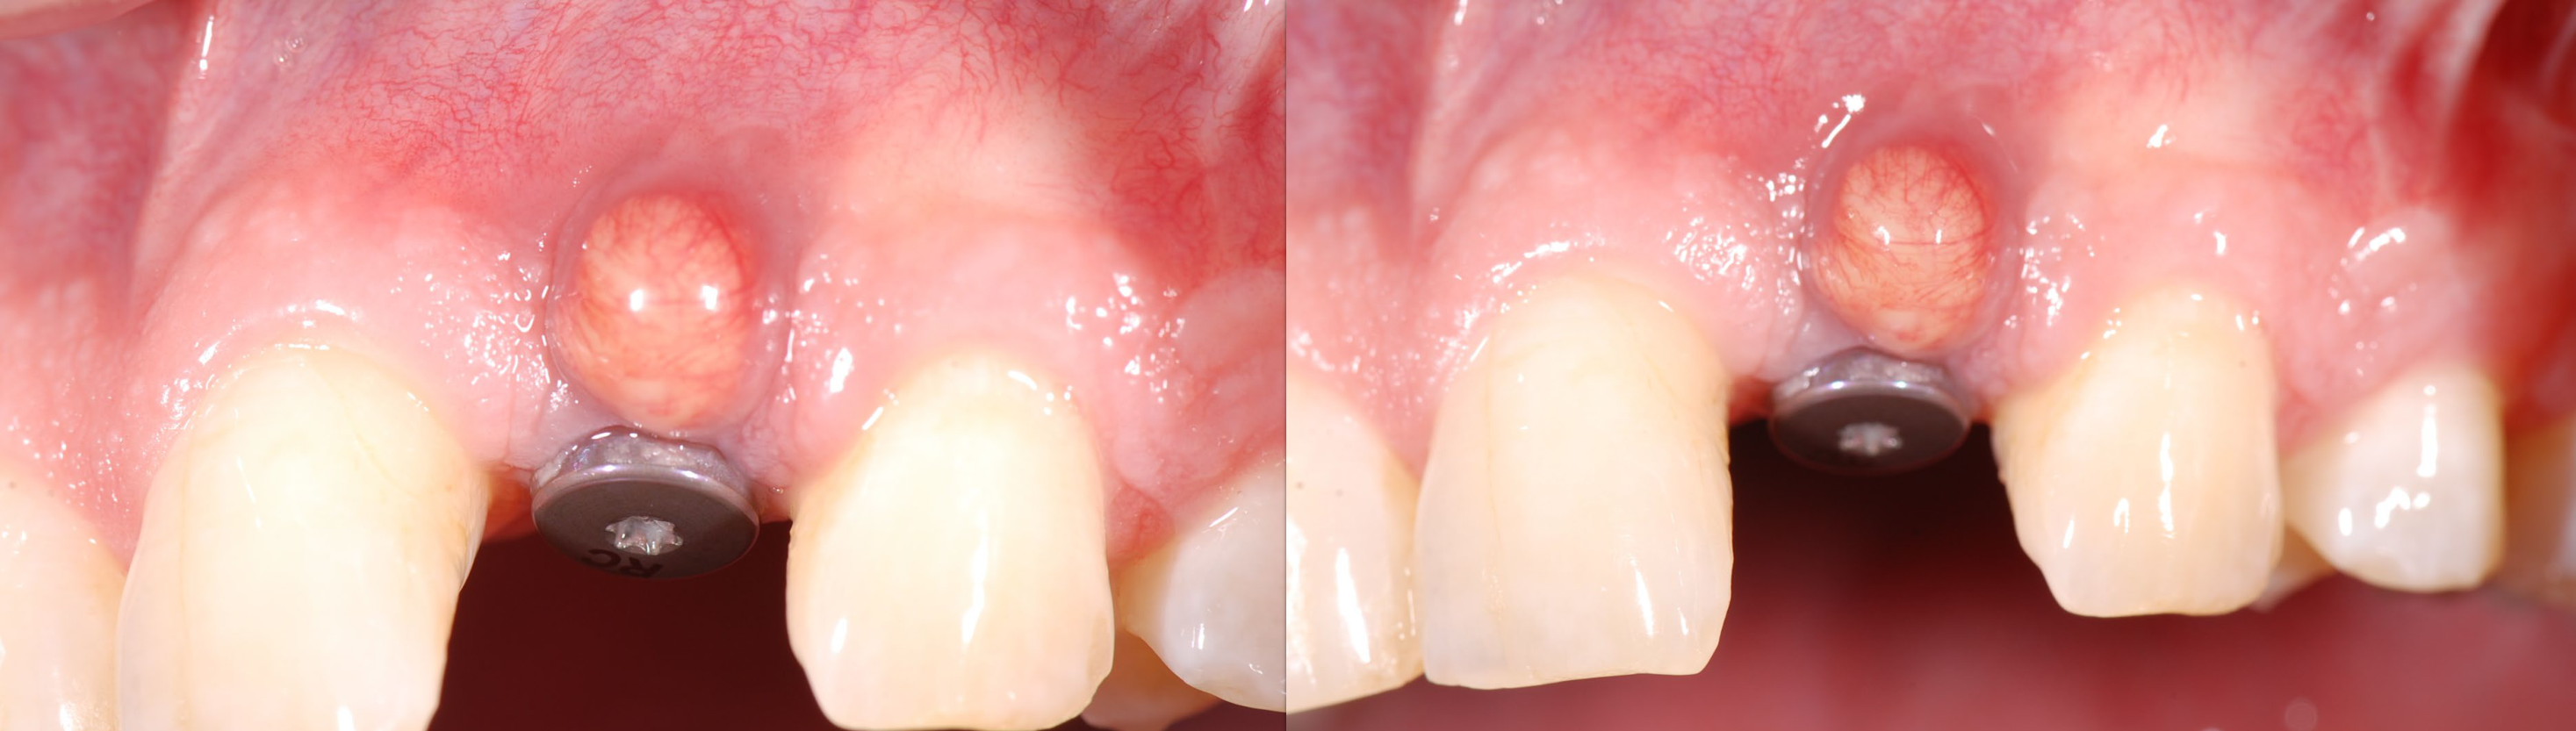
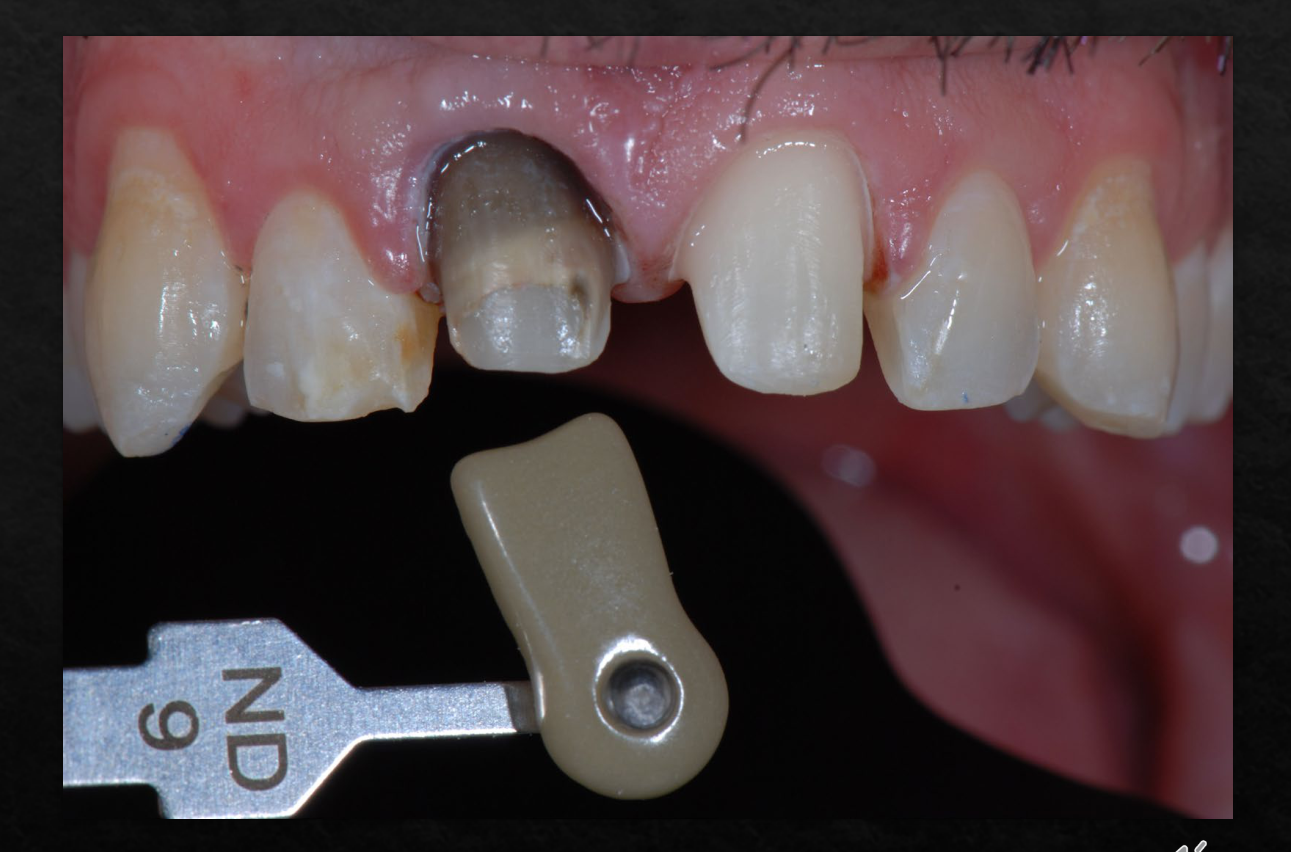
Convey and record aspects of treatment
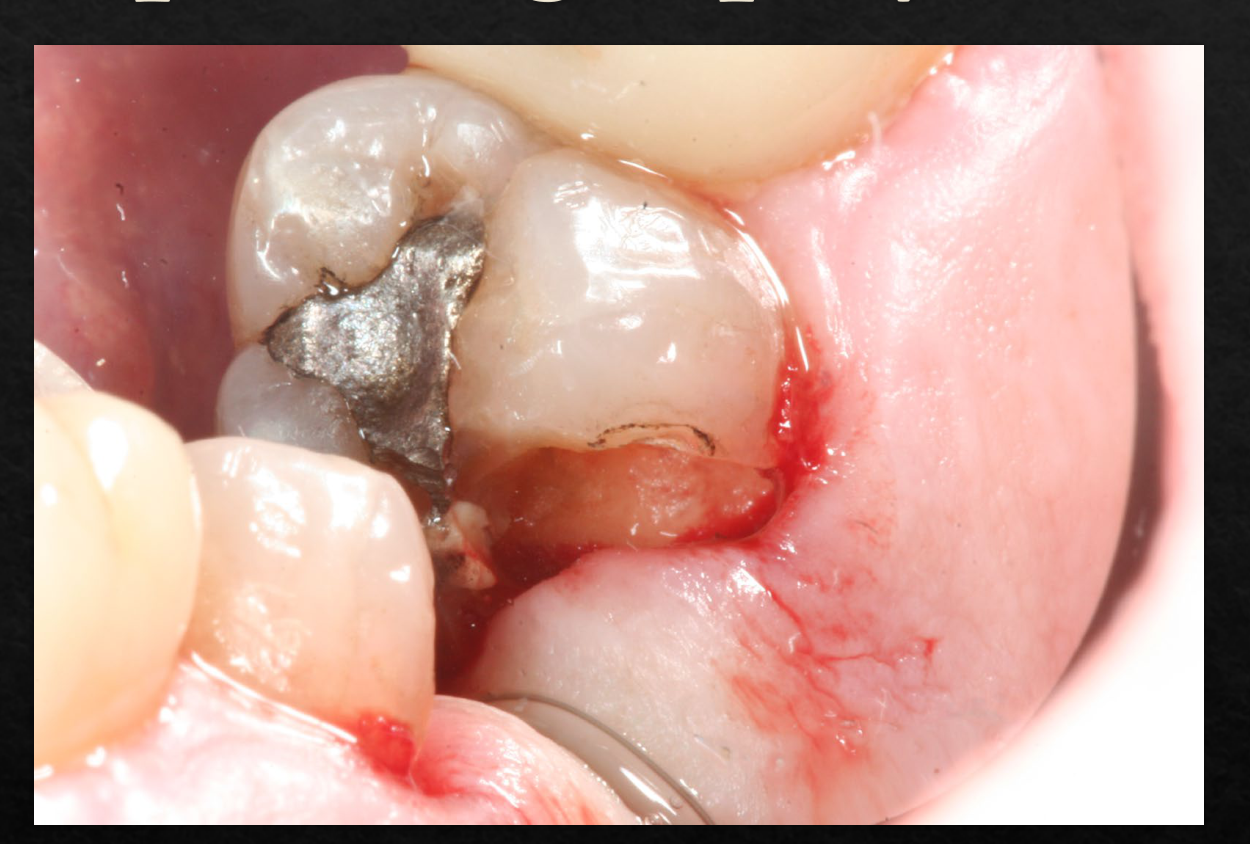
Tooth investigation-restoration removal
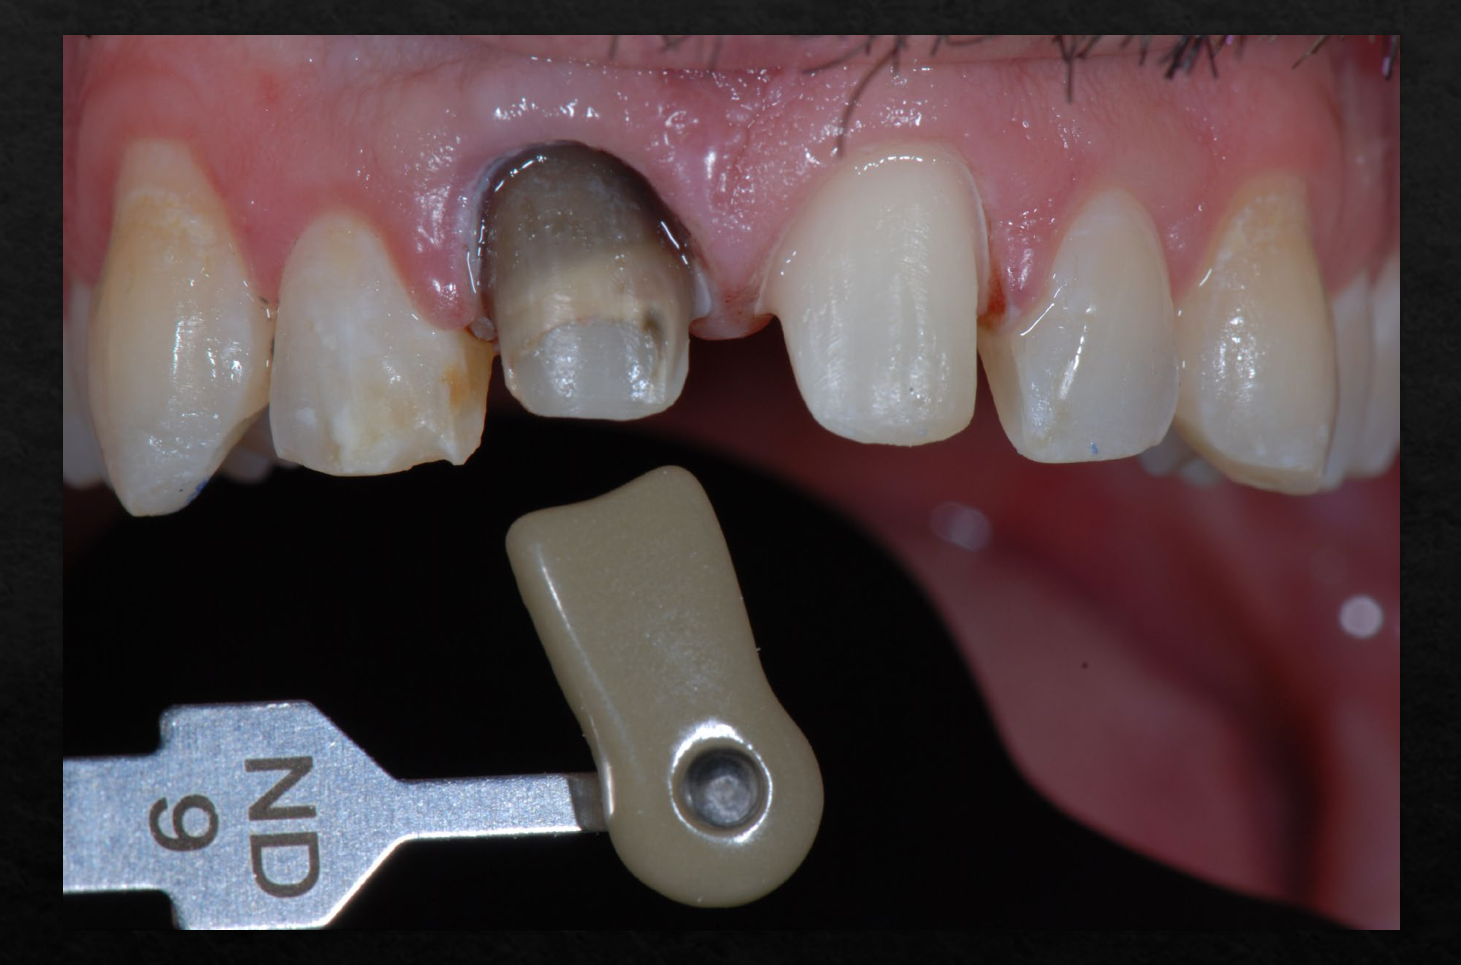
Convey and record aspects of treatment
ND 6
 |  |  |
 |  |  |
 |  |  |
 |  |  |
 |  |  |
Challenges in Dental Photography18
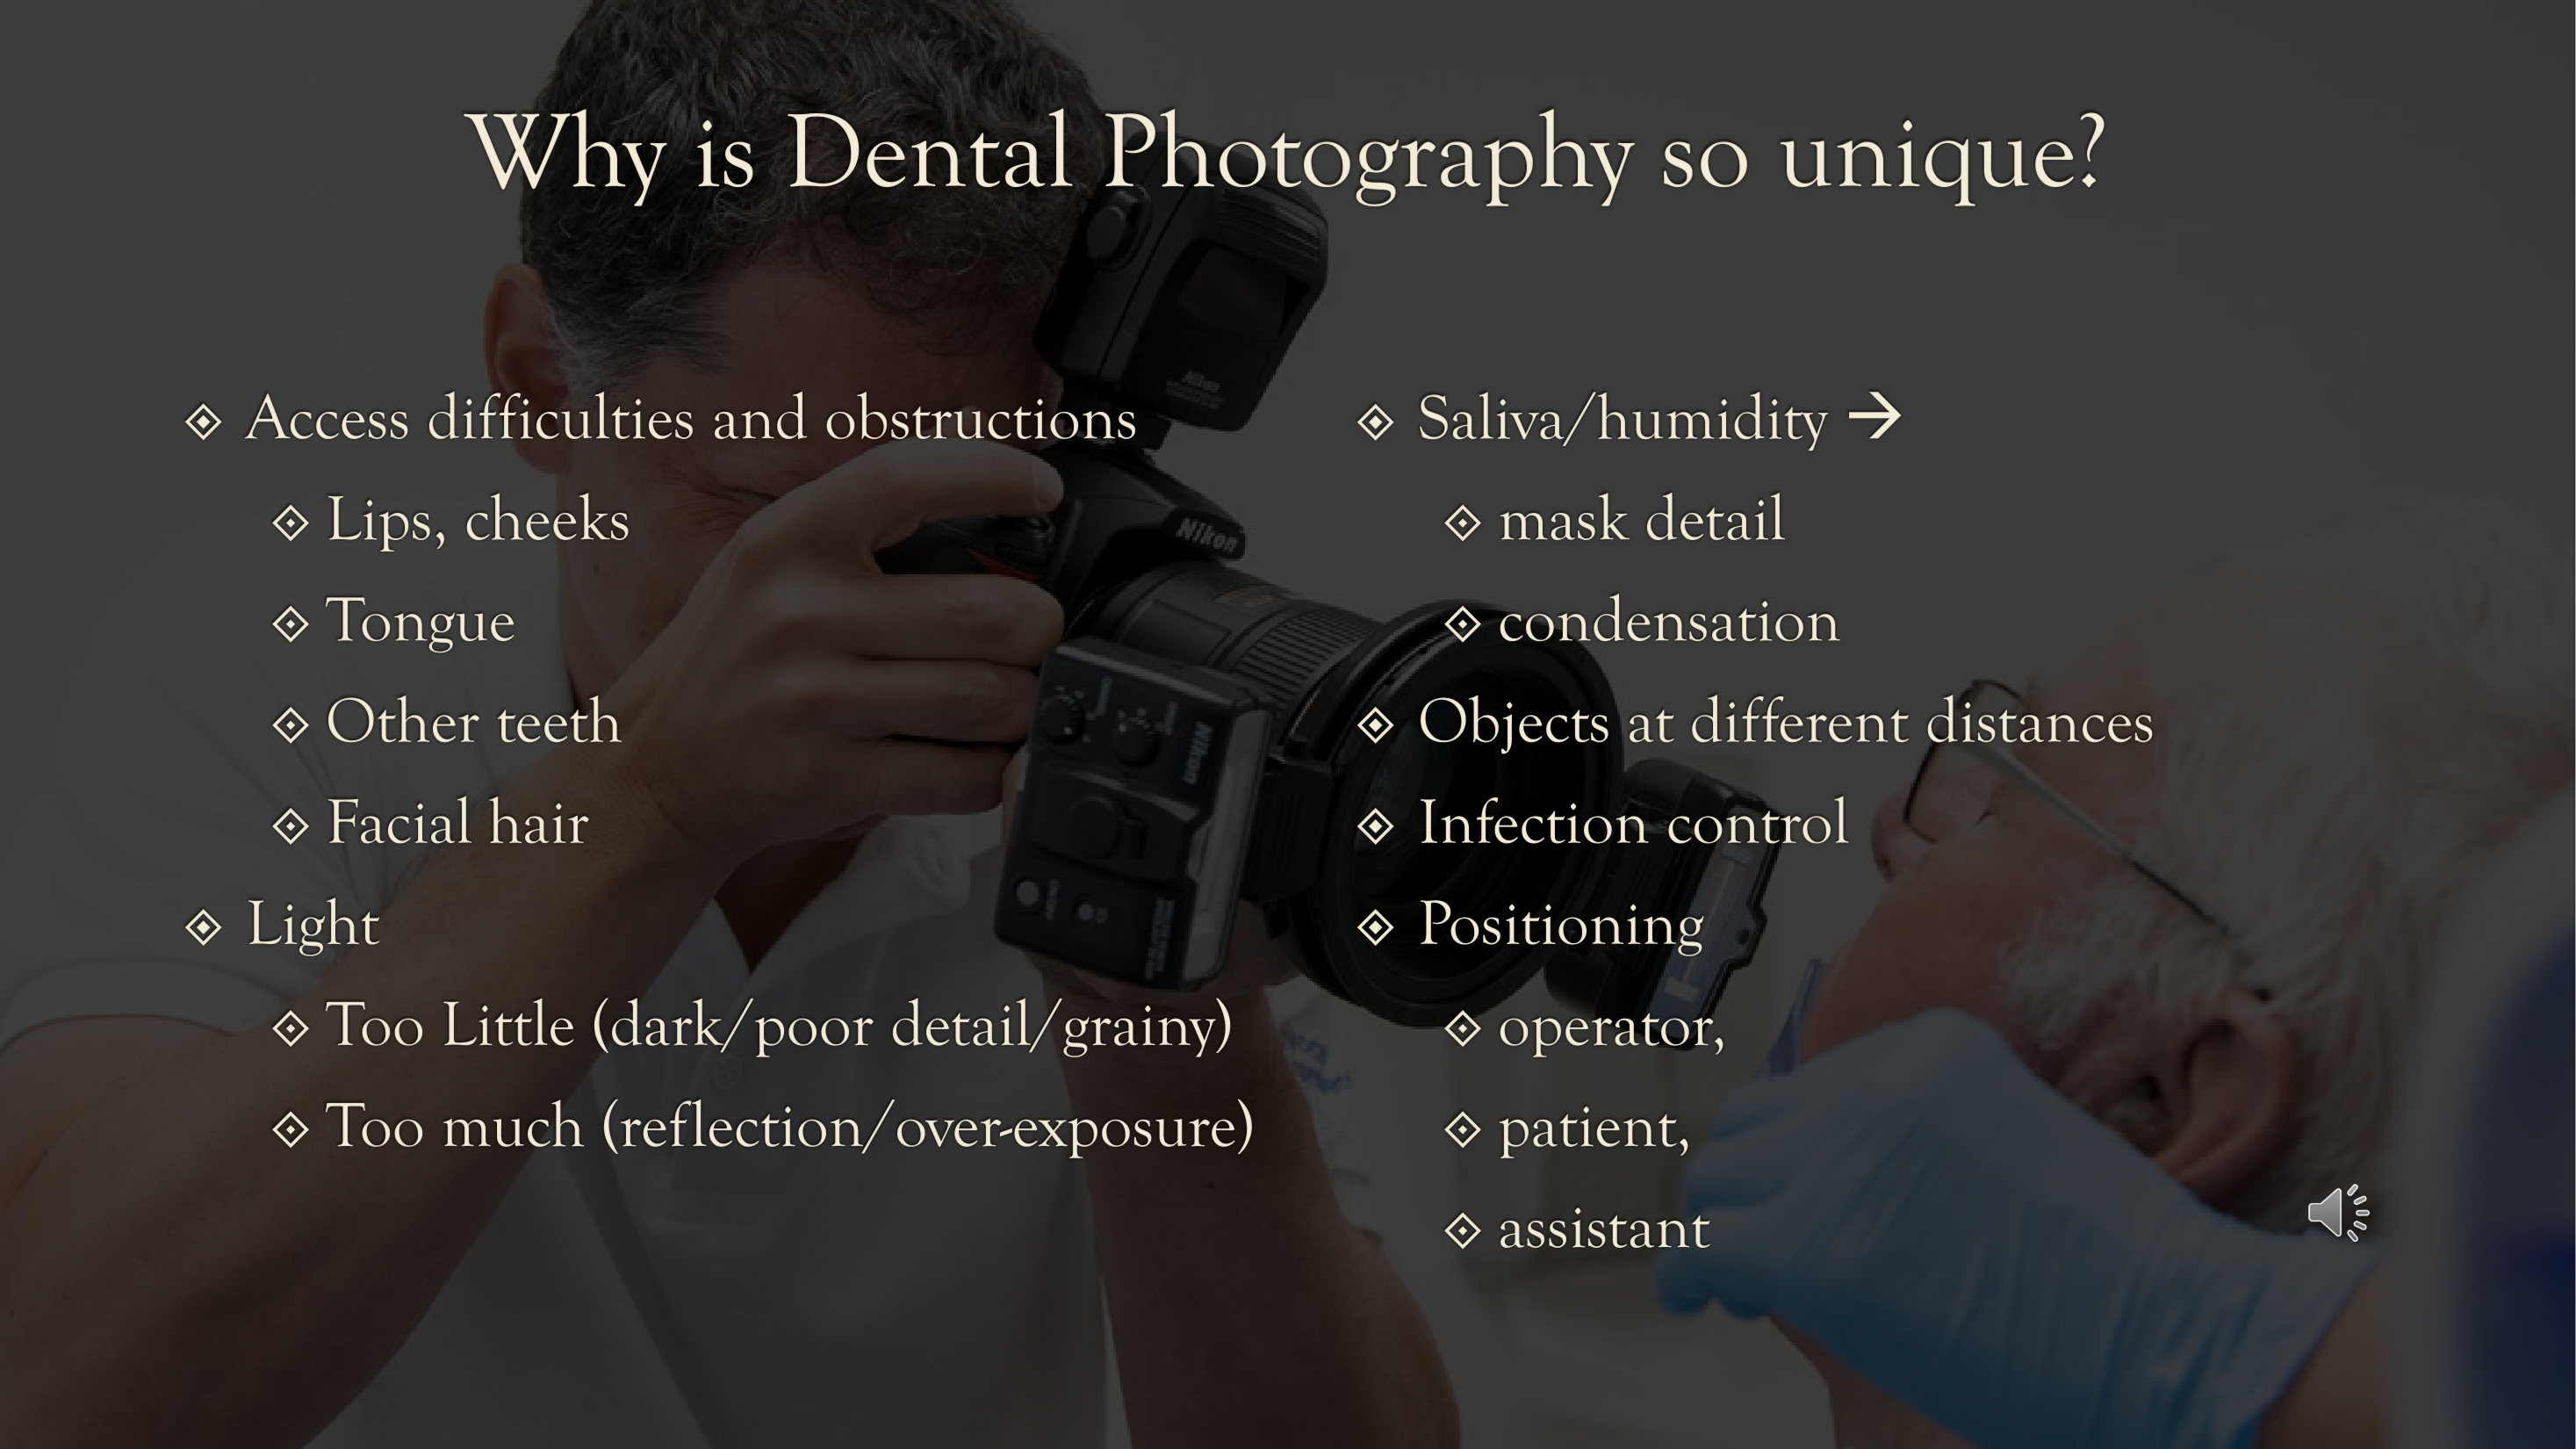
Why is Dental Photography so unique?
- Access difficulties and obstructions
- Lips, cheeks
- Tongue
- Other teeth
- Facial hair
- Light
- Too Little (dark/poor detail/grainy)
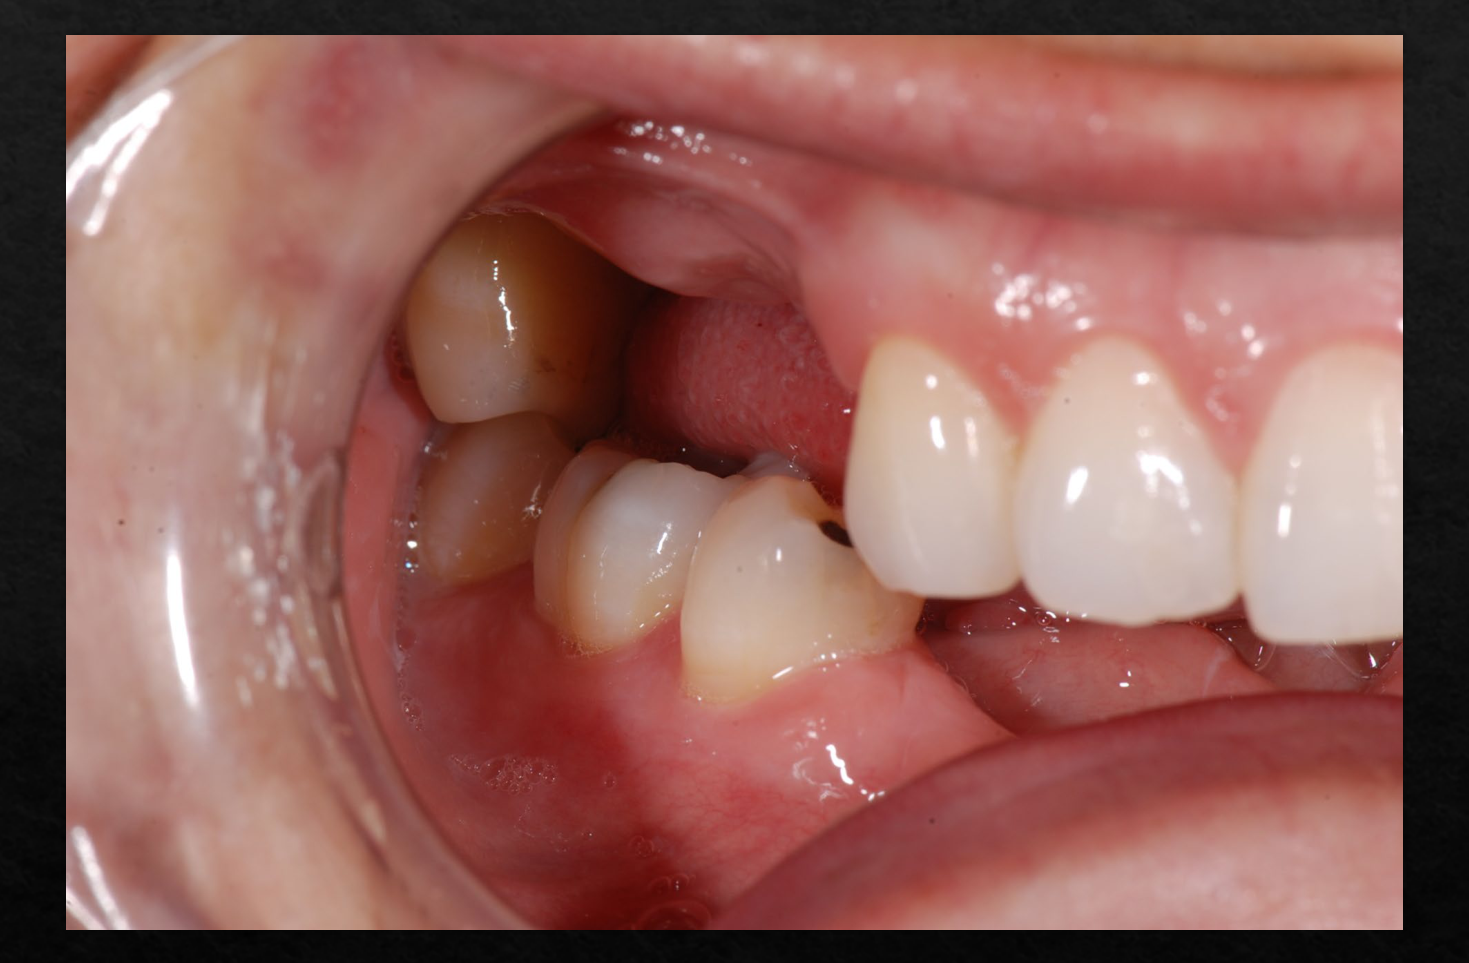
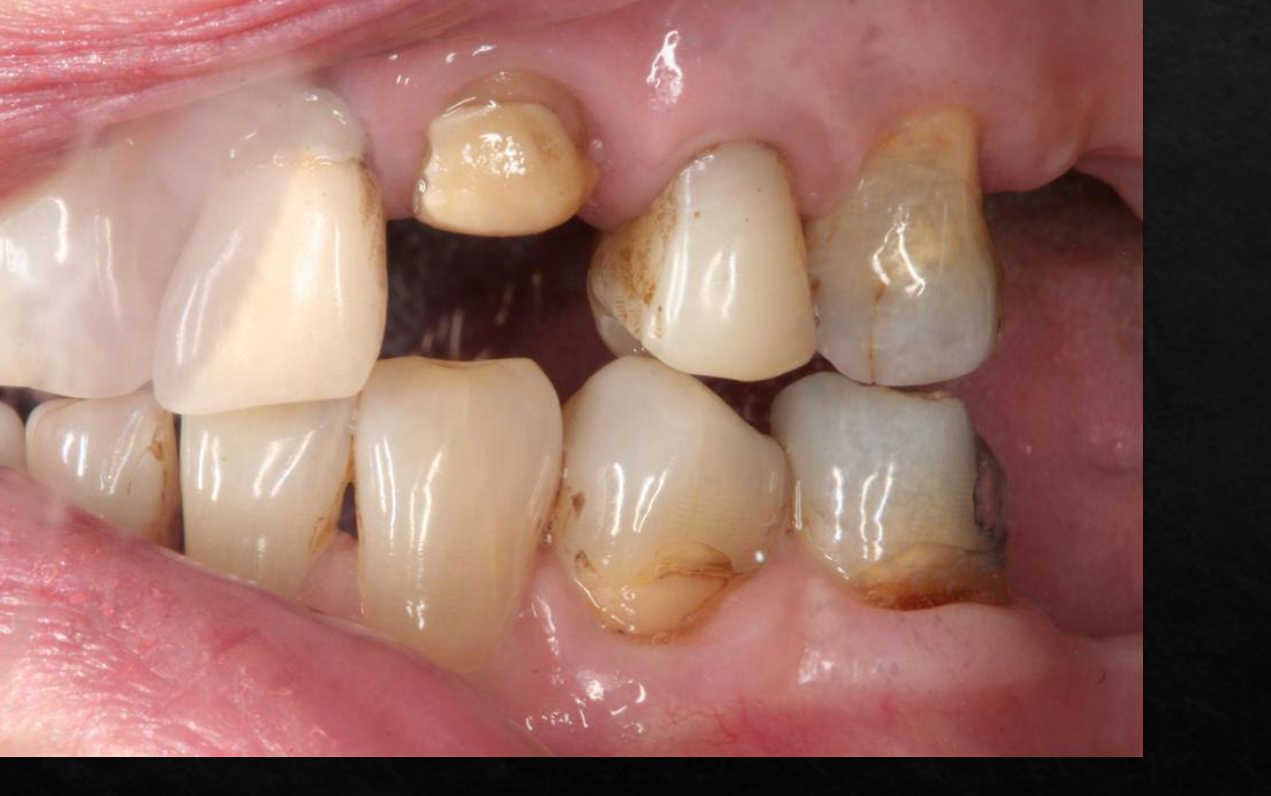
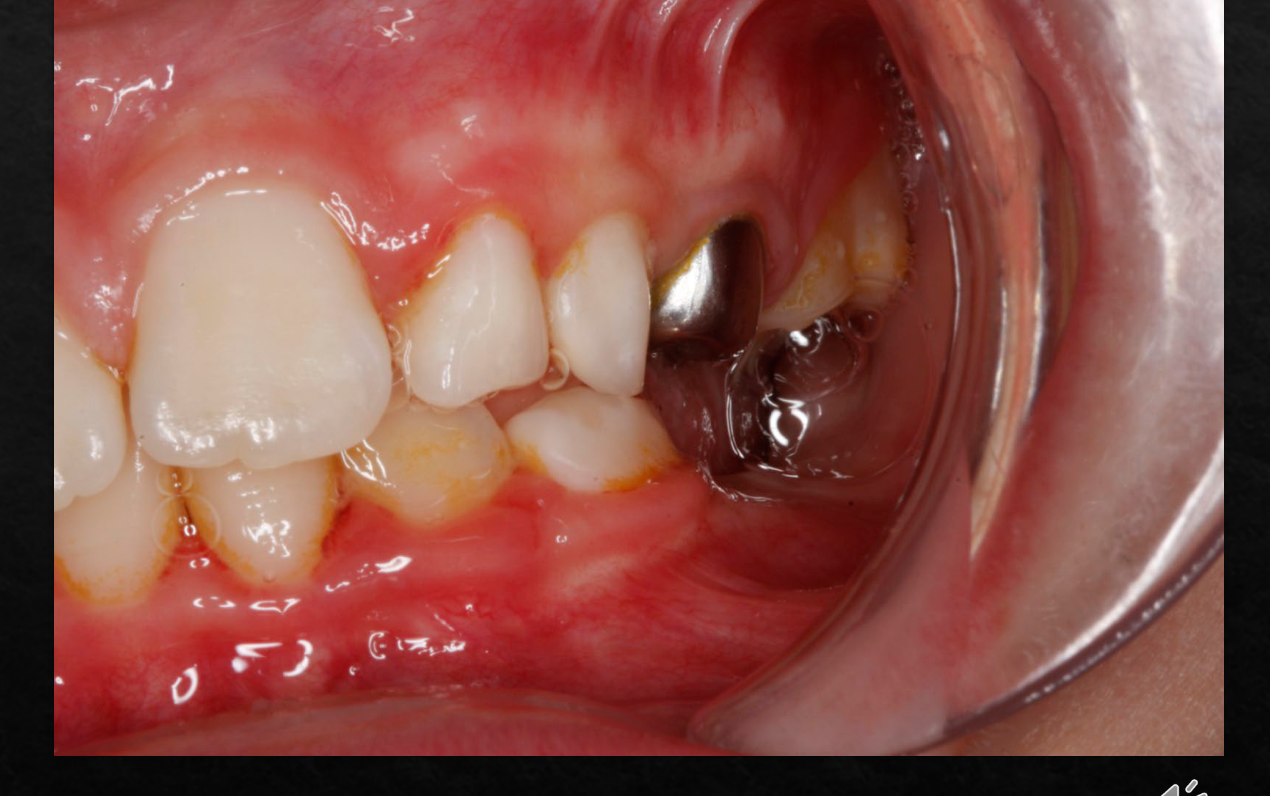
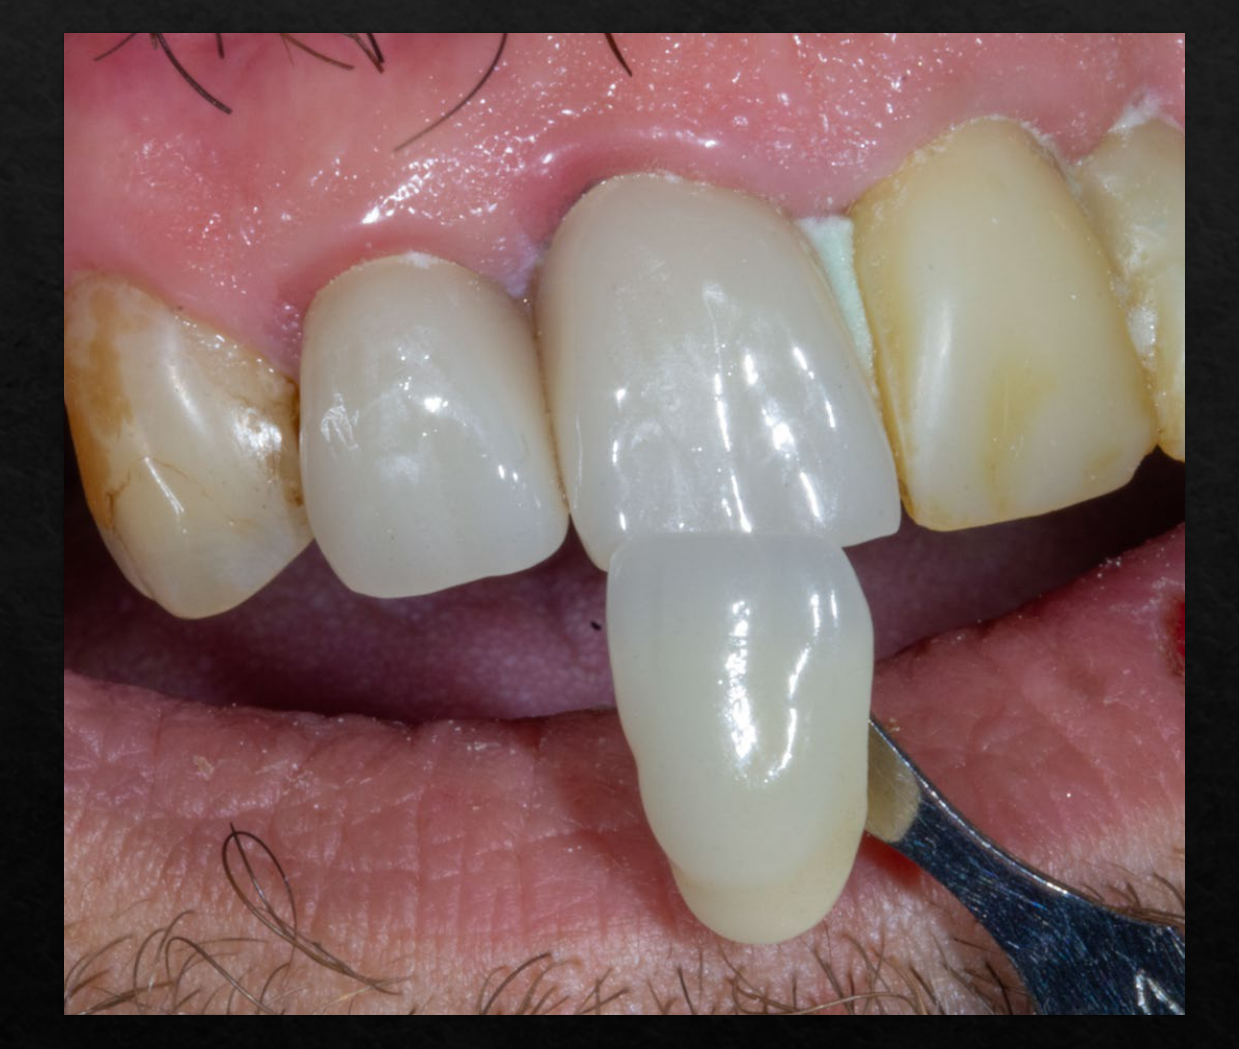
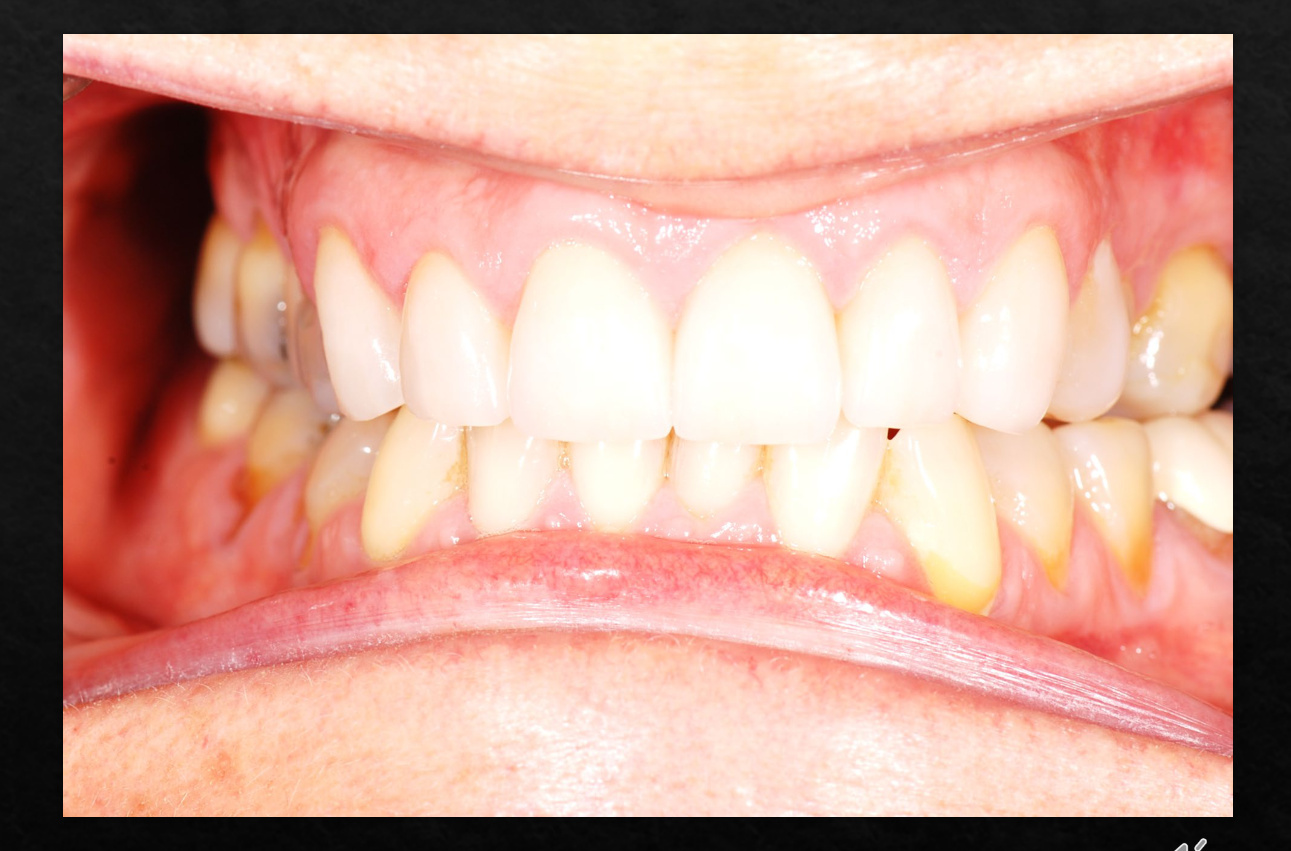
- Too much (reflection/over-exposure) - Increasing camera sensitivity can lead to grainy images, while excessive flash can cause “washout”.
- Saliva/humidity -> mask detail, condensation
- Objects at different distances
- Macro Environment: Close-up photography creates focusing issues and potential distortions.
- Infection control
- Positioning
- operator,
- patient,
- assistant
Criteria for Quality Clinical Images
What is a good (dental) photo?19202122232425262728
- Area of interest
- In Focus
- Correct (lighting) brightness
- Clear/contrast
- Obstructions
- Context/Story
- Proper Orientation: The occlusal plane should be perpendicular to the image (flattened out).
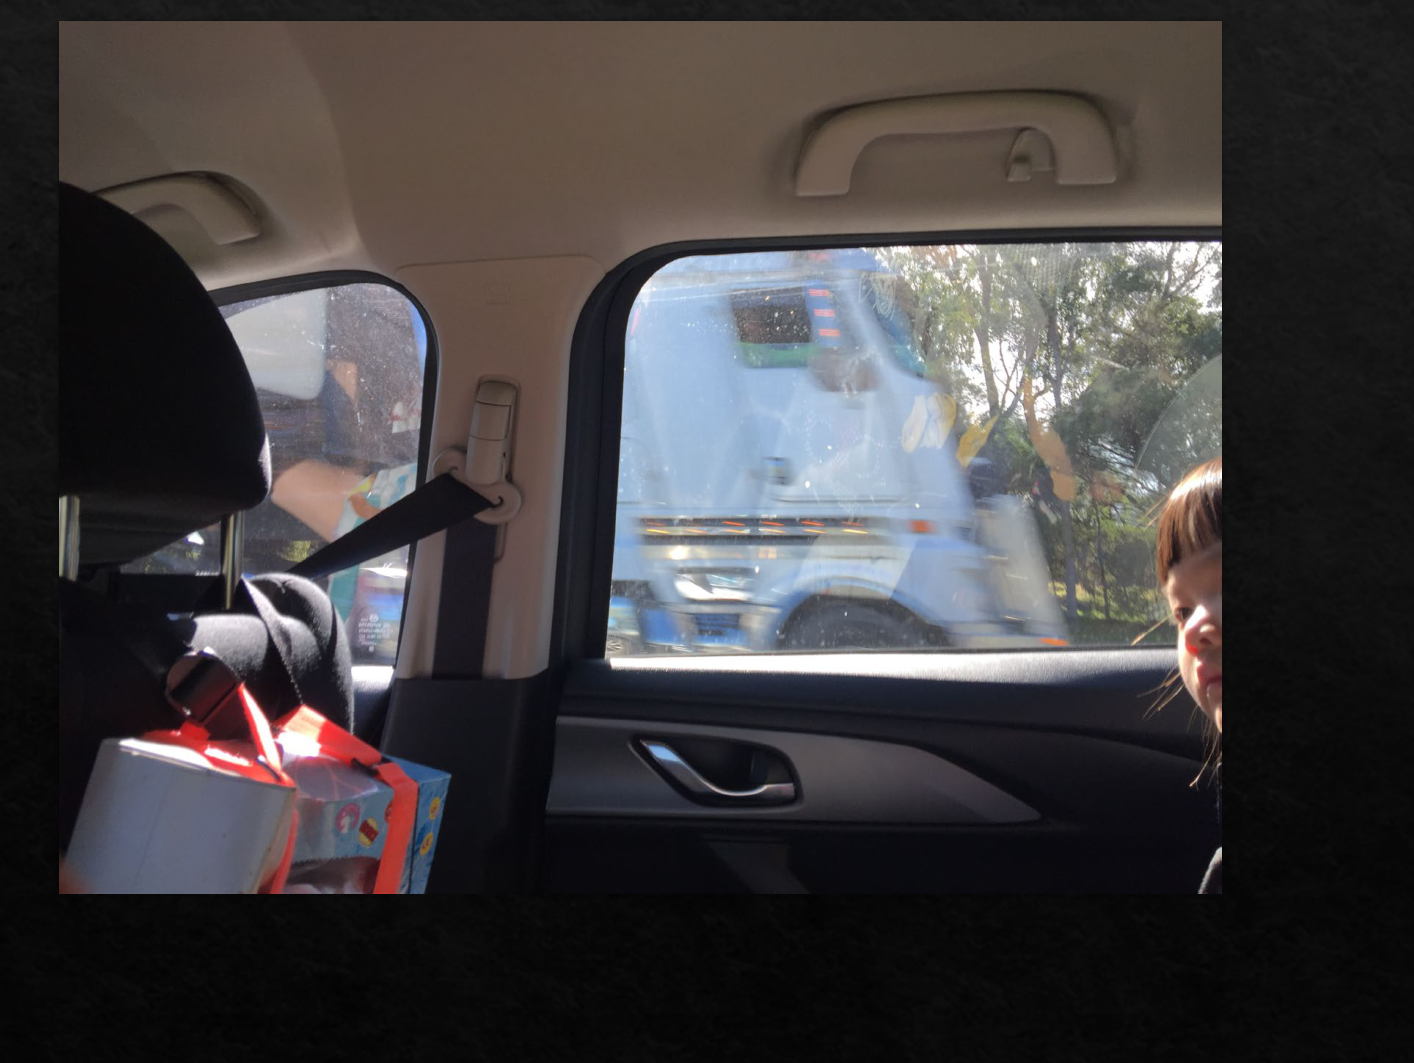
Why’s wrong with this image?
- Colour → too red
- No retractors
- Lip covers anteriors
- Poor angulation, can’t see palato-incisal surfaces
- Mirror not centered
- Taken too far away
- Upper lip in view
- Remains as mirror image
- Not flipped
What’s wrong with this image?
Magic…
- Flipped
- Cropped
- Area of interest changes
- Colours/brightness/contrast
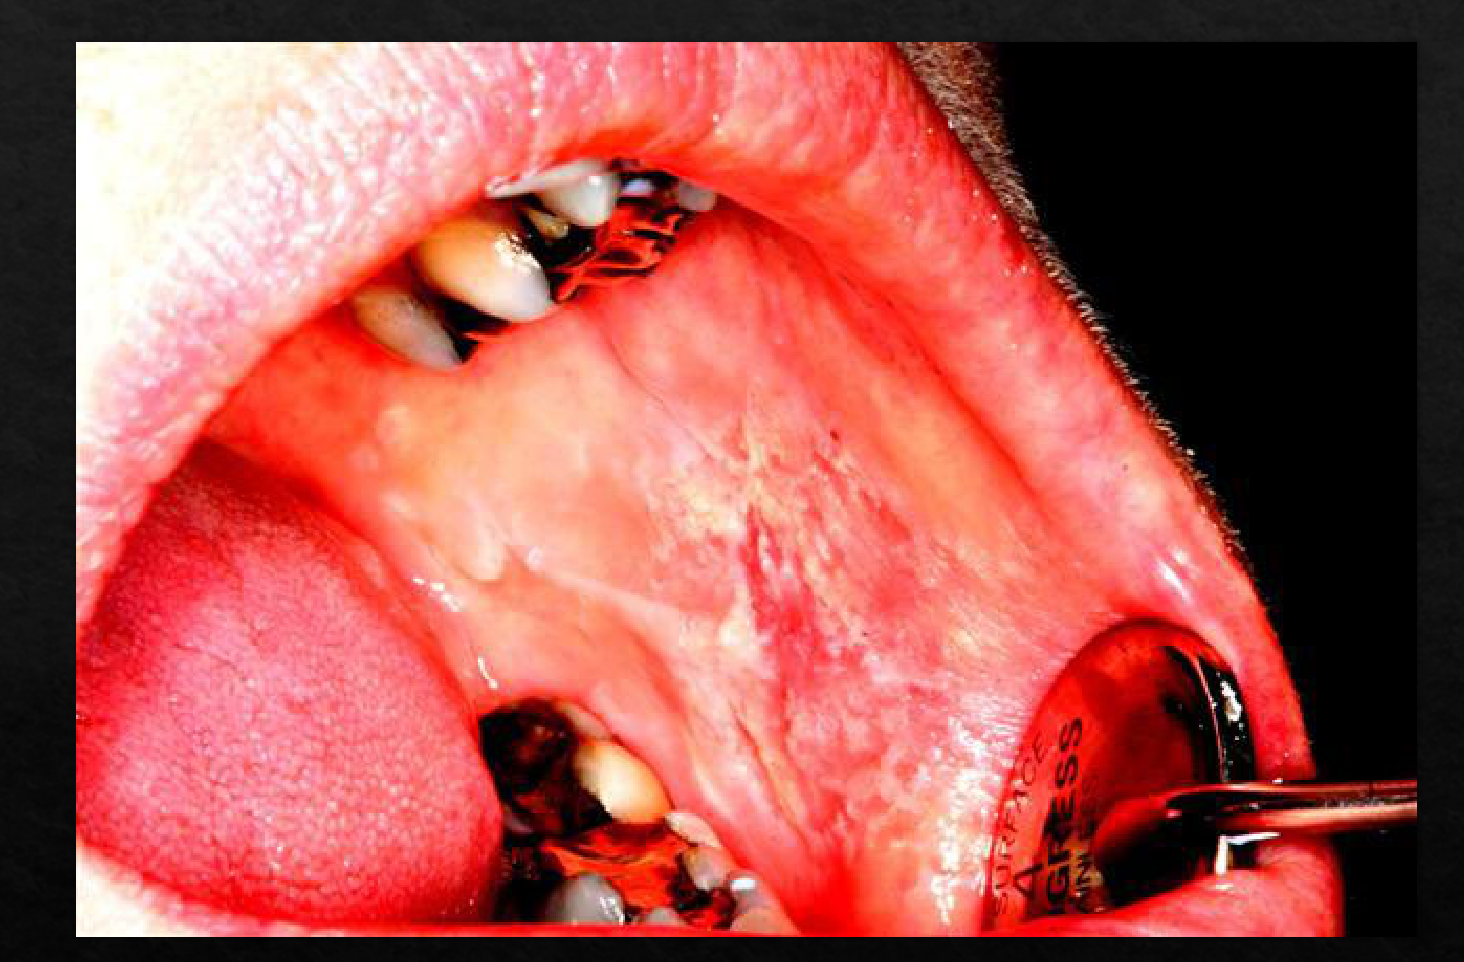
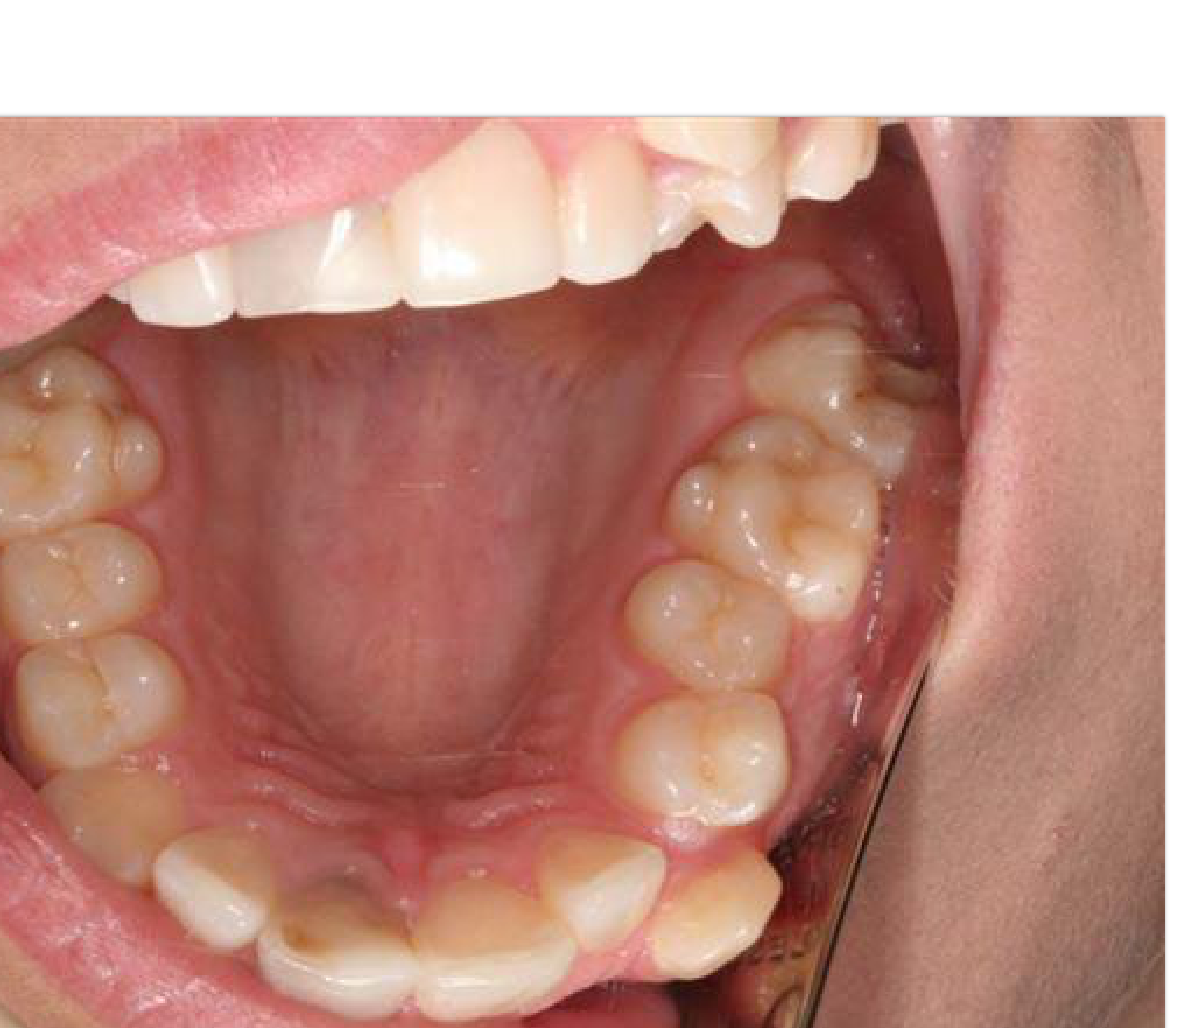
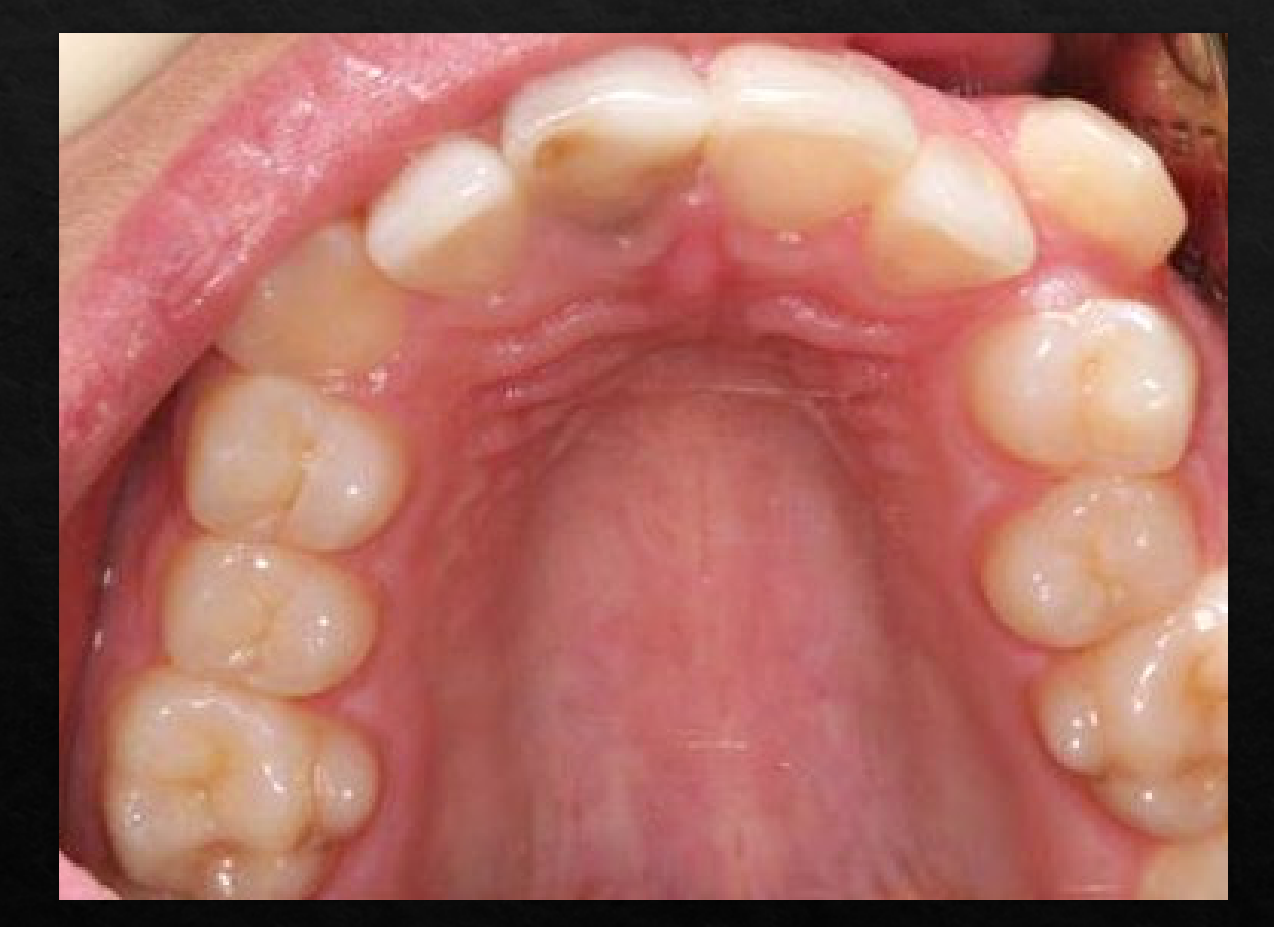
Shadows and Reduced illumination posterior segments
Mirror Fog/saliva
The text on the page only makes sense in the context of the figures and images (Dental X-ray showing root canal, Reflection/Over-exposed). Treat the whole page as a figure:
 |  |  |
 |  |  |
 |  |  |
 |  |  |
Limitations of Dental Photography29
Limits of Dental photography
- Time
- Cumbersome
- Positioning
- Equipment
- Patient
- Two-dimensional recording - no perception of depth
- Limited perception of depth can make depicting deep lesions (like external invasive resorption) difficult.
Equipment and Camera Settings
Equipment - camera30
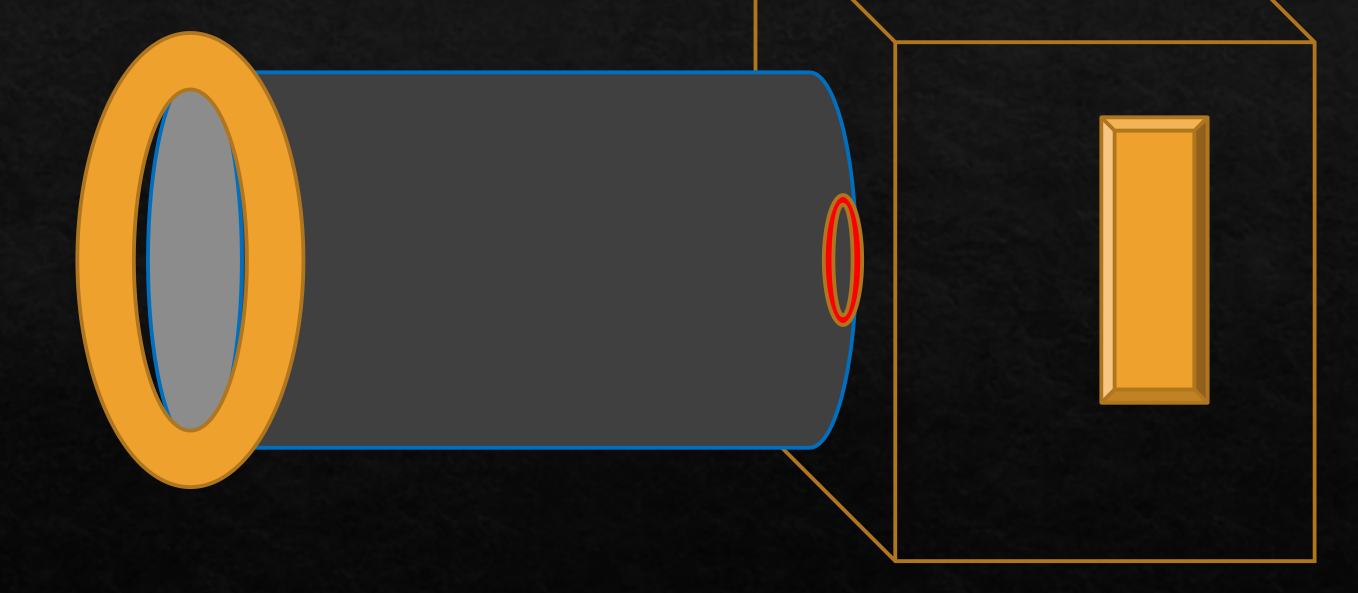
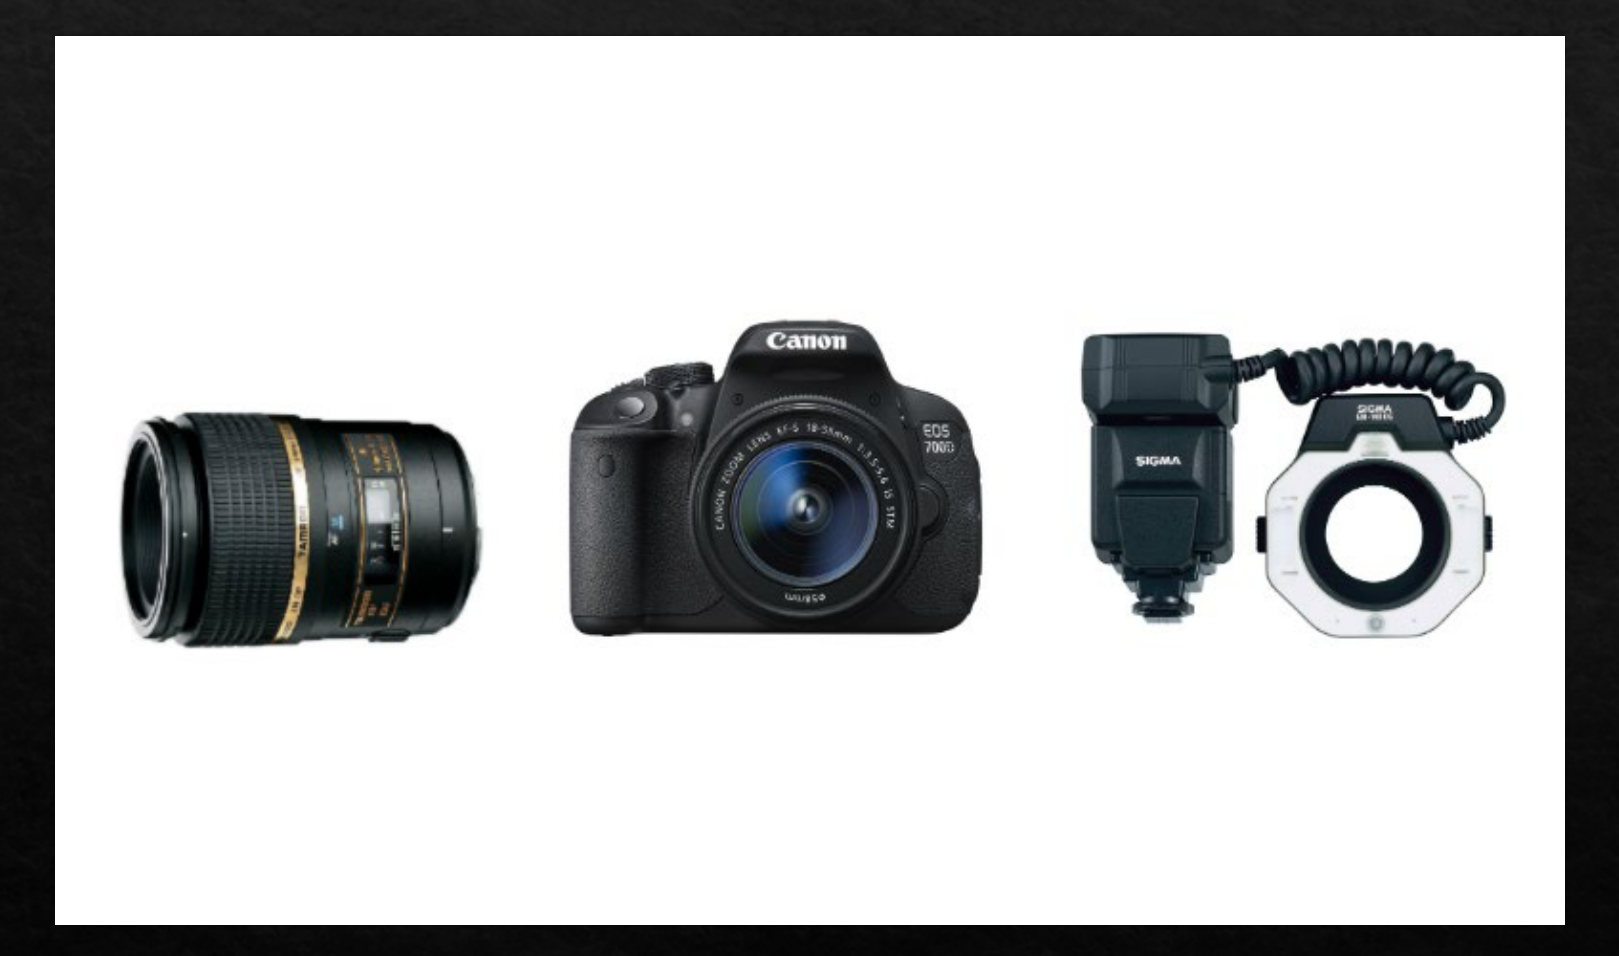
- The basic elements of the clinical camera setup include a Ring Flash for external light, a macro lens for close-up work, an aperture to control light/depth of field, and a digital sensor to record the image.
Photographic Parameters and Manual Settings3132
Photographic Parameters33
- ISO (↑)
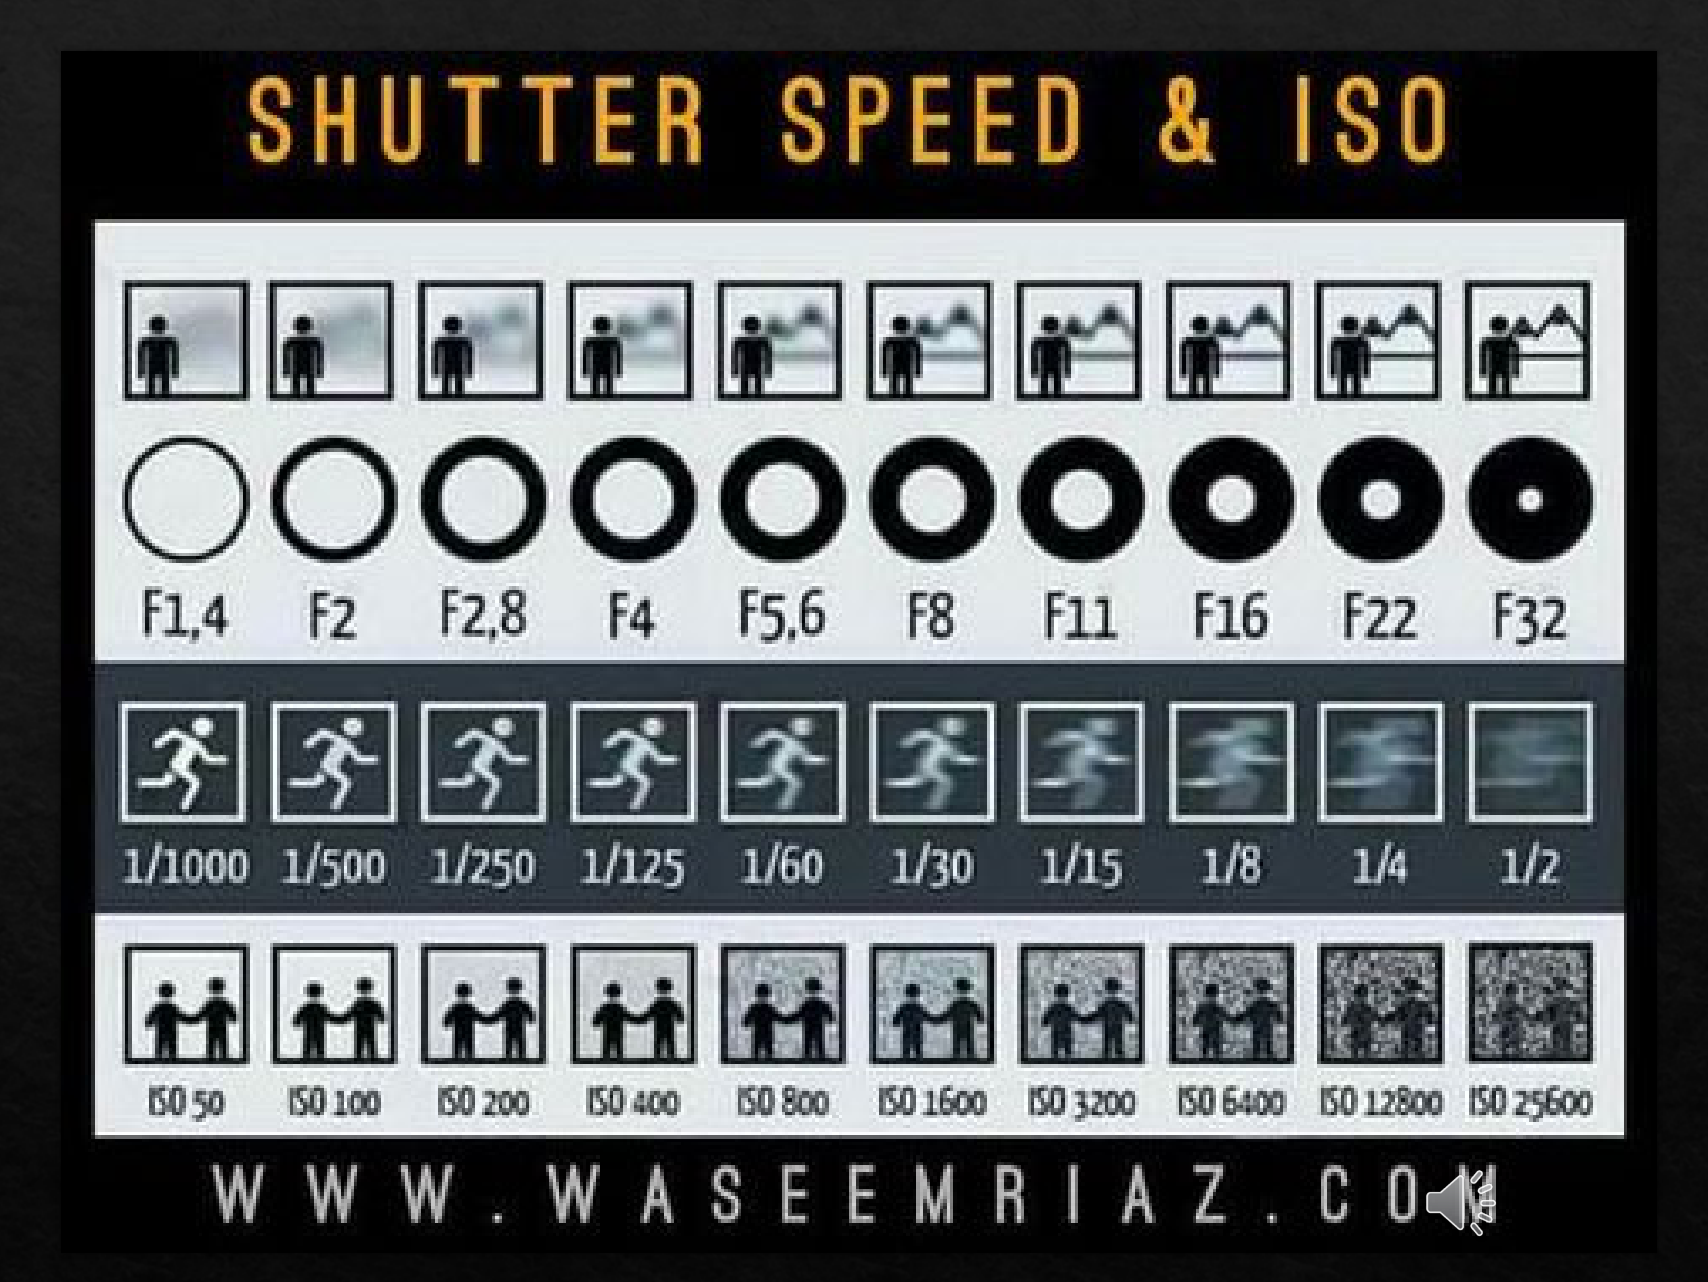
- Typically set between 100 and 400. Lower ISO provides a clearer image; higher ISO is better for low light but becomes grainy.
- Lighting (ring flash)
- Shutter speed
- Aperture
- f11 is used for extraoral face or profile shots, while f22 to f32 is used for intraoral or smile shots to ensure a deep depth of field (keeping near and far objects in focus).
- Composition/Area of Interest
Shutter Speed & ISO
| Aperture | F1.4 | F2 | F2.8 | F4 | F5.6 | F8 | F11 | F16 | F22 | F32 |
|---|---|---|---|---|---|---|---|---|---|---|
| Shutter | 1/1000 | 1/500 | 1/250 | 1/125 | 1/60 | 1/30 | 1/15 | 1/8 | 1/4 | 1/2 |
| ISO | 50 | 100 | 200 | 400 | 800 | 1600 | 3200 | 6400 | 12800 | 25600 |
Equipment - camera
- Camera on ‘M’ for manual settings
- ISO 100–200
- Lighting (ring flash) Max or + 1/3
- Shutter speed 1/125–1/200
- This speed is fast enough to overcome “handshake” or patient movement while still letting in enough light.
- Aperture
- F11 for face/profile
- F22 to 25 to 32 for close smile/intraoral
- Composition/Area of Interest as close as possible to area of interest
- Manual zoom (or auto if novice user)
Camera settings
https://bit.ly/uwadentphotosettings
Auxiliary Equipment
Equipment34
 |  |
 |
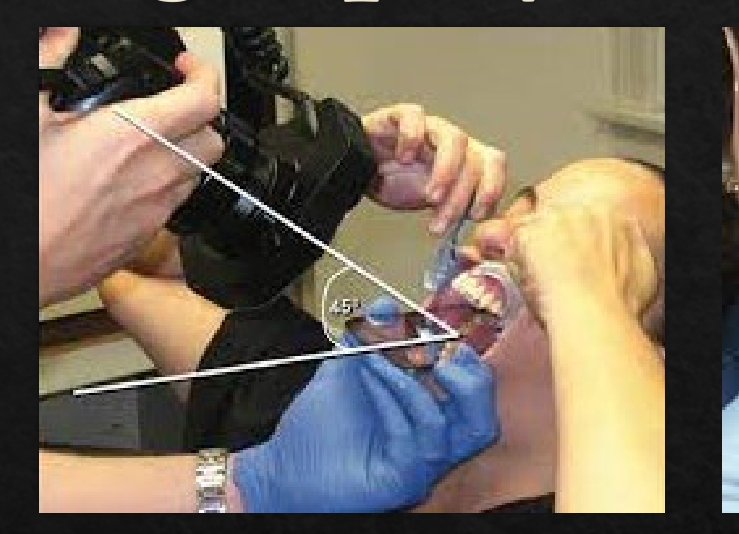
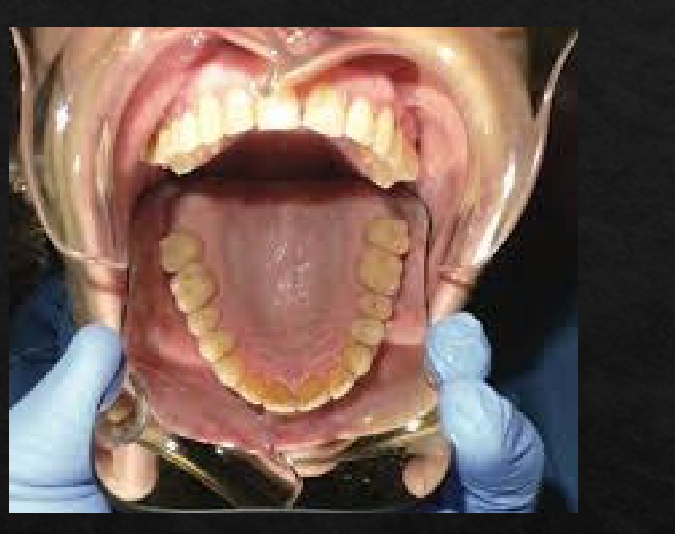
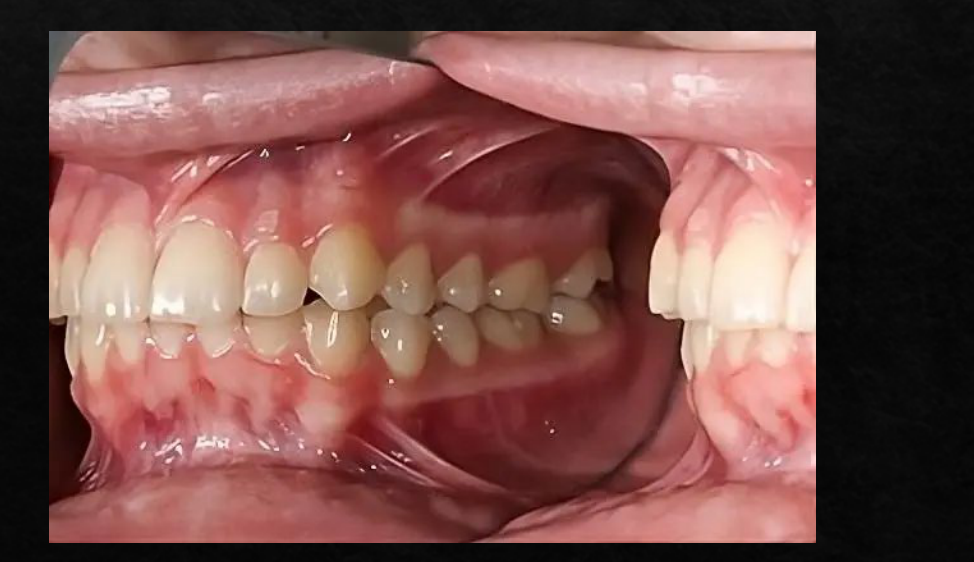
Equipment - Photography mirrors35
- Mirrors allow images to be taken perpendicular to occlusal plane
- Bypass anatomical limitations
- Mandibular opening
- Soft tissues
 |  |
 |
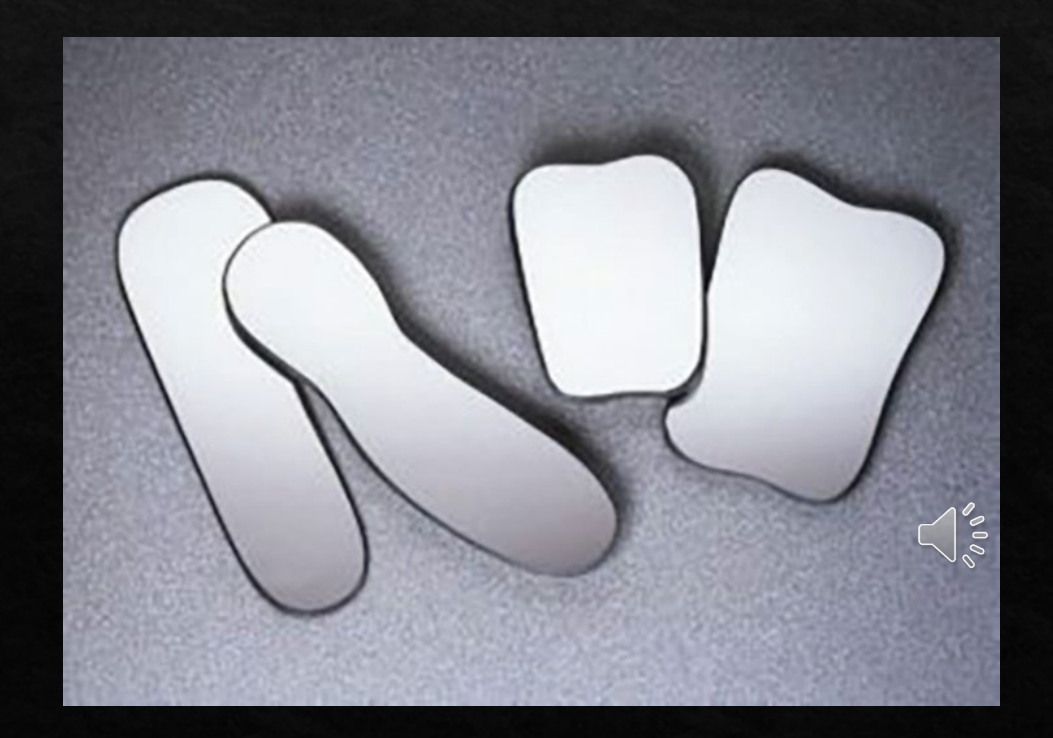
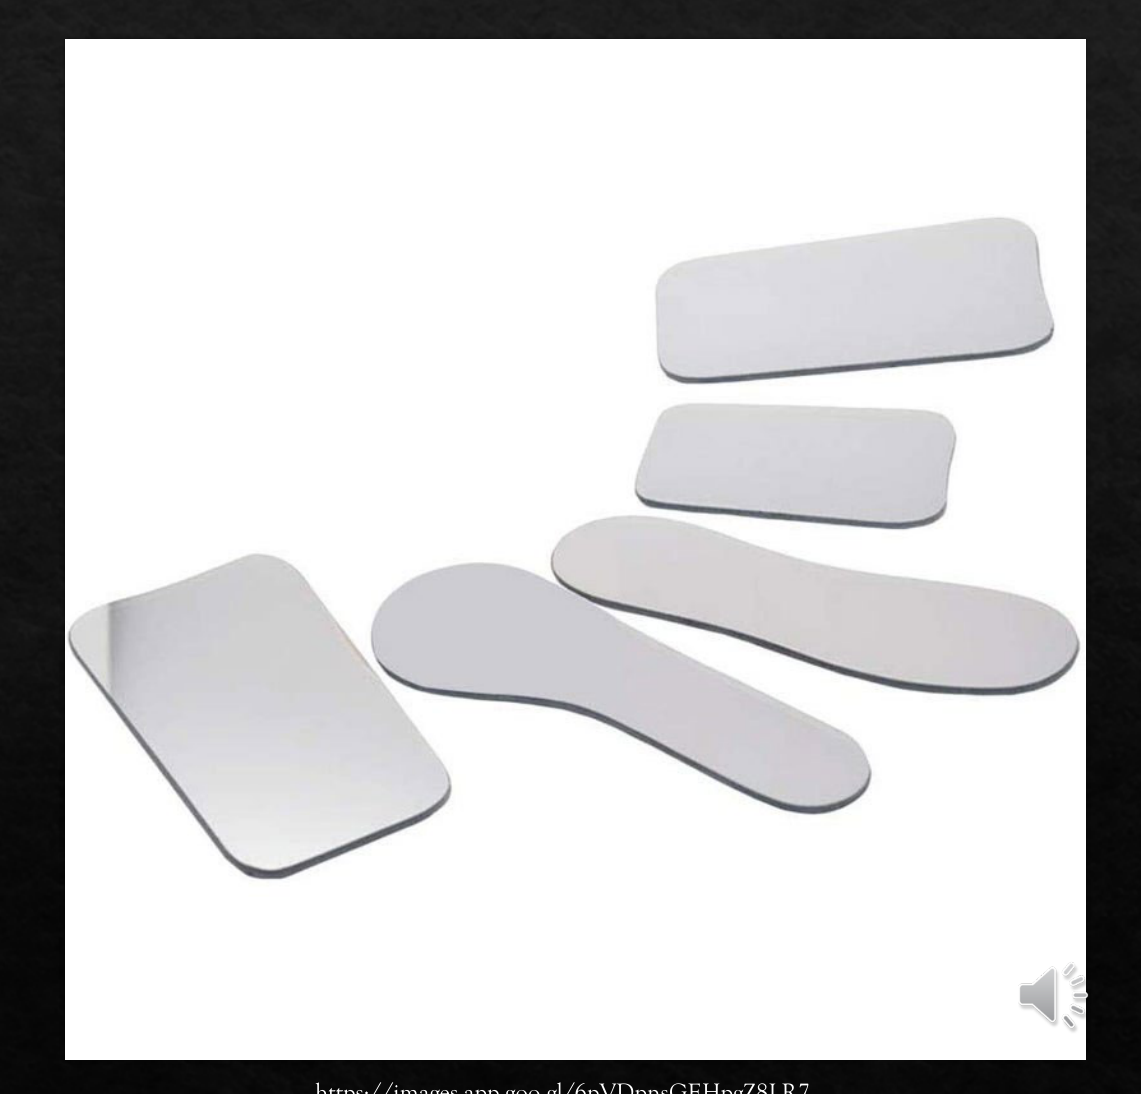
Photography mirrors36
- Occlusal – various sizes
- Used to see the full arch and palatal/incisal surfaces.
- Buccal
- Used for posterior regions to see buccal surfaces and intercuspation.
- Lingual
- Used for the tongue-side surfaces of teeth.
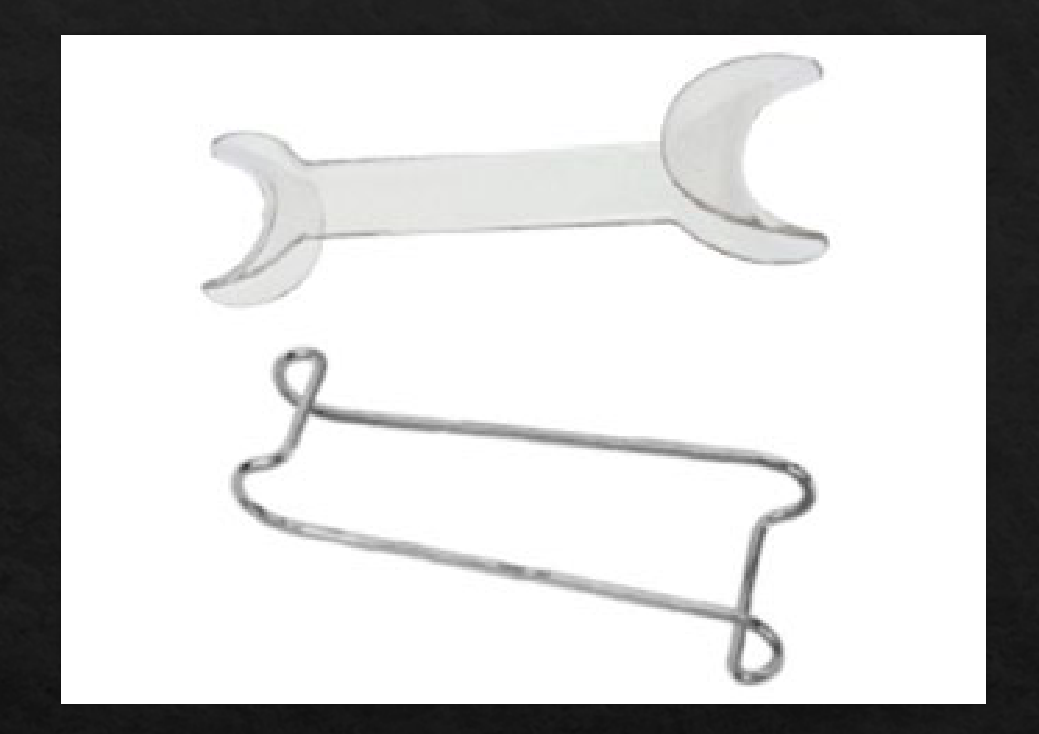
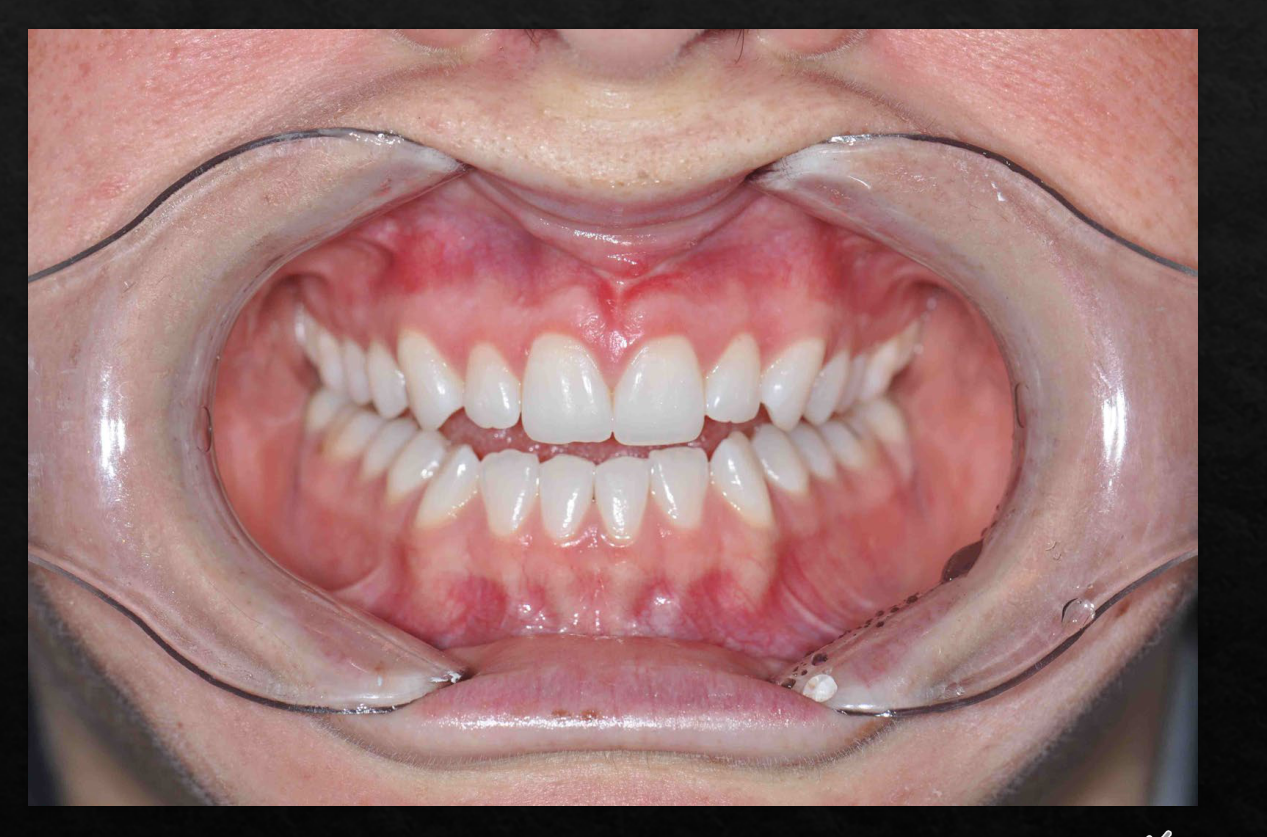
Retractors37
- Plastic vs Metal
- Metal (wire) retractors → surgery
- Plastic better at cheek retraction and supporting lips
Processing and File Management
Processing and Clinical Hints/Tips38
- Chairside
- File Handling
- Image Handling
Chairside Protocols and Consent
Chairside39
- Media consent via TOHM
- Take the right phot
- Aim to get the right shot the first time to avoid patient fatigue.o first time
- Avoids time consuming image manipulation later
- Accuracy
- Infection control
- You stay ‘clean’ – don’t touch patient
- Nurse/assistant stays ‘dirty’
- Patient to hold retractors/mirrors
Media Consent via TOHM e-forms40
Media Consent Tutorial, ScanX (TEMP108949) [In Progress]
THE UNIVERSITY OF WESTERN AUSTRALIA Oral Health Centre of Western Australia
Media Consent
I agree to my dental records being accessed by staff involved in my care and for it to be used for approved teaching and/or quality assurance activities, including clinical audits. I understand that any clinical images collected for treatment and/or teaching purposes will not be identifiable as my mine.
Mandatory Consent
You must obtain media consent through the Titanium (TOHM) system before taking any photographs. These images are part of the formal patient record.
Signature [Signature Box]
Tutorial, ScanX (TEMP108949) [Sign]
[Cancel] [Save & Print] [Save & Complete] [Save]
File Handling and Storage
File handling41
- Students to purchase own Memory (SD) card
- Download images from memory card as soon as possible
- Take a photo of patient name/screen capture
- Label files with both date of image and patient number and name
- Delete files from SD card after upload
- Avoids delays as camera/image software attempts to catalogue files in memory card
- Backup images to UWA student OneDrive account.
- Upload files to Romexis
- “Images not to leave OHCWA pr
- Images should not leave the Oral Health Centre premises on flash drives or SD cards due to privacy risks.emises”
- Privacy concerns
Image Post-Processing and Editing
Image handling42
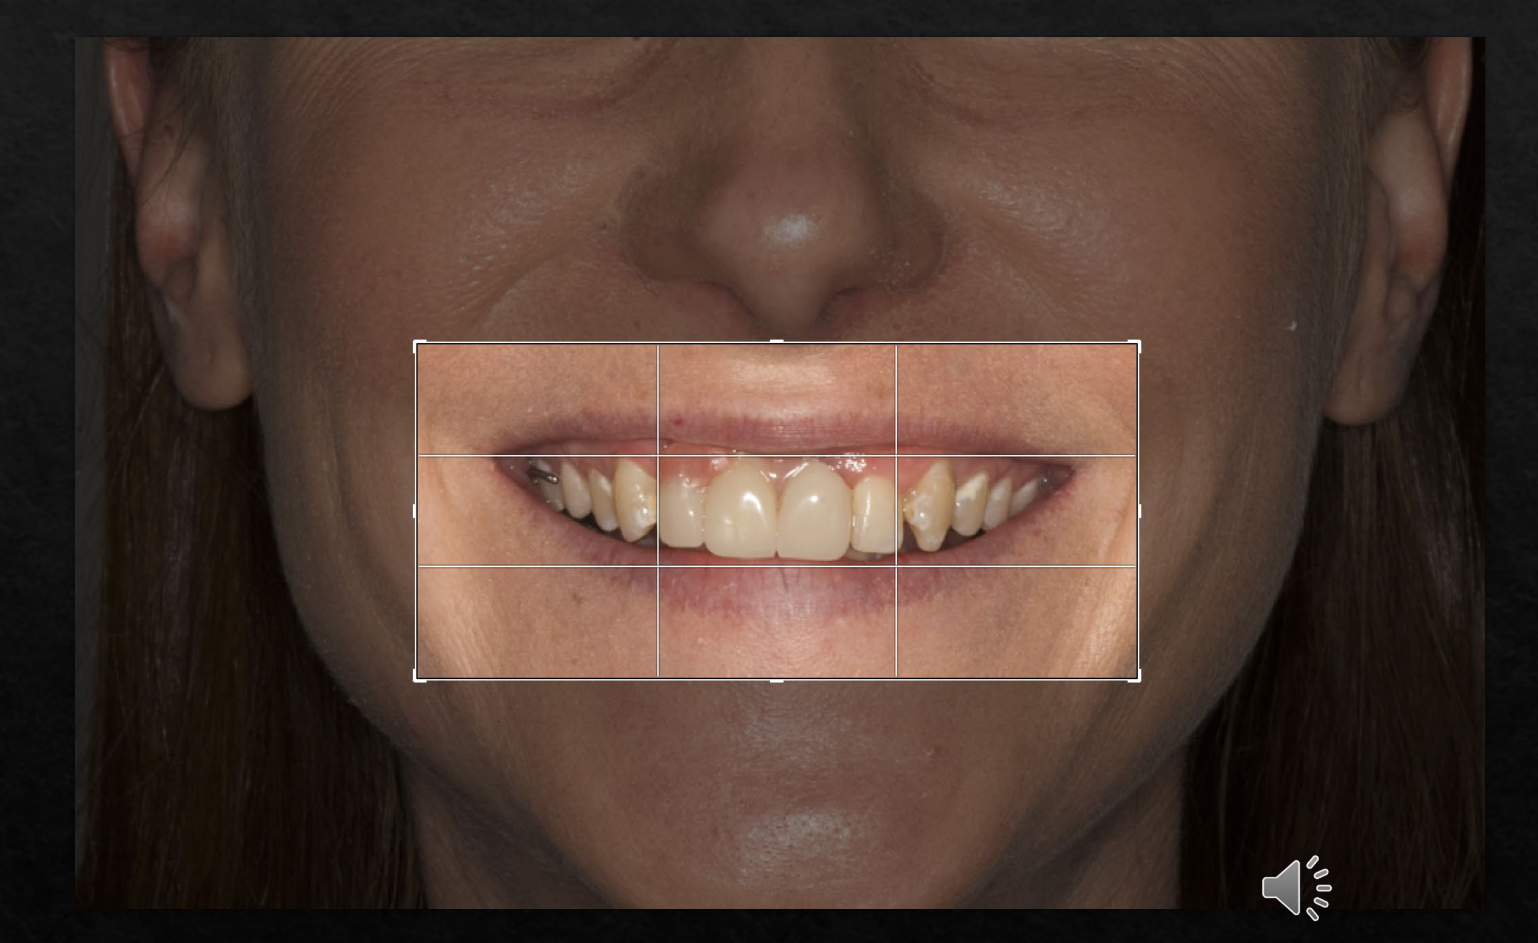
- Crop unwanted data/excess information from image
- Re-size maintaining aspect ratio
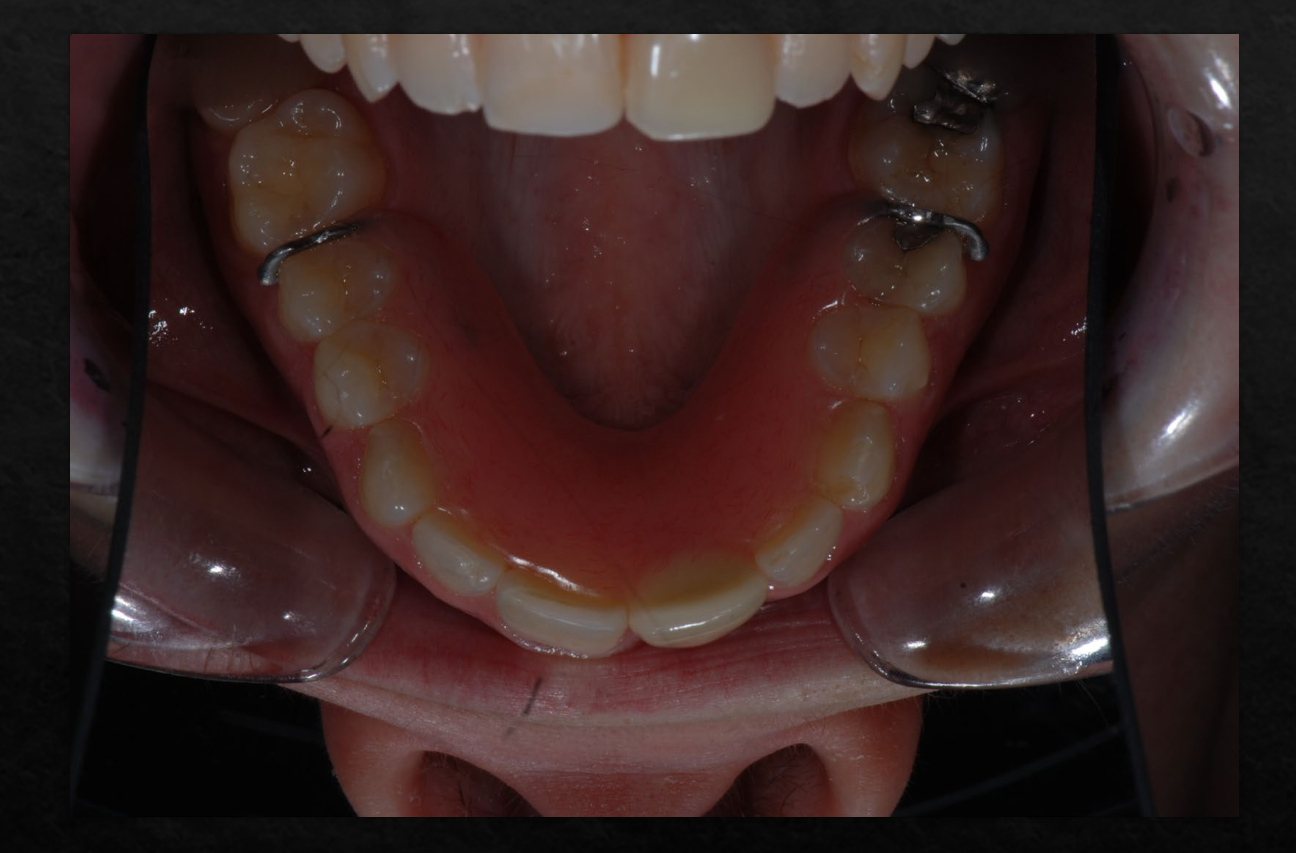
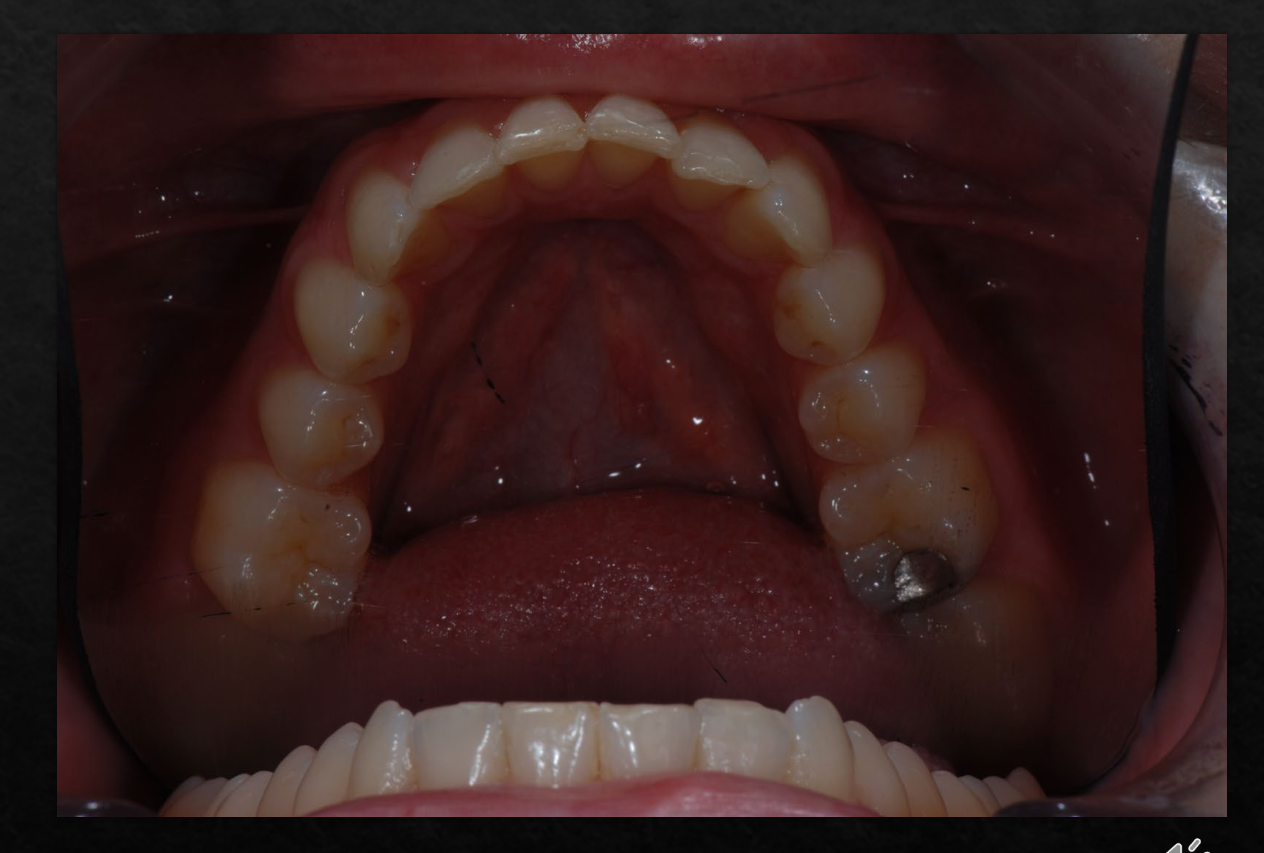
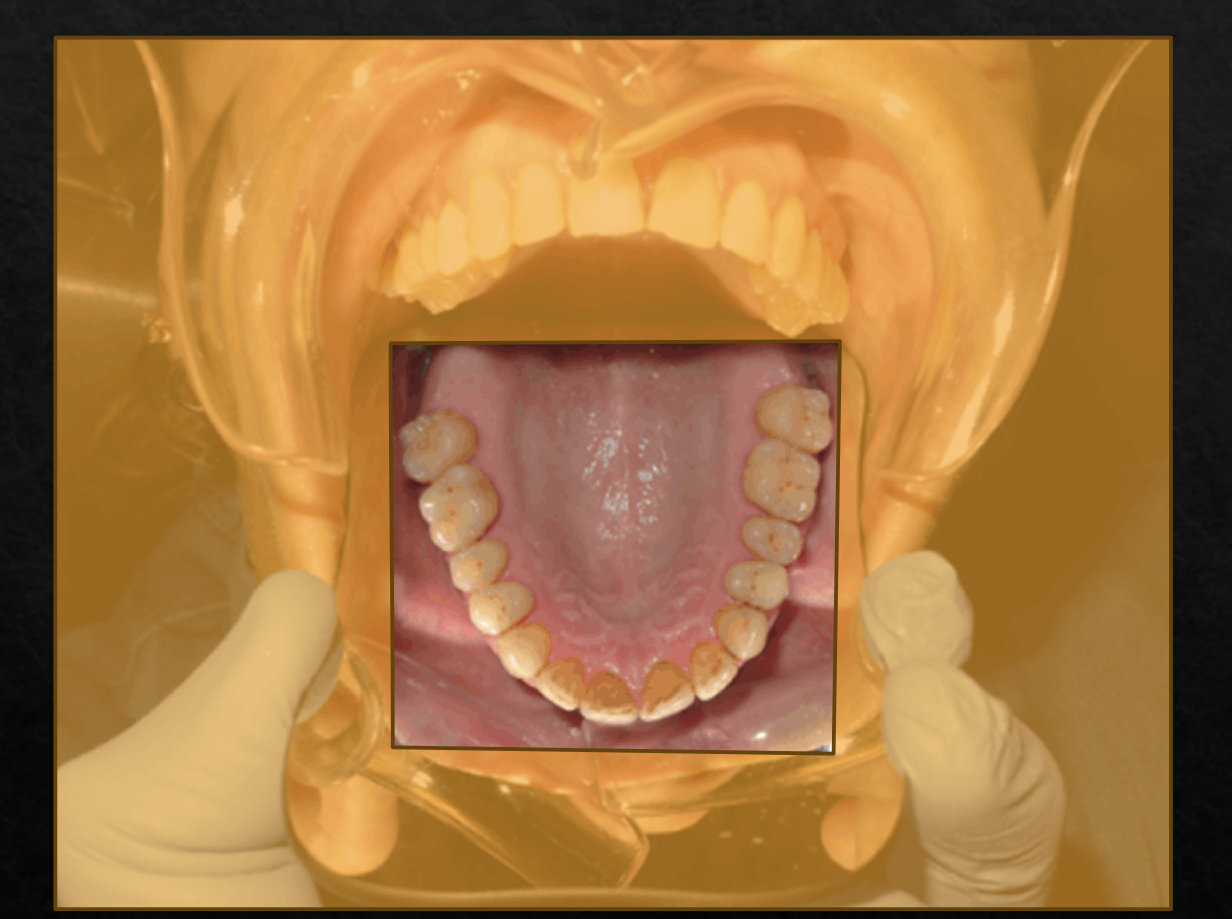
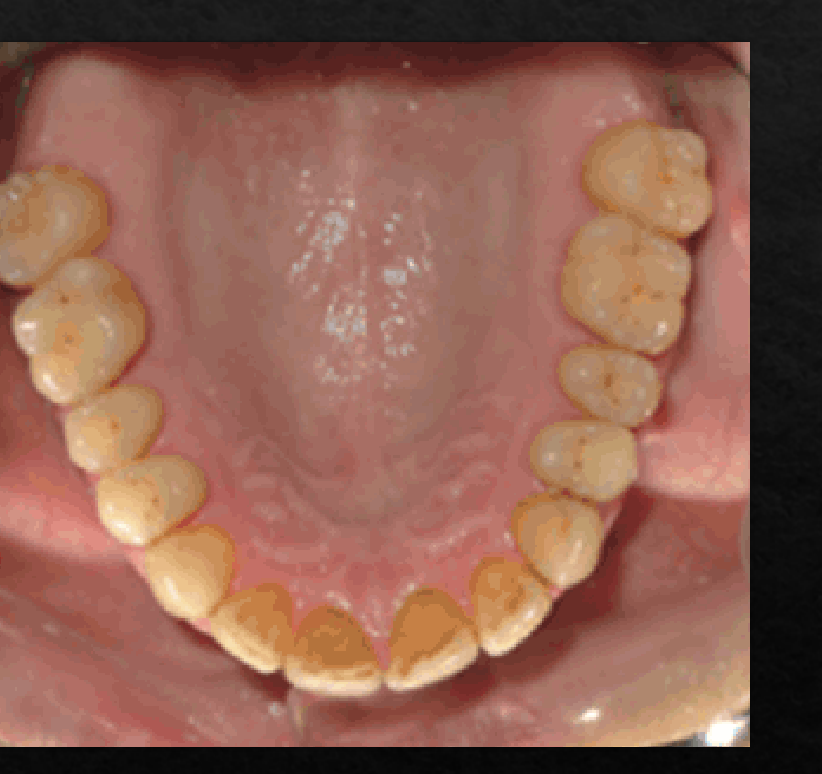
- Flip mirror images
- Vertical for occlusal photos
- Horizontal for buccal/lateral views
- Simple changes to brightness, color, and resizing while maintaining the aspect ratio.
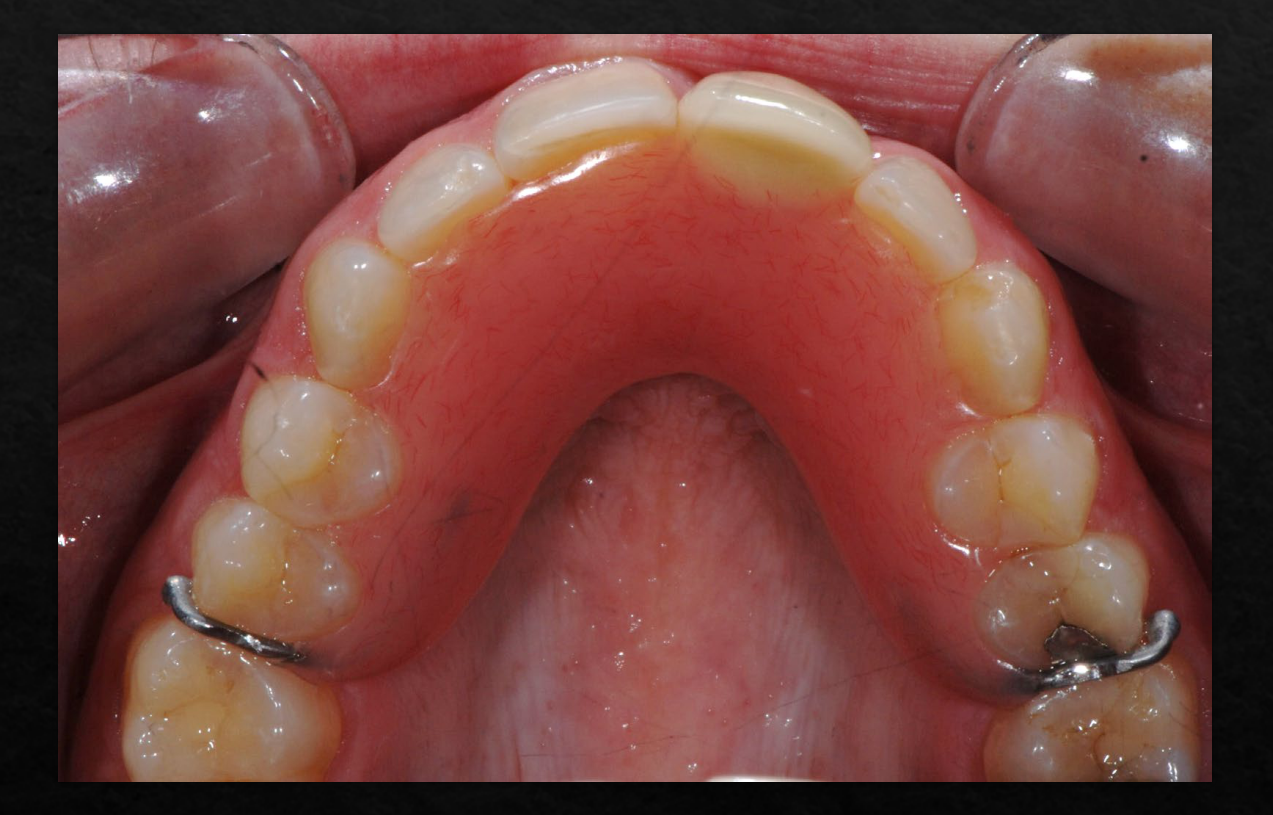
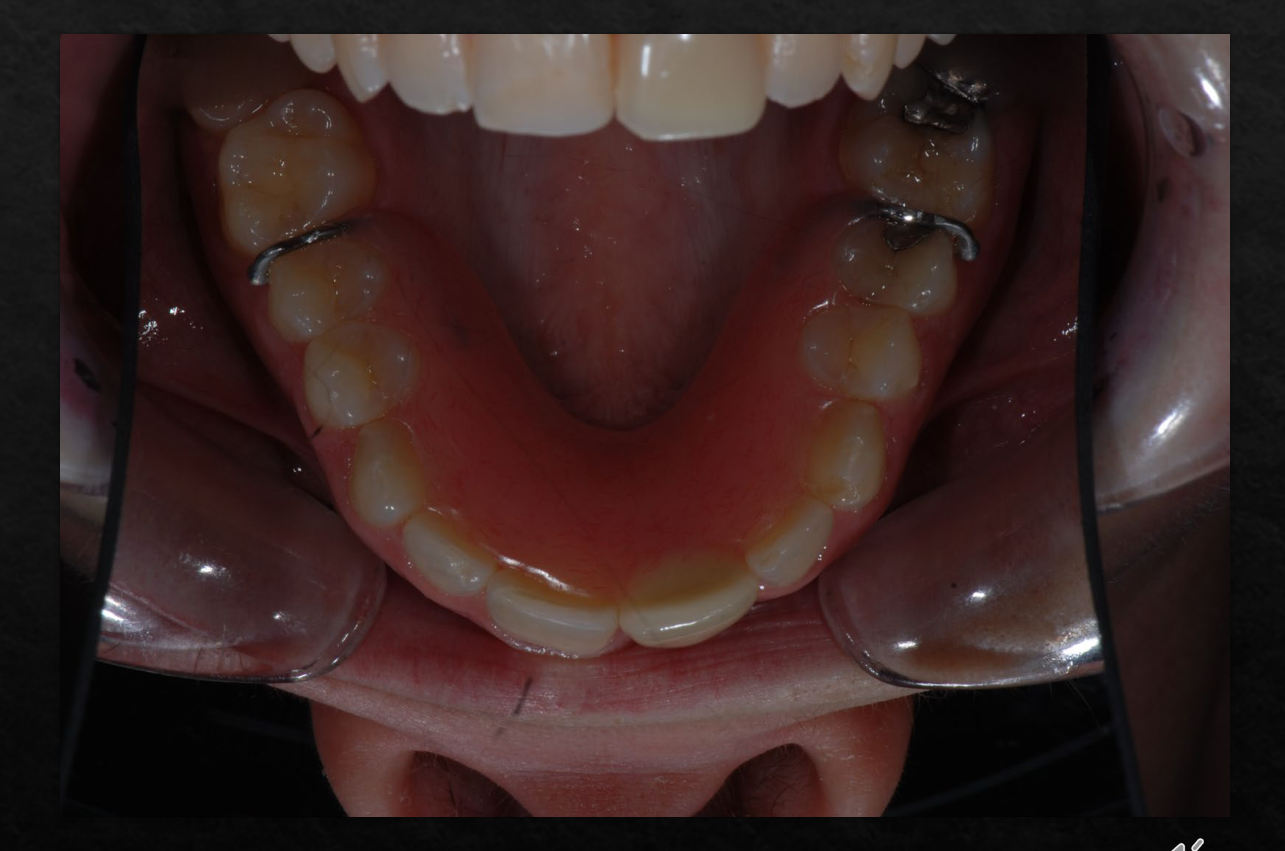
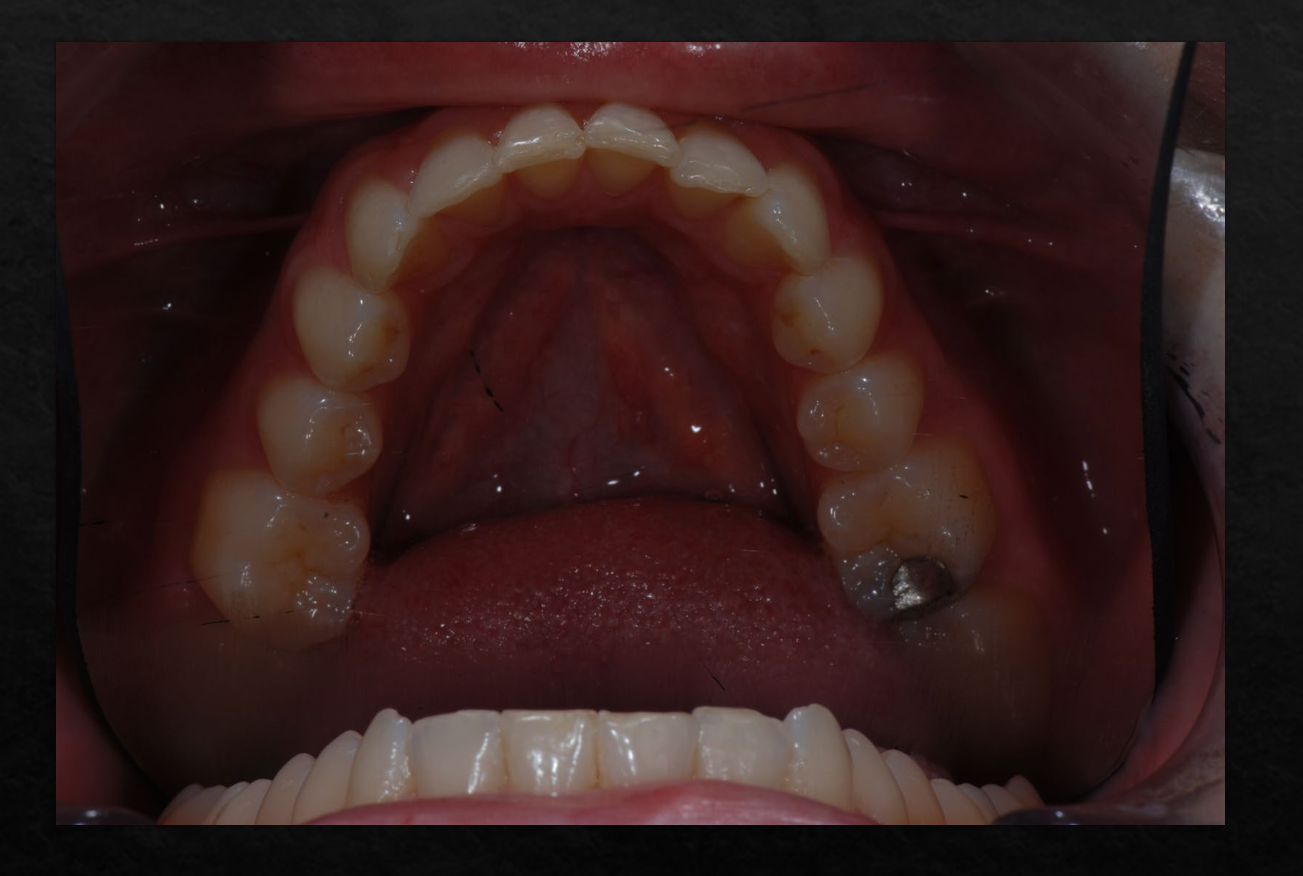
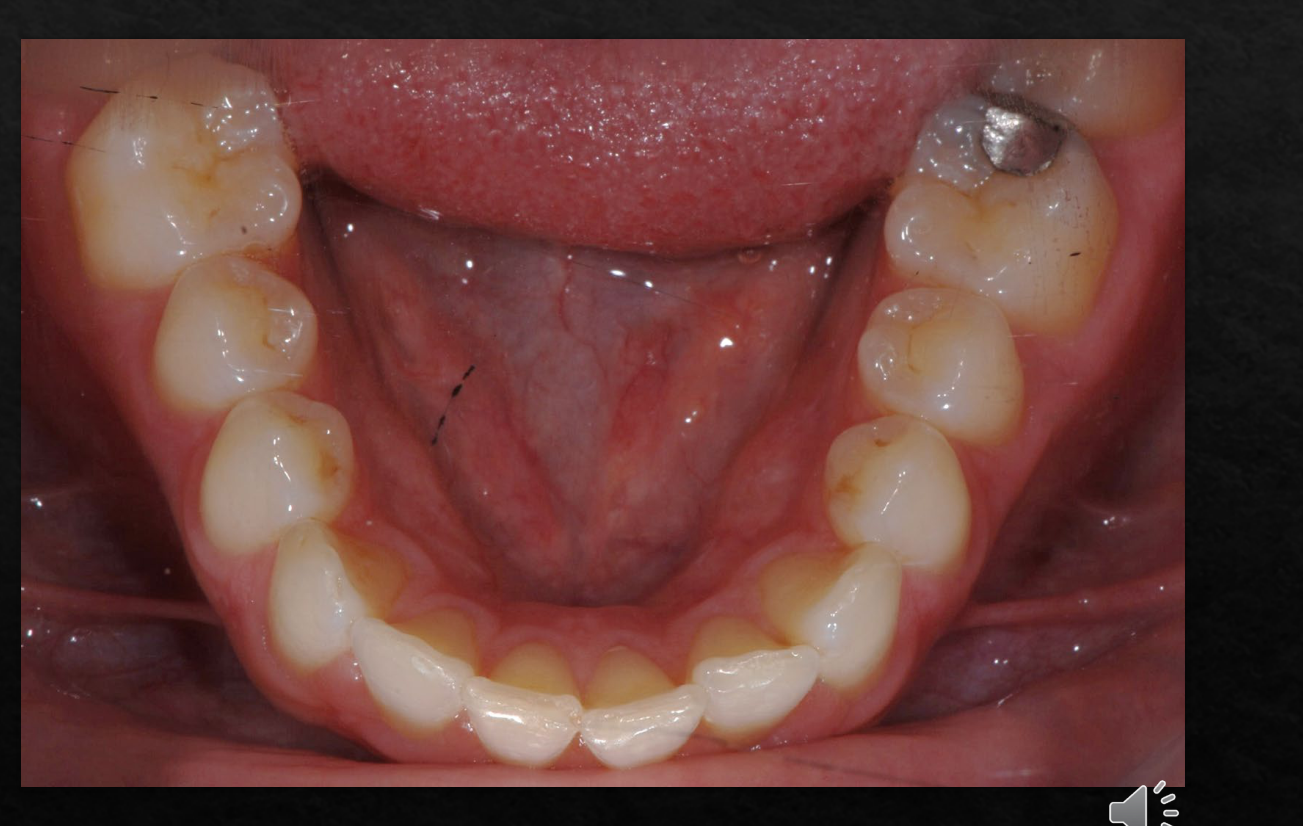
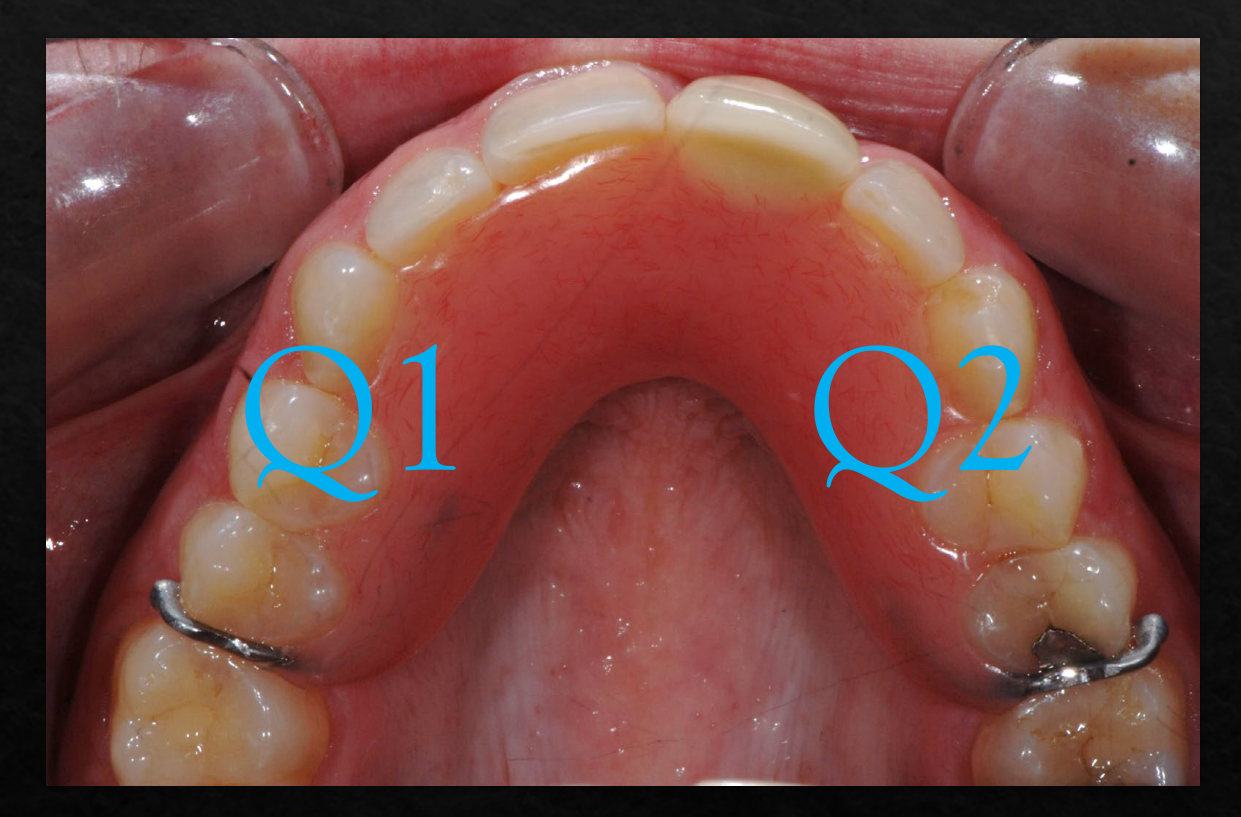
Mirror images4344454647
- Ensure these are flipped, not rotated, why?
- Crop out retractors
- Crop out mirror
- Crop out “non-mirror” teeth
- Crop out “non-mirror” teeth (the actual teeth visible at the edge of a mirror shot).
Original images – as taken
Flipped and cropped
 |  |  |
 |  |  |
 |  |
Software4849
-
Windows 10/11
- Paint
- Photos
- PowerPoint
- Adobe Photoshop/Lightroom
-
Mac
- Windows: Paint or Photos (preferred for permanent changes).
- Avoid doing primary edits in PowerPoint as it may reset image attributes.
-
Process your images and upload to Romexis/Sidexis regularly
- You must do it, because no one else will.
- This is patient information so handle accordingly with privacy & respect
-
Do not leave to the end of semester
- Karma
- You will see the impact of not having the data you need to make a diagnosis
- Do not do this to others.
Clinical Hints and Tips50
Optimizing Image Capture51
“Get the right shot… (duh!)”
Tip 1
Get the right shot…525354555657
- Digital photography allows for multiple re-takes
- But
- Patients get tired
- Each image takes time to handle, look at, and process
- Takes up less storage
- Set yourself and the patient up to get it right
- Positioning
- Lighting
- Retraction of soft tissues
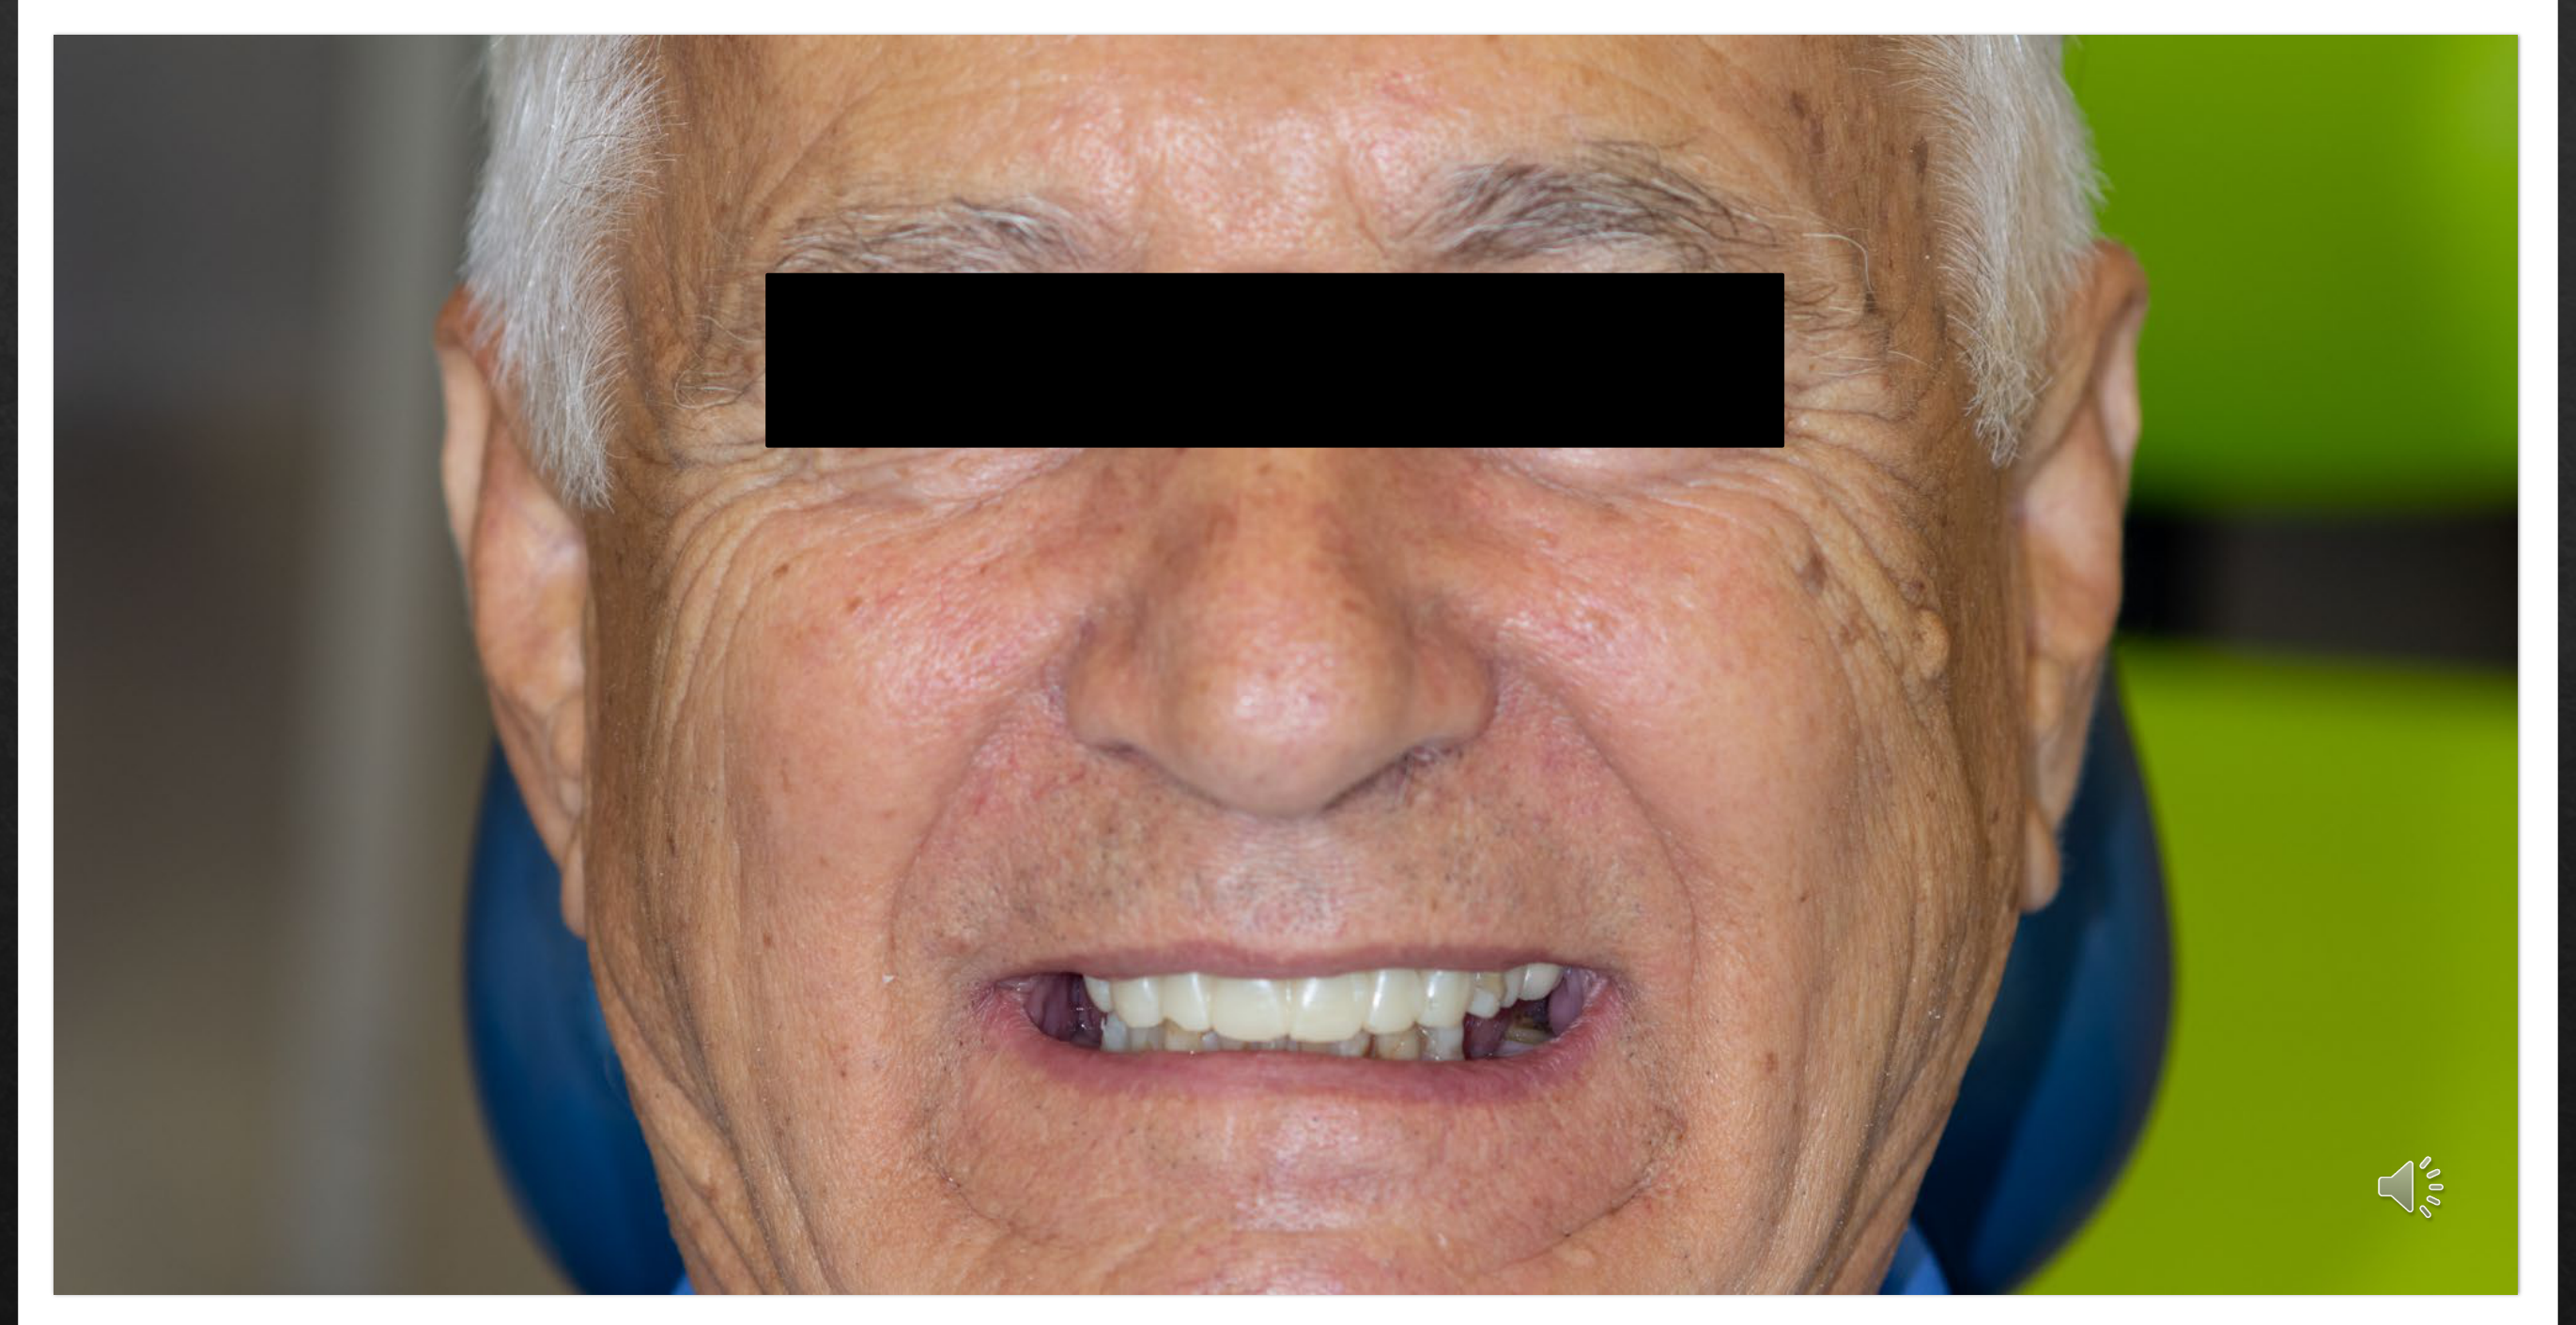
“Get in close”
Tip 2
Even intra-orally
- Zoom in as closely as possible to the area of interest to ensure accuracy.
 |  |  |
 |  |
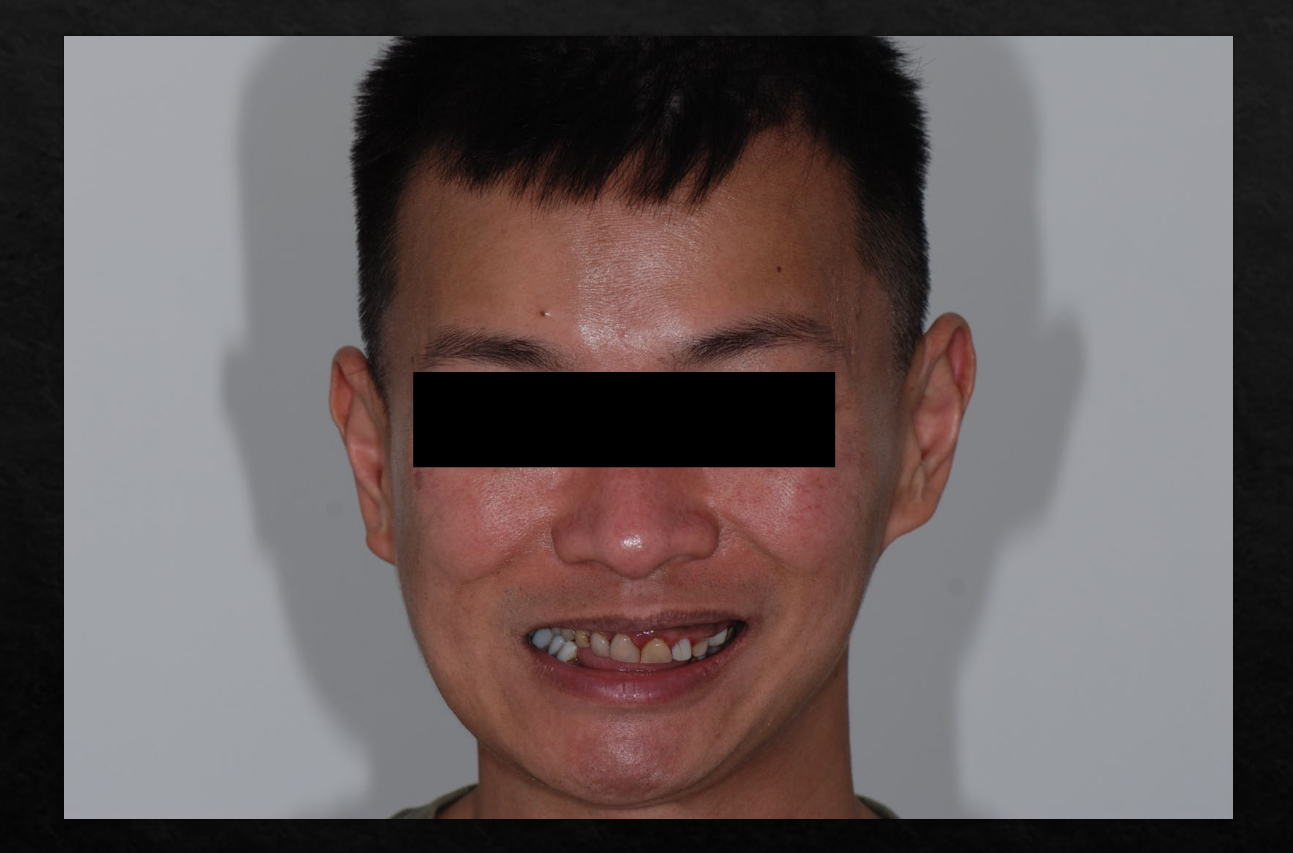
Subject Positioning and Background5859
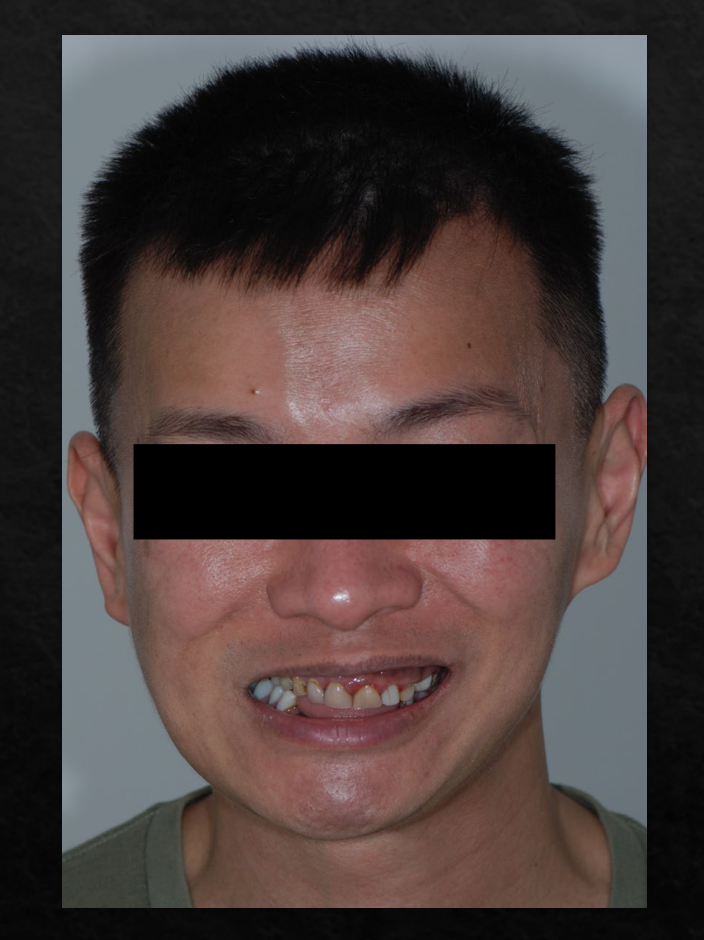
“Subject to take 3 to 4 steps from background”
- Extraoral: Ensure the patient is not leaning directly against a wall to reduce shadows.
- Intraoral: Use a contrastor (black background) where possible to make the teeth stand out. Avoid distracting backgrounds like the dental chair or headrest.
Tip 4
 |  |
Clinical Timing and Angulation60616263646566
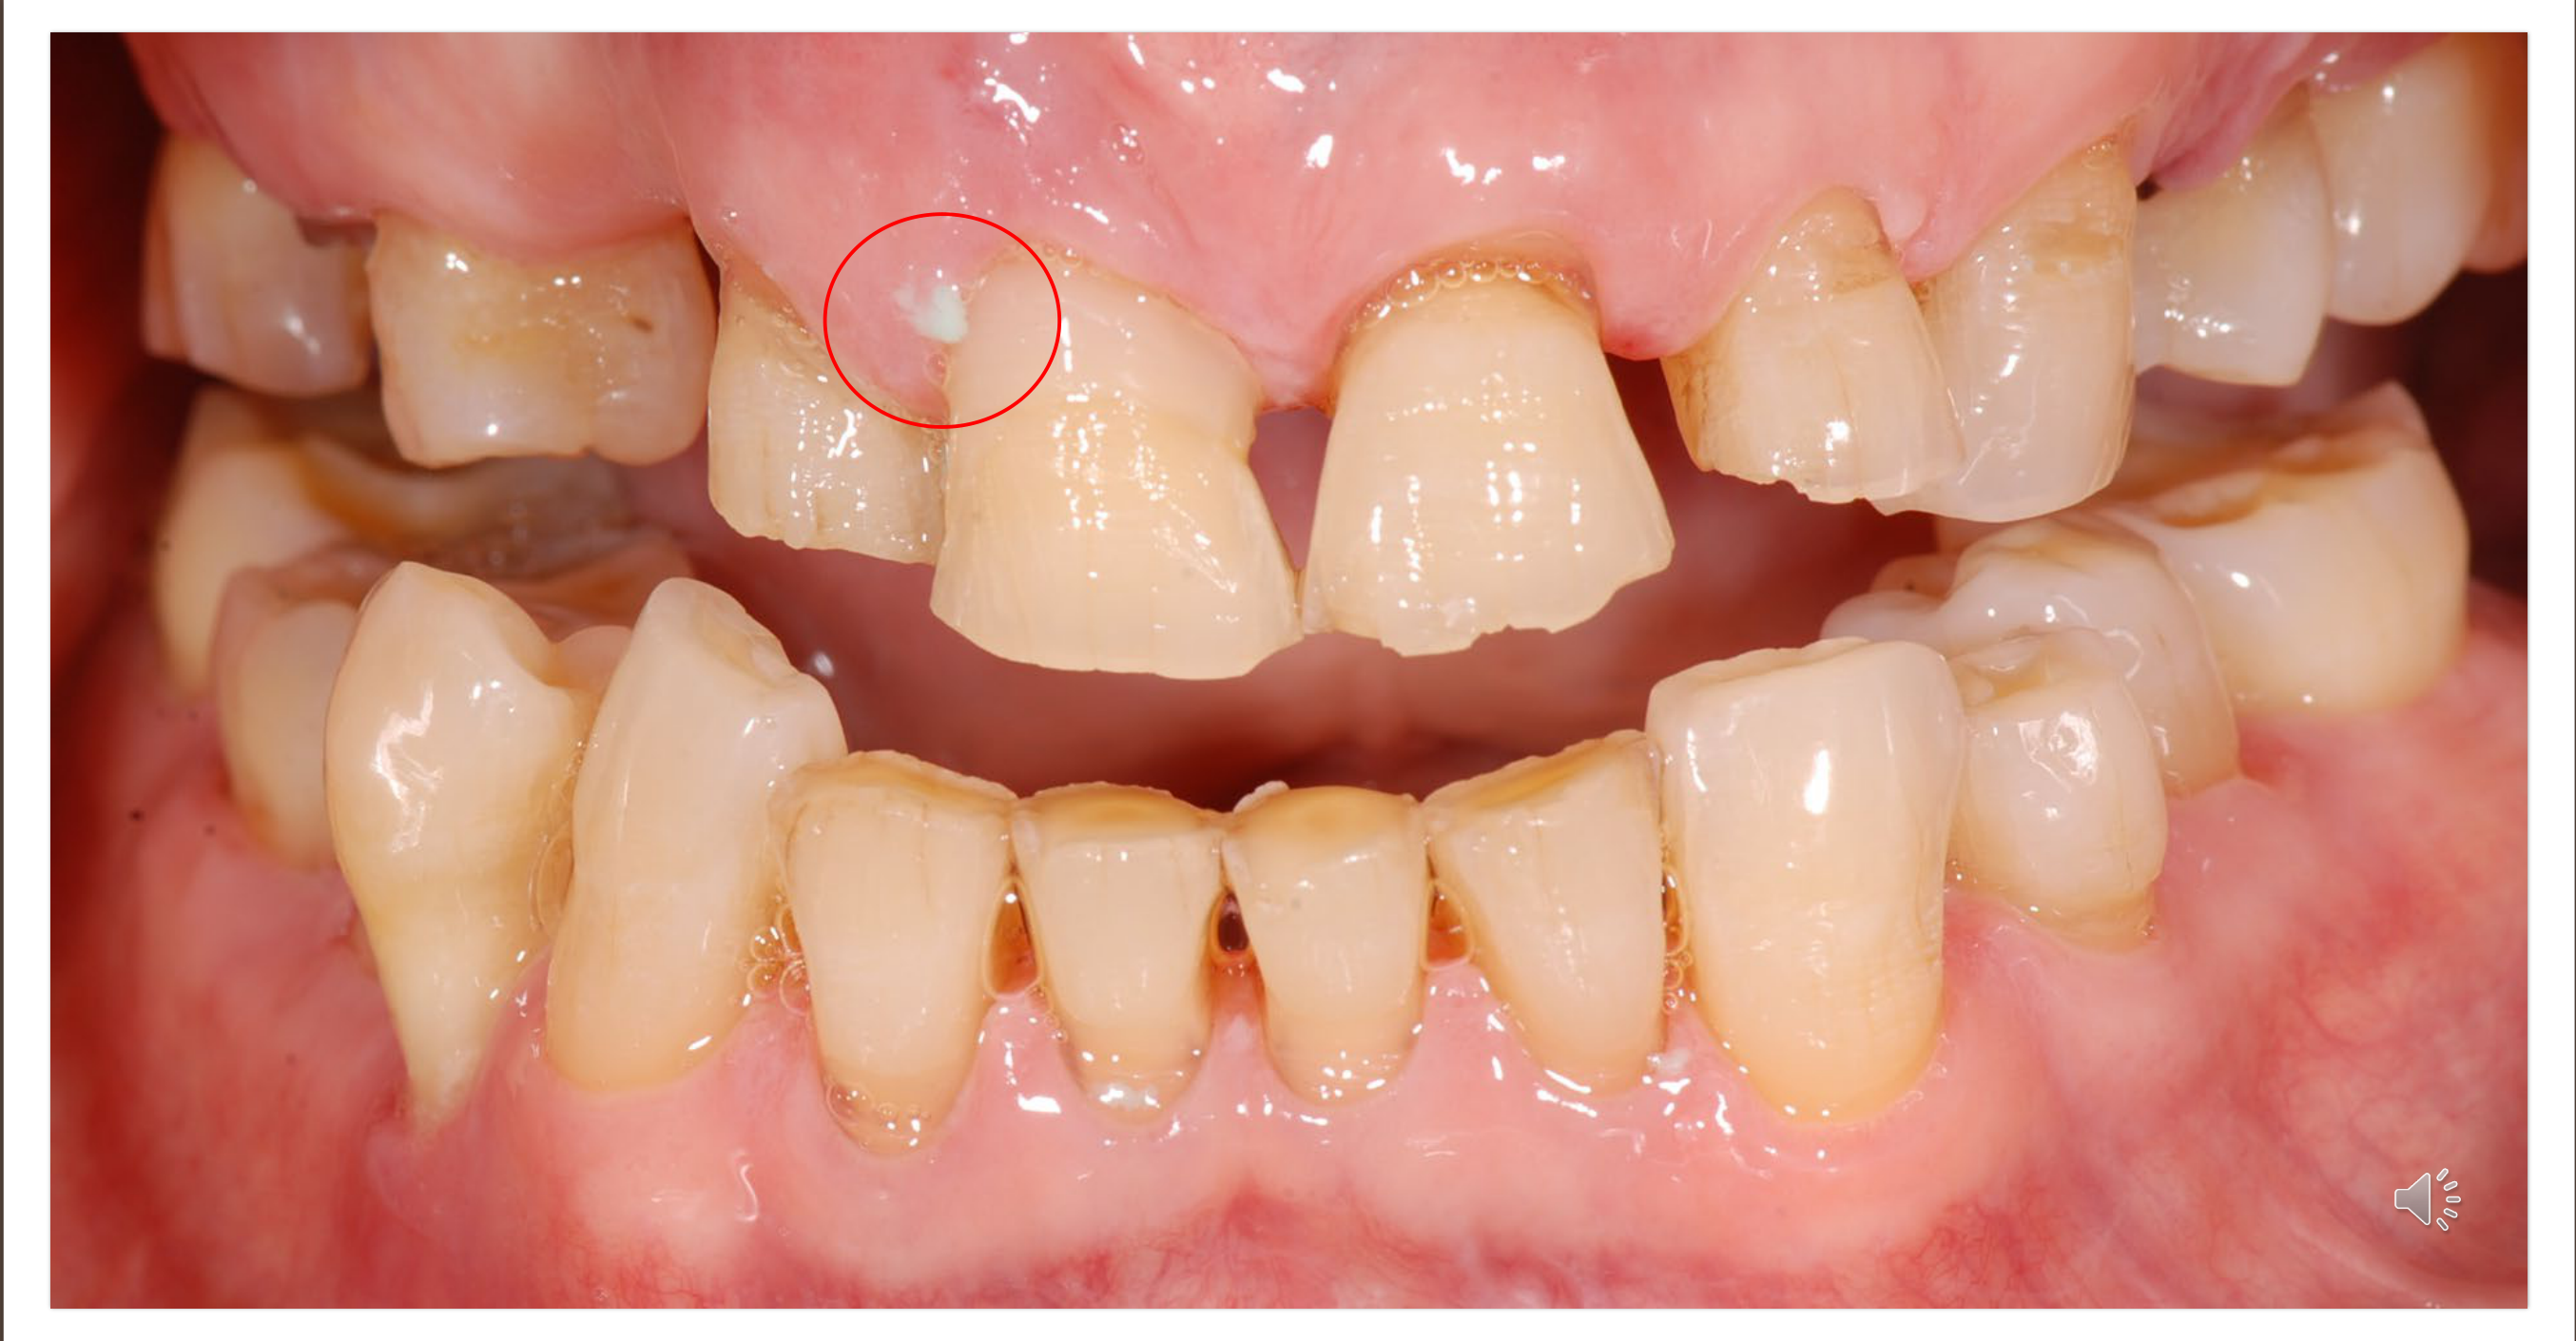
“Photos before alginates or plaque score”
Timing
Take photographs before procedures like plaque scores or alginate impressions to avoid debris (like alginate scraps) distracting from the image.
Tip 5
Tip 6
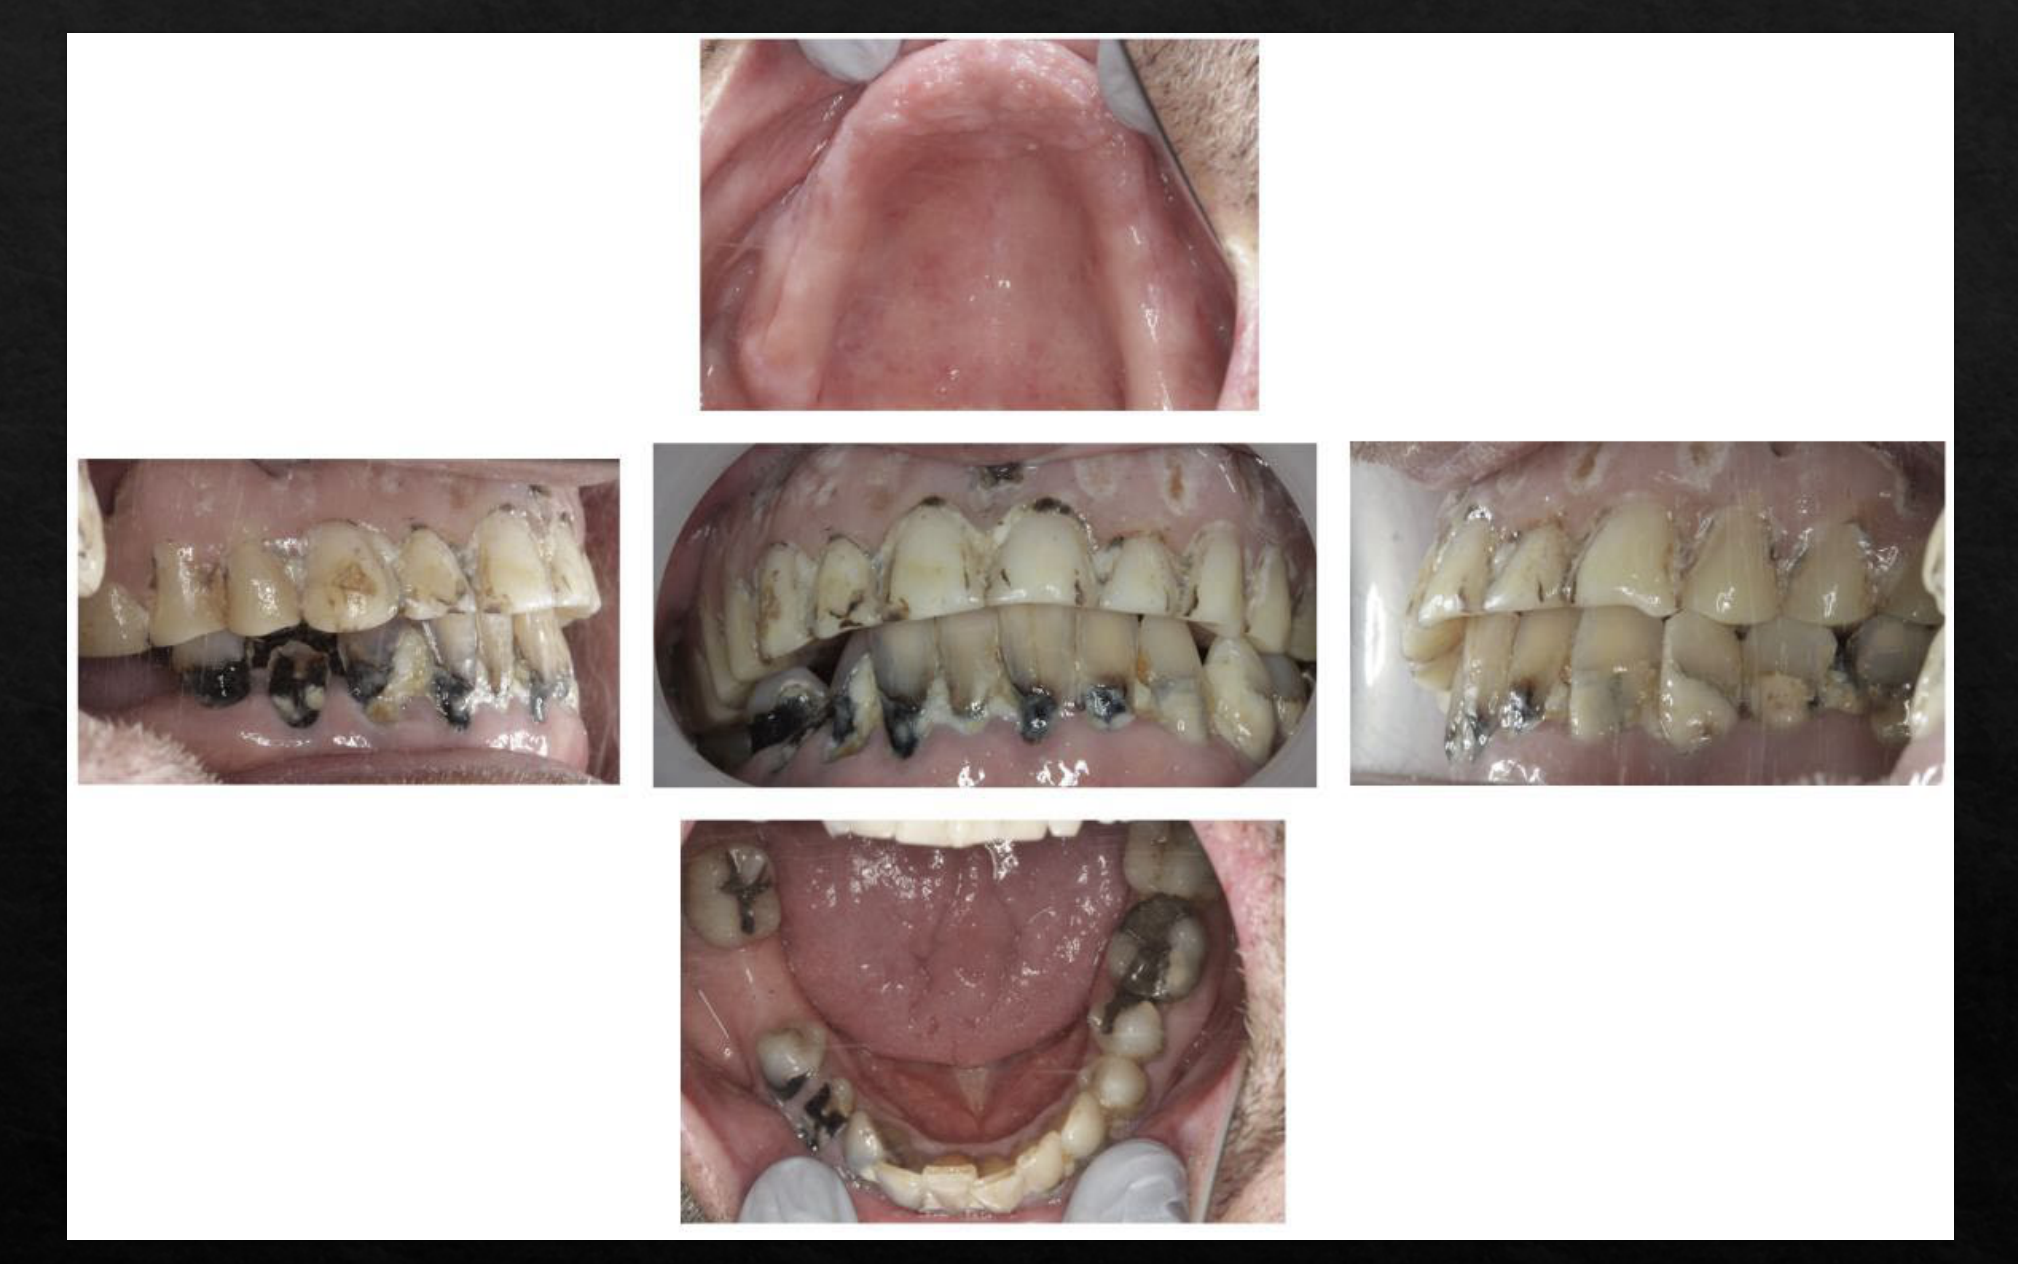
Watch the angulation of the anterior image - Ensure the patient’s head is not tilted too far back, which can distort the orientation of the anterior and lateral views.
Thanks
 |  |  |
 |  |  |
Clinical Practice Session67
Dental Photography Clinical Practice Session
Camera Operation and Techniques
Knowing the camera68
- Which camera am I using?
- Which flash am I using?
- Turning camera on and off
- Turning flash on and off
- Setting M mode
- How to set Aperture, shutter speed and ISO
- Camera battery in and out
- Flash batteries in and out
- SD card in and out
- The practical session will involve hands-on time to understand manual settings and camera operation.
Demonstration of Techniques69
- Extra-oral
- Face
- Profile
- Smiling
- At rest
- Smile only
- Intra-oral
- Anterior
- Anterior edge-to-edge
- Lateral/buccal
- Occlusal
- palatal/lingual
- Demonstrations will cover both extraoral and intraoral techniques, including the use of mirrors and retractors.
Compulsory Formative Activity
Dental Photography Essay
Students must submit a dental photography essay electronically via LMS. This involves:
- Submitting photographs taken during the practice session using the provided template.
- If practice photos are unavailable, use OHCWA patient photos (with proof of Titanium consent).
- Appraising the images and writing reflective comments on areas for improvement.
Audio Appendix
Additional Audio Content
The following sections from the lecture audio did not correspond to any heading in the main document.
Case Study: Technical Communication (Stump Shade)
Photographs are used to communicate the “stump shade” (the color of the underlying prepared tooth) to dental technicians. This is critical for ceramic crowns to ensure the technician can block out discolored areas, such as those caused by old trauma or endodontic treatment.
Case Study: Oral Medicine and Pathology
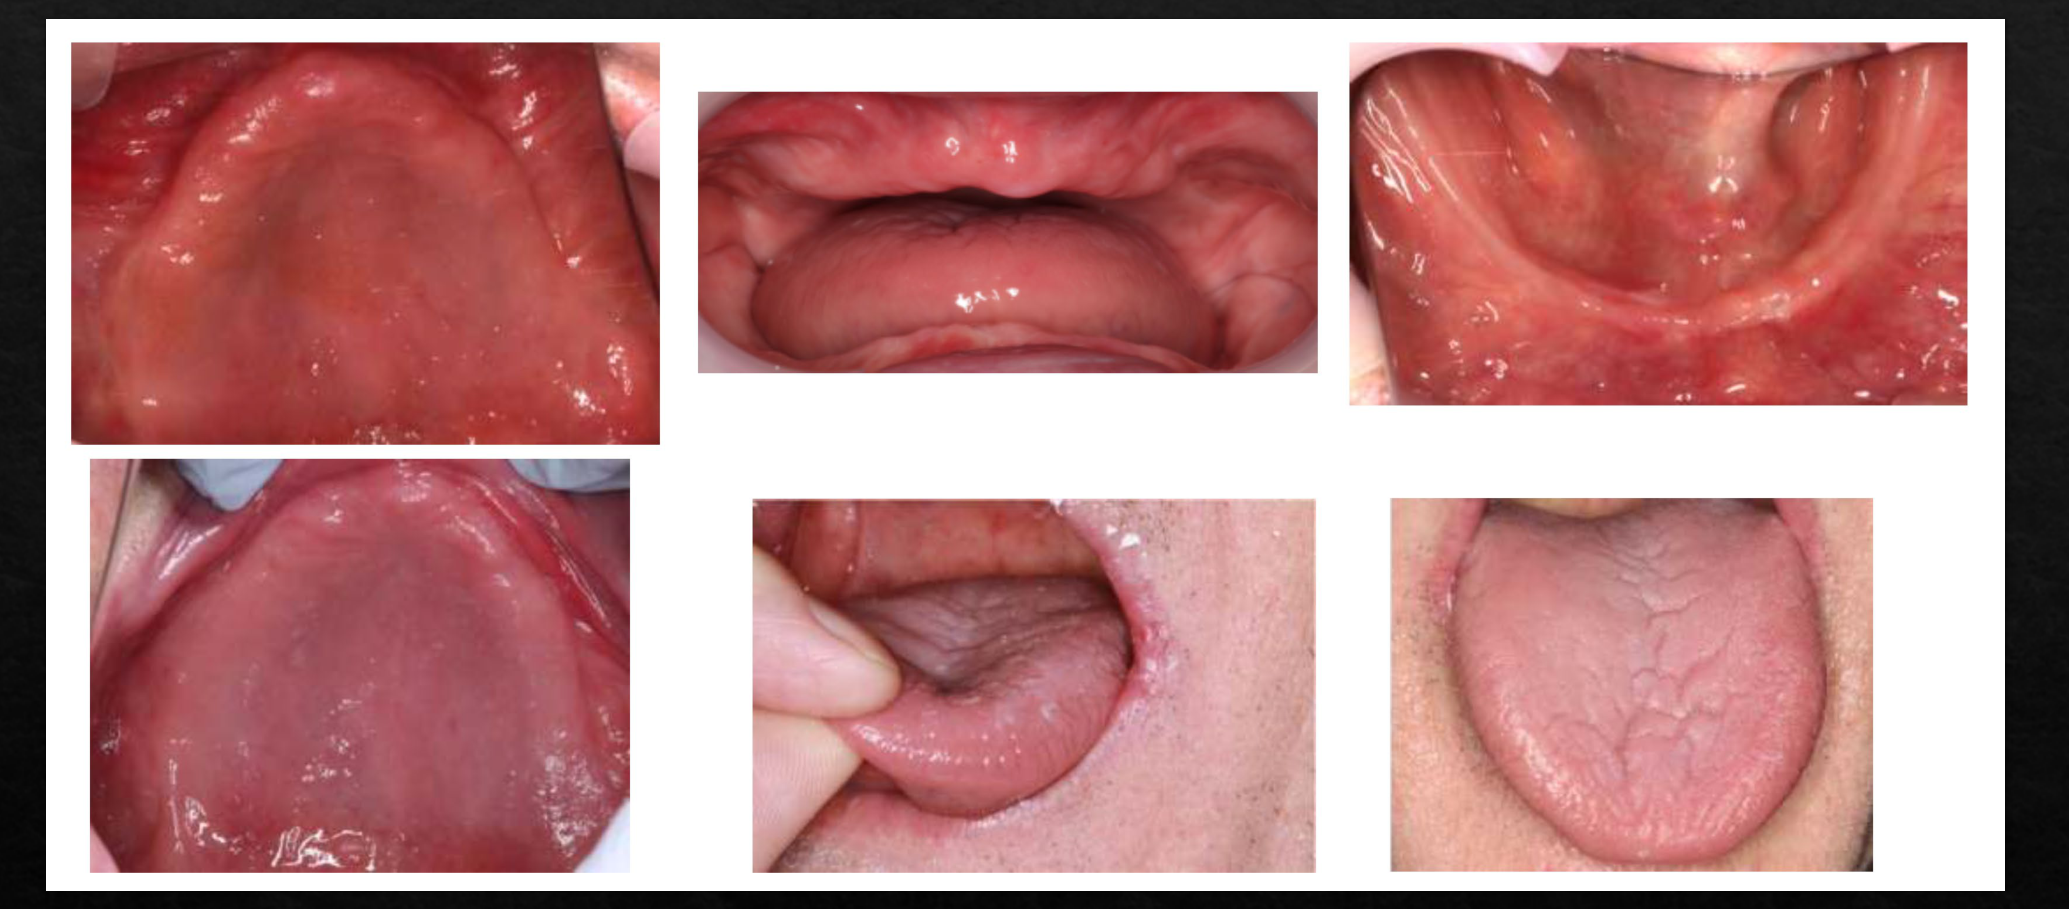
Photographs are used to depict conditions such as fissured tongue, ulcers, edematous soft tissues, and angular cheilitis to record pathology and monitor improvement.
Case Study: Medical-Legal and Trauma
In cases of workplace injuries or dental alveolar trauma, photographs provide essential evidence for legal or insurance claims and document the necessity of expensive rehabilitation.
Footnotes
-
Original PDF page 1: P1 Dental Photography, p.1 ↩
-
Original PDF page 2: P1 Dental Photography, p.2 ↩
-
Original PDF page 3: P1 Dental Photography, p.3 ↩
-
Original PDF page 4: P1 Dental Photography, p.4 ↩
-
Original PDF page 5: P1 Dental Photography, p.5 ↩
-
Original PDF page 6: P1 Dental Photography, p.6 ↩
-
Original PDF page 7: P1 Dental Photography, p.7 ↩
-
Original PDF page 8: P1 Dental Photography, p.8 ↩
-
Original PDF page 9: P1 Dental Photography, p.9 ↩
-
Original PDF page 10: P1 Dental Photography, p.10 ↩
-
Original PDF page 11: P1 Dental Photography, p.11 ↩
-
Original PDF page 12: P1 Dental Photography, p.12 ↩
-
Original PDF page 13: P1 Dental Photography, p.13 ↩
-
Original PDF page 14: P1 Dental Photography, p.14 ↩
-
Original PDF page 15: P1 Dental Photography, p.15 ↩
-
Original PDF page 16: P1 Dental Photography, p.16 ↩
-
Original PDF page 17: P1 Dental Photography, p.17 ↩
-
Original PDF page 18: P1 Dental Photography, p.18 ↩
-
Original PDF page 19: P1 Dental Photography, p.19 ↩
-
Original PDF page 20: P1 Dental Photography, p.20 ↩
-
Original PDF page 21: P1 Dental Photography, p.21 ↩
-
Original PDF page 22: P1 Dental Photography, p.22 ↩
-
Original PDF page 23: P1 Dental Photography, p.23 ↩
-
Original PDF page 24: P1 Dental Photography, p.24 ↩
-
Original PDF page 25: P1 Dental Photography, p.25 ↩
-
Original PDF page 26: P1 Dental Photography, p.26 ↩
-
Original PDF page 27: P1 Dental Photography, p.27 ↩
-
Original PDF page 28: P1 Dental Photography, p.28 ↩
-
Original PDF page 29: P1 Dental Photography, p.29 ↩
-
Original PDF page 30: P1 Dental Photography, p.30 ↩
-
Original PDF page 32: P1 Dental Photography, p.32 ↩
-
Original PDF page 34: P1 Dental Photography, p.34 ↩
-
Original PDF page 31: P1 Dental Photography, p.31 ↩
-
Original PDF page 35: P1 Dental Photography, p.35 ↩
-
Original PDF page 36: P1 Dental Photography, p.36 ↩
-
Original PDF page 37: P1 Dental Photography, p.37 ↩
-
Original PDF page 38: P1 Dental Photography, p.38 ↩
-
Original PDF page 39: P1 Dental Photography, p.39 ↩
-
Original PDF page 40: P1 Dental Photography, p.40 ↩
-
Original PDF page 41: P1 Dental Photography, p.41 ↩
-
Original PDF page 42: P1 Dental Photography, p.42 ↩
-
Original PDF page 43: P1 Dental Photography, p.43 ↩
-
Original PDF page 44: P1 Dental Photography, p.44 ↩
-
Original PDF page 45: P1 Dental Photography, p.45 ↩
-
Original PDF page 46: P1 Dental Photography, p.46 ↩
-
Original PDF page 47: P1 Dental Photography, p.47 ↩
-
Original PDF page 48: P1 Dental Photography, p.48 ↩
-
Original PDF page 49: P1 Dental Photography, p.49 ↩
-
Original PDF page 50: P1 Dental Photography, p.50 ↩
-
Original PDF page 51: P1 Dental Photography, p.51 ↩
-
Original PDF page 52: P1 Dental Photography, p.52 ↩
-
Original PDF page 53: P1 Dental Photography, p.53 ↩
-
Original PDF page 54: P1 Dental Photography, p.54 ↩
-
Original PDF page 55: P1 Dental Photography, p.55 ↩
-
Original PDF page 56: P1 Dental Photography, p.56 ↩
-
Original PDF page 57: P1 Dental Photography, p.57 ↩
-
Original PDF page 58: P1 Dental Photography, p.58 ↩
-
Original PDF page 59: P1 Dental Photography, p.59 ↩
-
Original PDF page 60: P1 Dental Photography, p.60 ↩
-
Original PDF page 61: P1 Dental Photography, p.61 ↩
-
Original PDF page 62: P1 Dental Photography, p.62 ↩
-
Original PDF page 63: P1 Dental Photography, p.63 ↩
-
Original PDF page 64: P1 Dental Photography, p.64 ↩
-
Original PDF page 65: P1 Dental Photography, p.65 ↩
-
Original PDF page 66: P1 Dental Photography, p.66 ↩
-
Original PDF page 67: P1 Dental Photography, p.67 ↩
-
Original PDF page 68: P1 Dental Photography, p.68 ↩
-
Original PDF page 69: P1 Dental Photography, p.69 ↩
-
Original PDF page 70: P1 Dental Photography, p.70 ↩