Clinical Workflow for Removable Partial Denture1
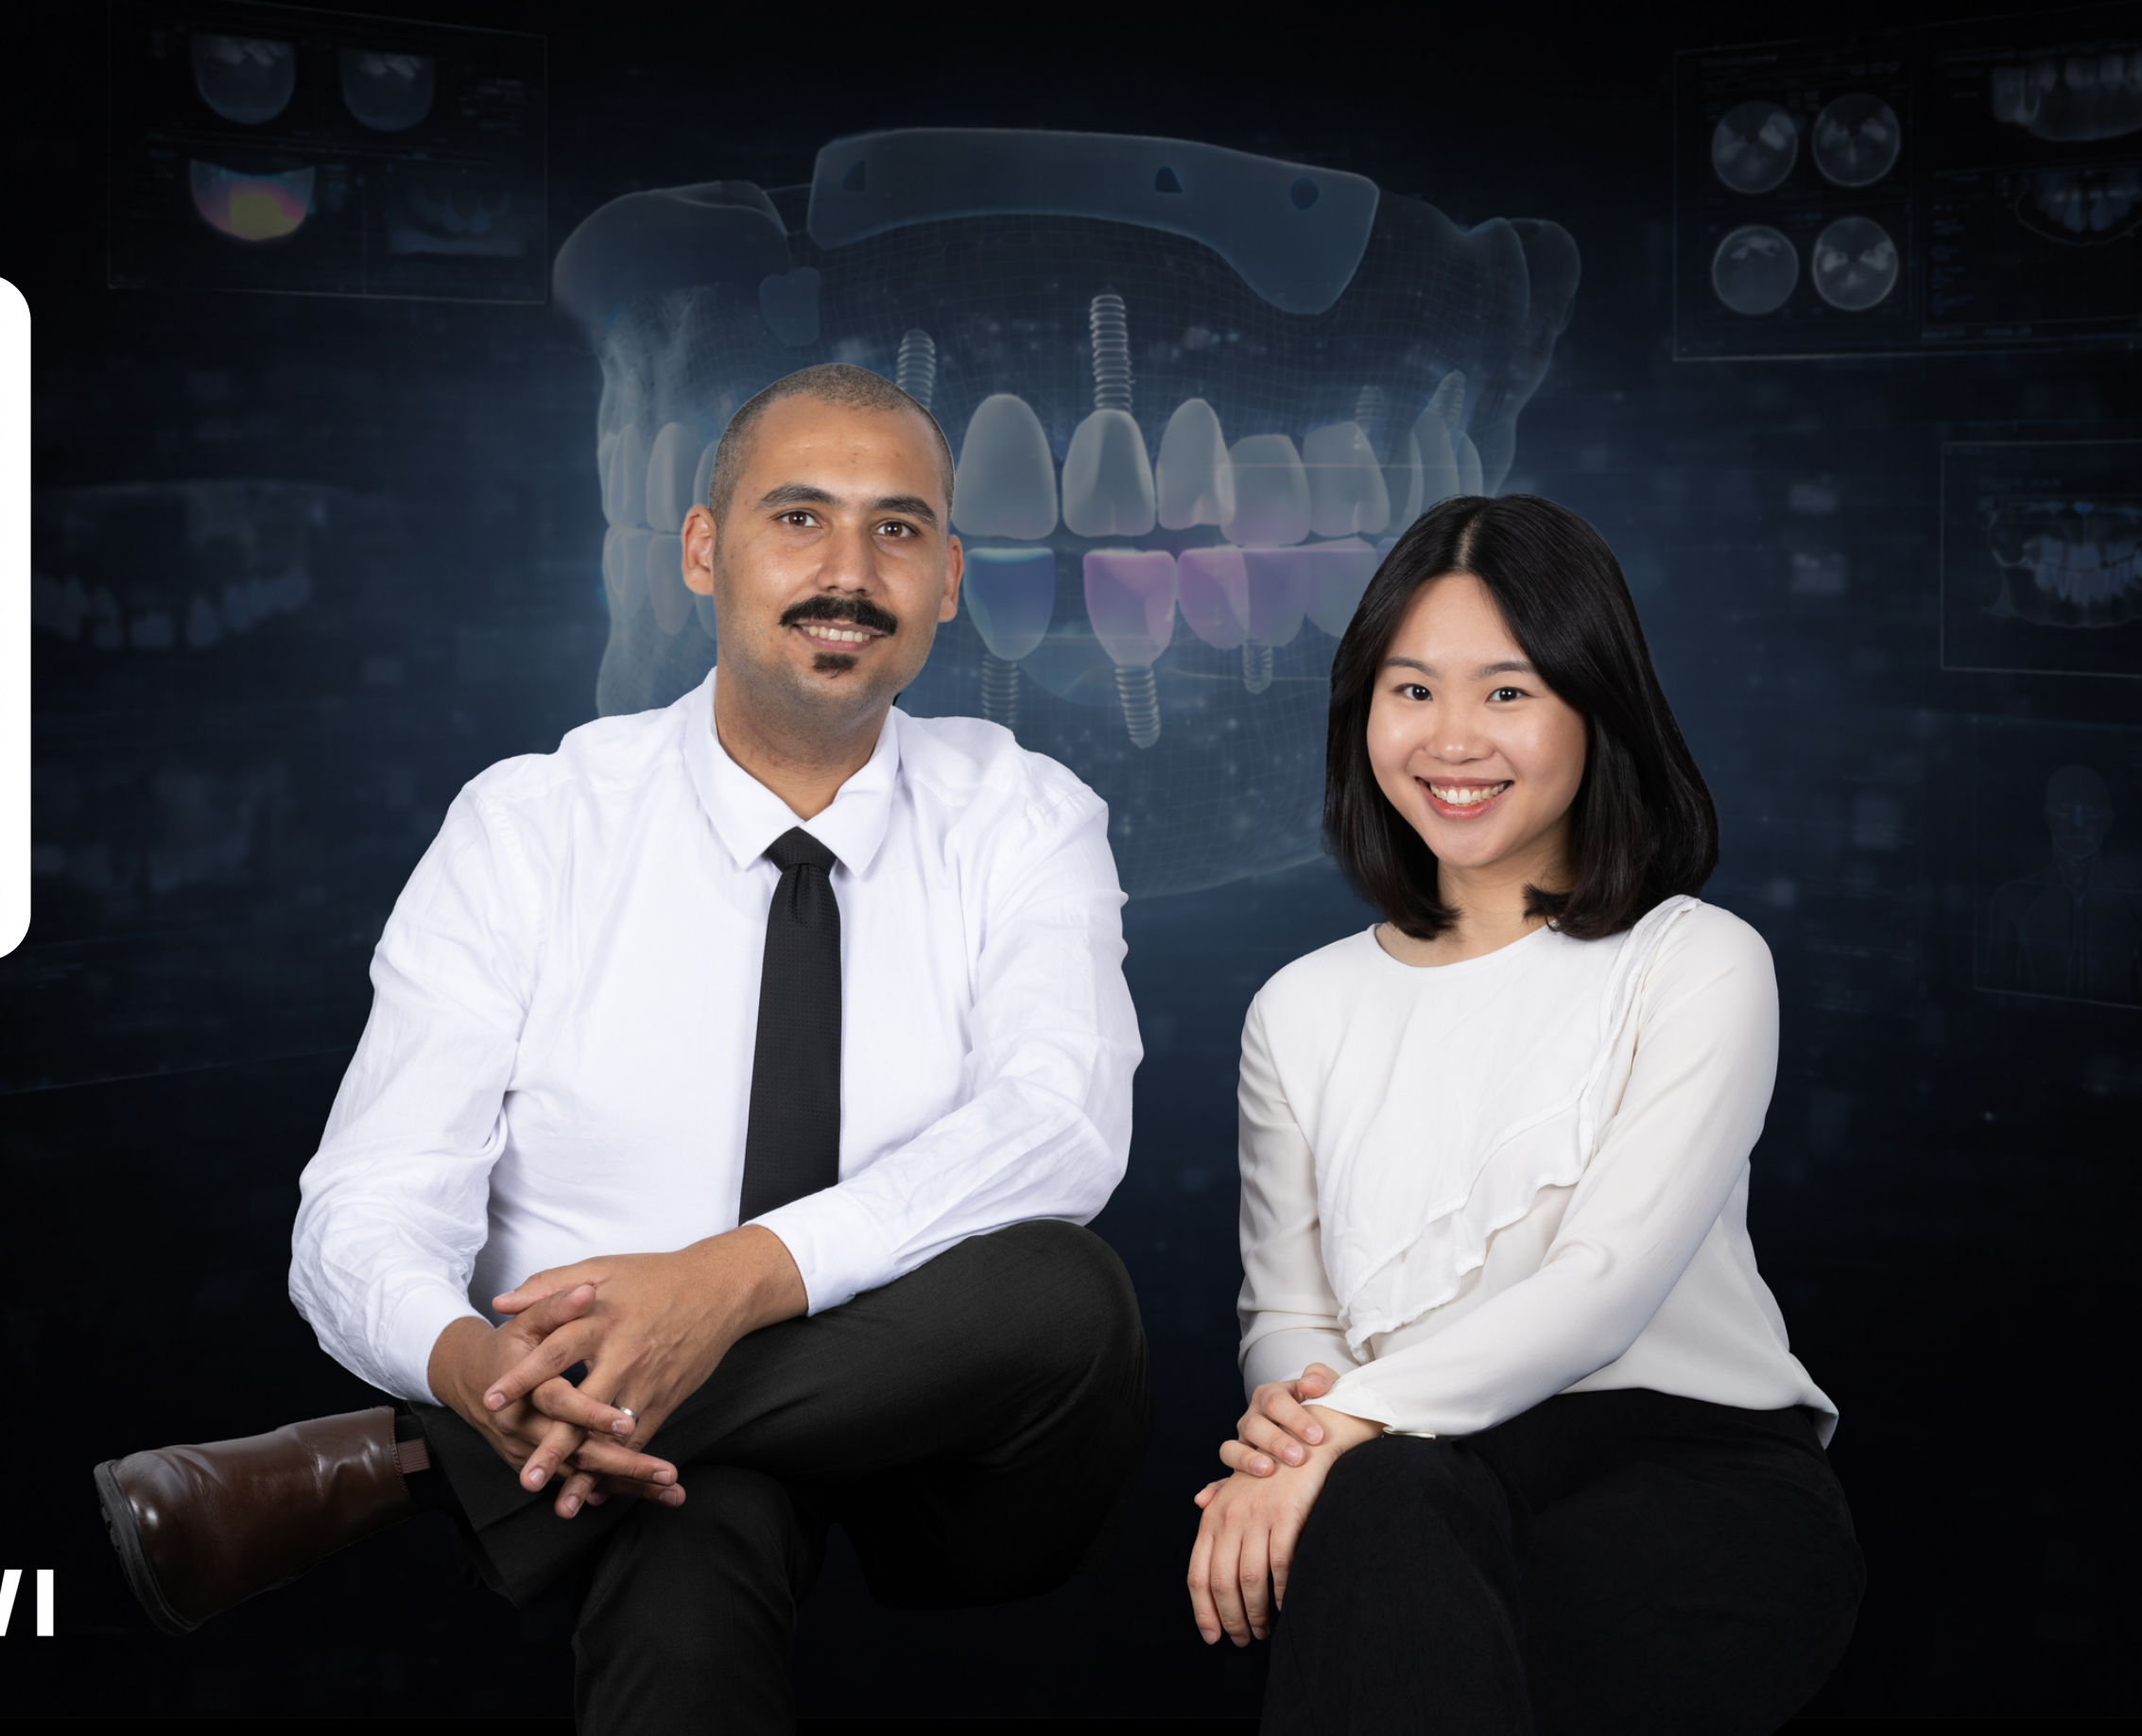
Presented by:
- Dr. Ahmad Hendawi
- Dr. Sheryl Teo
Clinical Decision Making and Patient Assessment2
Key Clinical Questions3
- Acrylic or Co-Cr?
- How do I assess the framework?
- Do I need an MMR?
- Is this impression good enough?
- Do I need a secondary impression?
- Do I border mould?
- Which impression material?
- How do I prevent my impression from getting stuck?
Acrylic vs Co-Cr?

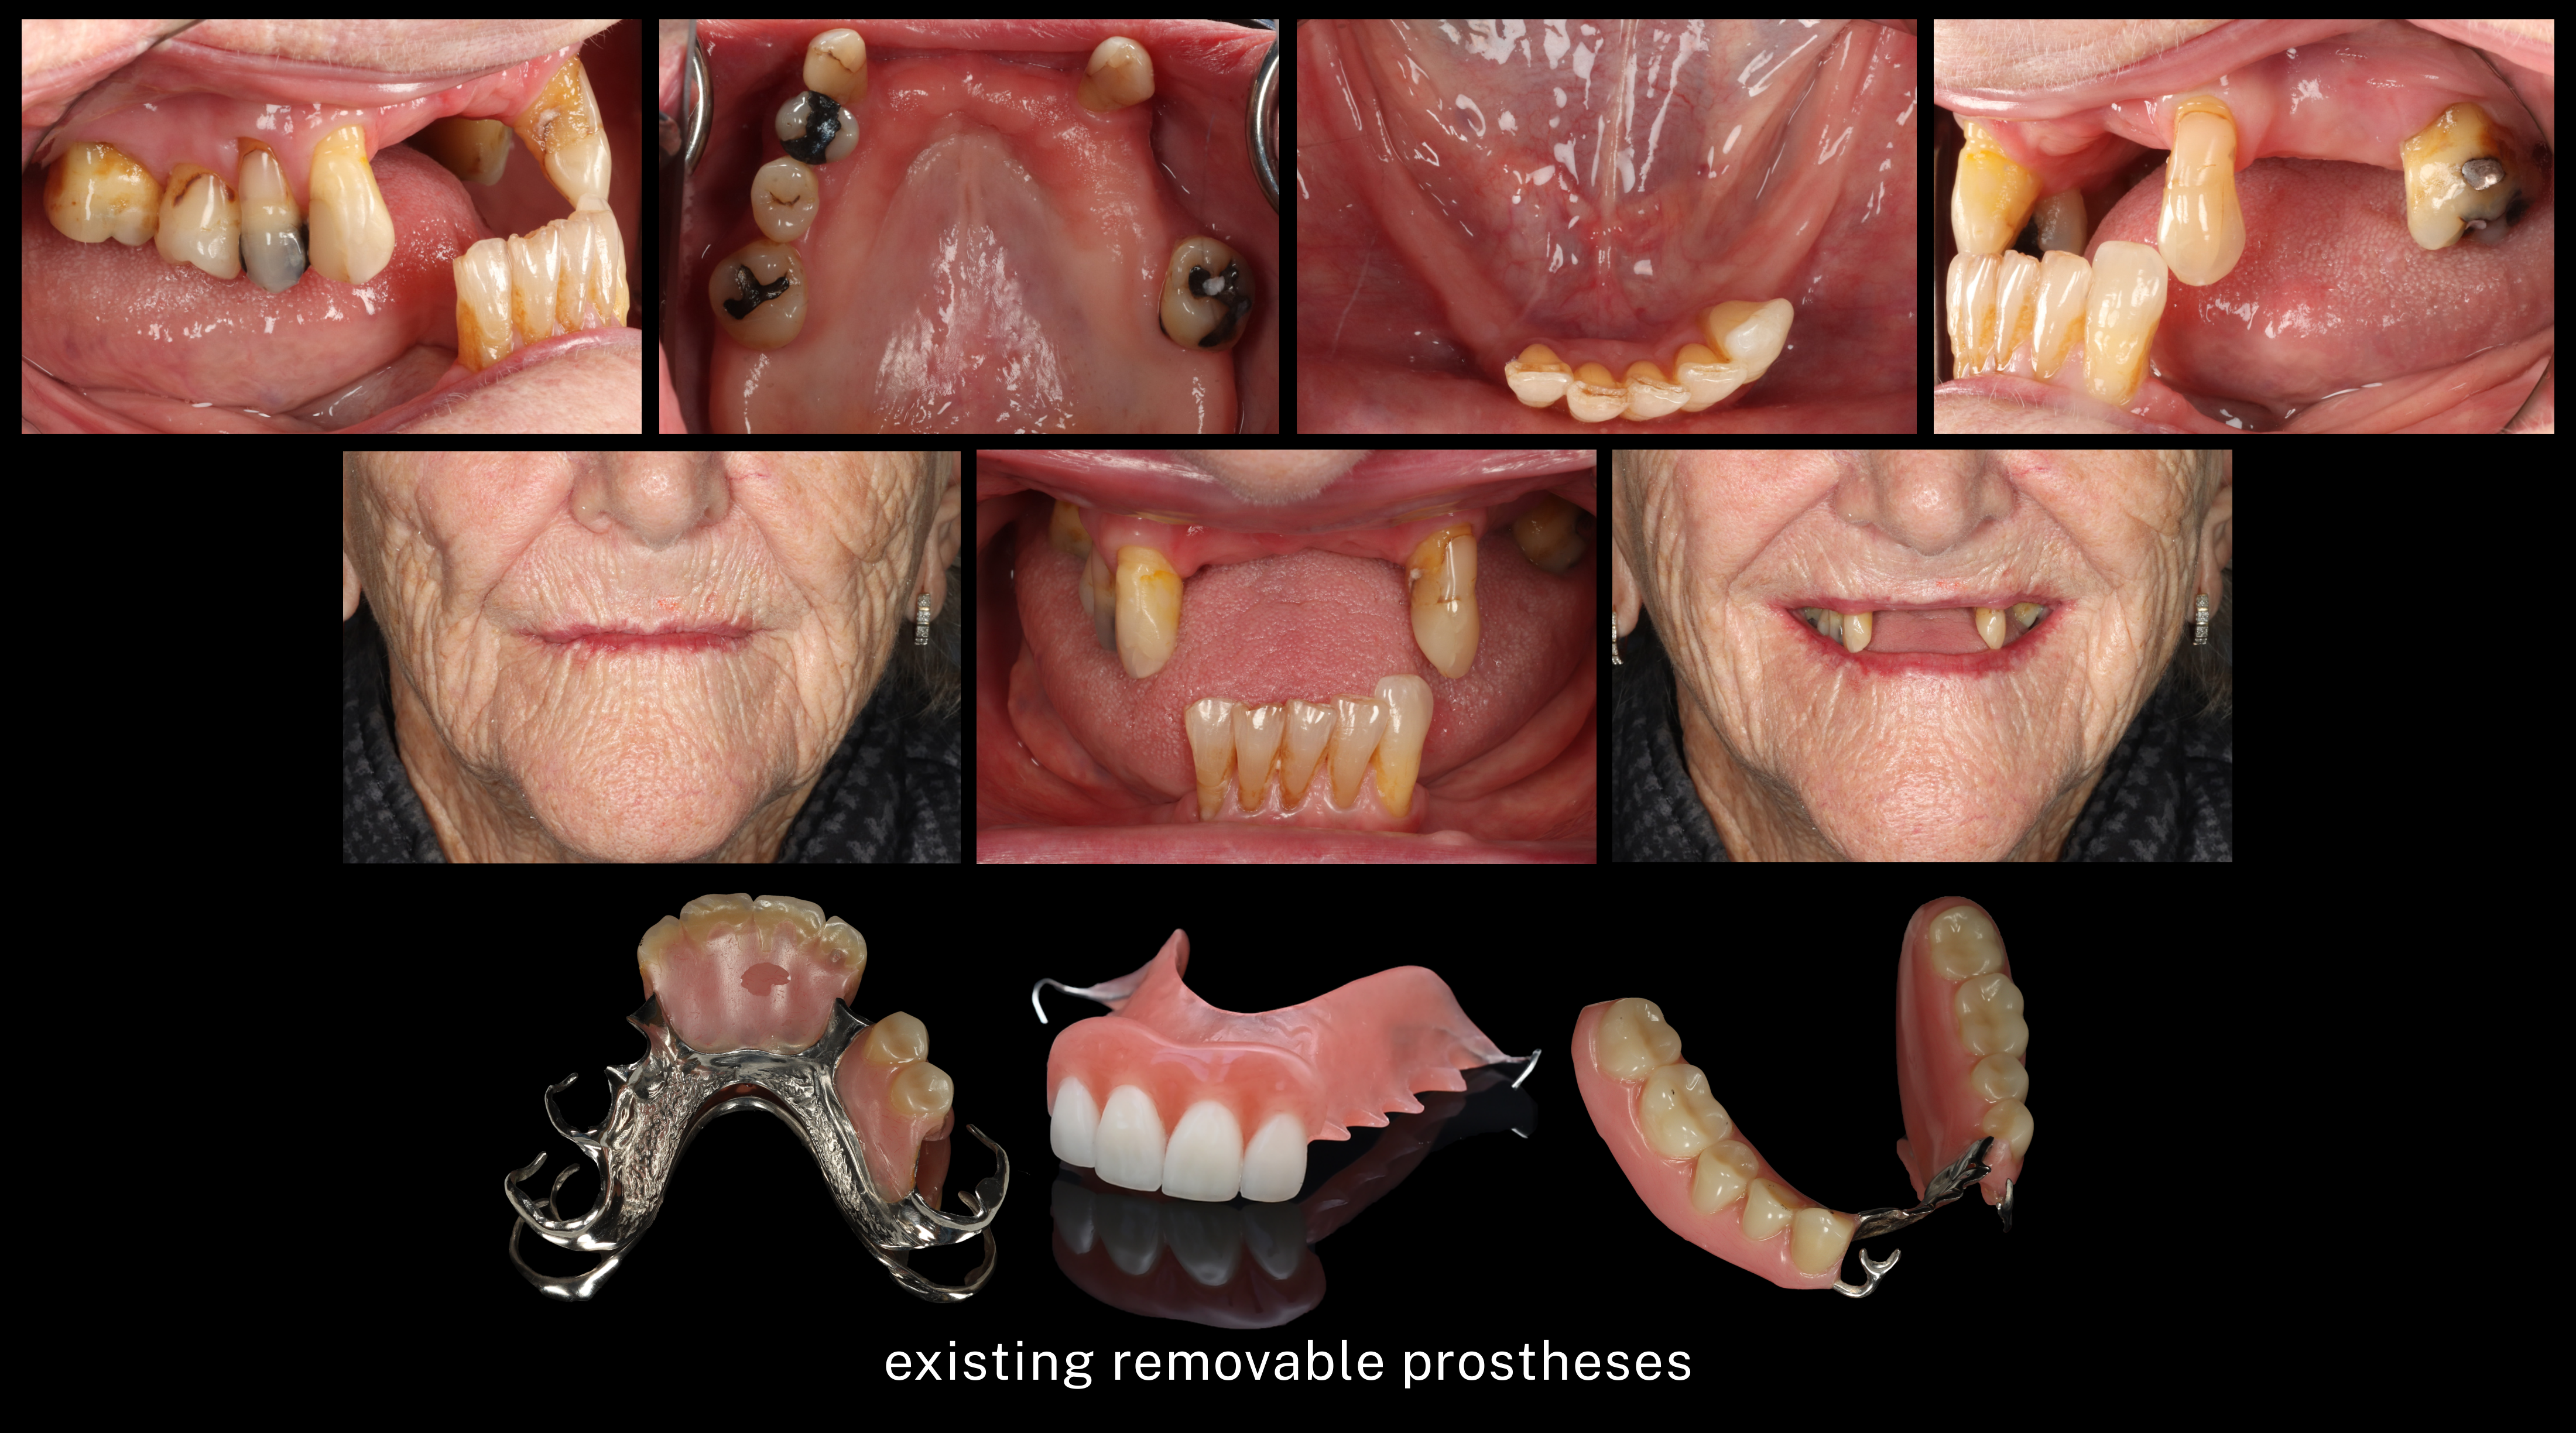
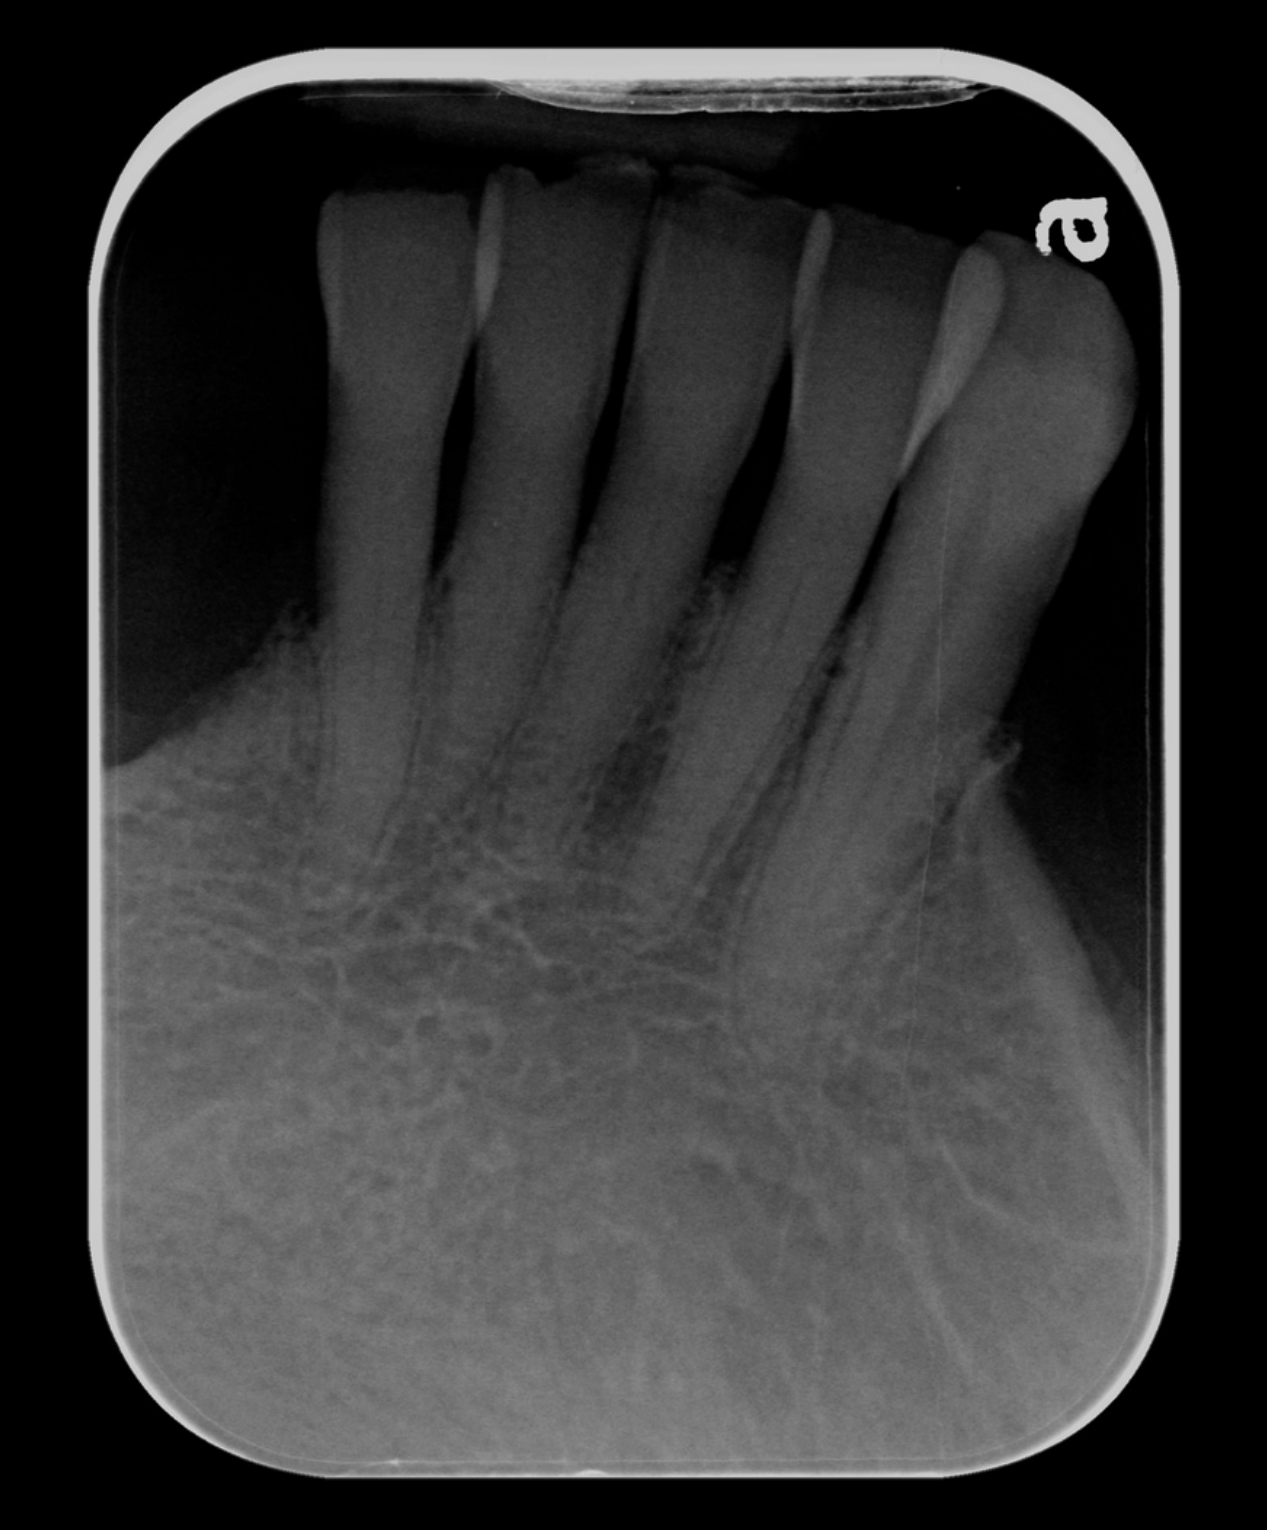
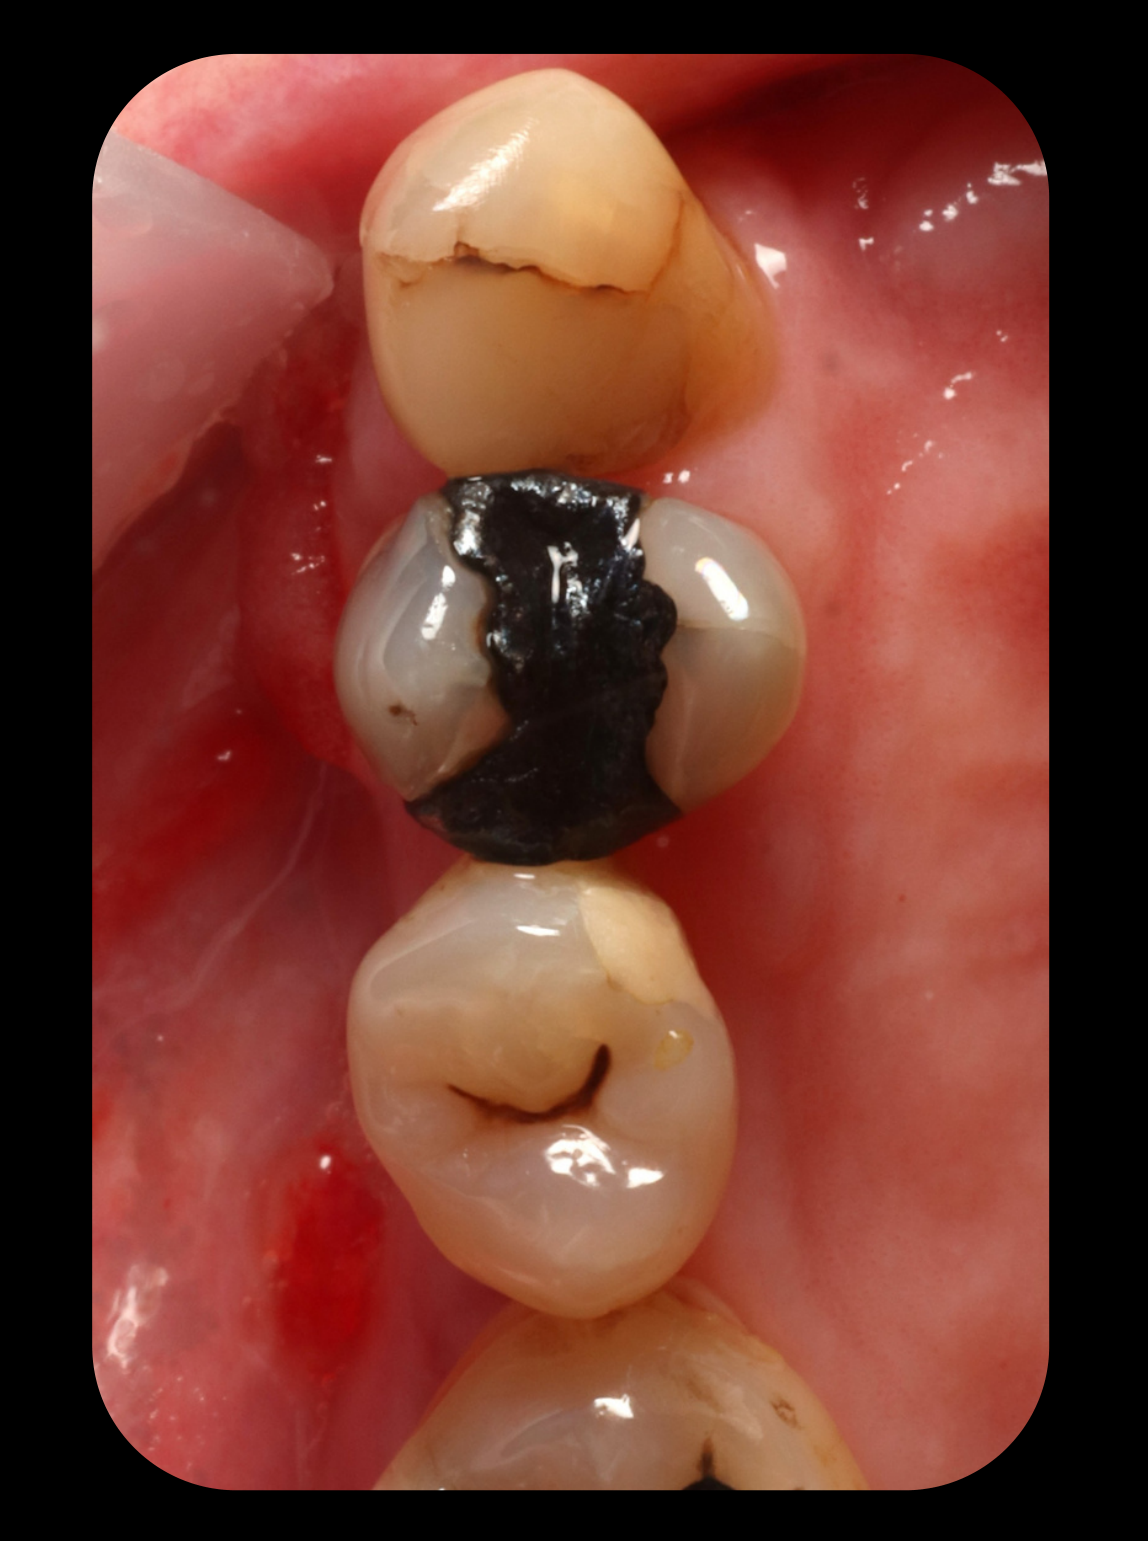
Diagnostic Evaluation and Tooth Prognosis456
Diagnose before you design
- “What denture should I make?”
- “What is happening in this mouth?”
 |  |
 |
Clinical Examination Considerations7
- Periodontal
- Restorative
- Occlusal
- Anatomical
- Functional
- Patient-related factors
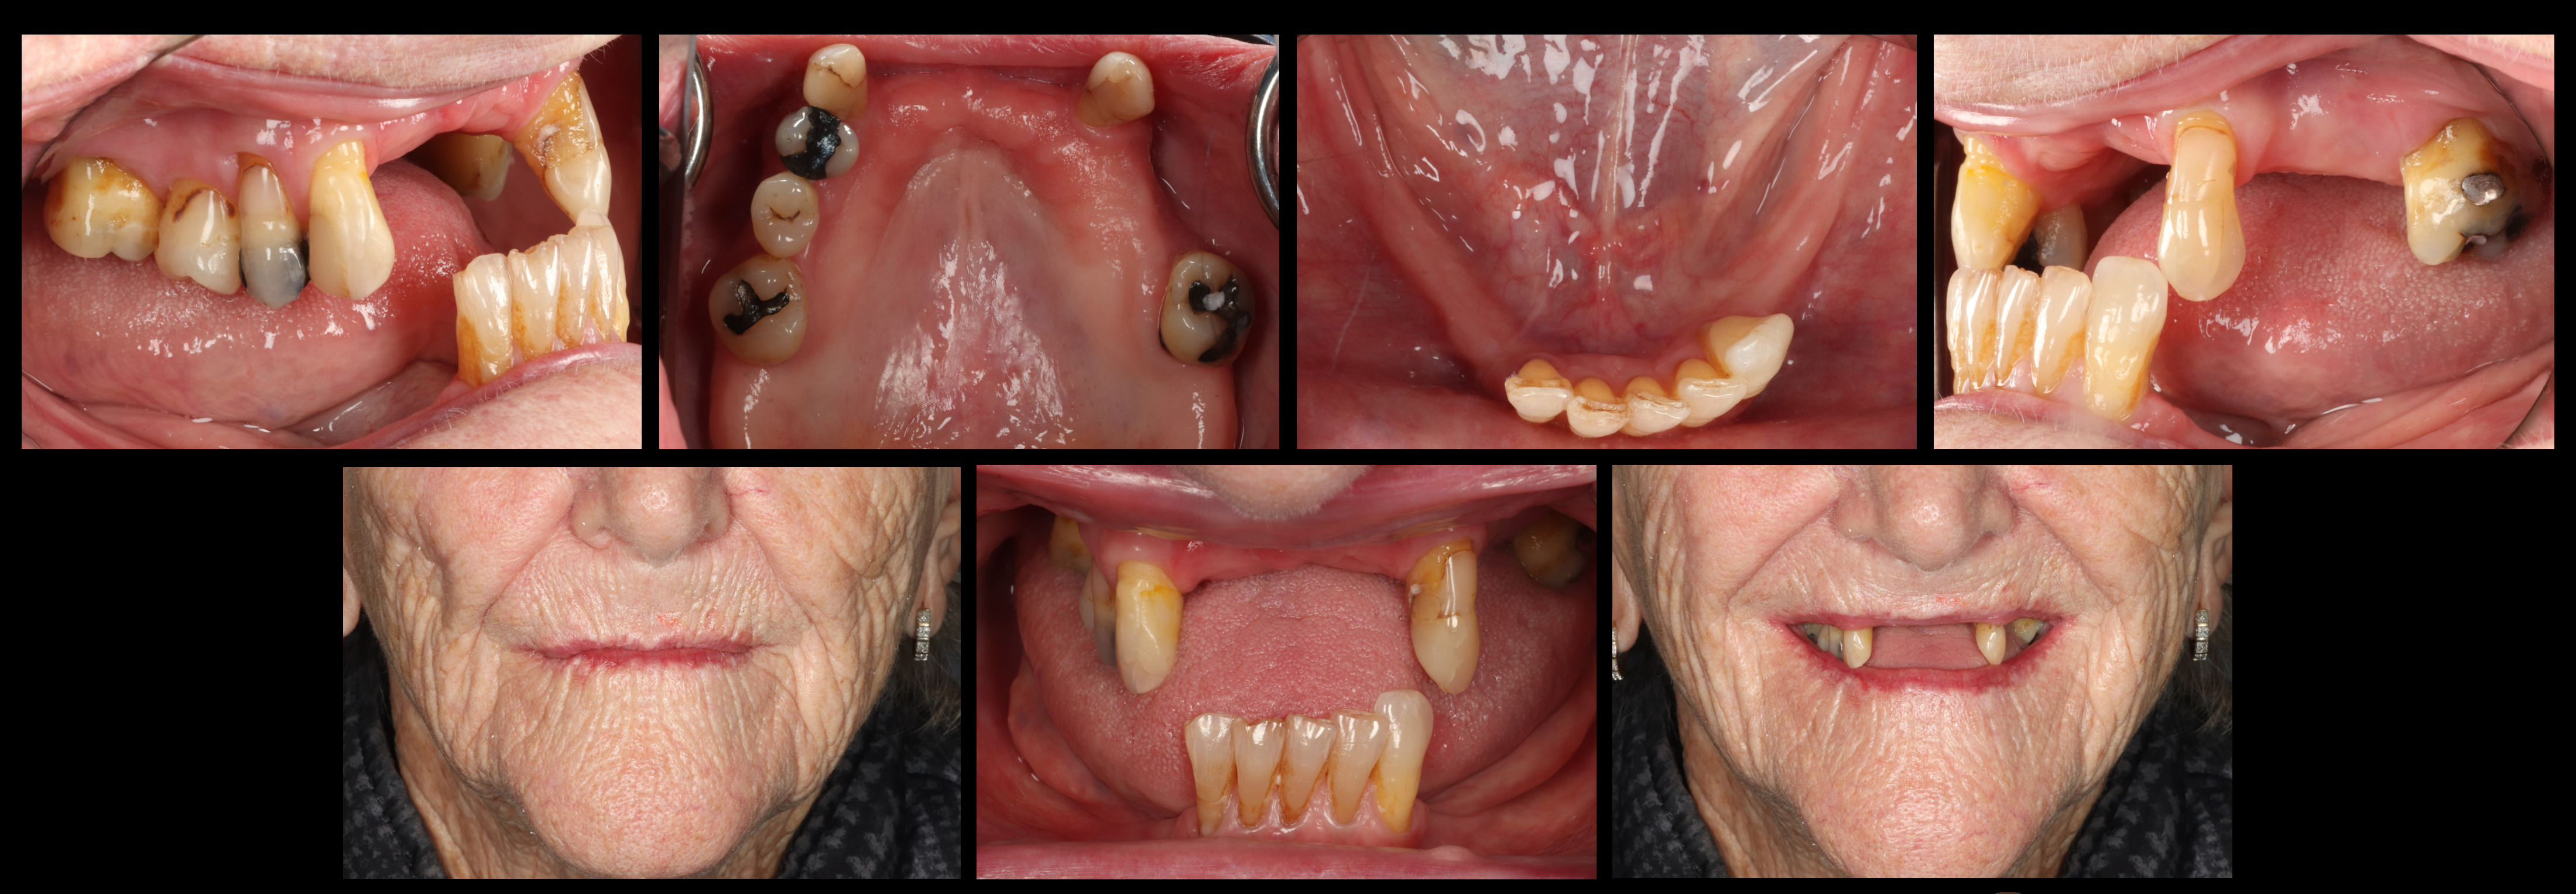
Tooth Contribution and Prognosis Assessment8
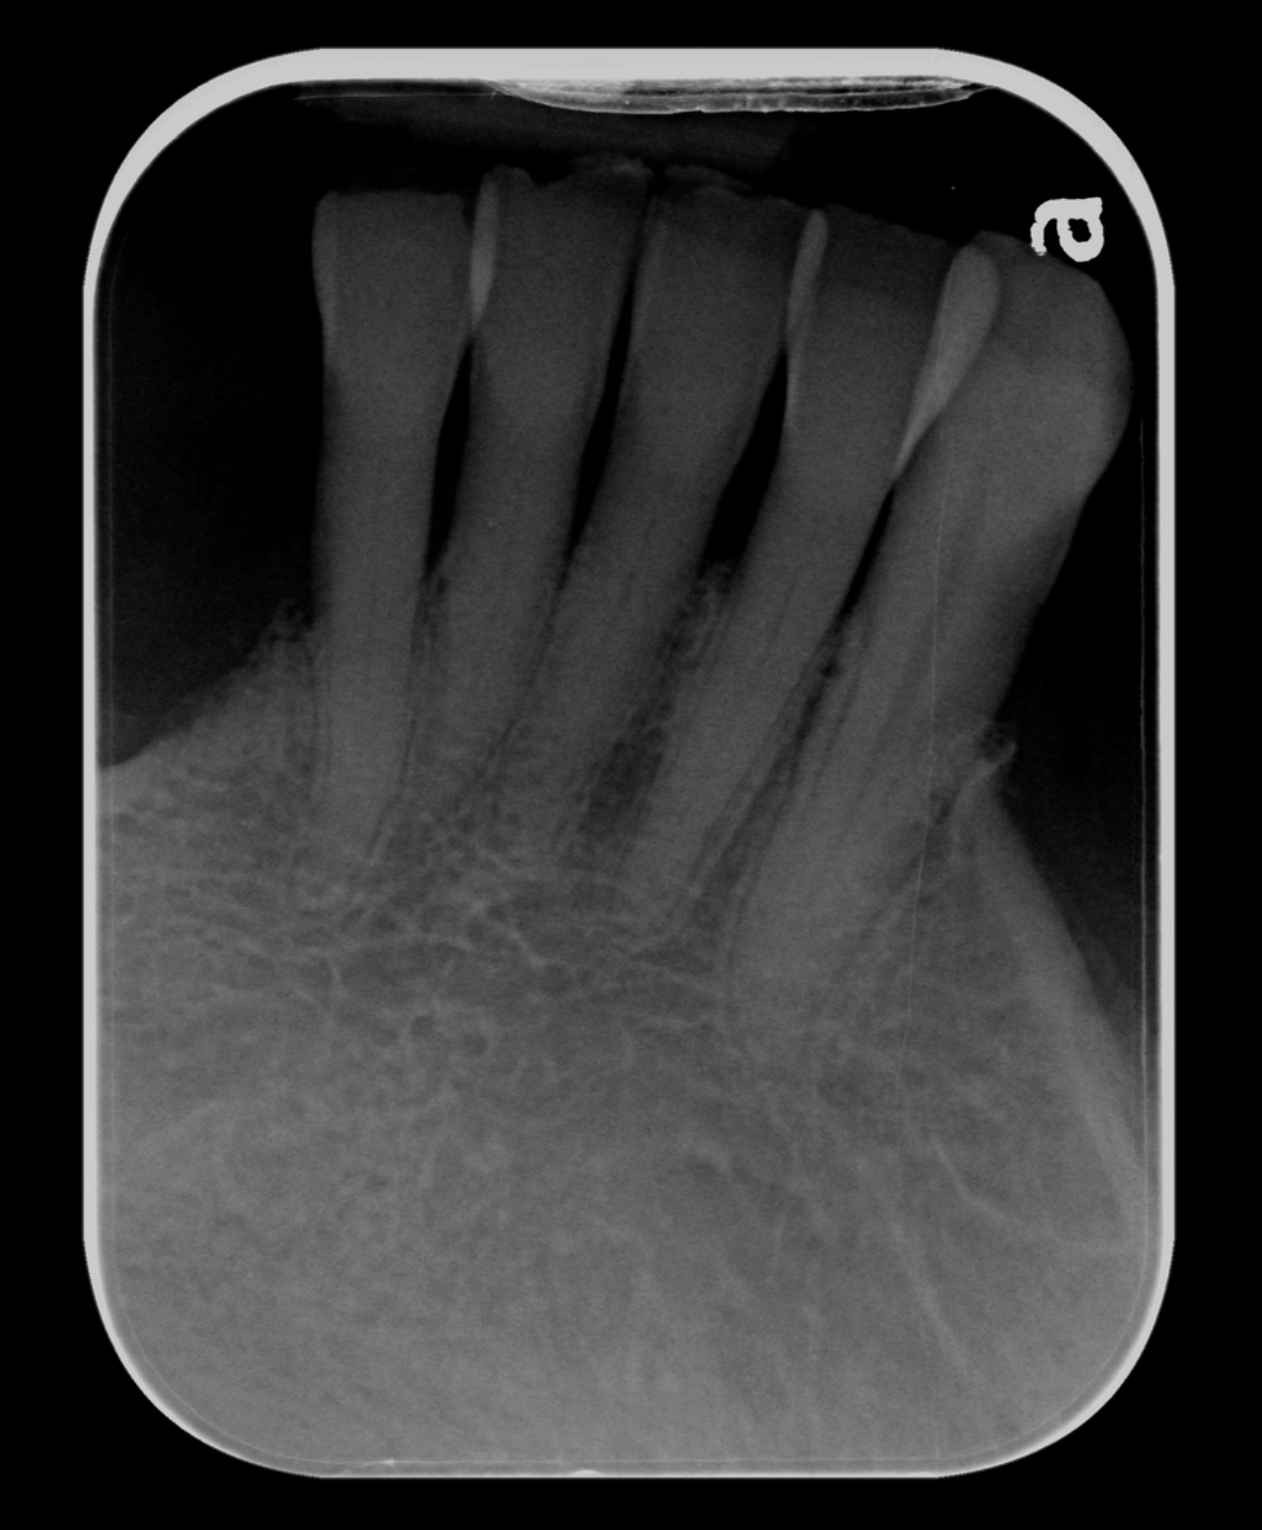
Can this tooth contribute? What is the individual and overall prognosis?
- Periodontal support
- Mobility
- Caries / restorability
- Crown & root anatomy
- Strategic position
- Cleansability
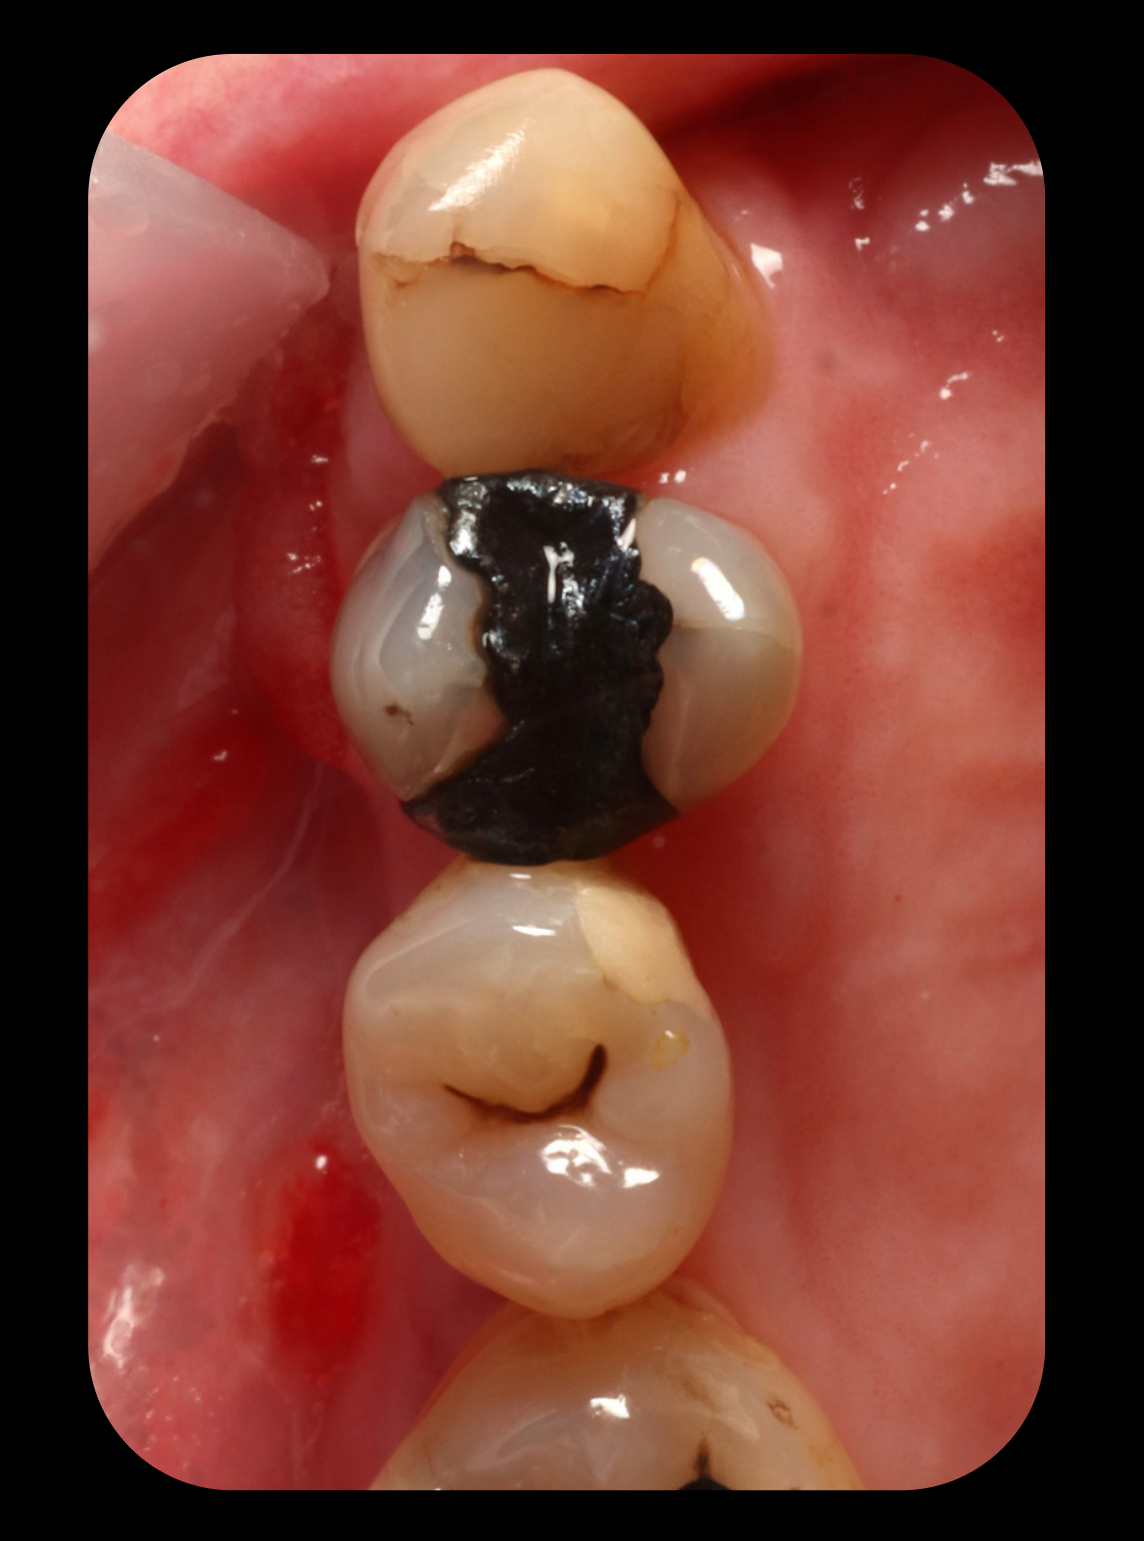
Can this tooth contribute? What is the individual and overall prognosis?
- Periodontal support
- Mobility
- Caries / restorability
- Crown & root anatomy
- Strategic position
- Cleansability
 |  |
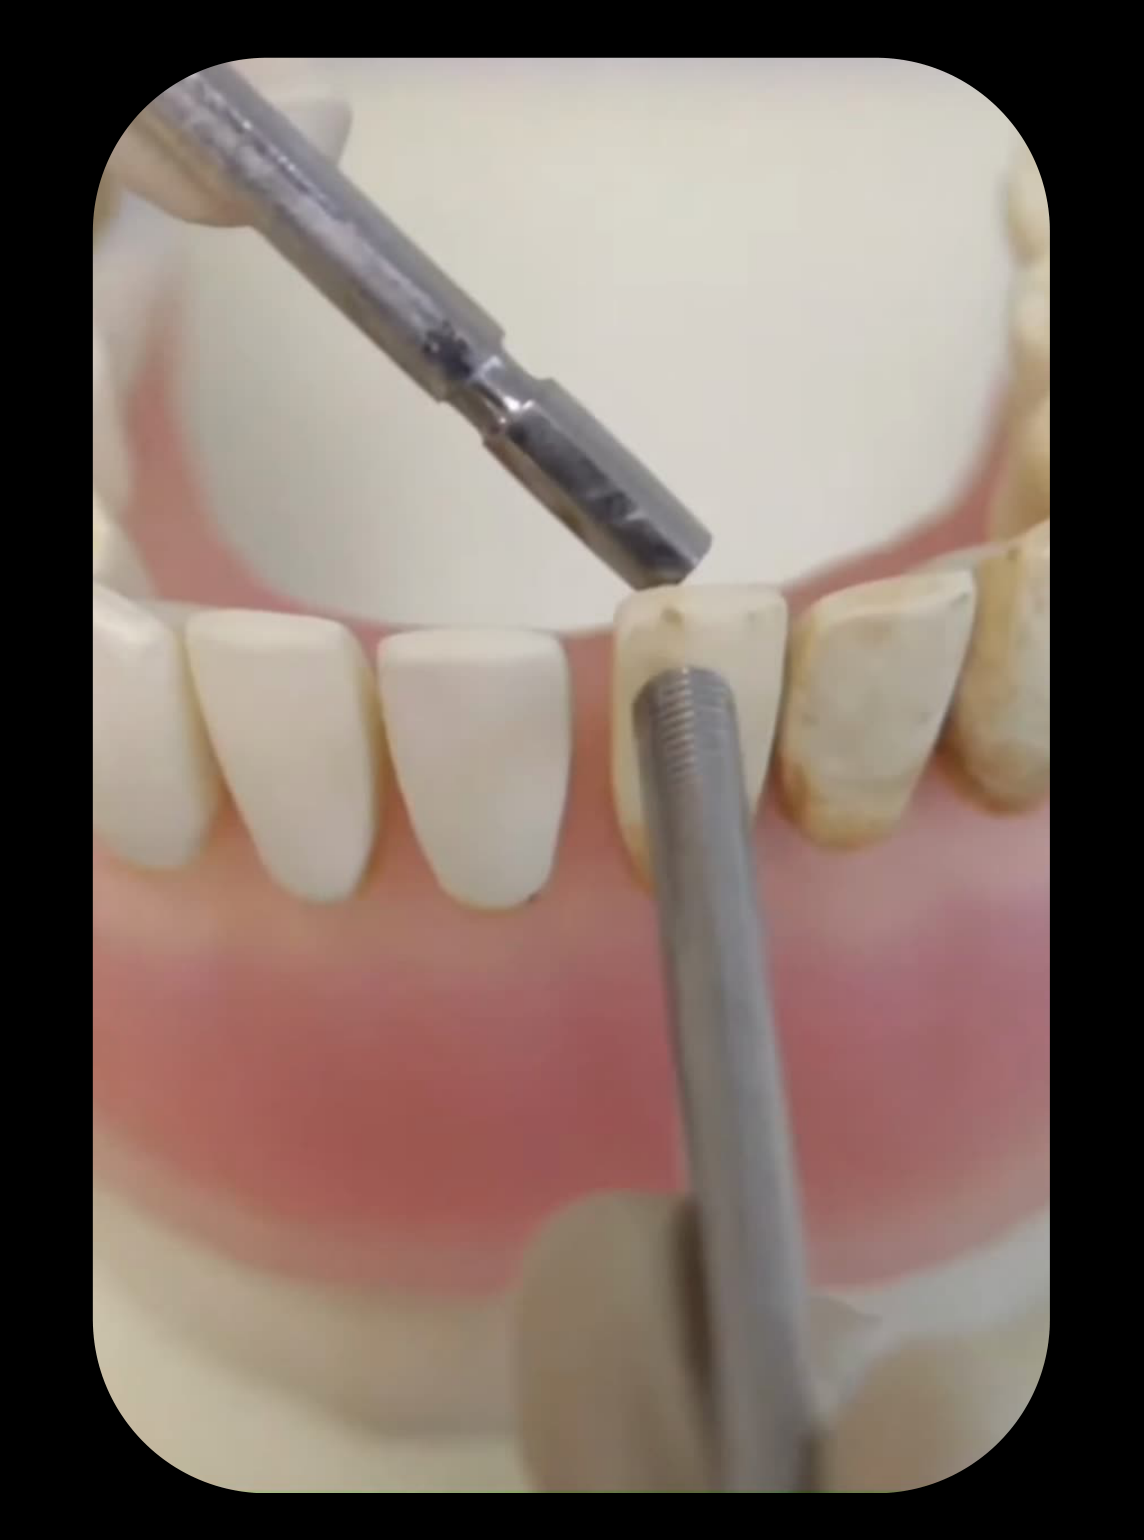
Tooth Mobility Evaluation9
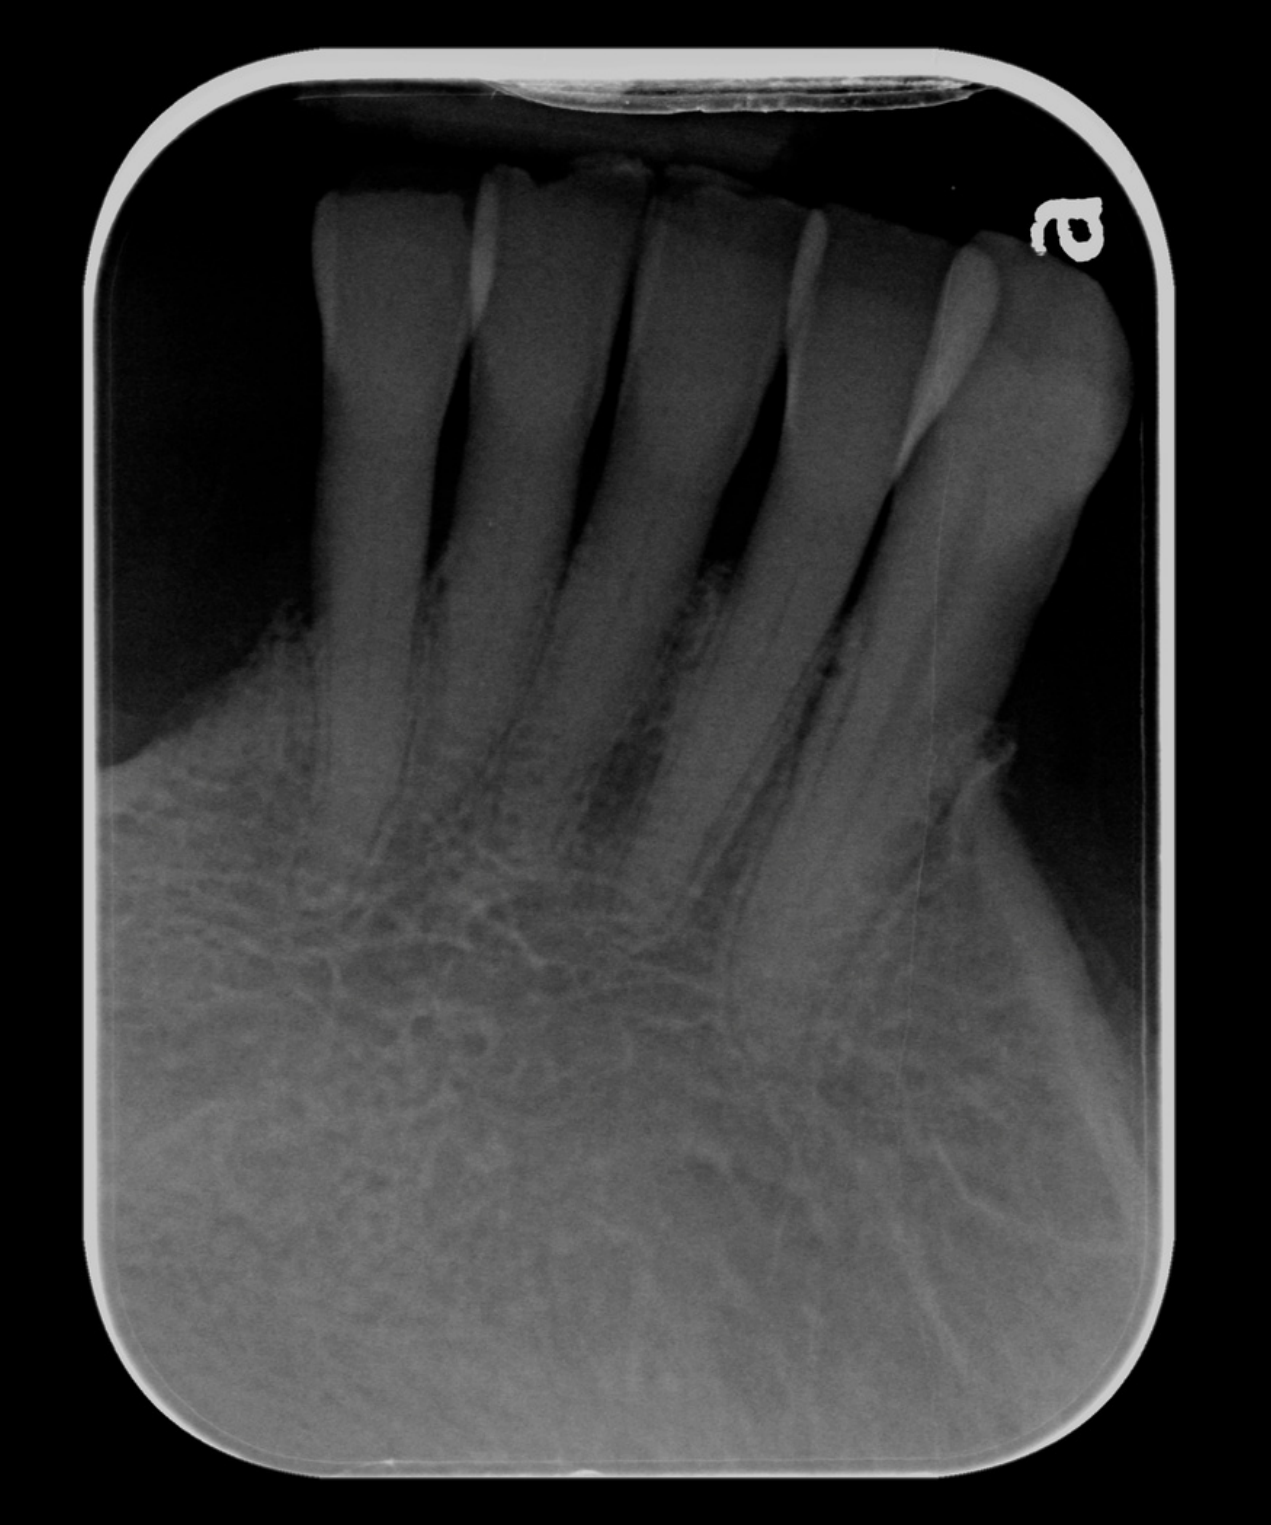
Mobility is a finding, not a prognosis!
- Why is it mobile?
- Periodontal disease
- Trauma from occlusion
- Periapical infection
- Traumatic injury
- Pathologic jaw lesion
- Is the cause controlled?
 |  |
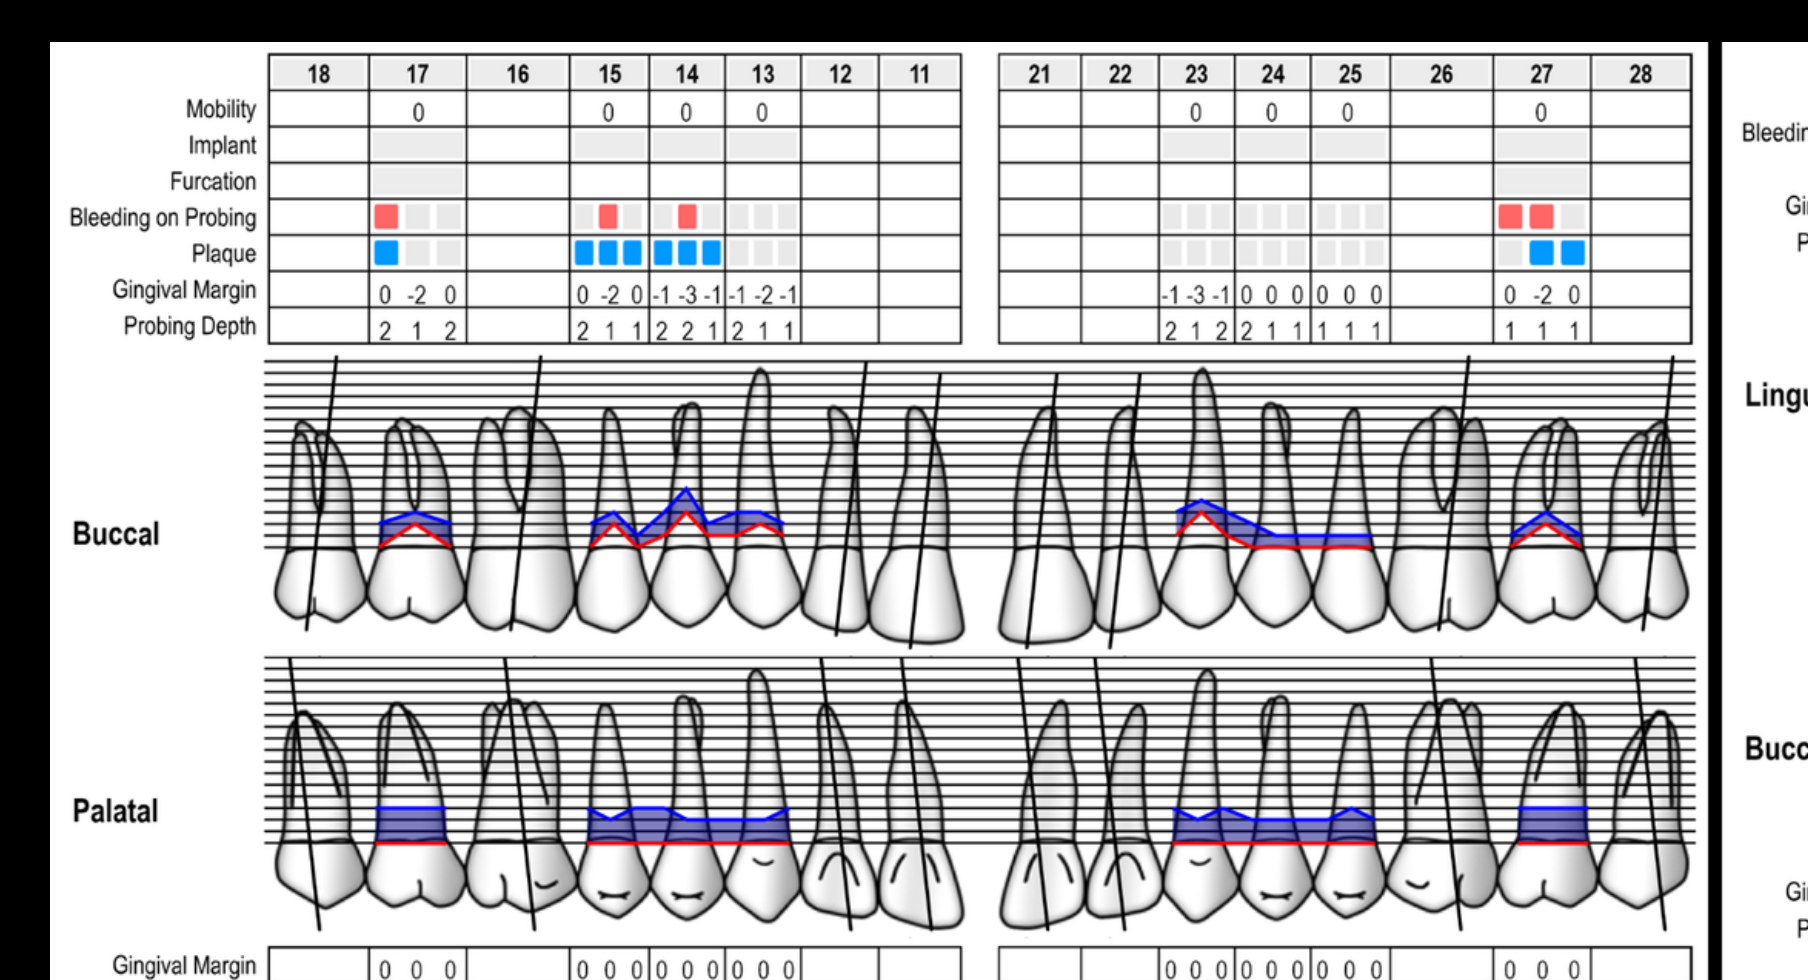
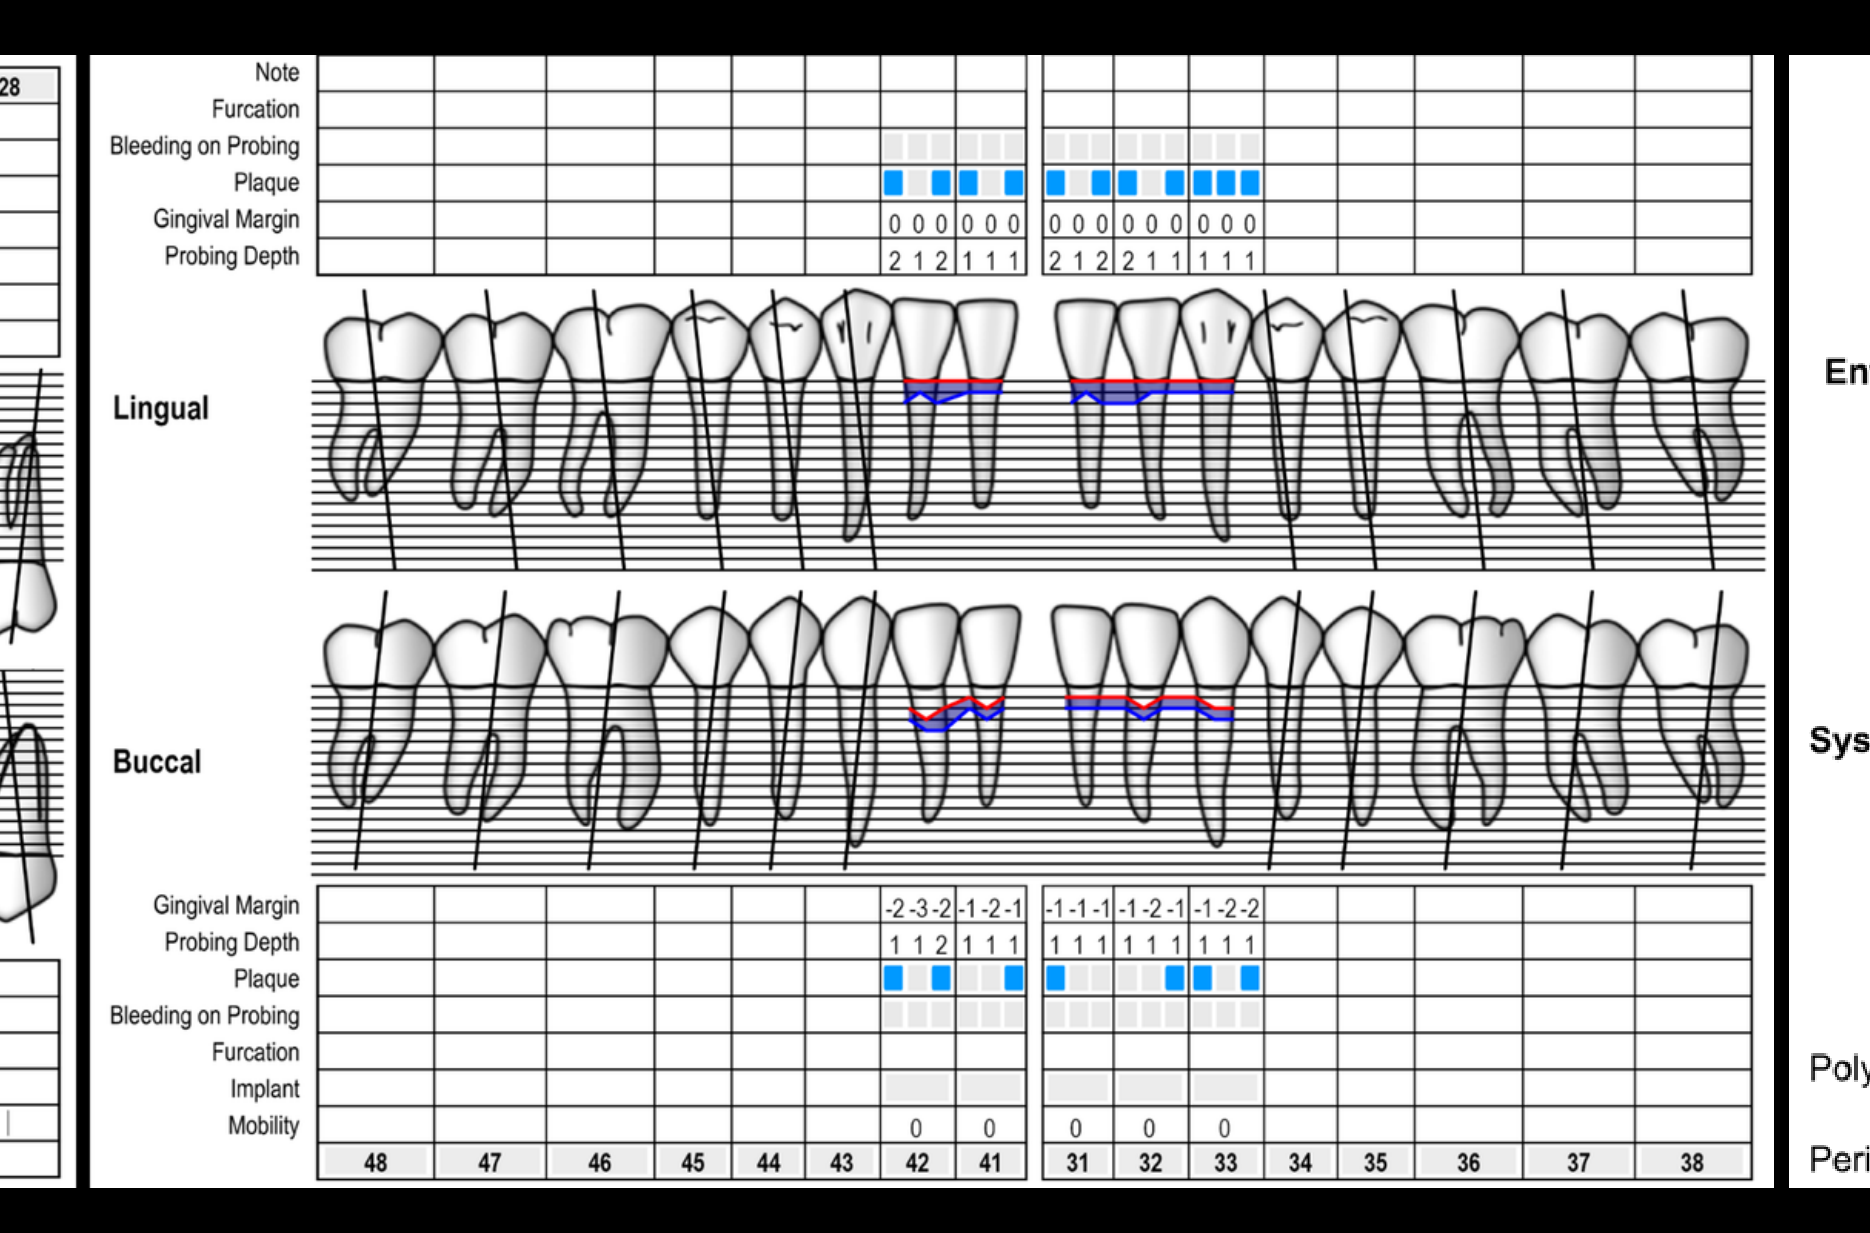
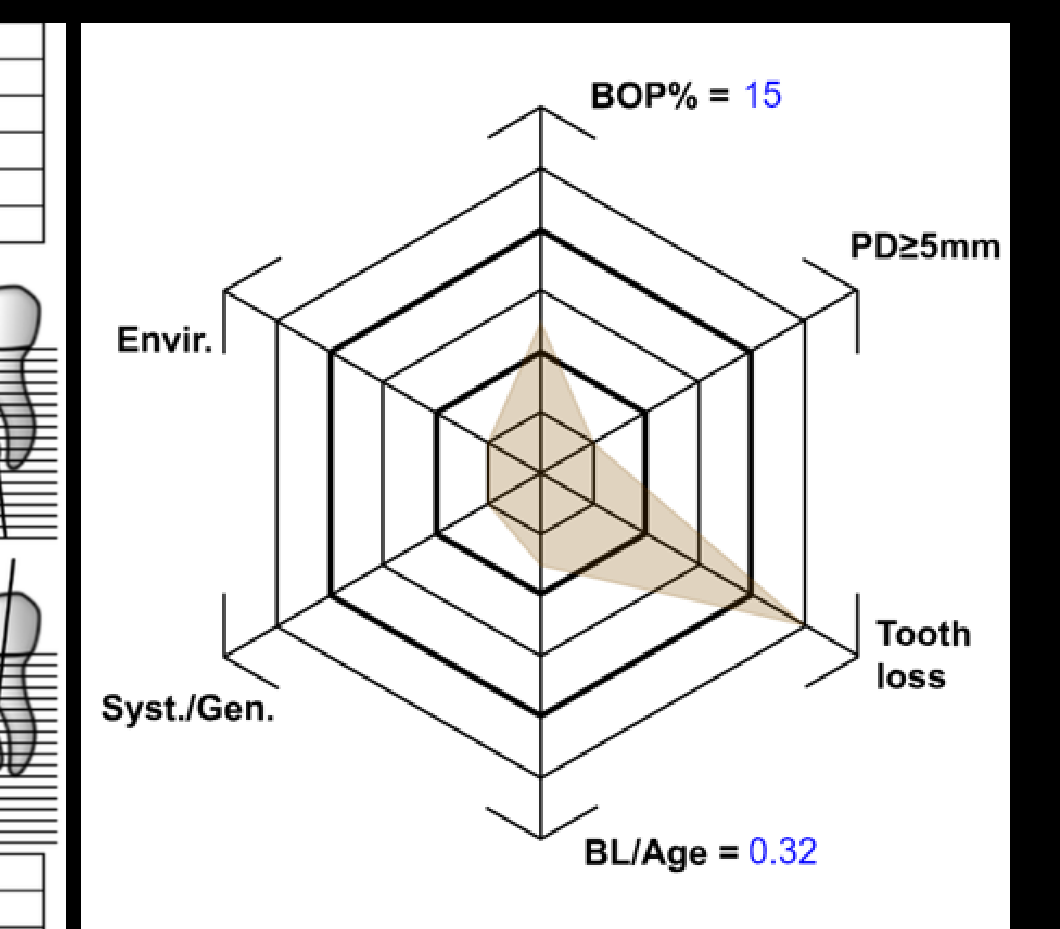
Periodontal Assessment and Staging10
Classification Framework11
Stage, grade, and current status.
 |  |
 |
Periodontitis: Staging12
Staging intends to classify the severity and extent of a patient’s disease based on the measurable amount of destroyed and/or damaged tissue as a result of periodontitis and to assess the specific factors that may attribute to the complexity of long-term case management. Initial stage should be determined using clinical attachment loss (CAL). If CAL is not available, radiographic bone loss (RBL) should be used. Tooth loss due to periodontitis may modify stage definition. One or more complexity factors may shift the stage to a higher level. See perio.org/2017wwdc for additional information.
| Severity | Stage I | Stage II | Stage III | Stage IV |
|---|---|---|---|---|
| Interdental CAL (at site of greatest loss) | 1–2 mm | 3–4 mm | ≥5 mm | ≥5 mm |
| RBL | Coronal third (<15%) | Coronal third (15%–33%) | Extending to middle third of root and beyond | Extending to middle third of root and beyond |
| Tooth loss (due to periodontitis) | No tooth loss | No tooth loss | ≤4 teeth | ≥5 teeth |
| Complexity: Local | • Max. probing depth ≤4 mm • Mostly horizontal bone loss | • Max. probing depth ≤5 mm • Mostly horizontal bone loss | In addition to Stage II complexity: • Probing depths ≥6 mm • Vertical bone loss ≥3 mm • Furcation involvement Class II or III • Moderate ridge defects | In addition to Stage III complexity: • Need for complex rehabilitation due to: – Masticatory dysfunction – Secondary occlusal trauma (tooth mobility degree ≥2) – Severe ridge defects – Bite collapse, drifting, flaring – <20 remaining teeth (10 opposing pairs) |
| Extent and distribution | For each stage, describe extent as: • Localized (<30% of teeth involved) • Generalized • Molar/incisor pattern | For each stage, describe extent as: • Localized (<30% of teeth involved) • Generalized • Molar/incisor pattern | For each stage, describe extent as: • Localized (<30% of teeth involved) • Generalized • Molar/incisor pattern | For each stage, describe extent as: • Localized (<30% of teeth involved) • Generalized • Molar/incisor pattern |
Periodontitis: Grading
Grading aims to indicate the rate of periodontitis progression, responsiveness to standard therapy, and potential impact on systemic health. Clinicians should initially assume grade B disease and seek specific evidence to shift to grade A or C. See perio.org/2017wwdc for additional information.
| Progression Criteria | Grade A: Slow Rate | Grade B: Moderate Rate | Grade C: Rapid Rate |
|---|---|---|---|
| Direct evidence of progression (RBL or CAL) | No loss over 5 years | <2 mm over 5 years | ≥2 mm over 5 years |
| Indirect evidence: % bone loss / age | <0.25 | 0.25 to 1.0 | >1.0 |
| Indirect evidence: Case phenotype | Heavy biofilm deposits with low levels of destruction | Destruction commensurate with biofilm deposits | Destruction exceeds expectations given biofilm deposits; specific clinical patterns suggestive of periods of rapid progression and/or early onset disease |
| Risk Factor: Smoking | Non-smoker | <10 cigarettes/day | ≥10 cigarettes/day |
| Risk Factor: Diabetes | Normoglycemic / no diagnosis of diabetes | HbA1c <7.0% in patients with diabetes | HbA1c ≥7.0% in patients with diabetes |
Staging intends to classify the severity and extent of a patient’s disease based on the measurable amount of destroyed and/or damaged tissue of periodontitis and to assess the specific factors that may contribute to the complexity of long-term case management.
Initial stage should be determined using clinical attachment loss (CAL). If CAL is not available, radiographic bone loss (RBL) should be used. Tooth loss due to periodontitis may modify stage definition. One or more complexity factors may shift the stage to a higher level. See perio.org/2017wwdc for additional information.
| Periodontitis | Stage I | Stage II | Stage III | Stage IV |
|---|---|---|---|---|
| Interdental CAL (at site of greatest loss) | 1–2 mm | 3–4 mm | ≥5 mm | ≥5 mm |
| RBL | Coronal third (<15%) | Coronal third (15%–33%) | Extending to middle third of root and beyond | Extending to apical third of and beyond root apex |
| Tooth loss (due to periodontitis) | No tooth loss | A = Total arch of individual |
Complexity: Local
- Stage I/II:
- Max. probing depth <4 mm
- Mostly horizontal bone loss
- In addition to Stage II:
- Max. probing depths
- Combined horizontal and vertical bone loss
- Ridge defects
- In addition to Stage III:
- Class II or III furcation
- Moderate ridge defects
- Bite collapse
- <20 teeth remaining (10 opposing)
Extent and Distribution
Add to stage as descriptor. For each stage, describe extent as:
- Localized (<30% of teeth involved)
- Generalized
- Molar/incisor pattern
Grading intends to classify the rate of periodontitis progression, responsiveness to standard therapy, and potential impact on systemic health.
Initially, one should assume Grade B disease and seek specific evidence to shift to Grade A or C. See perio.org/2017wwdc for additional information.
| Progression Factor | Grade A: Slow Rate | Grade B: Moderate Rate | Grade C: Rapid Rate |
|---|---|---|---|
| Radiographically accelerated | <2 mm over 5 years | 2–3 mm over 5 years | ≥3 mm over 5 years |
| % bone loss / age | — | Consistent with low risk | — |
| Smoking | Non-smoker | <10 cigarettes/day | ≥10 cigarettes/day |
| Diabetes | Normoglycemic / no history of Diabetes | HbA1c <7.0% in patients with Diabetes | HbA1c ≥7.0% in patients with Diabetes |
Periodontitis: Staging Overview13
Staging intends to classify the severity and extent of a patient’s disease based on the measurable amount of destroyed and/or damaged tissue of periodontitis and to assess the specific factors that may attribute to the complexity of long-term case management. Initial stage should be determined using clinical attachment loss (CAL). If CAL is not available, radiographic bone loss (RBL) should be used. Tooth loss due to periodontitis may modify stage definition. One or more complexity factors may shift the stage to a higher level. See perio.org/2017wwdc for additional information.
| Severity | Stage I | Stage II | Stage III | Stage IV |
|---|---|---|---|---|
| Interdental CAL (at site of greatest loss) | 1–2 mm | 3–4 mm | ≥5 mm | ≥5 mm |
| RBL | Coronal third (<15%) | Coronal third (15%–33%) | Extending to middle third of root and beyond | Extending to middle third of root and beyond |
| Tooth loss (due to periodontitis) | Extending to >4 teeth | Extending to >4 teeth | ||
| Complexity: Local | • ≥4 mm • Mostly horizontal bone loss | • ≥4 mm • Mostly horizontal bone loss | In addition to stage II complexity: • Probing depths ≥6 mm • Vertical bone loss ≥3 mm • Furcation involvement Class II or III • Moderate ridge defects | Addition to stage III complexity: • Need for complex rehabilitation • Masticatory disorder (tooth mobility) • Bite collapse <20 mm in occlusion (10 opposing) |
| Extent and distribution | Localized (<30% of teeth involved), Generalized, or Molar/incisor pattern | Localized (<30% of teeth involved), Generalized, or Molar/incisor pattern | Localized (<30% of teeth involved), Generalized, or Molar/incisor pattern | Localized (<30% of teeth involved), Generalized, or Molar/incisor pattern |
Periodontitis: Grading Overview
Grading aims to classify the rate of progression, response to standard therapy, and potential impact on systemic health. Few data currently available to fully assess the independently verified association of marker-based periodontitis grade with rate of progression, whether evidence to shift to grade A or C. See perio.org/2017wwdc for additional case phenotypes.
| Parameter | Grade A: Slow Rate | Grade B: Moderate Rate | Grade C: Rapid Rate |
|---|---|---|---|
| Rate of progression | No loss over 5 years | <2 mm over 5 years | ≥2 mm over 5 years |
| % RBL or CAL loss | 0–25% or <0.5 | 25–50% or 0.5–1.0 | >50% or >1.0 |
| Case phenotype | Heavy biofilm deposits with low levels of destruction | Destruction commensurate with biofilm deposits | Destruction exceeds expectations given biofilm deposits; specific clinical patterns suggestive of periods of rapid progression and/or early onset disease |
| Smoking | Non-smoker | <10 cigarettes/day | ≥10 cigarettes/day |
| Diabetes | Normoglycemic / no diagnosis of diabetes | HbA1c <7.0% in patients with diabetes | HbA1c ≥7.0% in patients with diabetes |
Summary Matrix
- Staging (Calculated based on extent of destroyed or damaged tissue to assess long-term complexity):
- Stage I / II
- Stage III / IV
- Grading (Identifies rate of progression, response to standard therapy, and potential systemic impact):
- Grade A
- Grade B
- Grade C
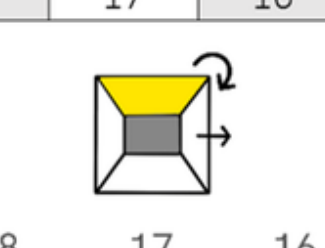
Diagnostic and Prognosis Charting14
| Assessment | 18 | 17 | 16 | 15 | 14 | 13 | 12 | 11 | 21 | 22 | 23 | 24 | 25 | 26 | 27 | 28 |
|---|---|---|---|---|---|---|---|---|---|---|---|---|---|---|---|---|
| Pros | ||||||||||||||||
| Perio | ||||||||||||||||
| Endo | ||||||||||||||||
| CO₂ | + | + | + | + | + | + | ||||||||||
| TTP | - | - | - | - | ||||||||||||
| Tooth (Maxillary) | 18 | 17 | 16 | 15 | 14 | 13 | 12 | 11 | 21 | 22 | 23 | 24 | 25 | 26 | 27 | 28 |
| Tooth (Mandibular) | 48 | 47 | 46 | 45 | 44 | 43 | 42 | 41 | 31 | 32 | 33 | 34 | 35 | 36 | 37 | 38 |
| TTP | - | - | - | - | - | |||||||||||
| CO₂ | + | + | + | + | + | |||||||||||
| Endo | ||||||||||||||||
| Perio | ||||||||||||||||
| Pros |
 |  |  |
 |  |  |
 |  |  |
 |  |  |
 |  |  |
 |  |  |
 |  |  |
 |  |  |
 |  |  |
 |  |  |
CPITN
| Sextant Scores | ||
|---|---|---|
| 2 | 2 | 2 |
| — | 2 | — |
Charting Legend
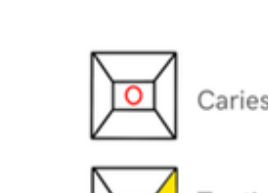
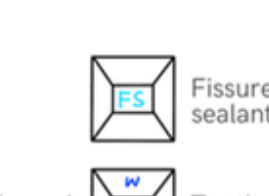
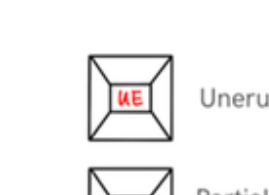
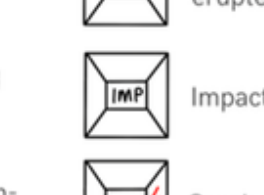
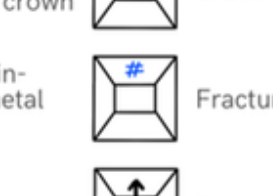
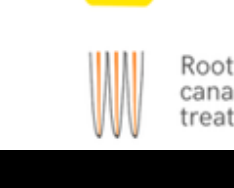
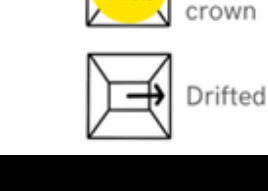
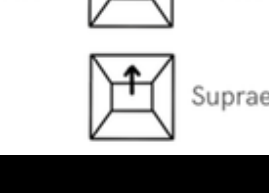
- Caries | Fissure sealant | Unerupted
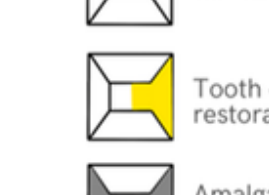
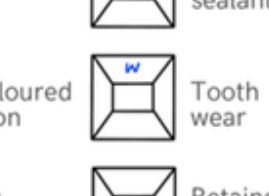
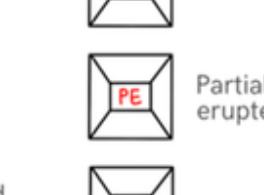
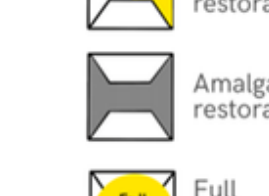
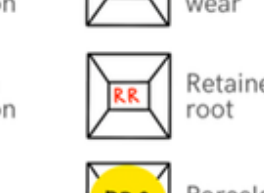
- Tooth coloured restoration | Tooth wear | Partially erupted
- Amalgam restoration | Retained root | Impacted
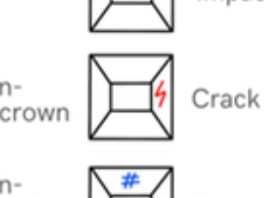
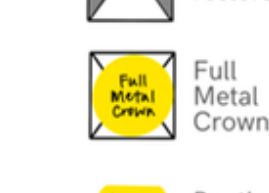
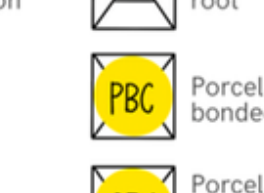
- Full Metal Crown | Porcelain-bonded crown | Crack
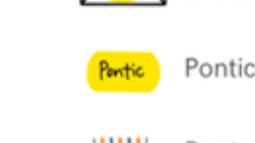
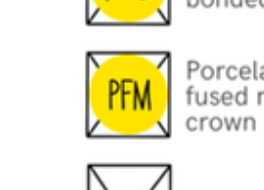
- Pontic | Porcelain-fused metal crown | Fracture
- Root canal treated | Drifted | Supraerupted
Tooth Prognoses Classification
| Prognoses | Class | Additional Factors | Symbol |
|---|---|---|---|
| Good | A | Anatomic irregularities | * |
| Fair | B | Iatrogenic compromising factors | + |
| Questionable | C | Iatrogenic compromising factors | + |
| Compromised | D | ||
| Non-salvageable | X |
Material Selection: Acrylic Versus Cobalt-Chromium1516
Acrylic vs Co-Cr?
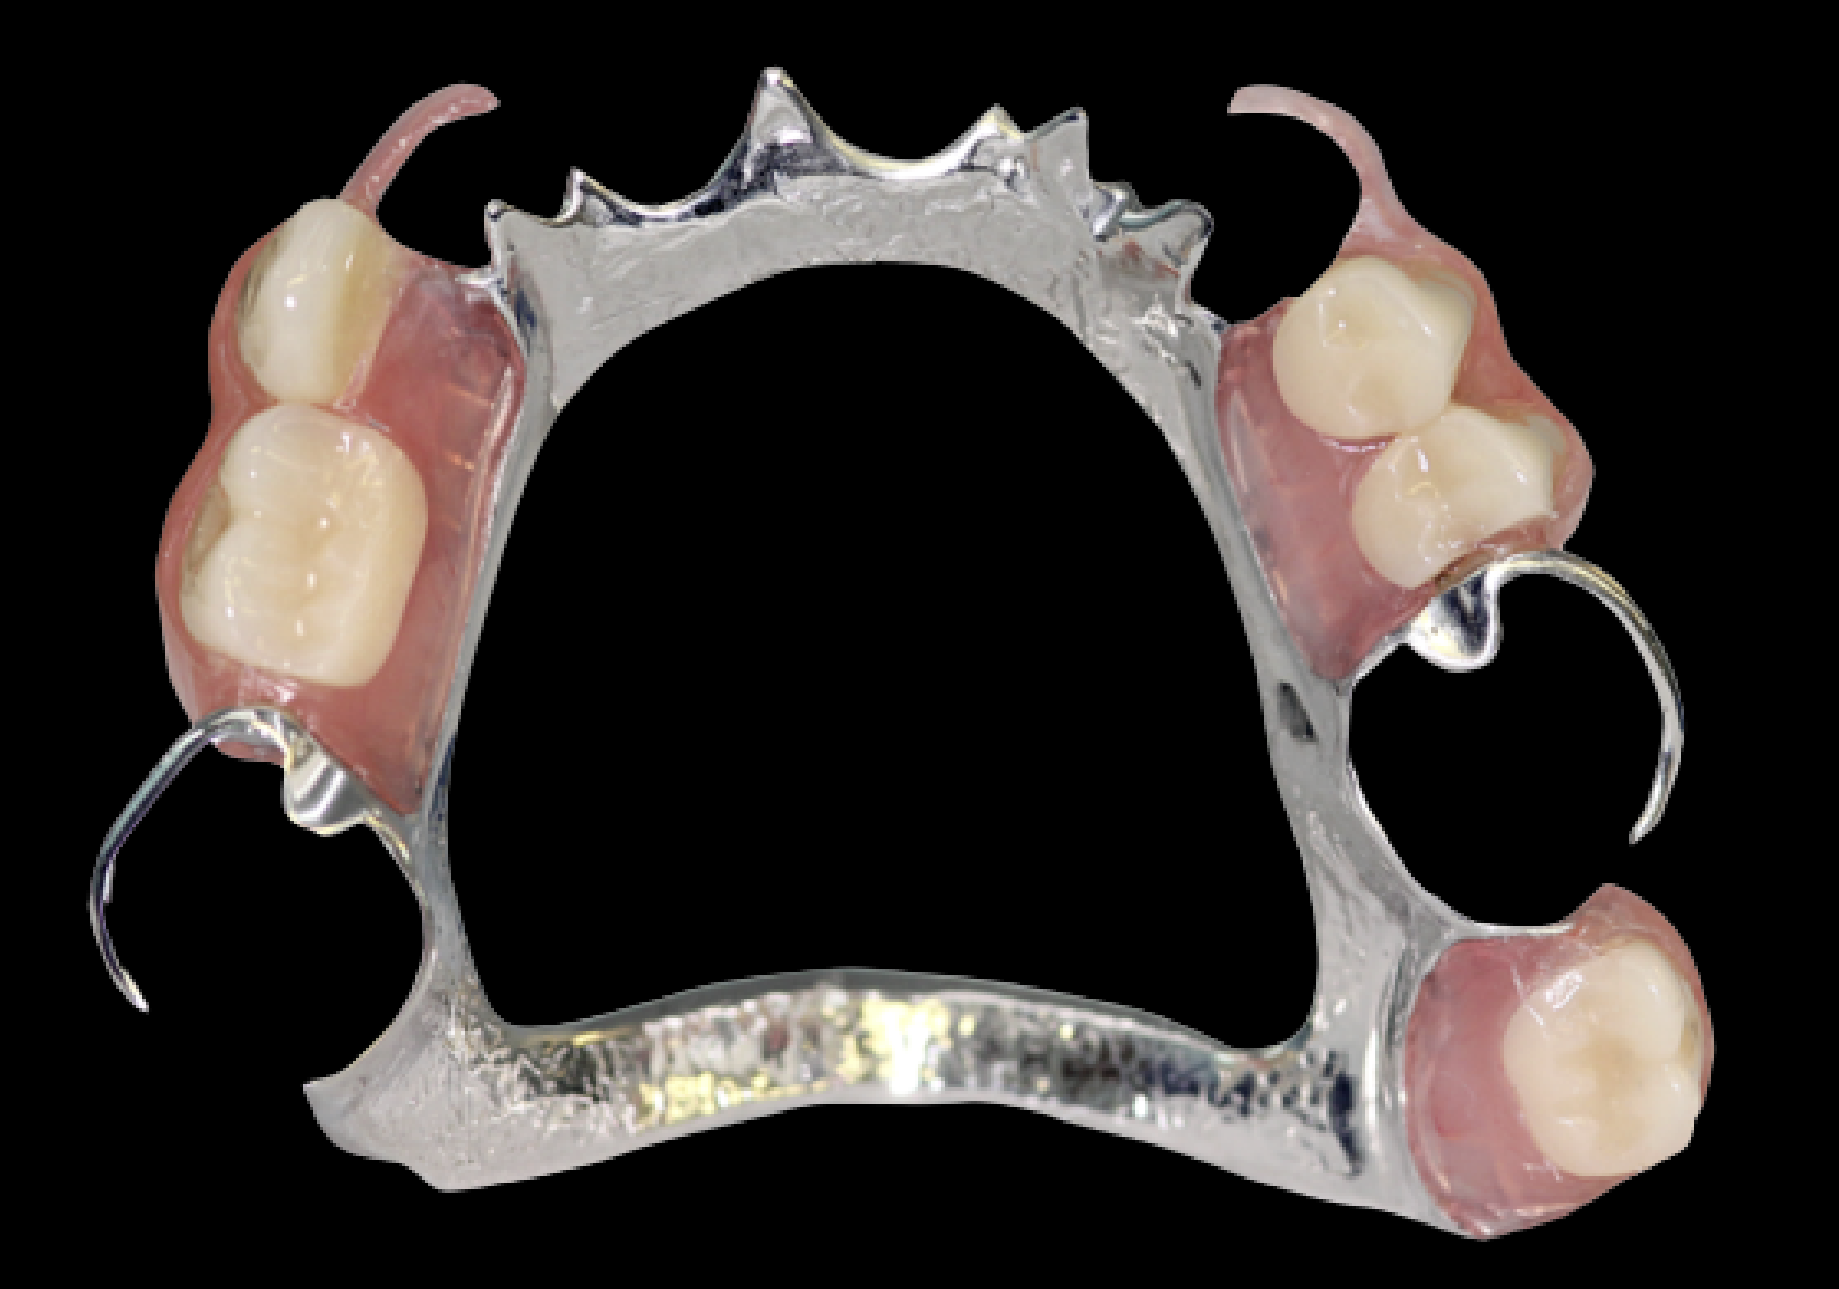
Indications for Acrylic17
- Changing dentition
- Questionable prognosis
- Future extraction likely
- Easy to modify / add teeth
- Transitional treatment
- Flexibility
Indications for Cobalt-Chromium (Co-Cr)
- Rigid
- Thin
- Less tissue coverage
- Design-controlled support & bracing
- Potentially more cleansable
- …in the right patient
Material Comparison18
- Acrylic
- Changing dentition
- Questionable prognosis
- Future extraction likely
- Easy to modify / add teeth
- Transitional treatment
- Flexibility
- Co-Cr
- Rigid
- Thin
- Less tissue coverage
- Design-controlled support & bracing
- Potentially more cleansable
- …in the right patient
The patient is part of the design.
Biology + prognosis + maintenance + cost + time + expectations = SHARED DECISION
Acrylic RPD Clinical Workflow
Patient Pathways19
One patient journey. Two pathways:
- Acrylic
- Co-Cr
Standard Procedural Steps
- Primary impression
- Preliminary articulation
- Preliminary Try-in
- Survey + design
- Special Tray
- Mouth prep
- Definitive impression
- Framework
- MMR
- Tooth try-in
- Insert
Complete Sequence (Co-Cr Pathway)20
- Primary impression
- Preliminary articulation
- Preliminary Try-in
- Survey + design
- Special Tray
- Mouth prep
- Definitive impression
- Framework
- MMR
- Tooth try-in
- Insert
 |  |
Streamlined Sequence (Acrylic Pathway)
- Primary impression → Special Tray? → Definitive impression → MMR? → Tooth try-in? → Insert
Primary Impressions and Diagnostic Planning
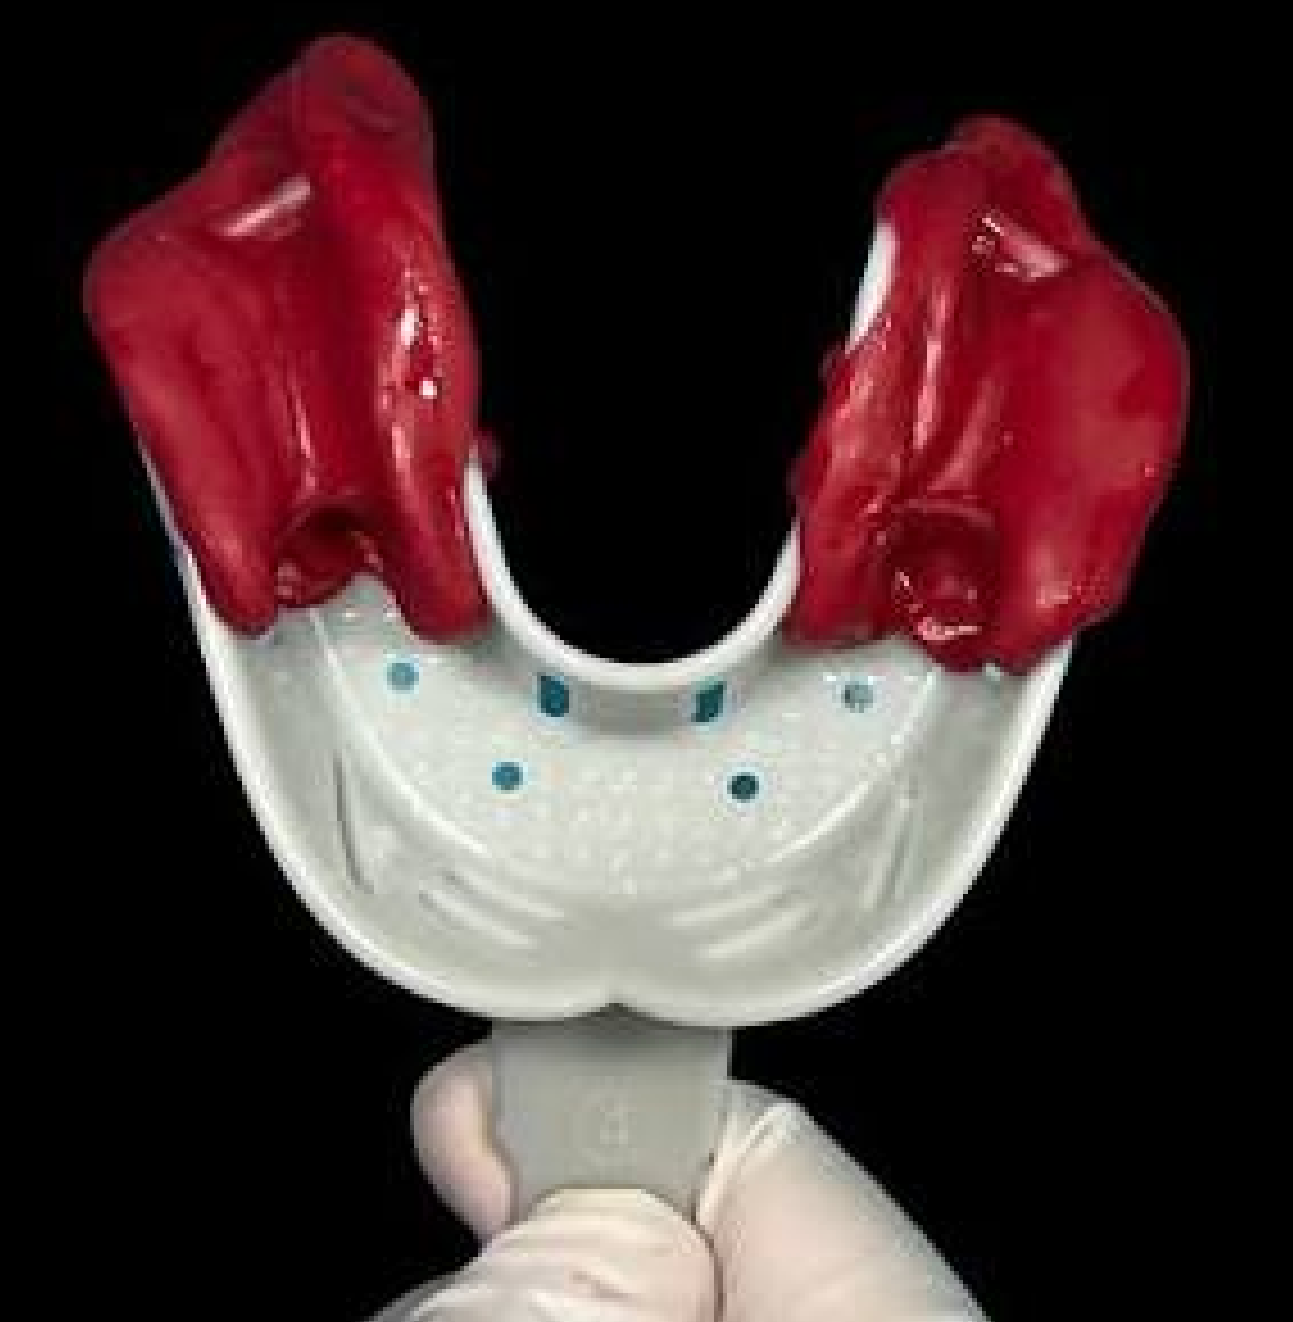
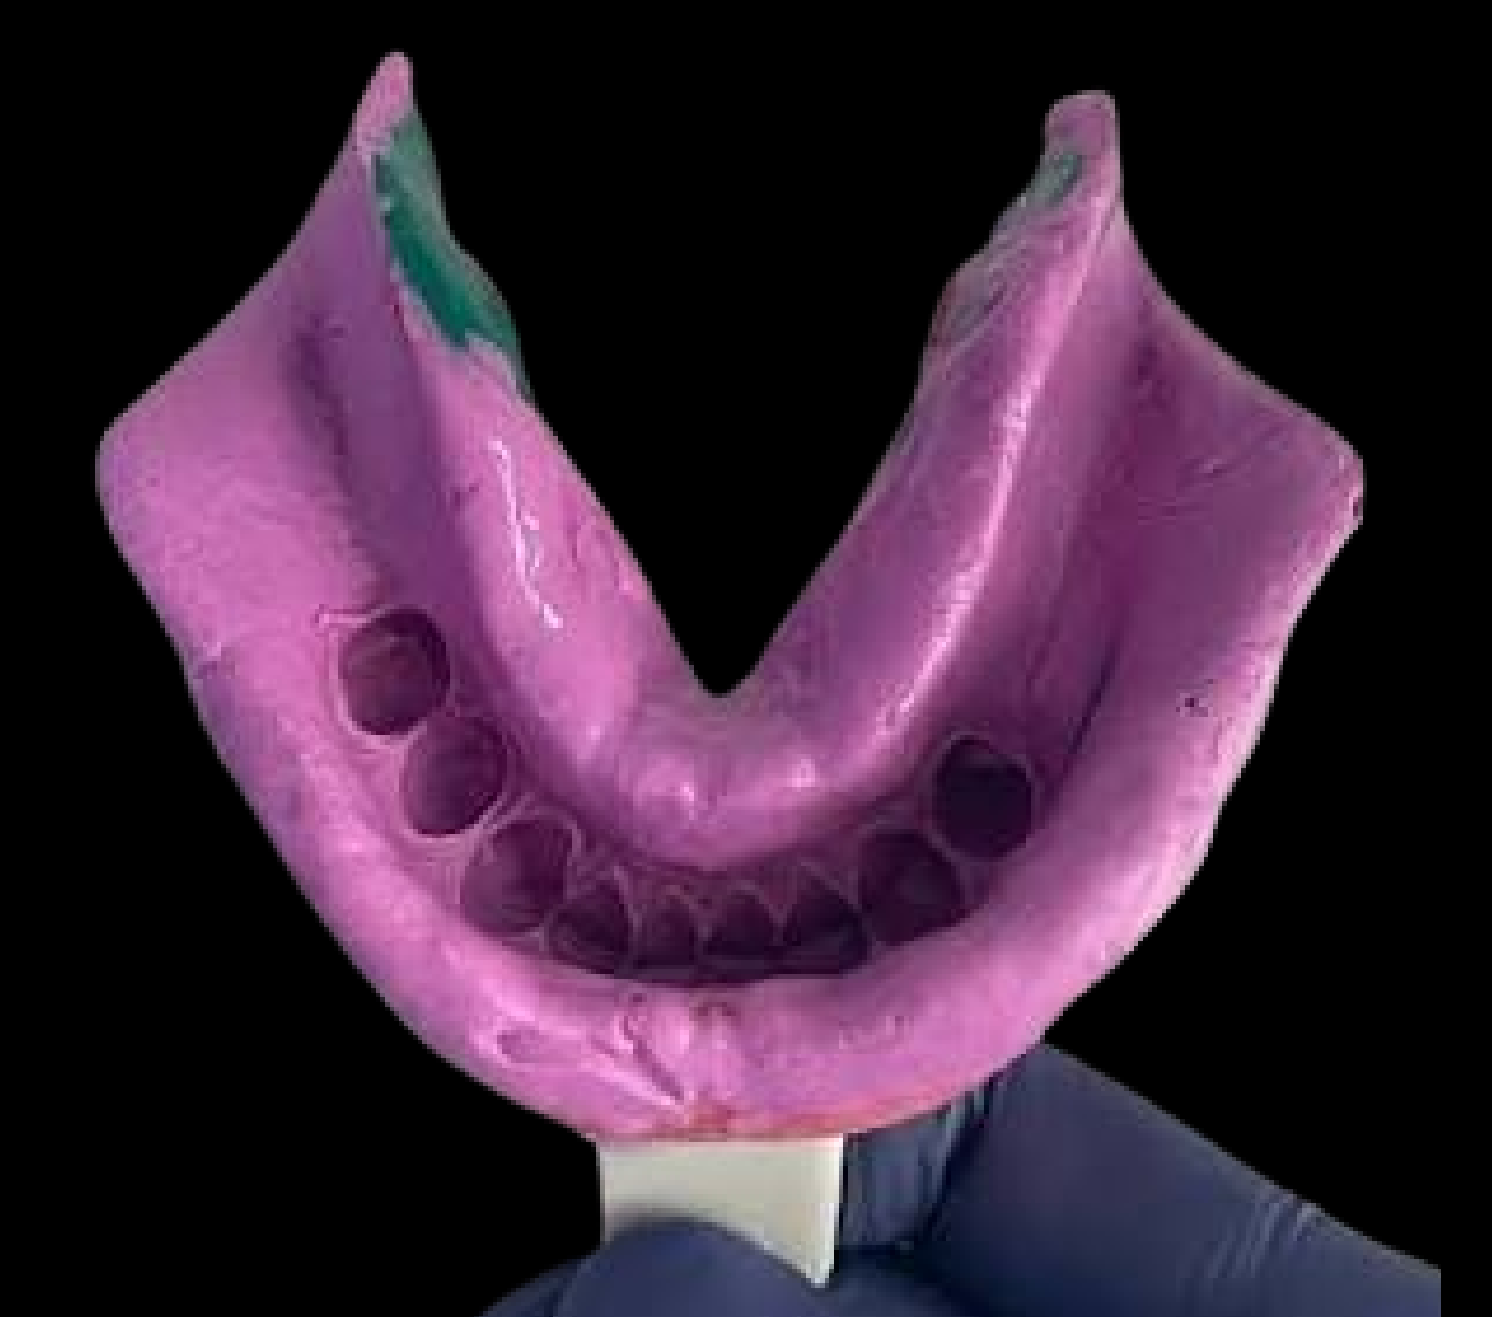
Step 1: Primary Impression21
-
Aim: A diagnostic representation of the dentition and edentulous areas
-
Tray selection: Stock tray (with modification as needed)
-
Stock tray modification: heat to widen, add putty to extend, green-stick compound, or periphery wax; modify if it contacts the ridge or is too short. The primary impression also provides a basis for preliminary surveying, even when a simple wrought-wire clasp is planned.
 |  |
Secondary Impression Assessment22
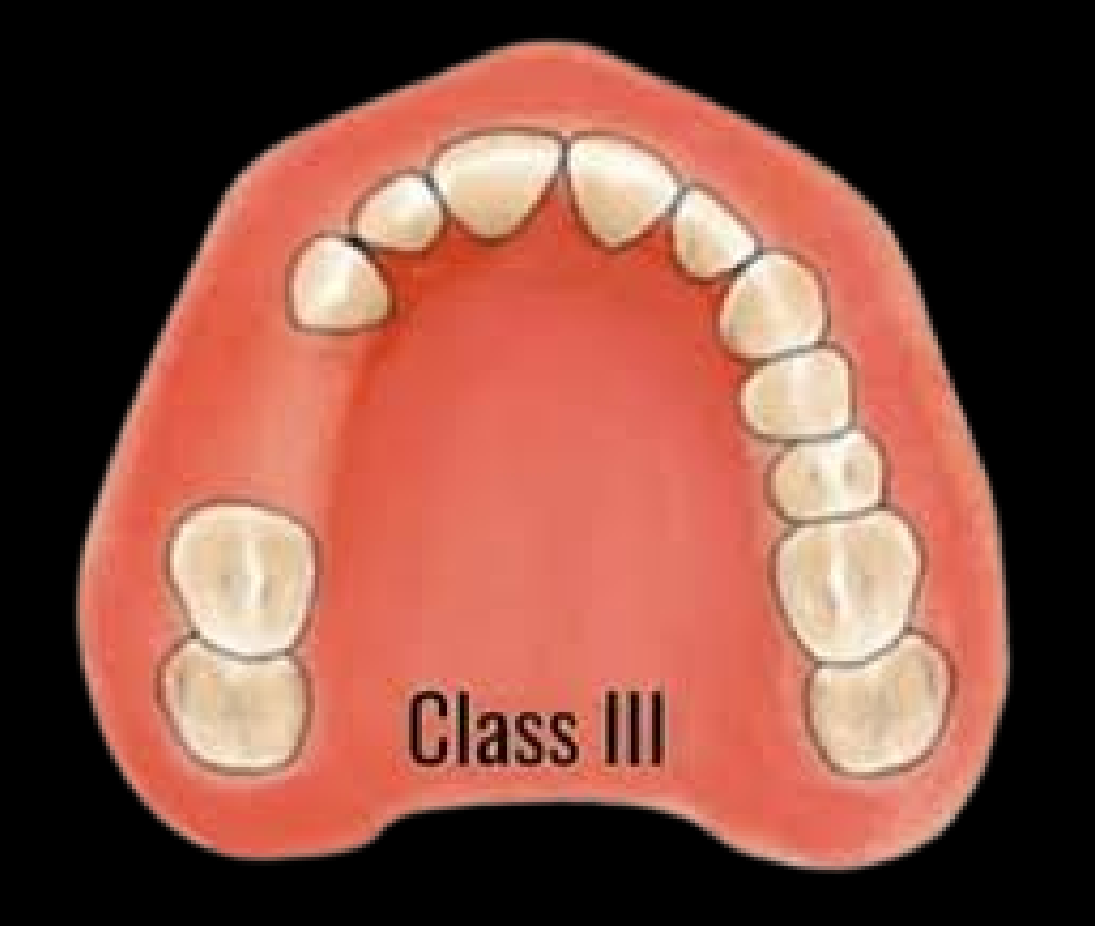
Do we need a secondary impression? Ask about the edentulous span and what the impression must achieve.
 |  |
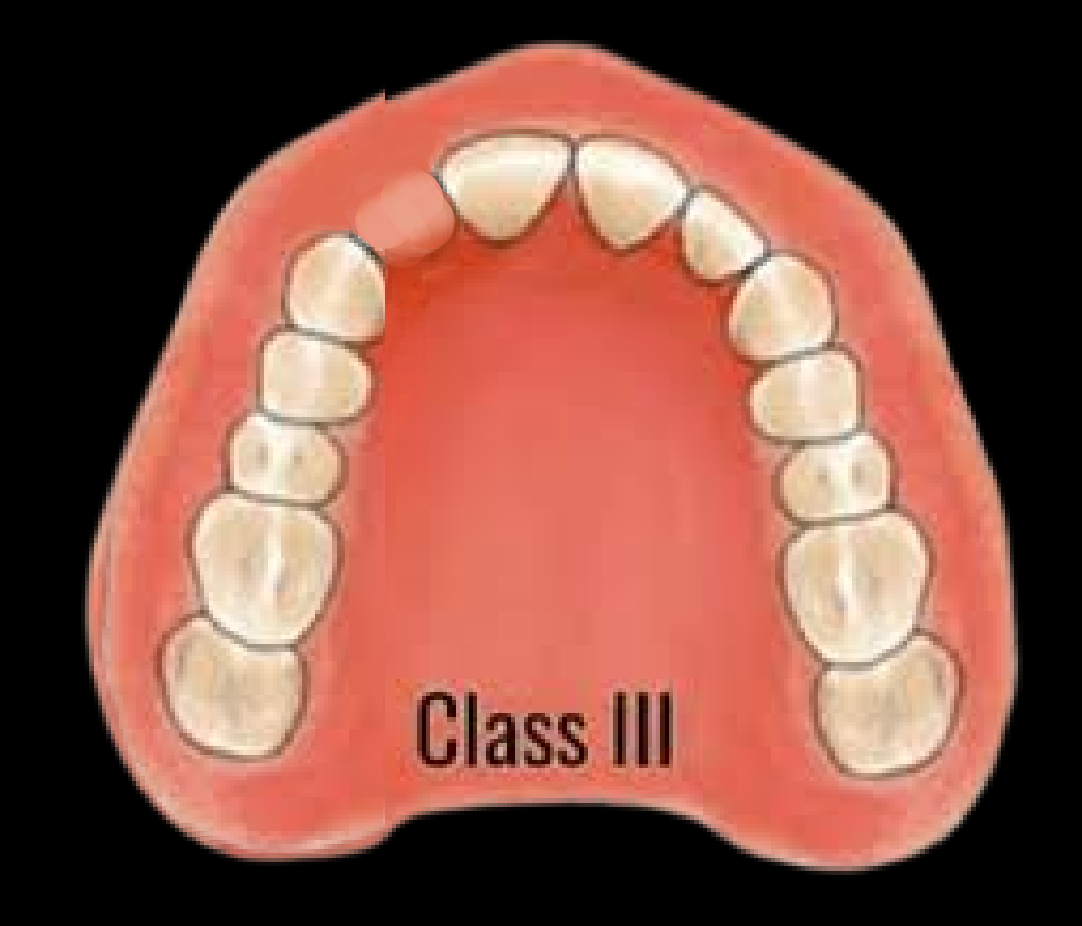 |
May Not Need
- Short bounded saddle
- Single missing tooth
Indications for Secondary Impression23
Ask about the edentulous span and what the impression must achieve.
-
Short bounded saddle
-
Single missing tooth
-
A very good alginate primary impression may suffice when the saddle is bounded and tooth-supported and the denture is not primarily tissue-supported
Strongly Consider
-
Kennedy I / II free-end saddle
-
Long Kennedy IV
-
Large tissue-supported Kennedy III
-
Full vestibular extension and maximum tissue support are required; the primary impression does not accurately record the required anatomy
Special Tray Design and Prescription
Impression Tray Specifications24
- Perforated Tray
- Alginate → 3 mm spacer
- Non-Perforated Tray
- Polyvinyl Siloxane (PVS) → 2 mm spacer
- Polyether → 2 mm spacer
The laboratory/technician needs to know what comes next.
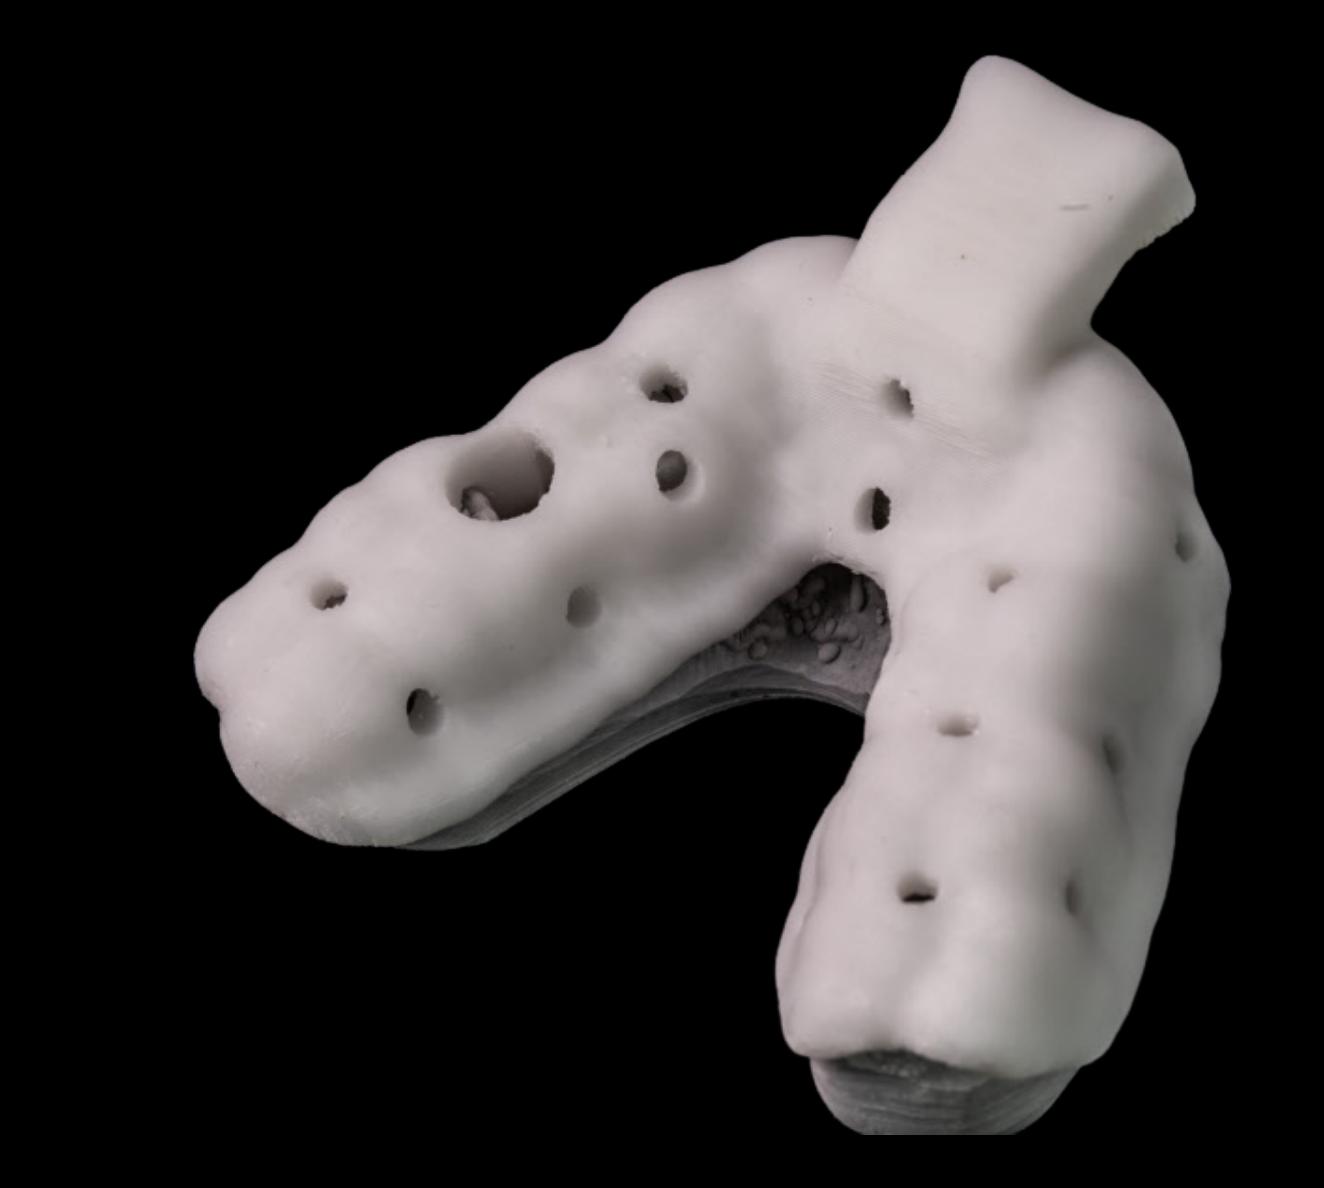
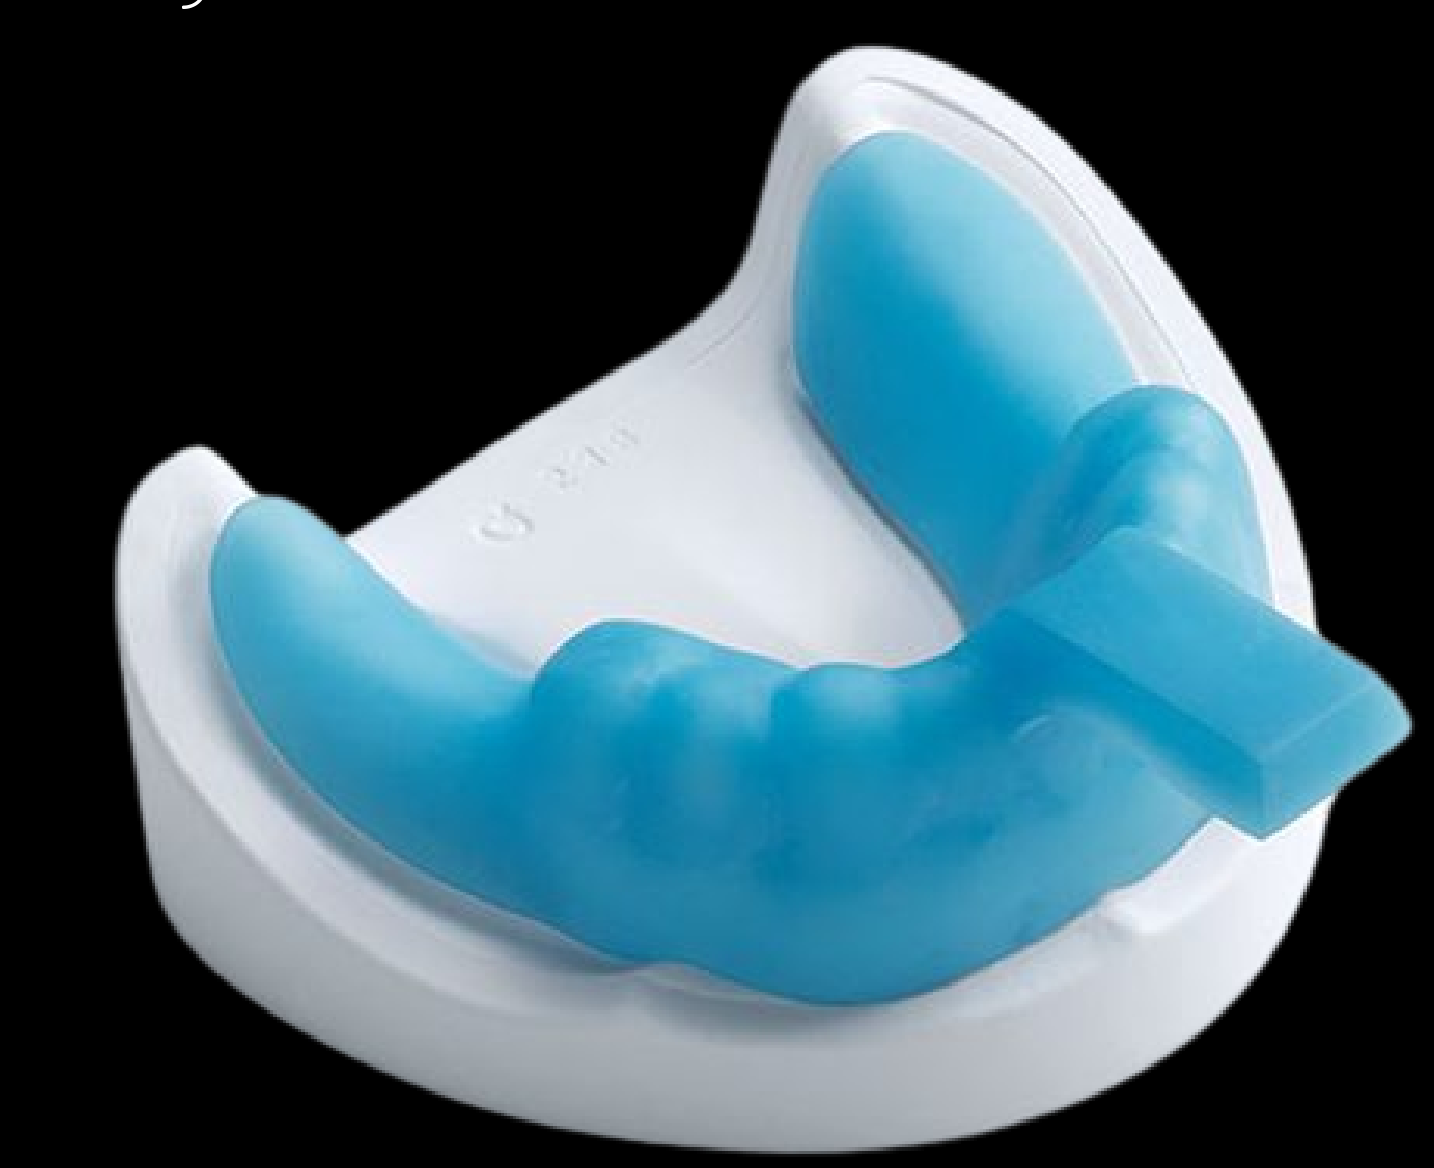
Lecturer — Tissue Stops
A tissue stop is an extension of the tray that contacts selected teeth and prevents the tray from sinking excessively into the tissues.
- A spacer is created by placing wax on the model before fabricating the tray; the space later accommodates the impression material.
- Tissue stops may be helpful for less experienced clinicians; one speaker does not routinely use them because they are familiar with tray positioning and the amount of pressure required.
 |  |
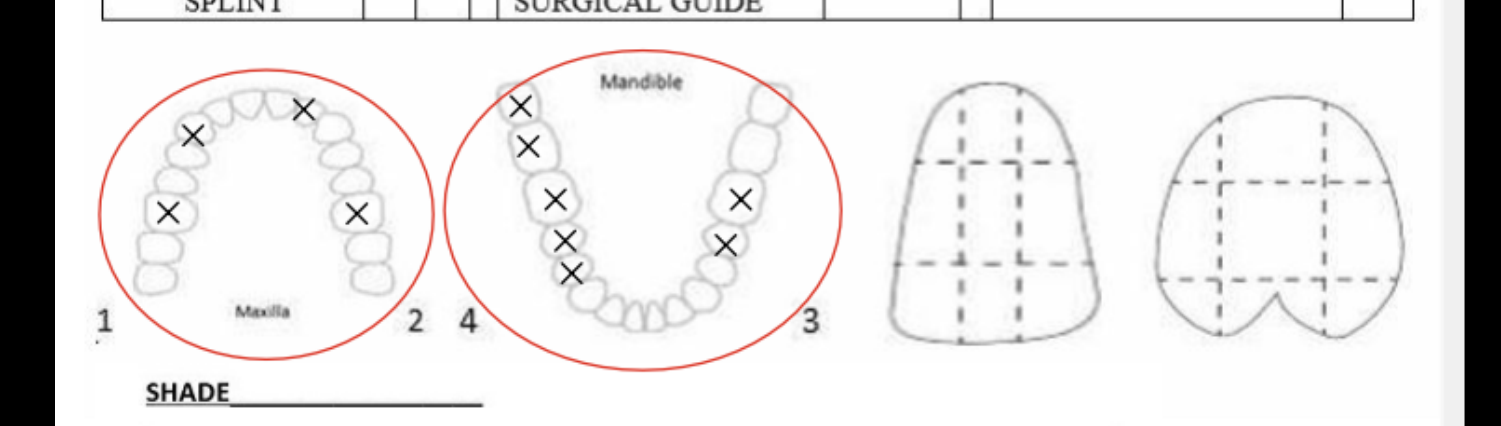
Prescription Requirements25
-
Material planned
-
Tray perforated / non-perforated
-
Spacer requirement
-
Purpose of impression → removable / fixed
-
Arch, whether tissue stops are required, and the intended prosthesis. The impression material should be selected before the prescription is written because it affects tray design.
 |  |
 |
Laboratory Instructions Comparison26
 |  |
Inadequate Instruction
“Dear Lab, Please make special tray.”
- Do not criticize the laboratory design later if the prescription did not communicate the required details
Appropriate Instruction
“Dear Lab, Please fabricate Upper and Lower Special tray according to the following:
- Maxillary perforated special tray with 3 mm spacer for Alginate impression
- Mandibular non-perforated special tray with 2 mm spacer for PVS impression with tissue stops”
Special Tray Clinical Try-in Steps27
- Seat
- Gross extension
- Seating
- Interference
- Sharp edges
- Function
- Cheek/lip manipulation
- Tongue movements
- Trim
- Adjust areas that displace the tray
- Reassess
- Repeat functional movements
- Determine whether the tray is overextended; trim before border moulding when required
Definitive Impressions and Border Moulding
Indications for Border Moulding28
Does every special tray need border moulding?
- Border mould when functional base extension matters.
Common Situations
- Kennedy I / II free-end saddle
- Long Kennedy IV
- Large tissue-supported saddle
- Posterior maxillary extension where the denture base extends into functionally relevant soft tissue areas
Lecturer — Border Moulding
Do not memorize classifications mechanically — determine whether the planned denture needs tissue support and full extension.
- If it does, border moulding is needed.
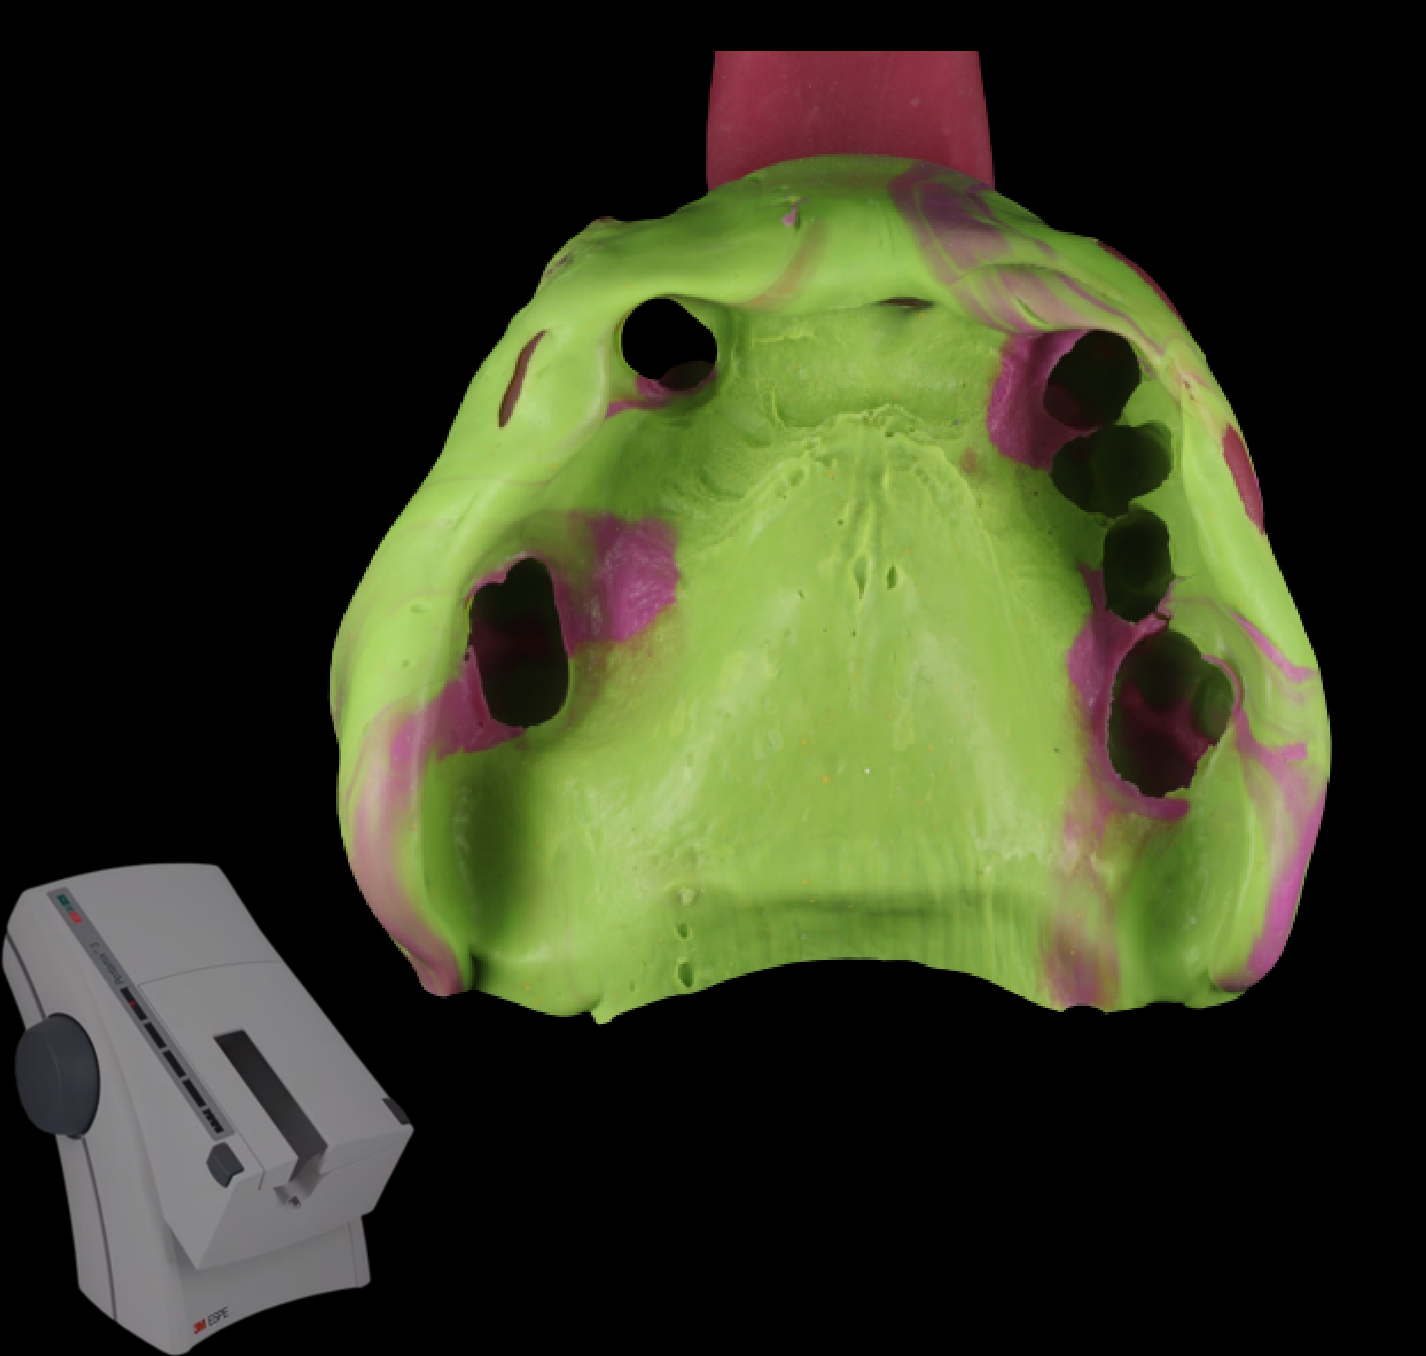
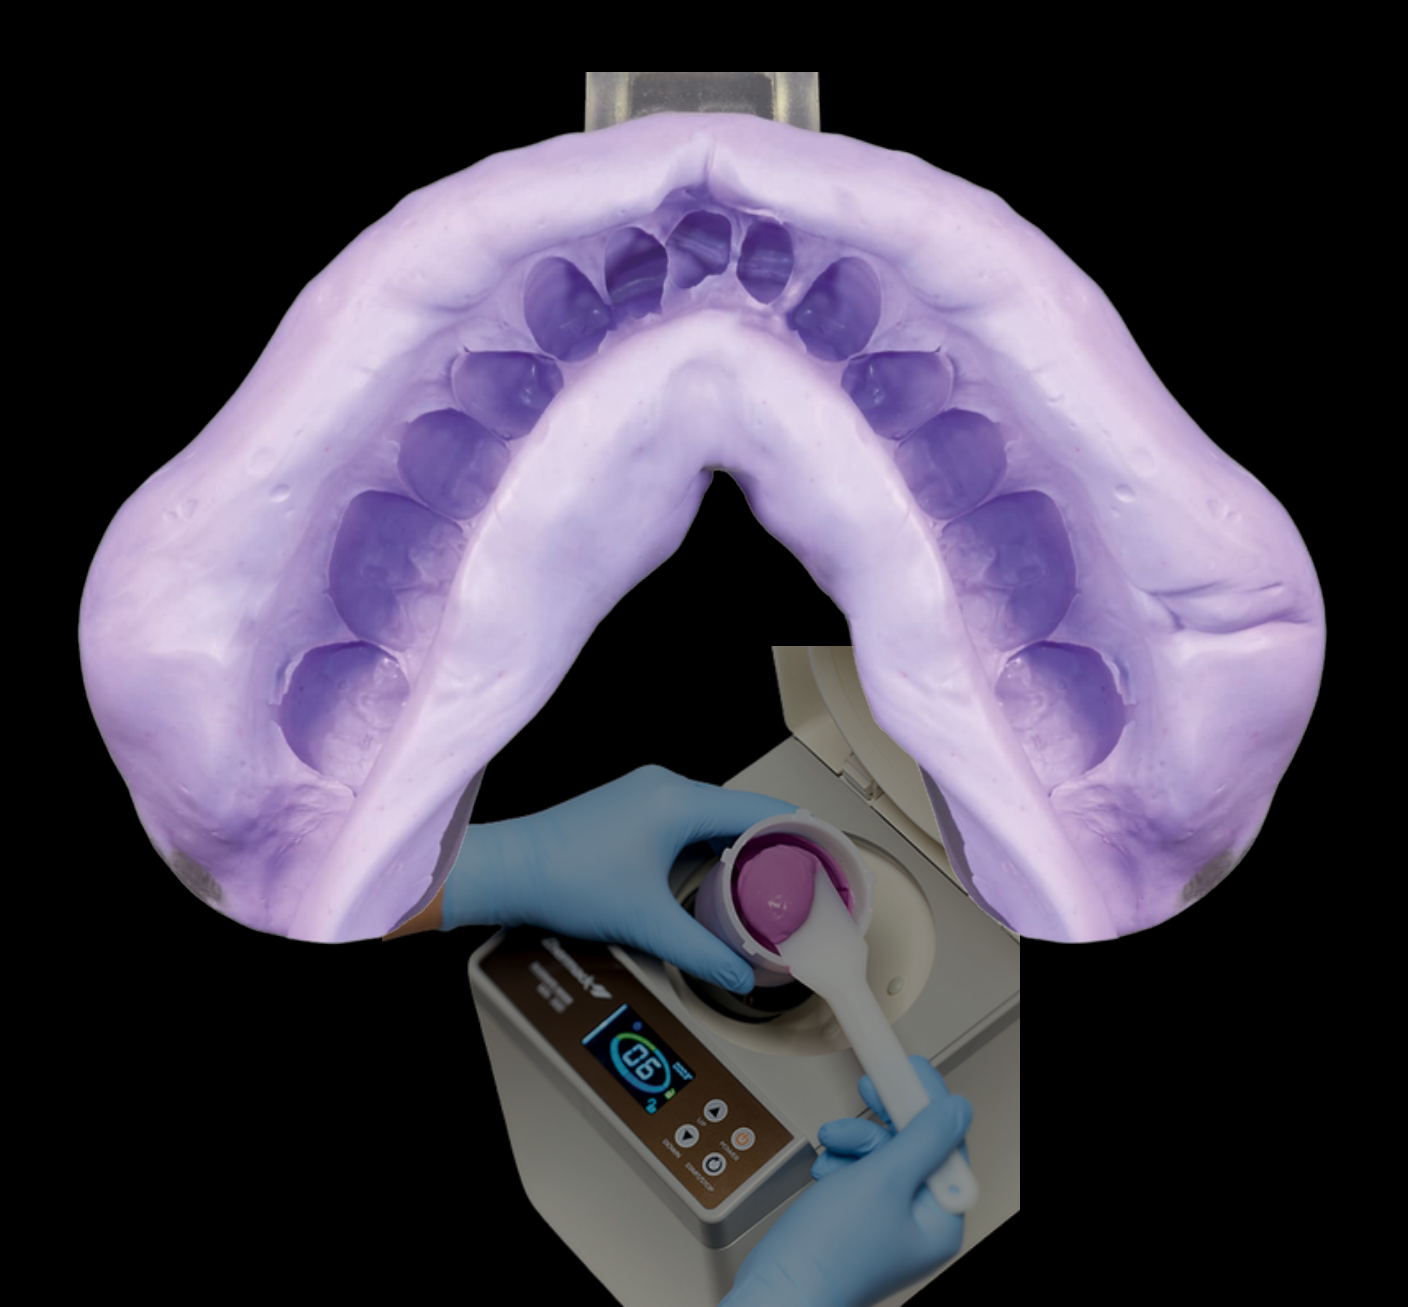
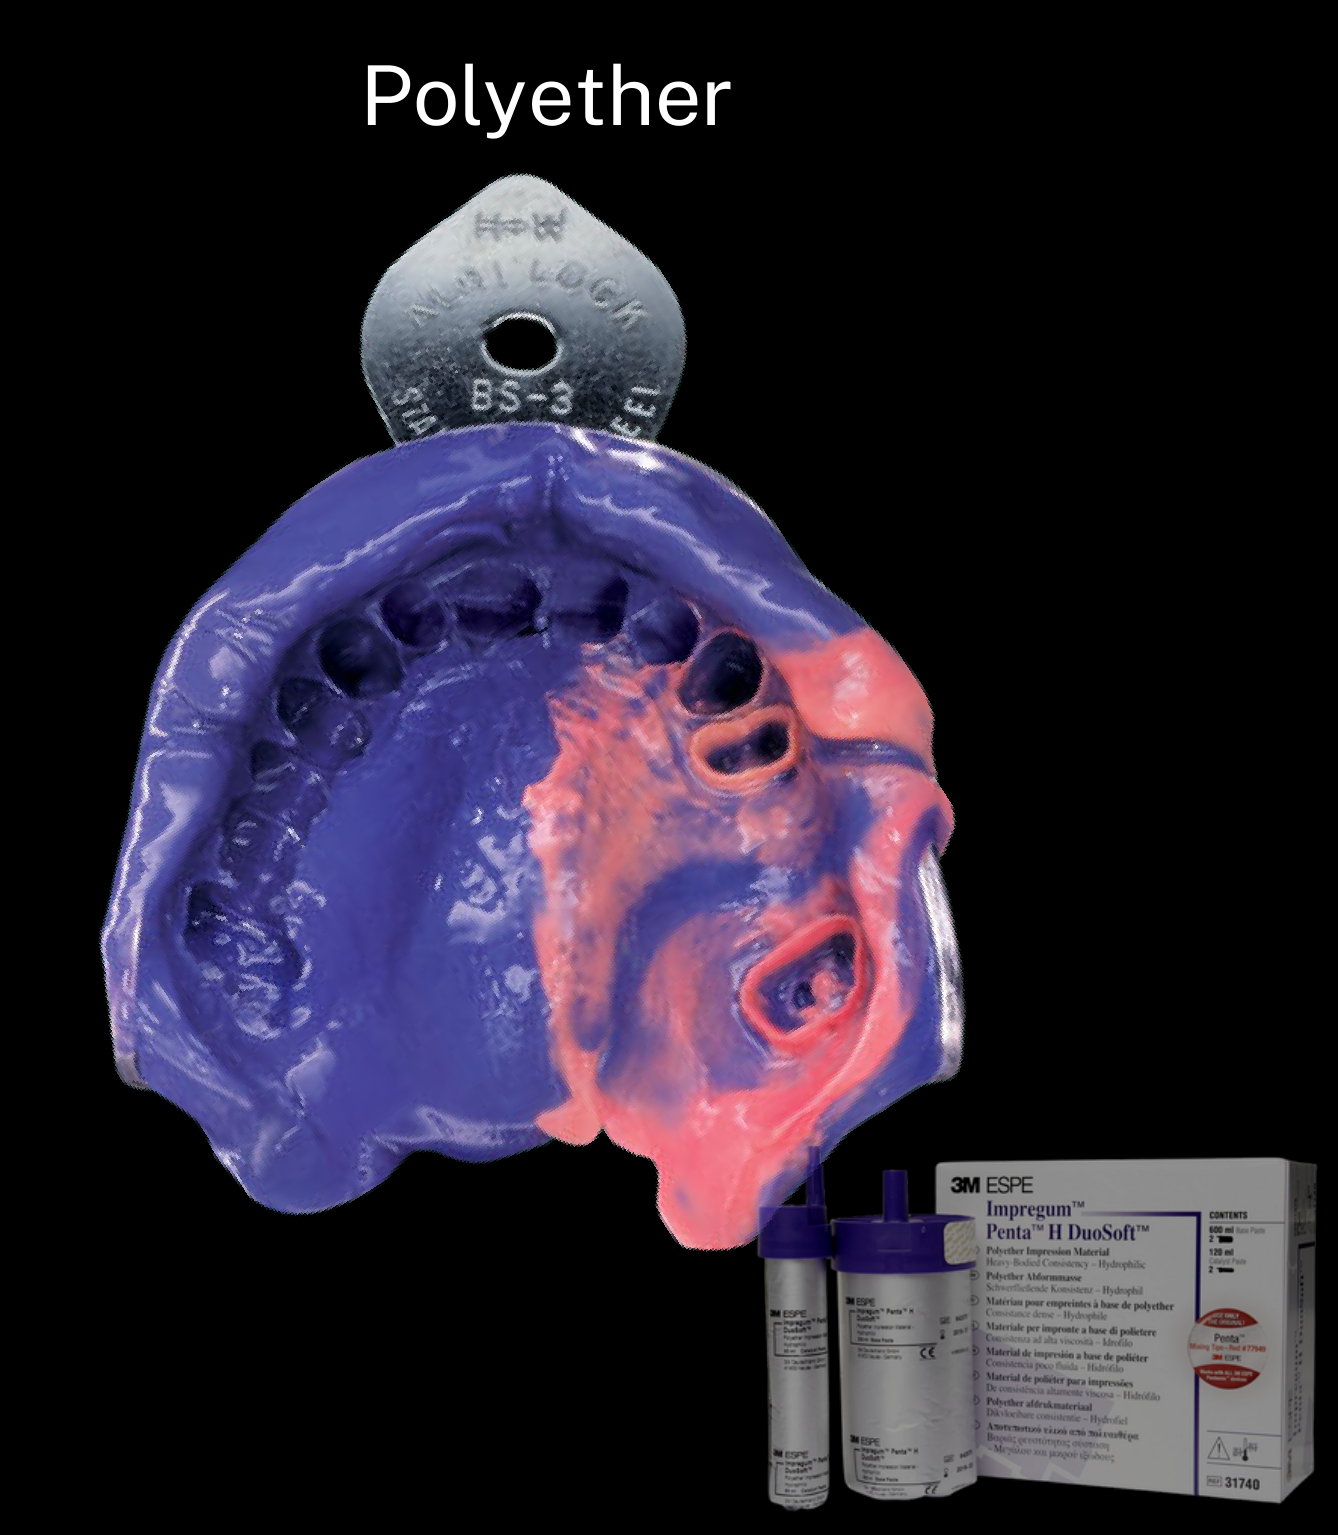
Material Selection29
- Polyvinyl Siloxane (PVS)
- Alginate
- Polyether
 |  |
 |
Frequency of Impression Material Use30
- Common:
- Polyvinyl Siloxane (PVS)
- Alginate
- Rare:
- Polyether
Lecturer — Material Choice
The choice of impression material depends on the clinician’s experience, the material available, the patient, the anatomy, and the required accuracy.
- Some experienced clinicians use alginate for definitive impressions, including for acrylic and cobalt-chromium prostheses.
- The choice should be guided by the required clinical outcome rather than a single universally correct material.
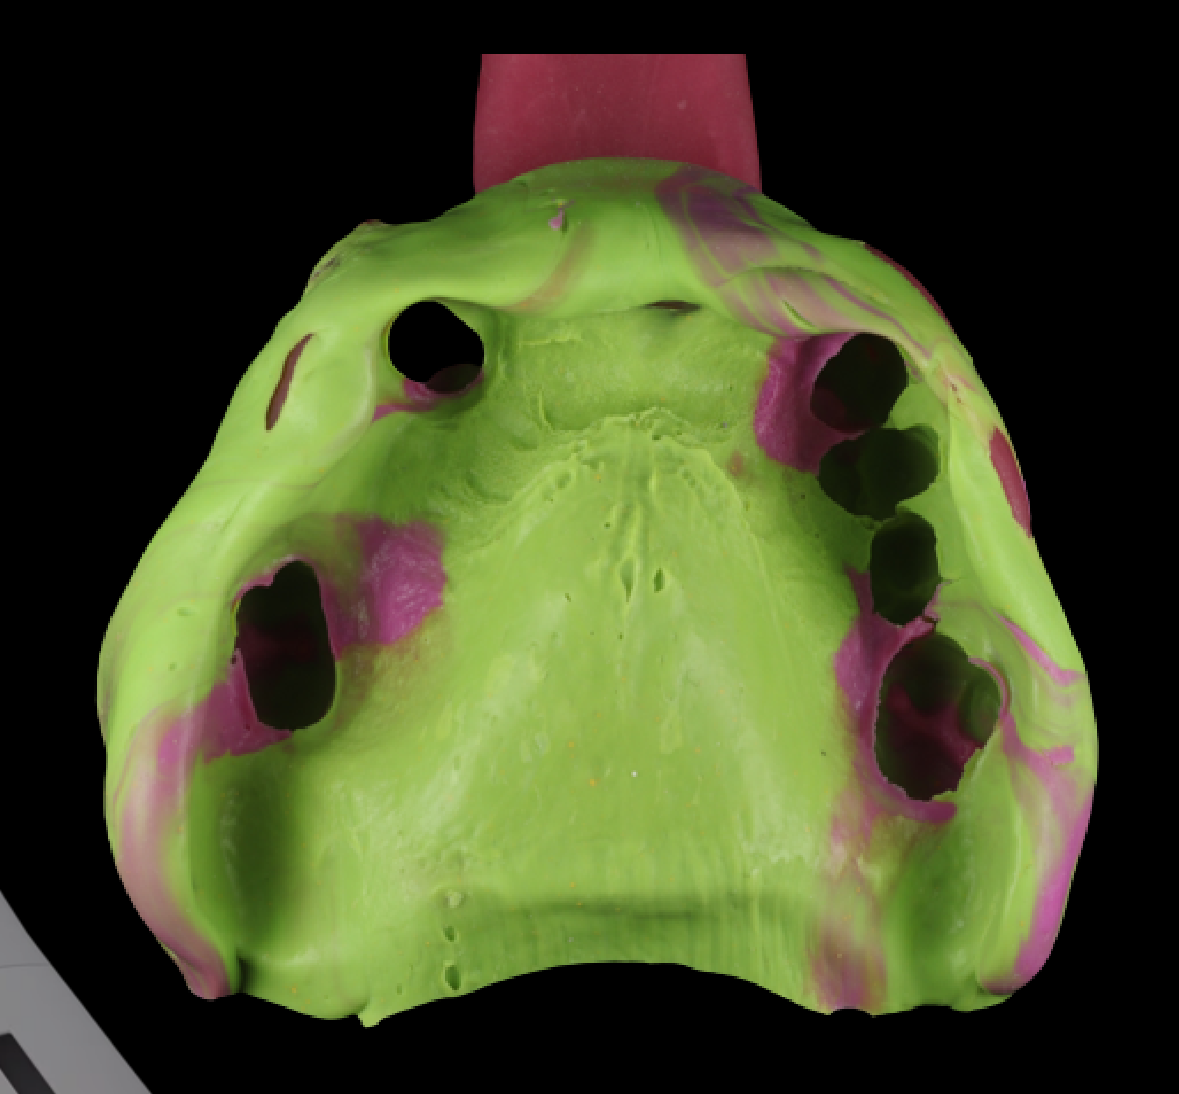
Polyvinyl Siloxane (PVS) Viscosities31
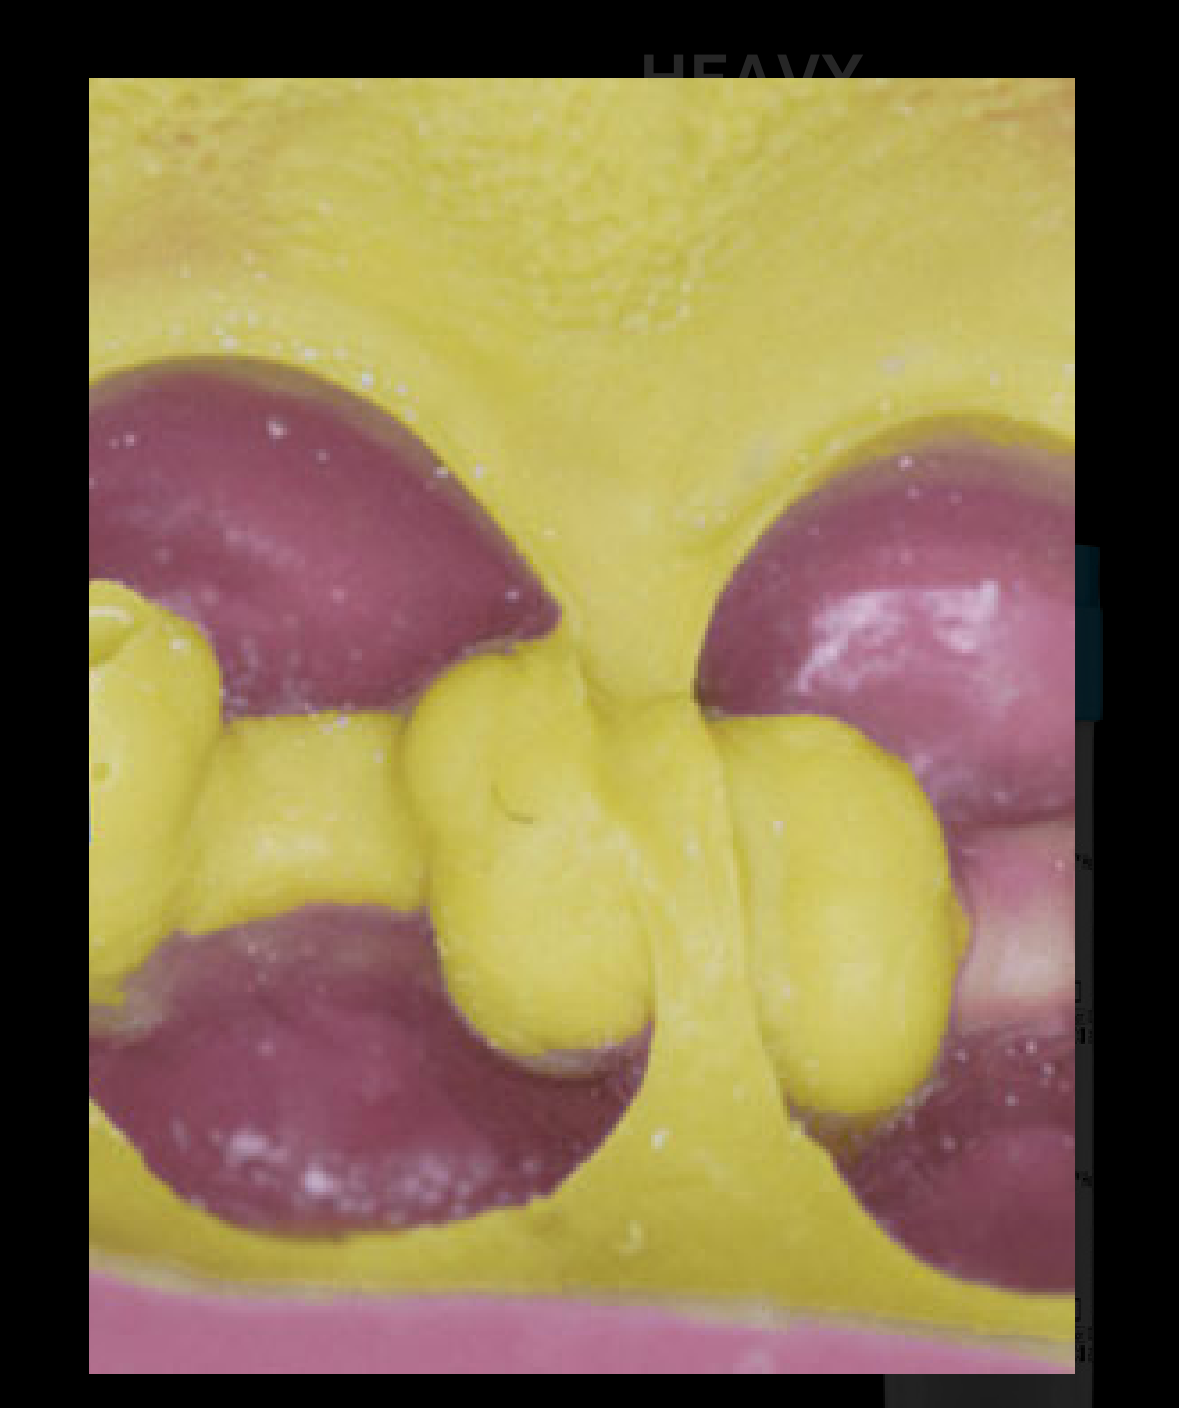
- Heavy body
- Medium body
- Light body
Lecturer — PVS Combinations
PVS may be used in combinations such as heavy body + light body, medium body + light body, or medium body alone.
- One speaker preferred medium body + light body because heavy body had not worked well in their hands; others use heavy body + light body successfully.
- Do not mix different generations or products if their setting times are incompatible — read the tubes carefully.
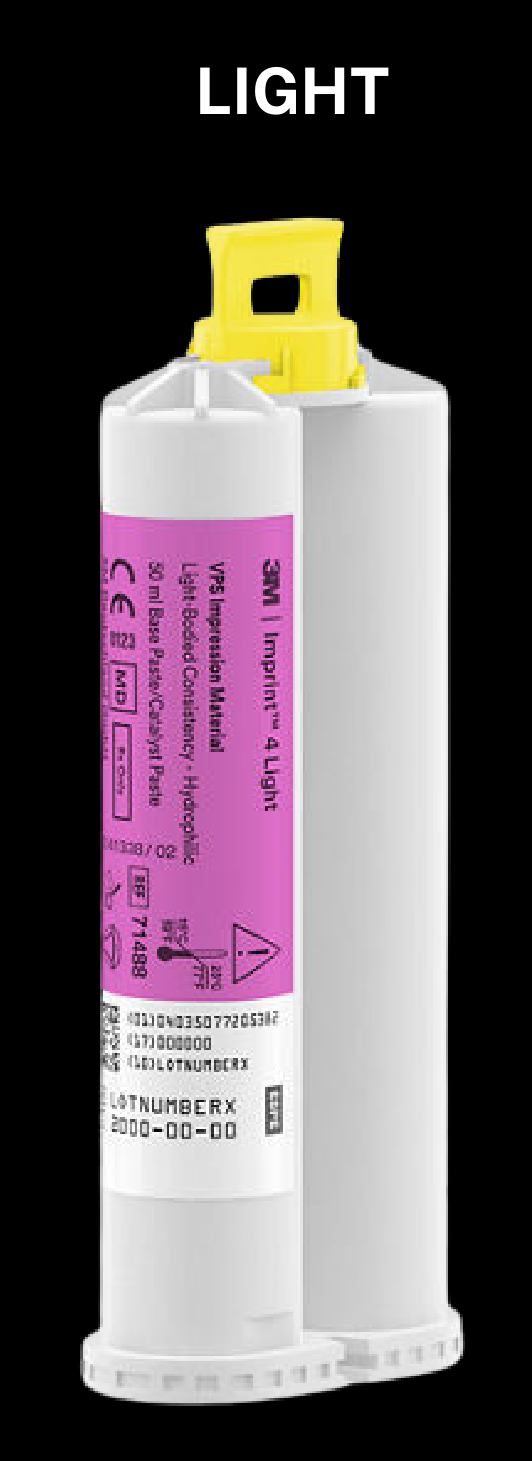
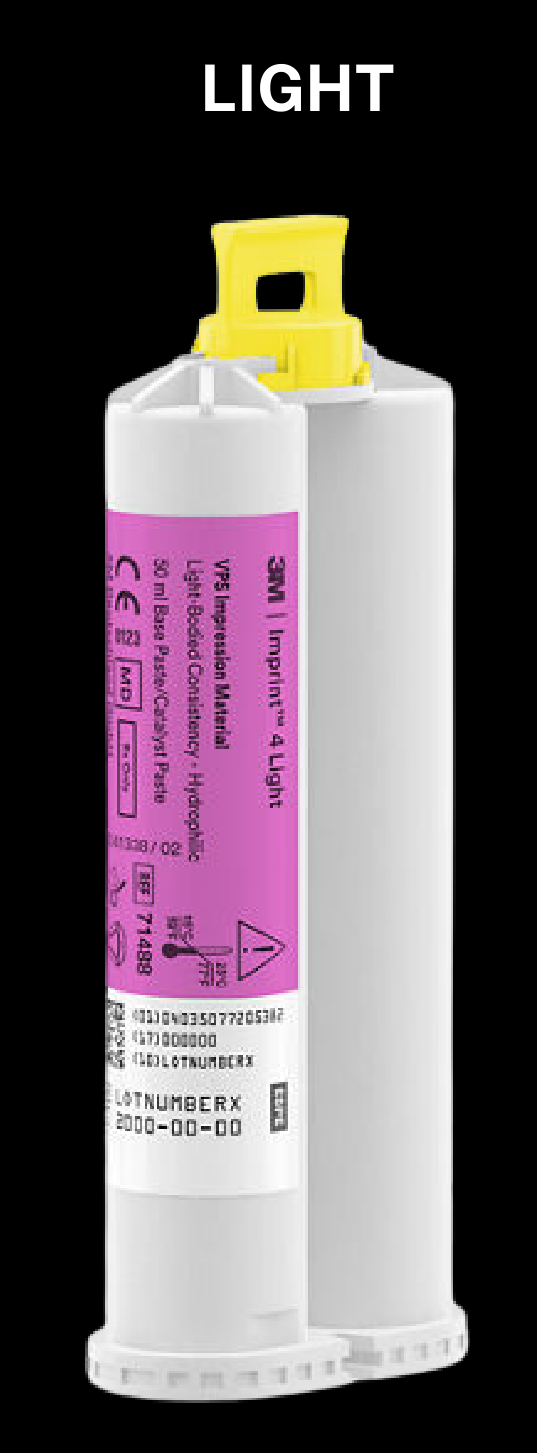
Use of Light Body PVS32
Light body impression material is used where critical detail matters:
- Rest seats
- Guide planes
- Prepared tooth surfaces
- Lingual plate contact
- Palatal plate contact
Lecturer — Light Body Use
For a routine acrylic denture, light body may not always be necessary.
- If heavy body is used, light body may help fill drags or defects created by the heavy material.
- Medium body may be used alone or with light body; light body may be placed on the teeth, tissues, and tray.
- These approaches are clinician preferences rather than absolute rules.
 |  |
Undercut Blockout33
 |  |
Identifying Risk Areas
- Black triangles / open embrasures / large interdental spaces
- Gingival recession
- Tipped teeth
- Bridge or pontic undercuts
- Mobile / periodontally compromised teeth
Lecturer — Polyether Removal
Polyether is particularly difficult to remove when set because it may lock into undercuts.
- It can remove teeth with the impression, require sectioning of the tray, or require cutting the impression material while it is in the patient’s mouth.
- Removal of a trapped impression can risk injury to the lips or soft tissues.
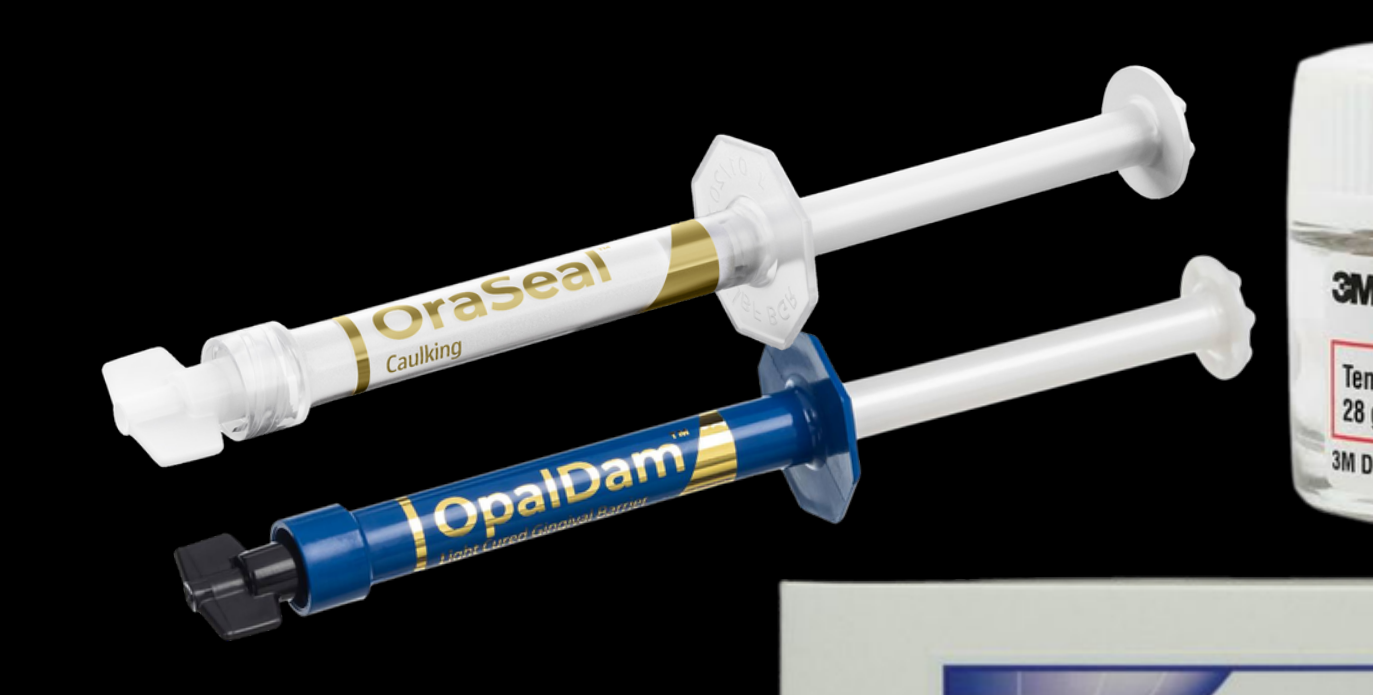
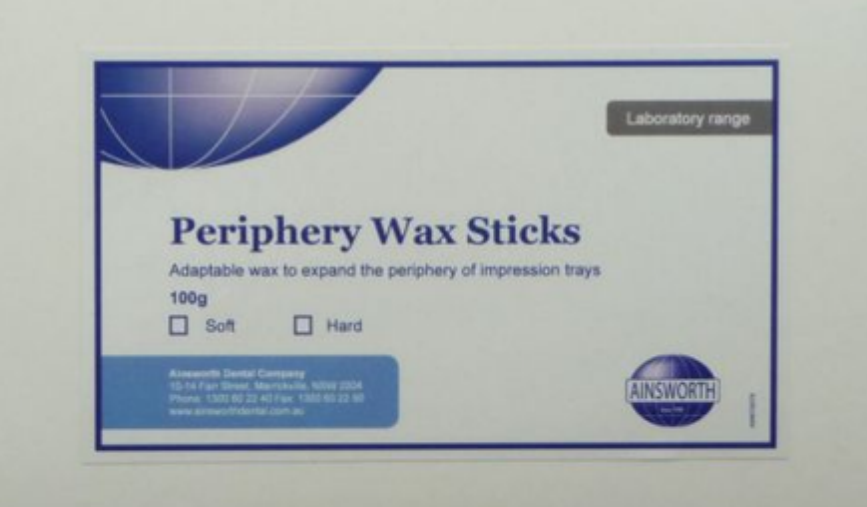
Blockout Materials
- Periphery wax
- Light-cure gingival barrier
- PTFE / Teflon tape
- Oraseal
- Temporary restorative material
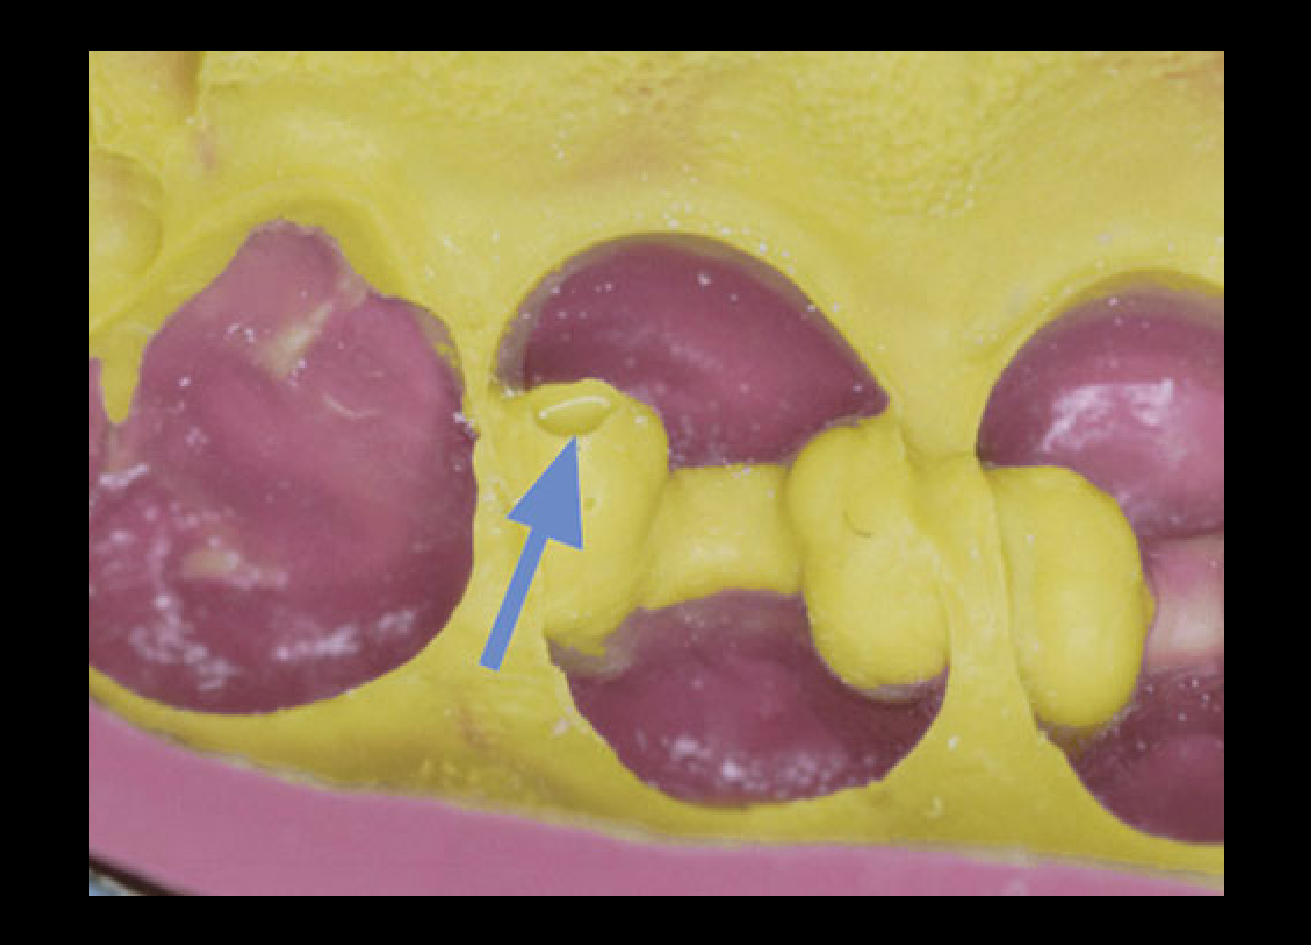
Lecturer — Blockout by Material
Blockout requirements depend on the impression material.
- Alginate generally flexes and may not require blockout.
- Heavy PVS should be blocked out in interproximal areas where locking is possible.
- Polyether should always be blocked out when undercuts are present.
- The blockout should stop the material passing through an undercut and locking between surfaces — it does not need to cover the entire tooth circumference.
Critical Anatomic Landmarks by Saddle Type34
 | 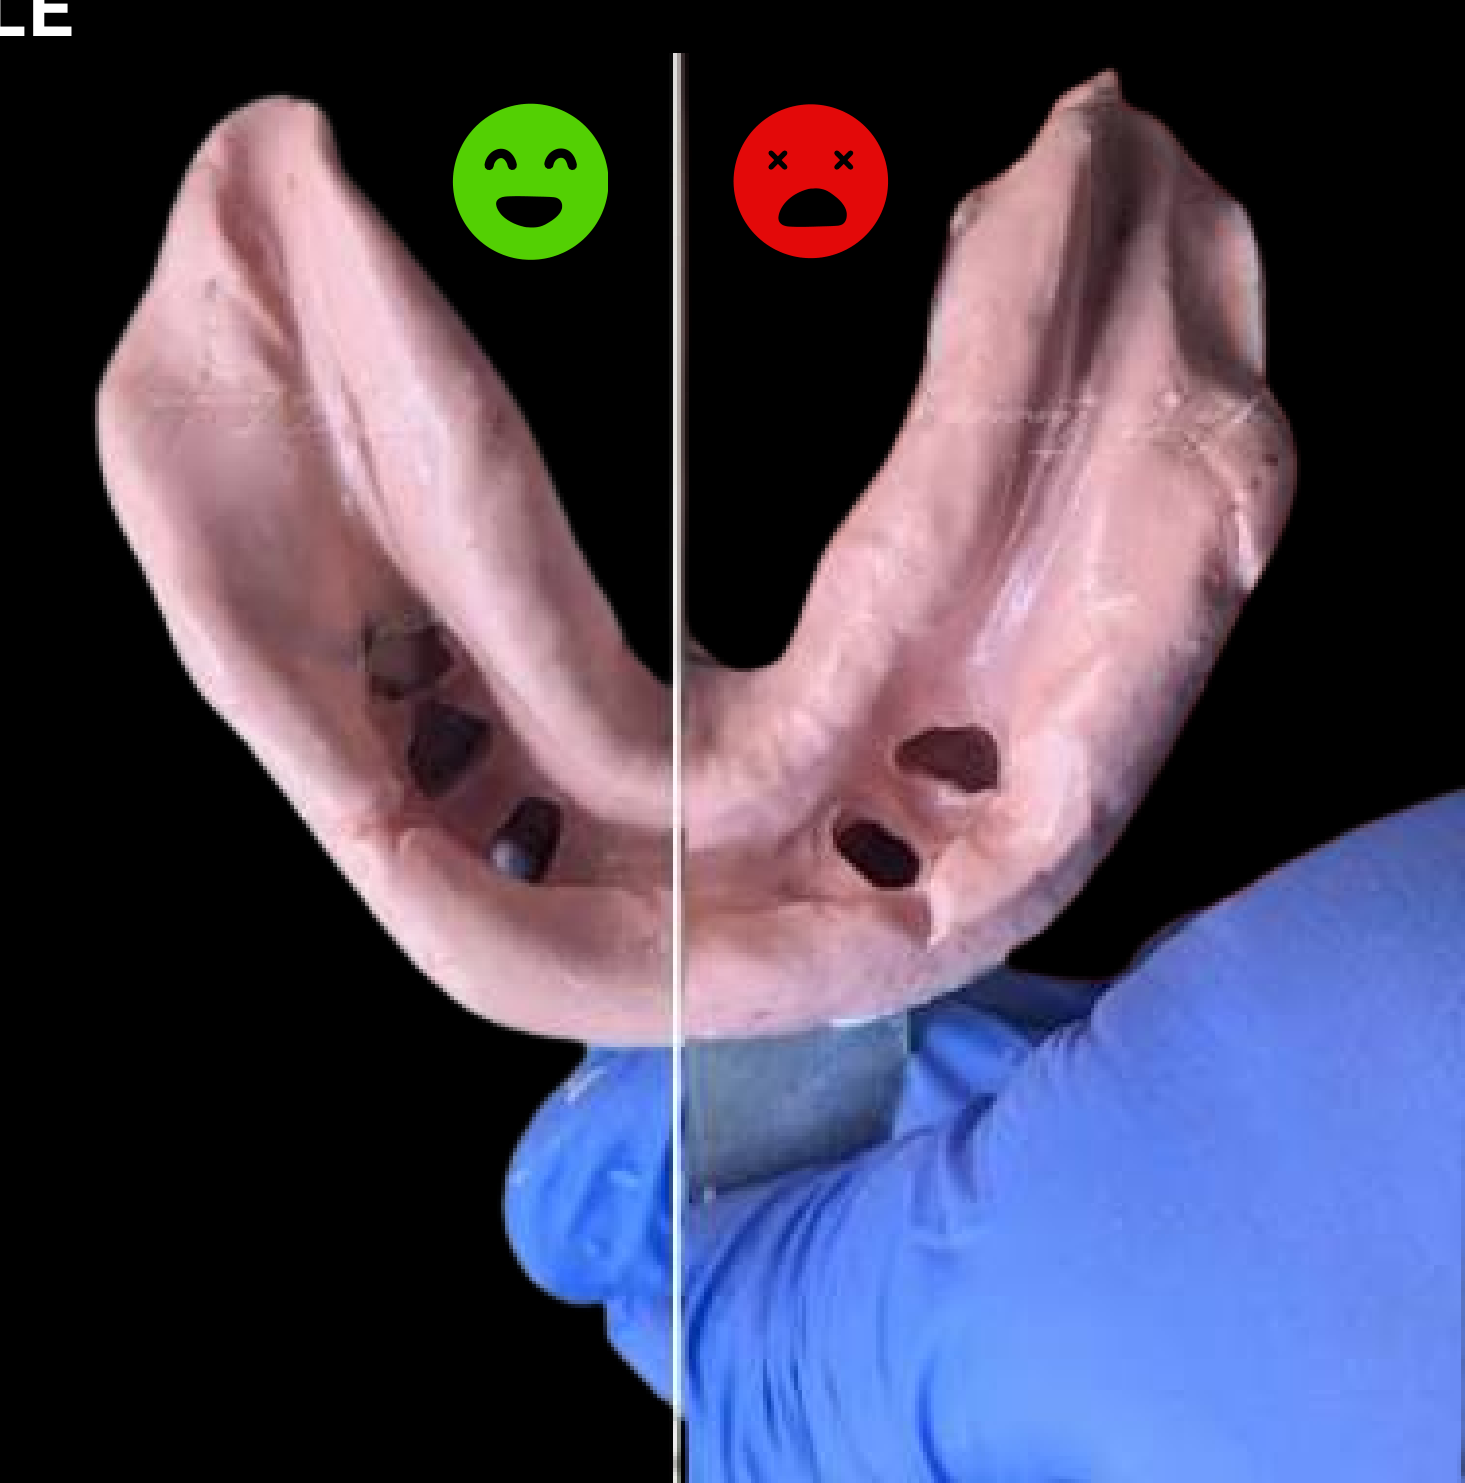 |
Tooth-Supported / Bounded Saddle
- Rest seats / guide planes
- Saddle anatomy
- Path-of-insertion information and relevant tooth surfaces
Lecturer — Impression Defects
Assess the abutment teeth as well as the rest seats and guide planes.
- An impression defect may be acceptable if it is unrelated to the denture design.
- Example: a drag between two teeth may not matter if no acrylic or denture component will occupy that area.
Free-End / Long Saddle
- Abutment teeth
- Entire denture-bearing area
- Buccal + lingual extension
- Retromolar pad / tuberosity
- Functional peripheral form
Lecturer — Impression Assessment
Assess the impression independently before asking a supervisor whether it is acceptable.
- Judge the impression according to the purpose of the denture and the anatomy that must be recorded.
- A major defect in a retromolar pad or buccal shelf area may prevent the denture from being fabricated appropriately.
Maxillomandibular Relationships (MMR)35
 | 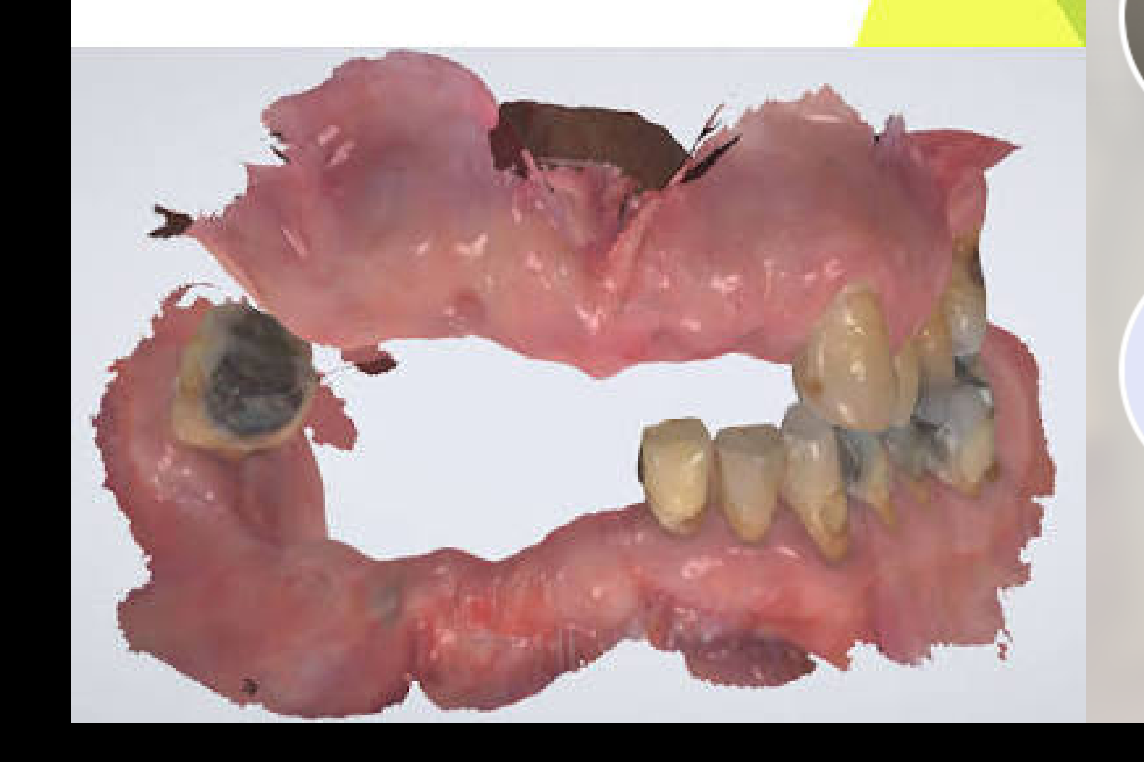 |  |
 |  |  |
 |  |
Indications for Maxillomandibular Relationships (MMR)36
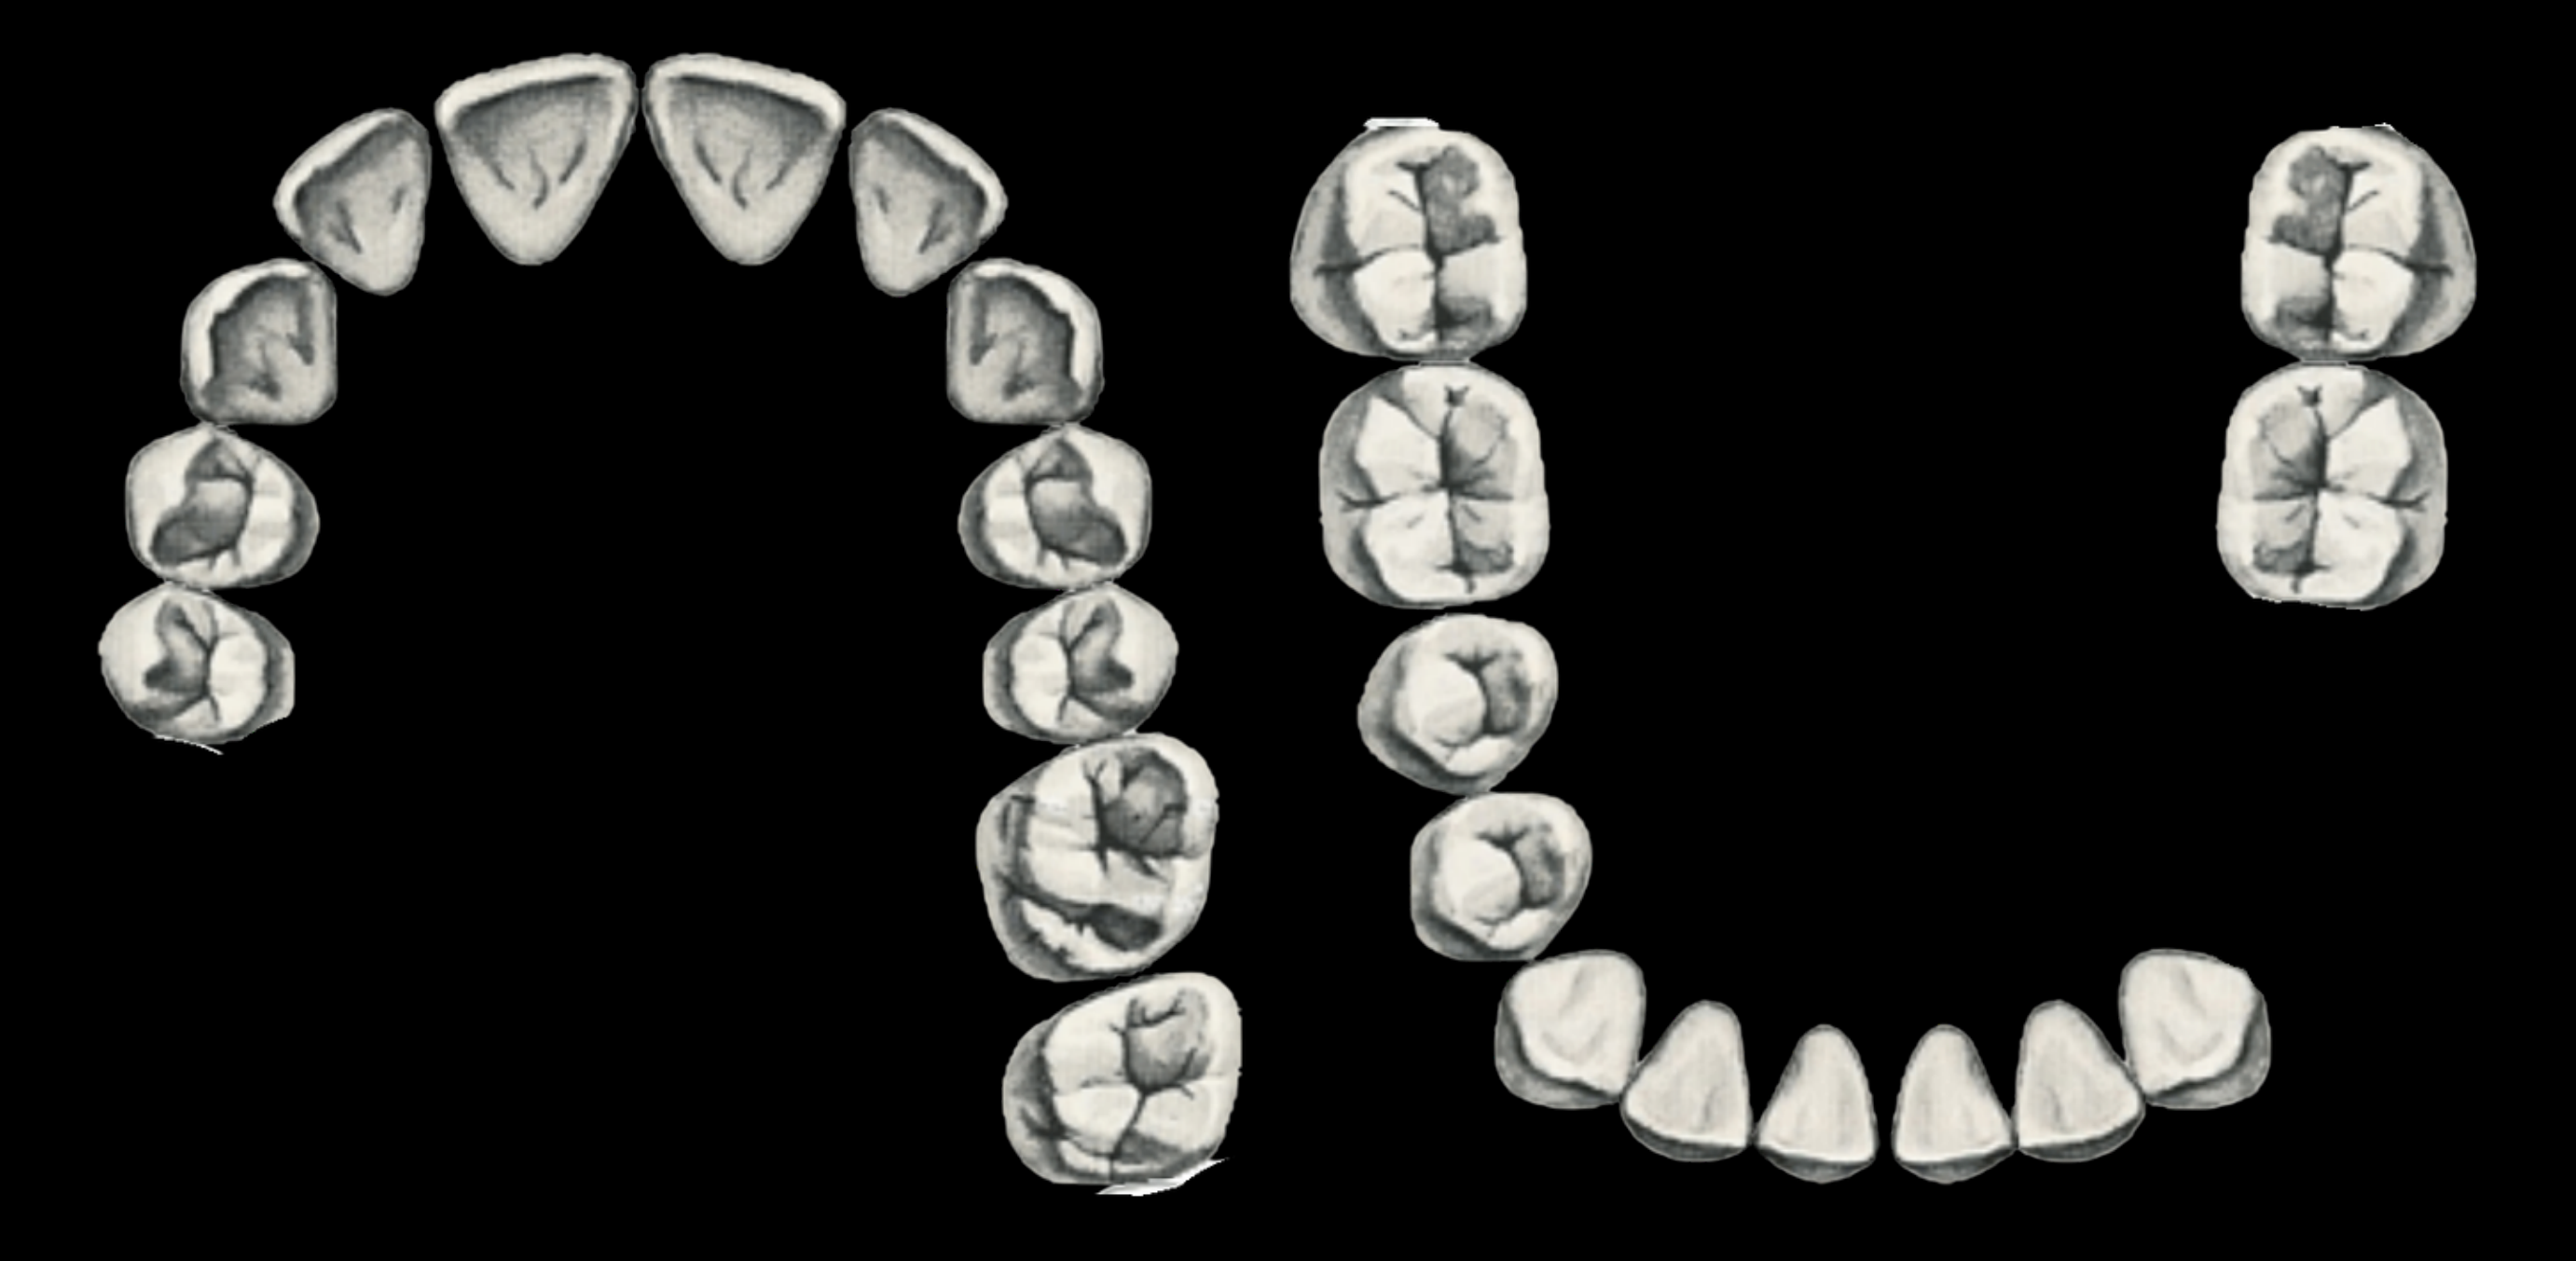
Required / Essential
- Kennedy I / II free-end saddle
- Long Kennedy IV
- Unstable occlusal stops
- Vertical dimension of occlusion (VDO) change
Not Essential37
- Kennedy III (when hand articulation is possible)
Lecturer — MMR Decisions
The speakers’ protocol was to take an MMR for free-end saddles, even when only two teeth were missing, because the casts can be unstable during laboratory articulation.
- An MMR is also indicated when the casts may tilt during articulation or when there is insufficient stable tooth contact to position the casts predictably.
- A tripod contact may be sufficient: one contact in each posterior region and one anterior contact; four contacts are preferable, but three stable contacts may suffice.
- Even when a complete base-and-rim MMR is not required, the speakers advised routinely taking a bite record and deciding afterward whether it will be used.
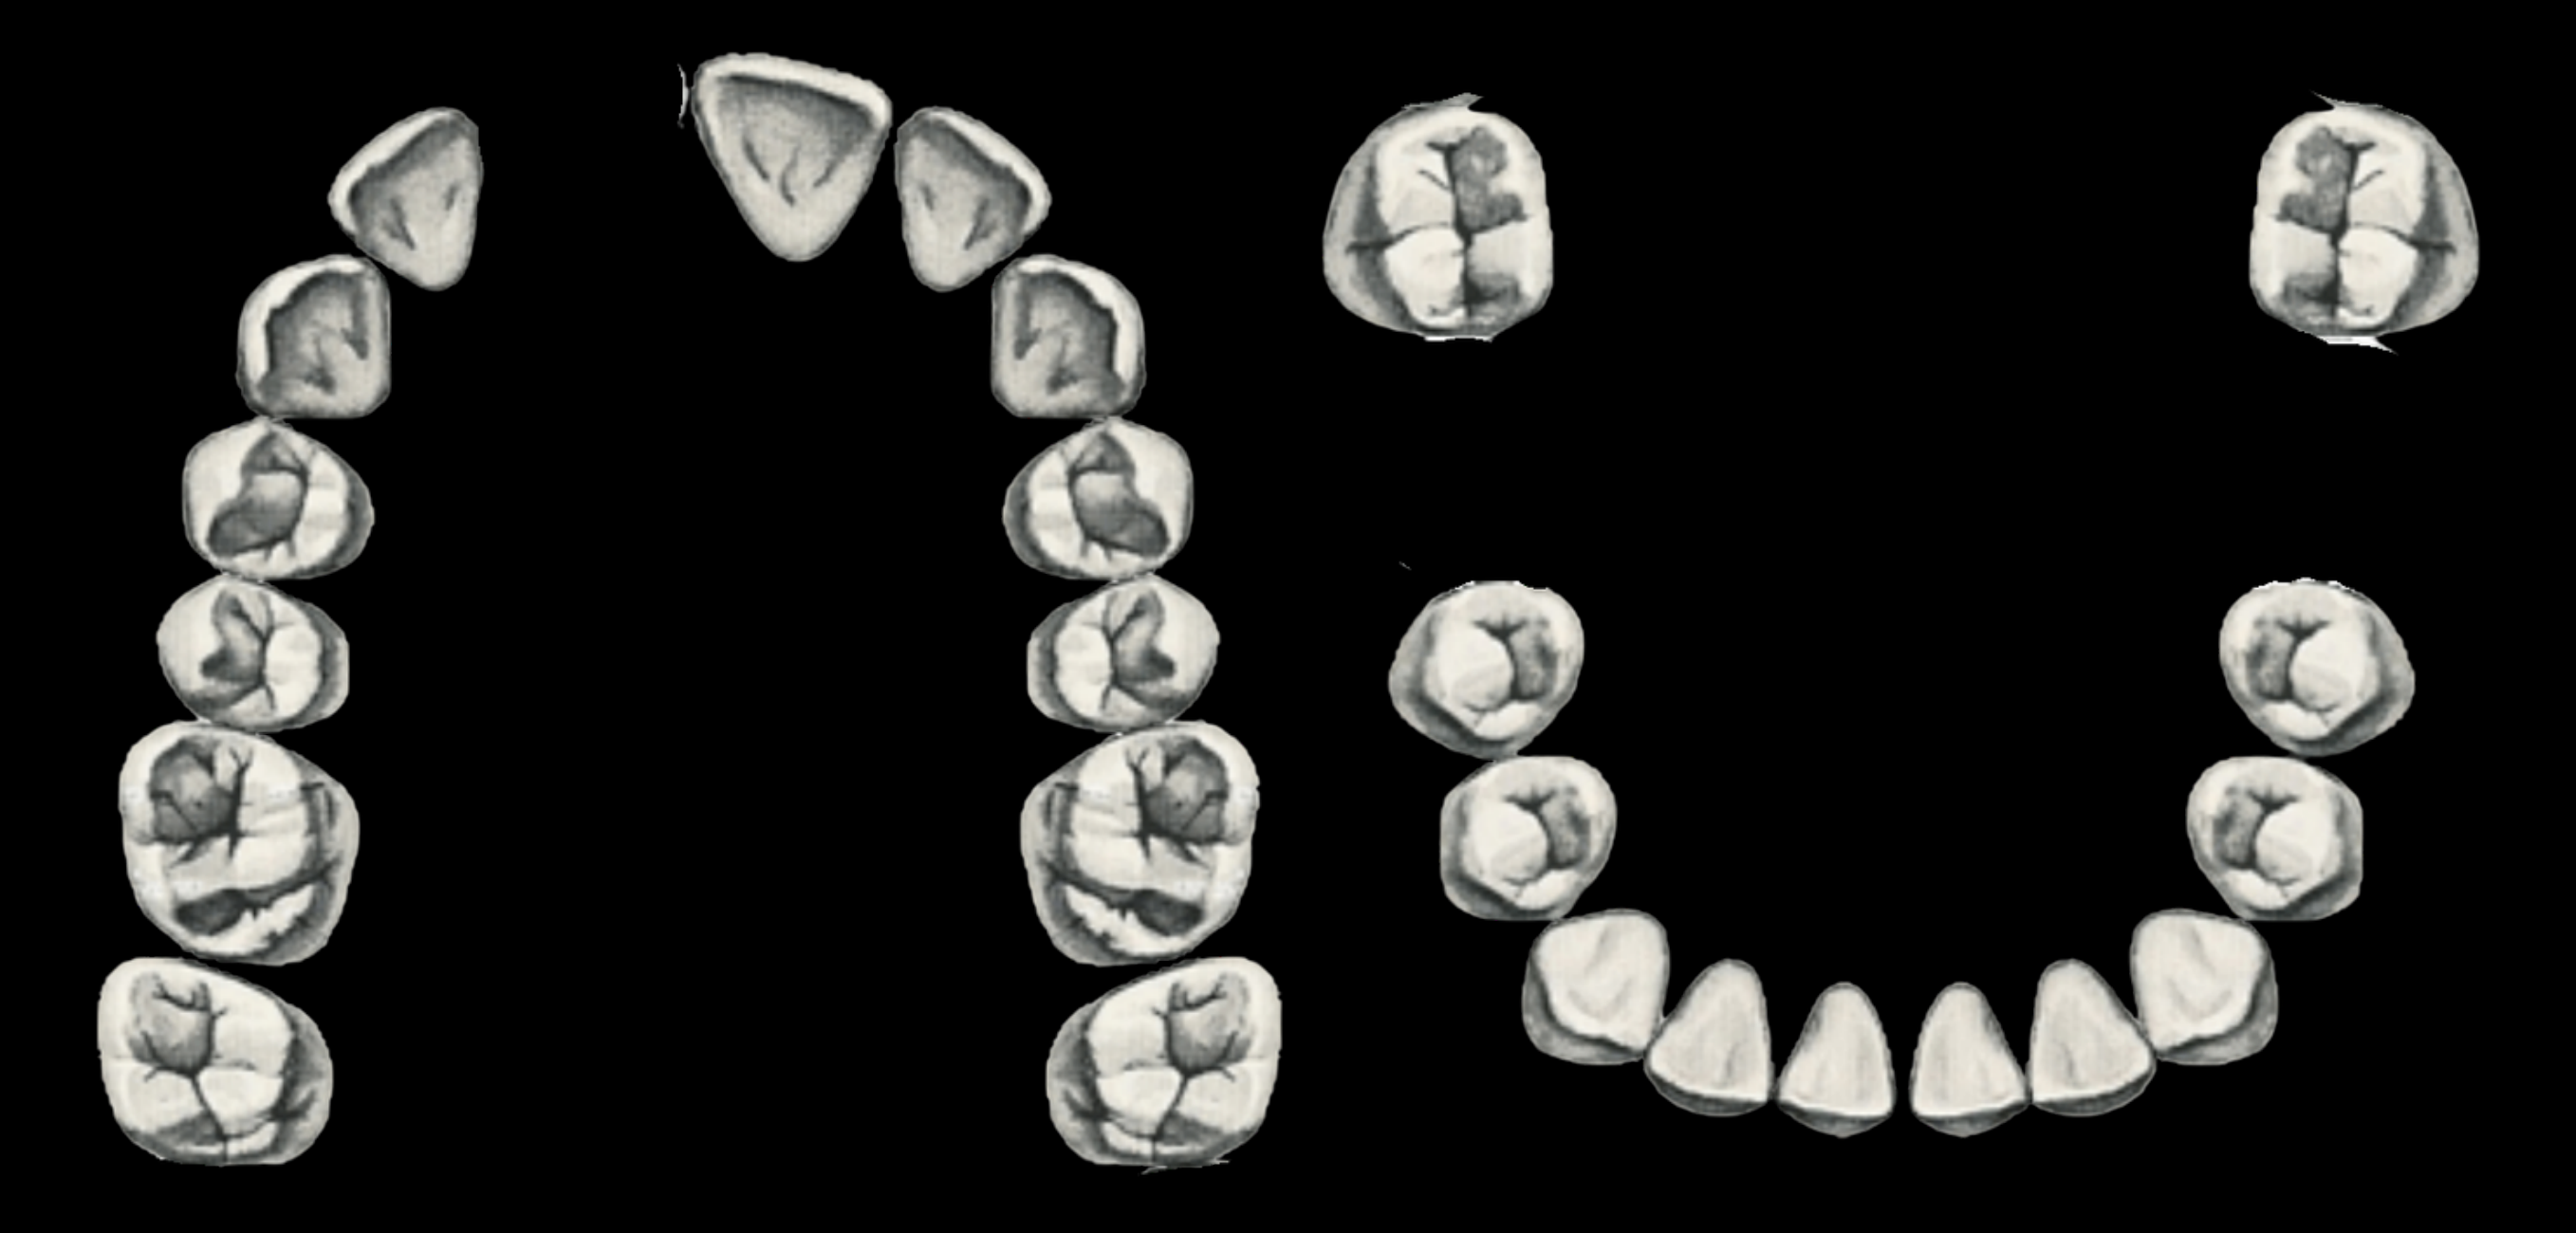
Clinical Articulation Assessment38
When evaluating the need for an MMR:
- Do not ask only: “Can the patient bite together?”
- Ask: “Can the technician articulate these casts predictably?”
Lecturer — Articulation Checks
The laboratory model should reproduce the patient’s occlusion as closely as possible.
- Compare articulating-paper marks on the articulator with those in the patient’s mouth, and check the stability of the record.
- Potential causes of discrepancy include an inaccurate bite record, incorrect articulation, movement or compression of free-end tissues, periodontal ligament compression, bubbles in the bite material, stone between occlusal surfaces, and untrimmed interproximal extensions of the bite record.
- Before sending a bite record to the laboratory, check for perforations, confirm the recorded contacts match the patient’s mouth, and remove excess material.
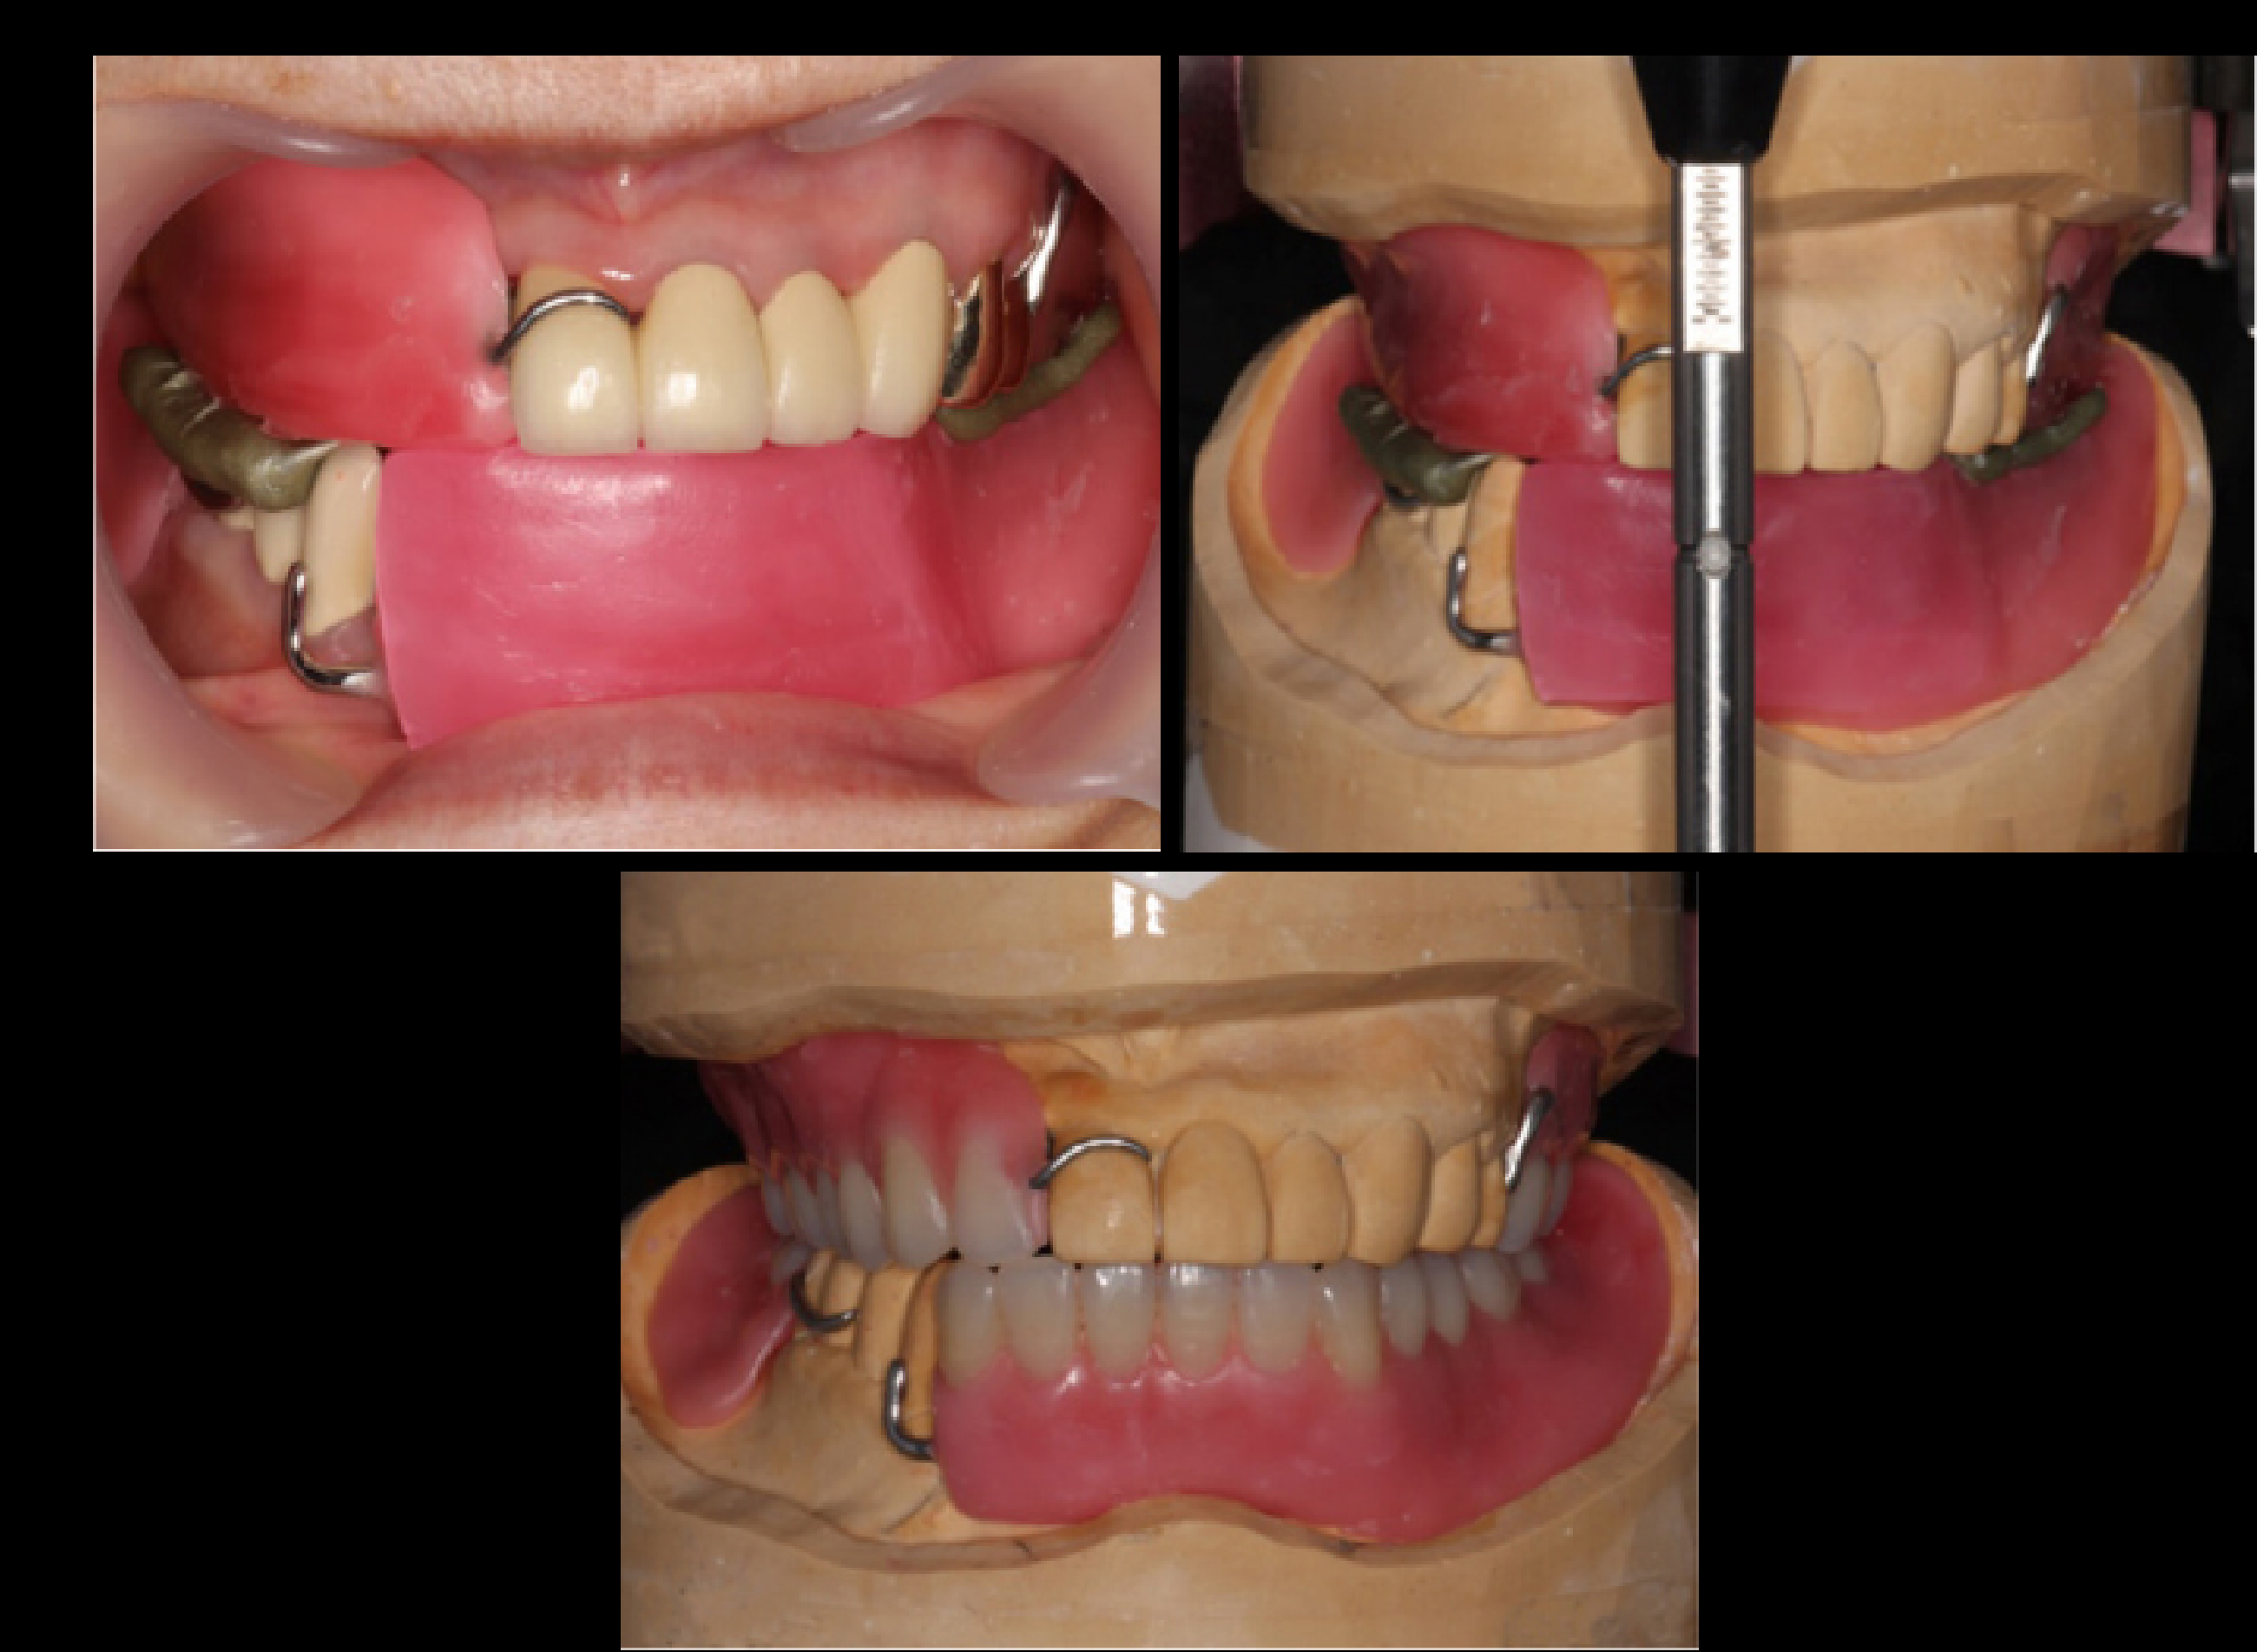
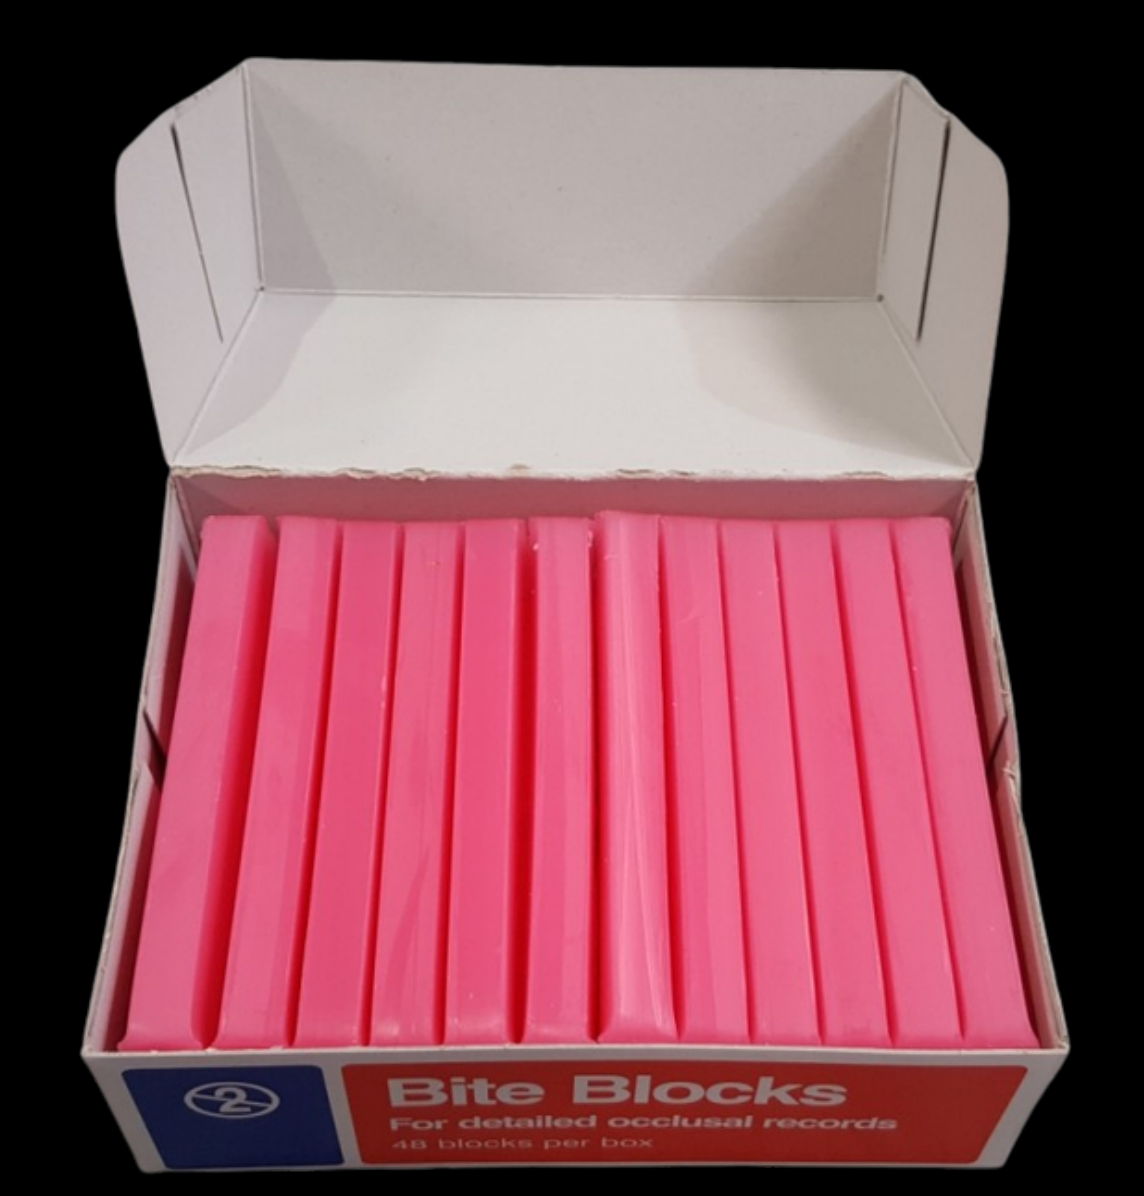
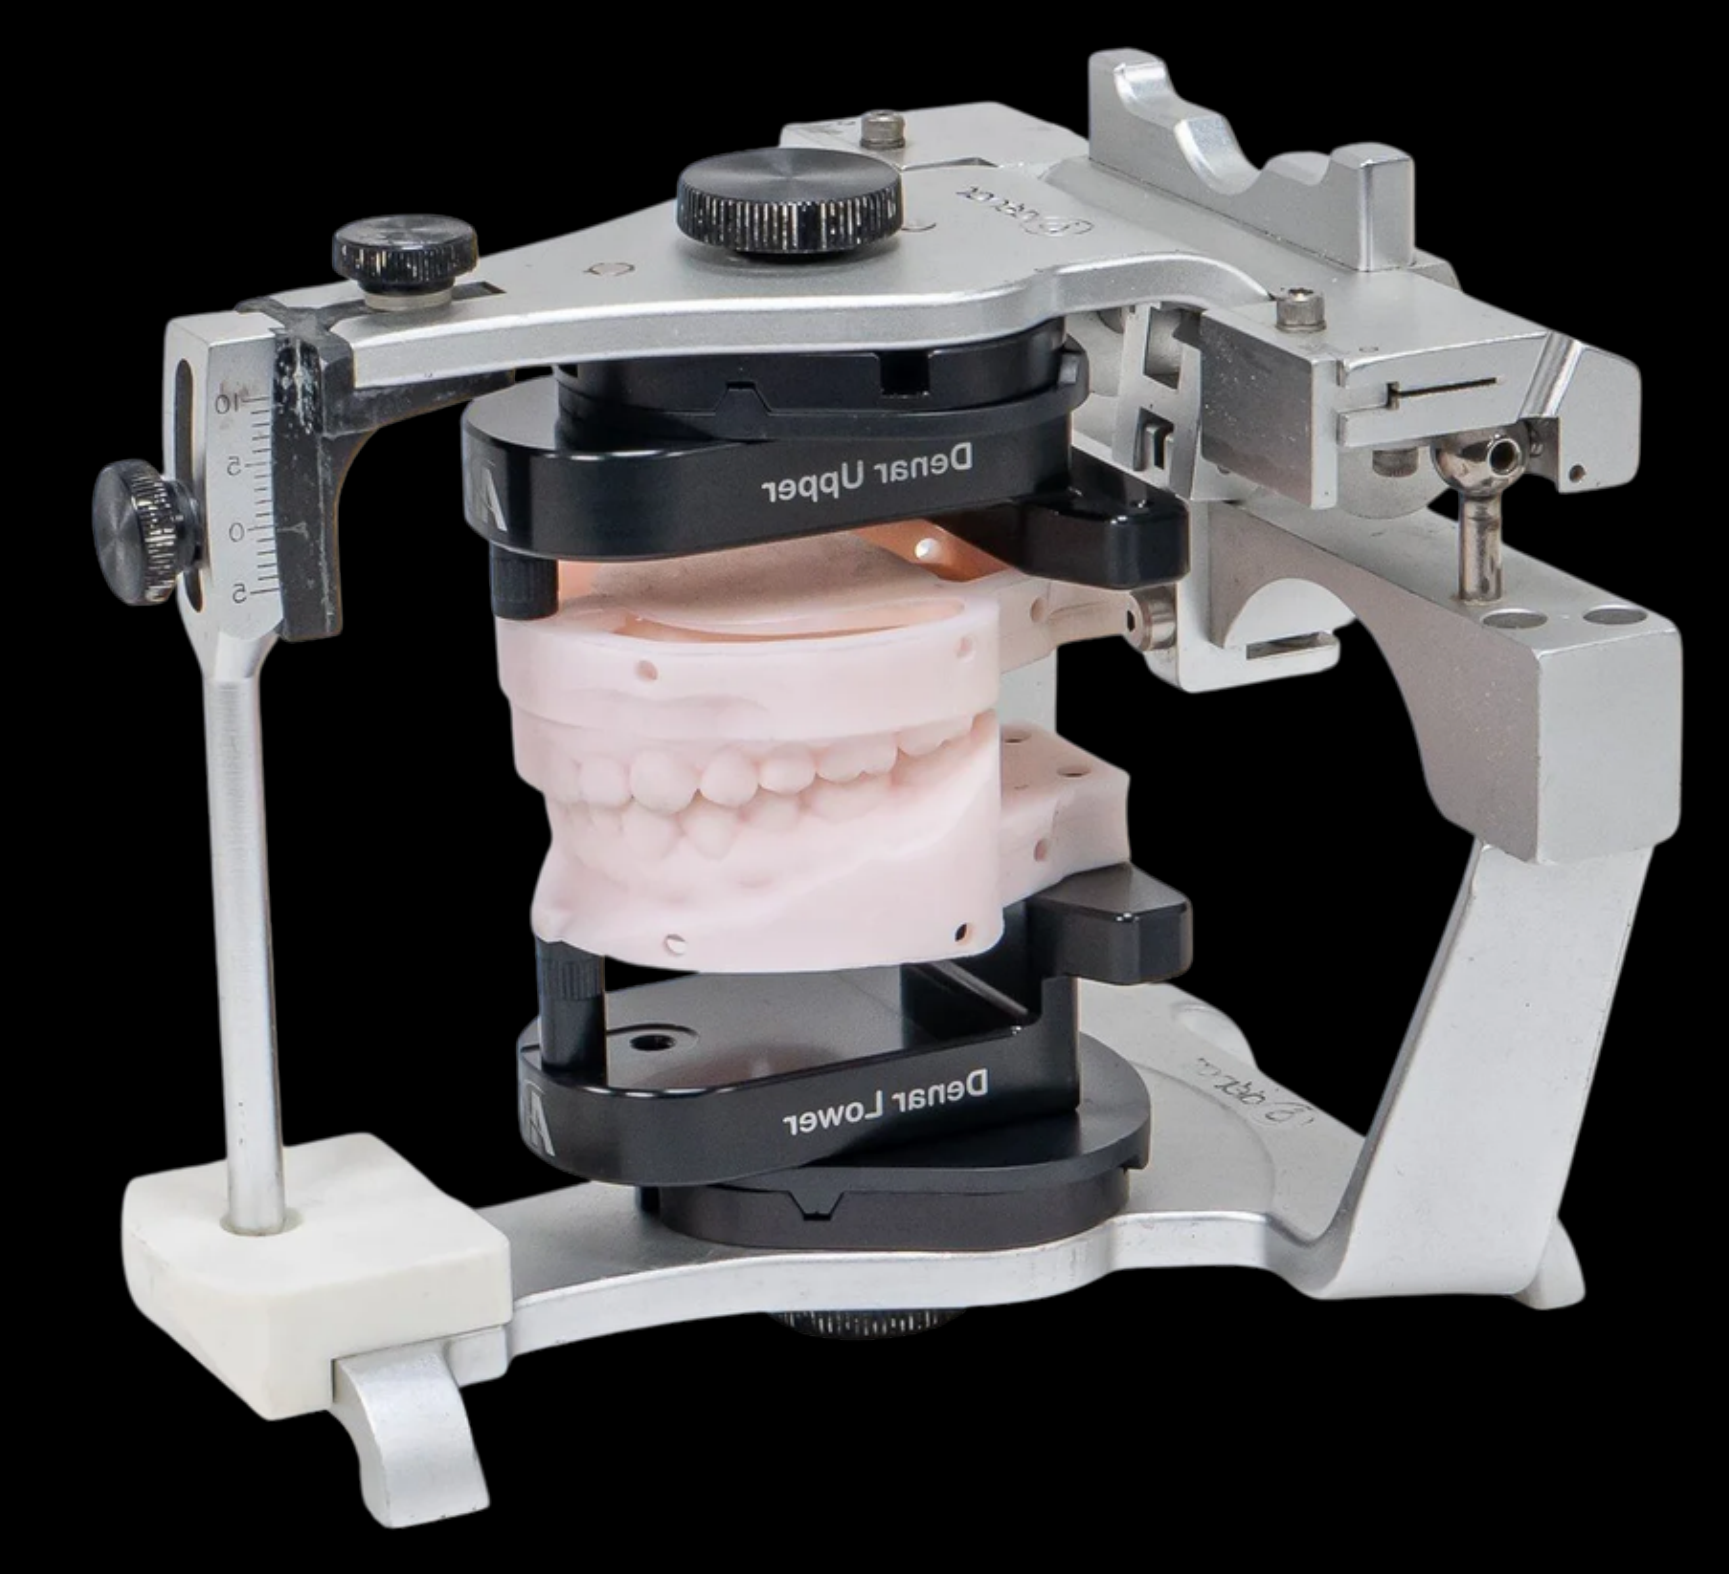
Practical Guide: Cast-Rocking Test39
Put the models together and evaluate stability:
- Are they stable?
- Are they rocking / sliding?
Lecturer — Cast Stability
A free-end cast may appear stable in the patient’s mouth because the patient’s joints and muscles stabilize the bite.
- The laboratory works with rigid casts and cannot reproduce tissue compression in the same way.
- The clinician should ensure the record provides a stable relationship for the technician.
 | 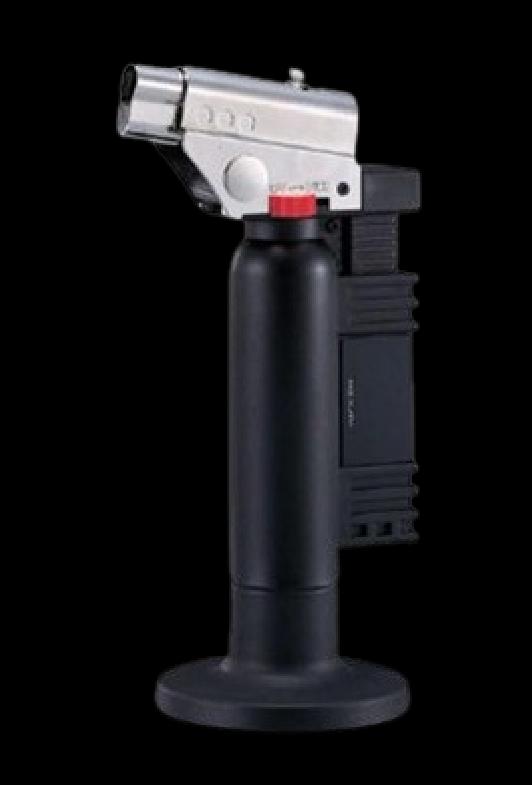 |
 |  |
Feasibility of Digital Bite Registration40
| More Predictable | More Challenging |
|---|---|
| Short bounded saddle | Long edentulous span |
| Stable teeth | Free-end saddle |
| Good access + moisture control | Mobile / displaceable tissues |
| Reliable occlusal landmarks | Functional border required |
| Minimal tissue displacement | Limited access or difficult tongue/cheek control |
| Few stable occlusal landmarks |
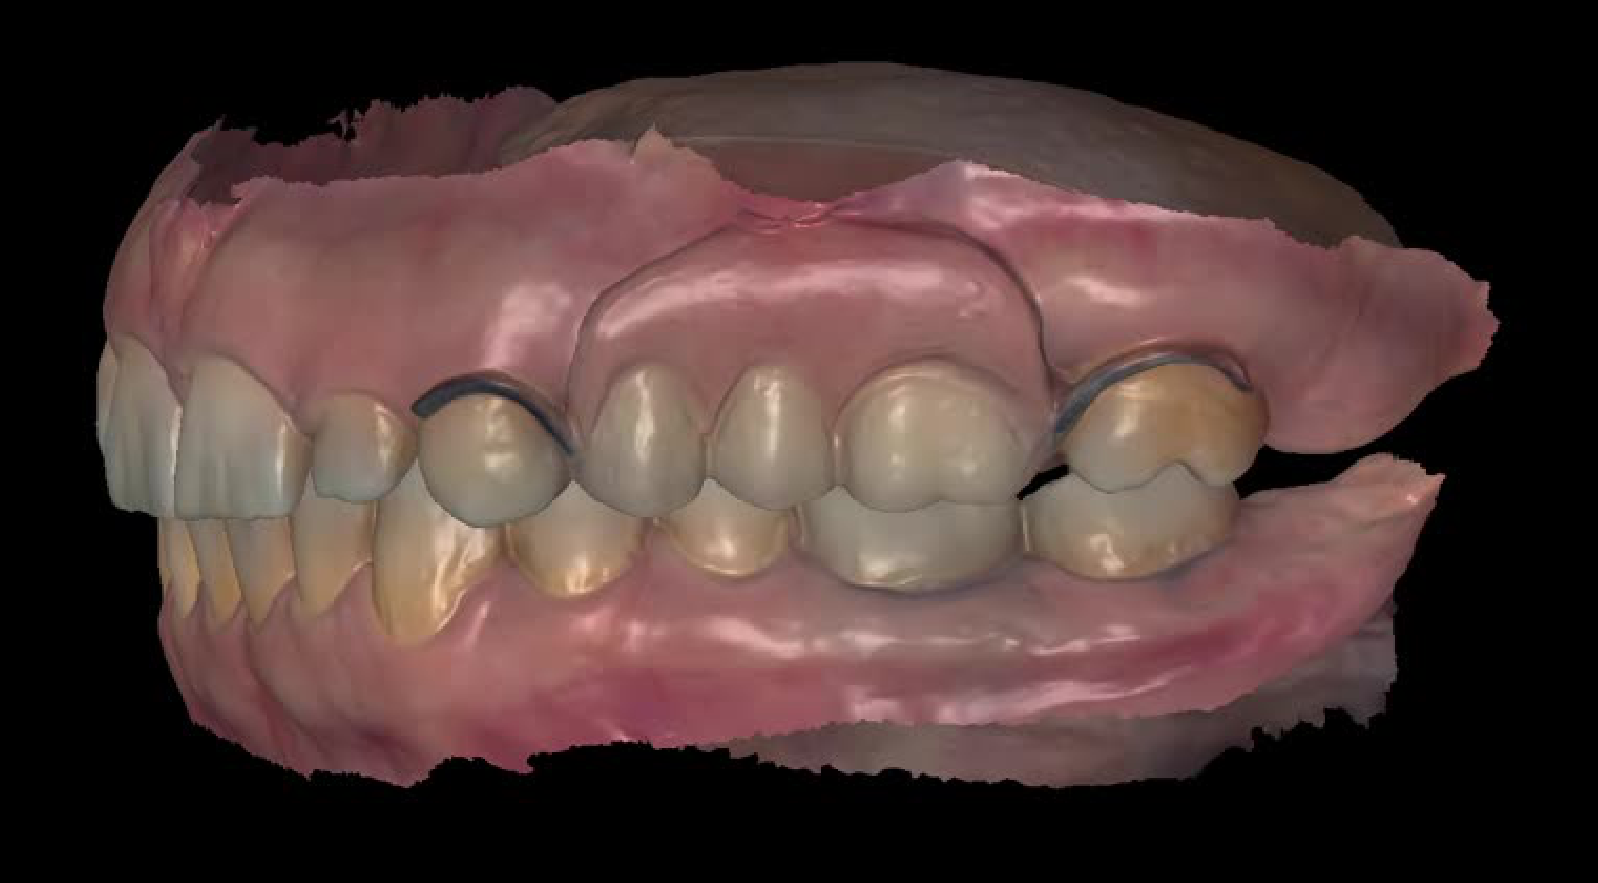
The scan can look beautiful… but the bite can still be wrong. Always validate the digital record clinically.
Lecturer — Digital Bite
A scanner may appear to produce a bite record but still use algorithms that cannot establish the true occlusion when posterior support is missing.
- Examine the digital occlusion using the scanner’s contact-only function.
- If a digital workflow is selected, it should ideally remain within the digital workflow rather than alternating between scans, printed models, and conventional records.
Can I scan the bite?

Tooth Try-In and Insertion
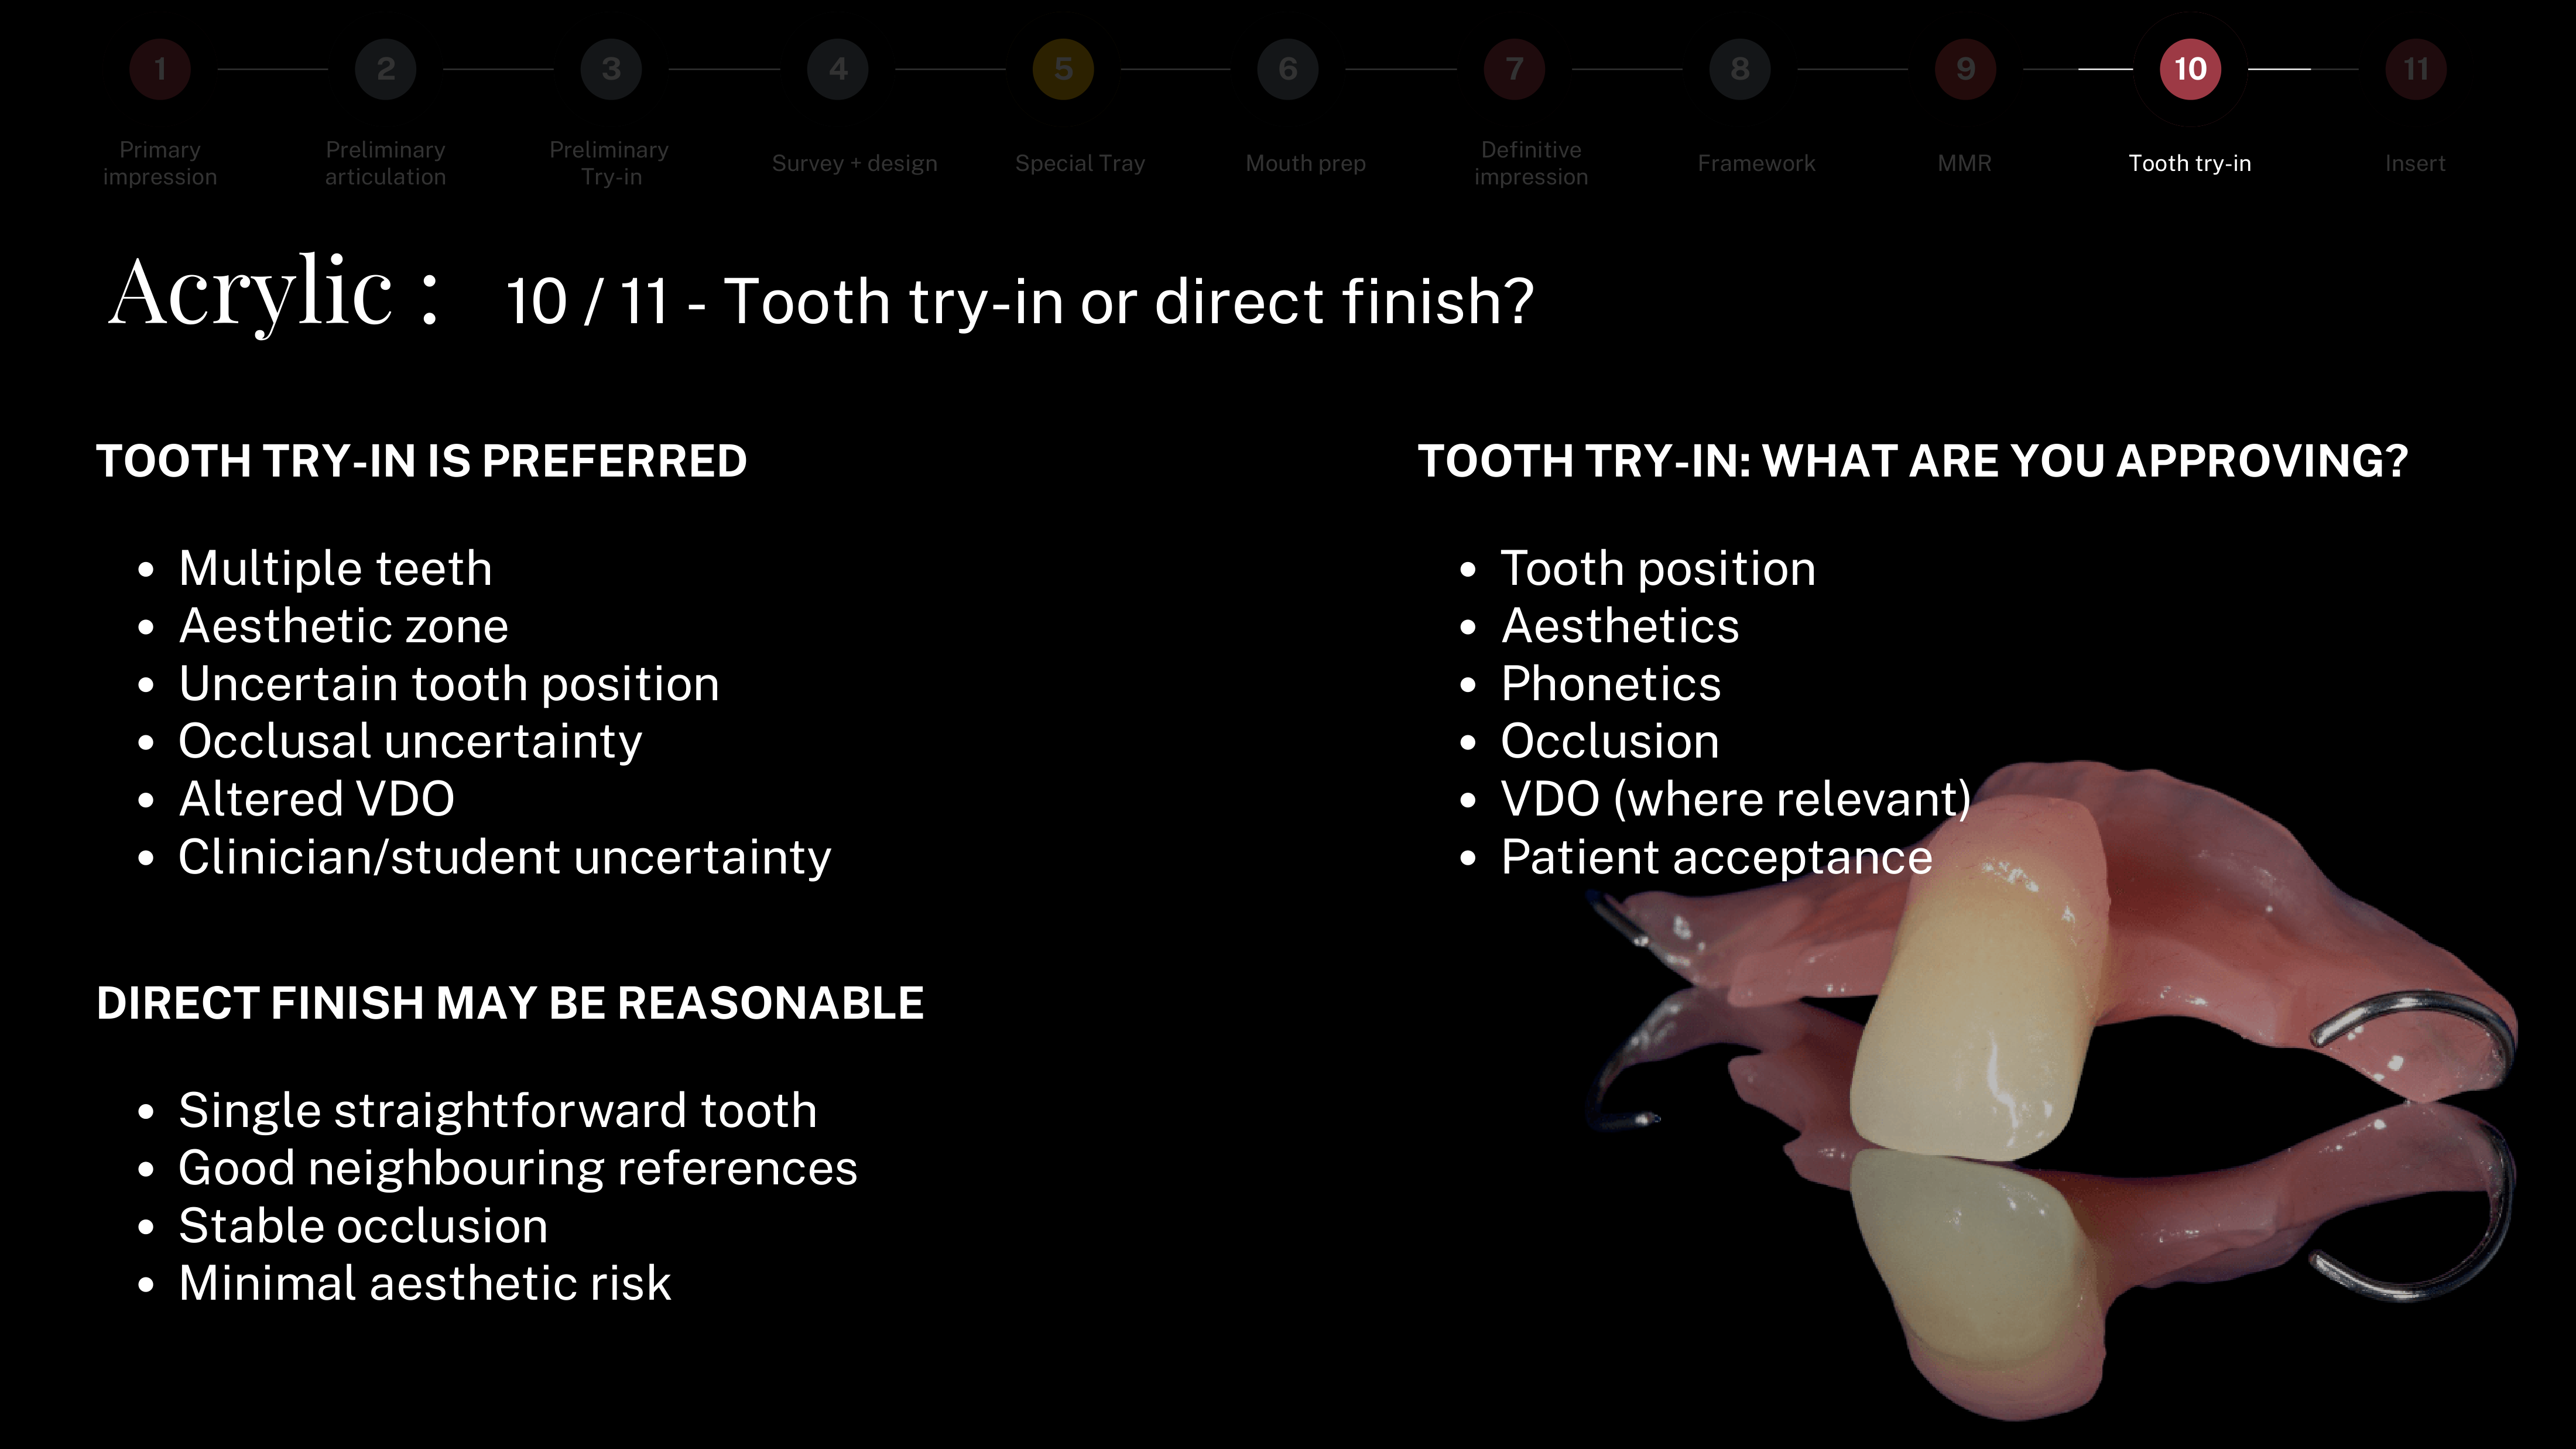
Tooth Try-In vs. Direct Finish41
Tooth Try-In is Preferred
-
Multiple teeth
-
Aesthetic zone
-
Uncertain tooth position
-
Occlusal uncertainty
-
Altered VDO
-
Clinician/student uncertainty
-
The patient’s expectations need to be confirmed; the try-in should also confirm retention and stability and that the vertical dimension has not been unintentionally increased
Direct Finish May Be Reasonable
- Single straightforward tooth
- Good neighbouring references
- Stable occlusion
- Minimal aesthetic risk
Lecturer — Shade Selection
Shade selection should include a shade tab and preferably a photograph of the shade tab in the patient’s mouth.
- Communicate the patient’s age and relevant aesthetic information when needed.
- For a single missing anterior tooth, a try-in may not be necessary if occlusion and articulation are satisfactory.
Clinical Checks During Tooth Try-In
- Tooth position
- Aesthetics
- Phonetics
- Occlusion
- VDO (where relevant)
- Patient acceptance
Lecturer — Shim Stock Test
The patient should be able to bite in the same position with and without the denture; a shim stock test can verify this.
- Place shim stock between selected natural teeth without the denture, ask the patient to bite, and confirm contact.
- Insert the denture, place the shim stock in the same position, and ask the patient to bite again.
- If contact is lost with the denture, the denture may have opened the vertical dimension and requires adjustment before processing.
Denture Insertion Guidelines42
Do not jam it in!
Path of Insertion Assessment
- Posterior → anterior?
- Right → left?
- Simultaneous seating?
Delivery Technique
Look for the first contact, then adjust conservatively:
- Rigid acrylic interface
- Clasp
Lecturer — Conservative Adjustment
Acrylic dentures may be tight because wax or acrylic is present in interproximal areas near the clasps.
- The initial adjustment should generally be directed at the rigid acrylic components rather than the clasp — a common error is to adjust the clasp when the acrylic is actually preventing seating.
- Do not over-trim the embrasures because this may cause food packing and discomfort; the adjustment should be controlled and incremental.
Cobalt-Chromium RPD Clinical Workflow
Indications for Material Selection43
Acrylic
- Changing dentition
- Questionable prognosis
- Future extraction likely
- Easy to modify / add teeth
- Transitional treatment
- Flexibility
Cobalt-Chromium (Co-Cr)
- Rigid
- Thin
- Less tissue coverage
- Design-controlled support and bracing
- Potentially more cleansable
- Indicated in the appropriate clinical presentation
Complete Clinical Stages44
- Primary impression
- Preliminary articulation
- Preliminary try-in
- Survey + design
- Special tray
- Mouth preparation
- Definitive impression
- Framework try-in
- Maxillomandibular relationship (MMR)
- Tooth try-in
- Insertion
Stage Emphasis by Material
- Preliminary articulation
- Preliminary try-in (optional)
- Survey + design
Cobalt-Chromium
- Mouth preparation
- Framework try-in
- MMR
Preliminary Articulation and Diagnostic Tooth Arrangement
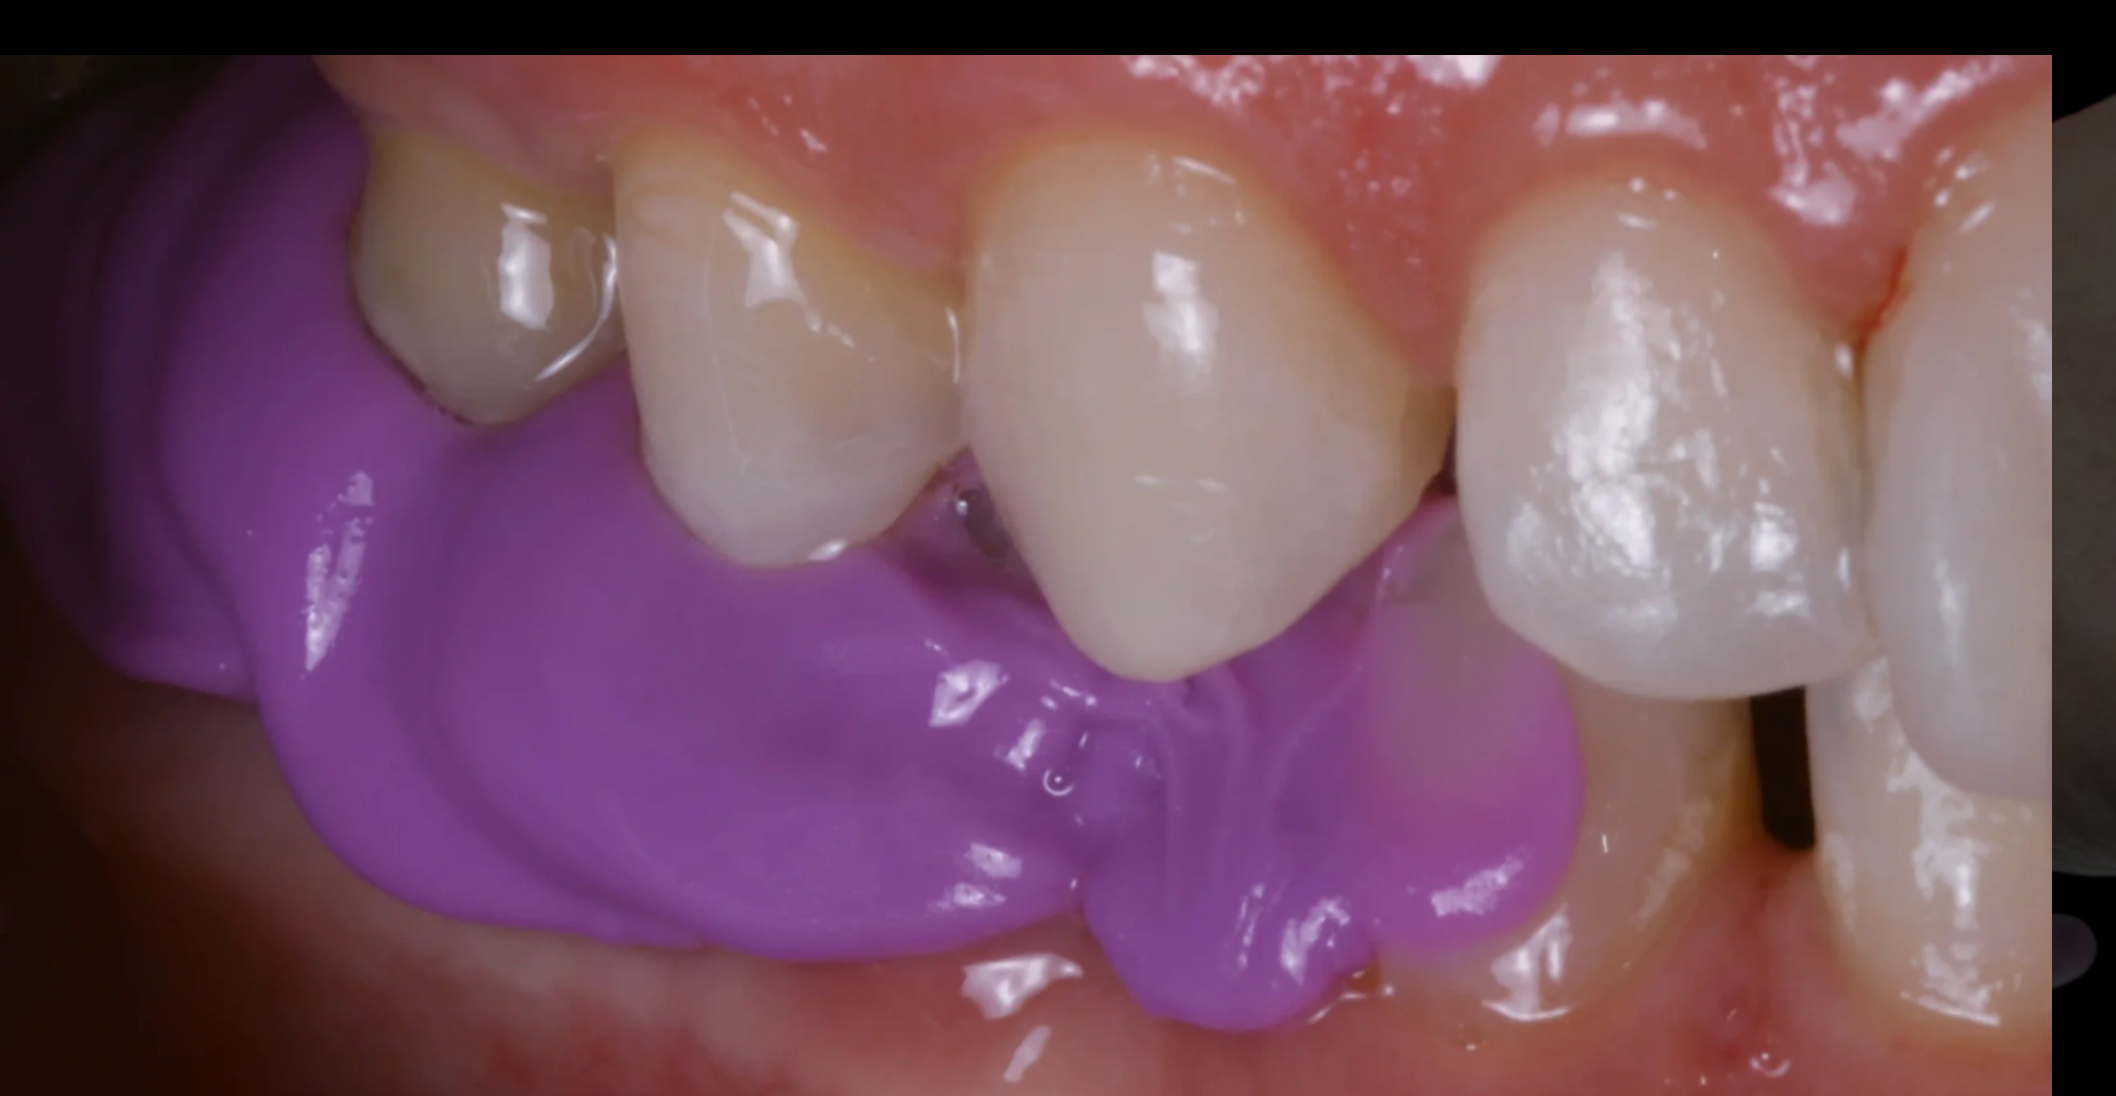
Stage 2: Diagnostic Cast Articulation45
Methods to articulate diagnostic casts:
- PVS bite registration
- Diagnostic MMR
- Base and occlusal rim fabricated intraorally, on the study model, or requested from the laboratory
Lecturer — Diagnostic Articulation
Diagnostic articulation may be requested when the laboratory needs to assess the occlusal relationship, the available prosthetic space, the likely tooth position, the proposed vertical dimension, and the relationship between the abutments and opposing teeth.
- The laboratory request may include pouring upper and lower impressions, articulating the models, surveying the articulated models, and providing diagnostic information for the planned framework.
 |  |
 |
Stage 3: Preliminary Try-In46
Sometimes you need the teeth before the metal.
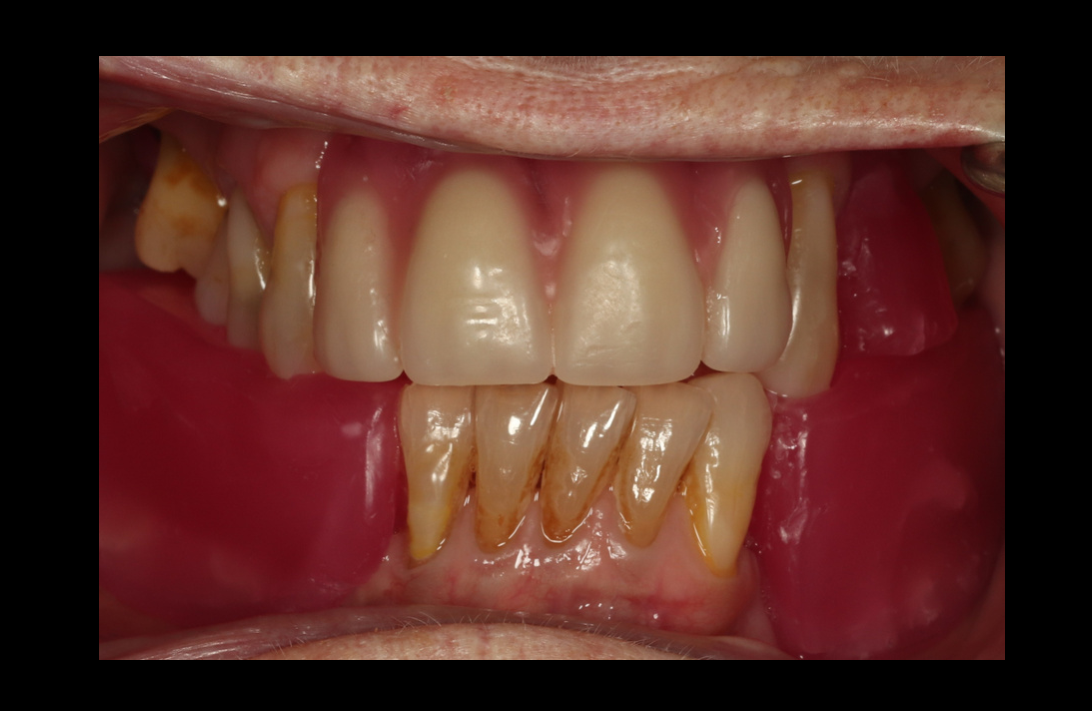 | 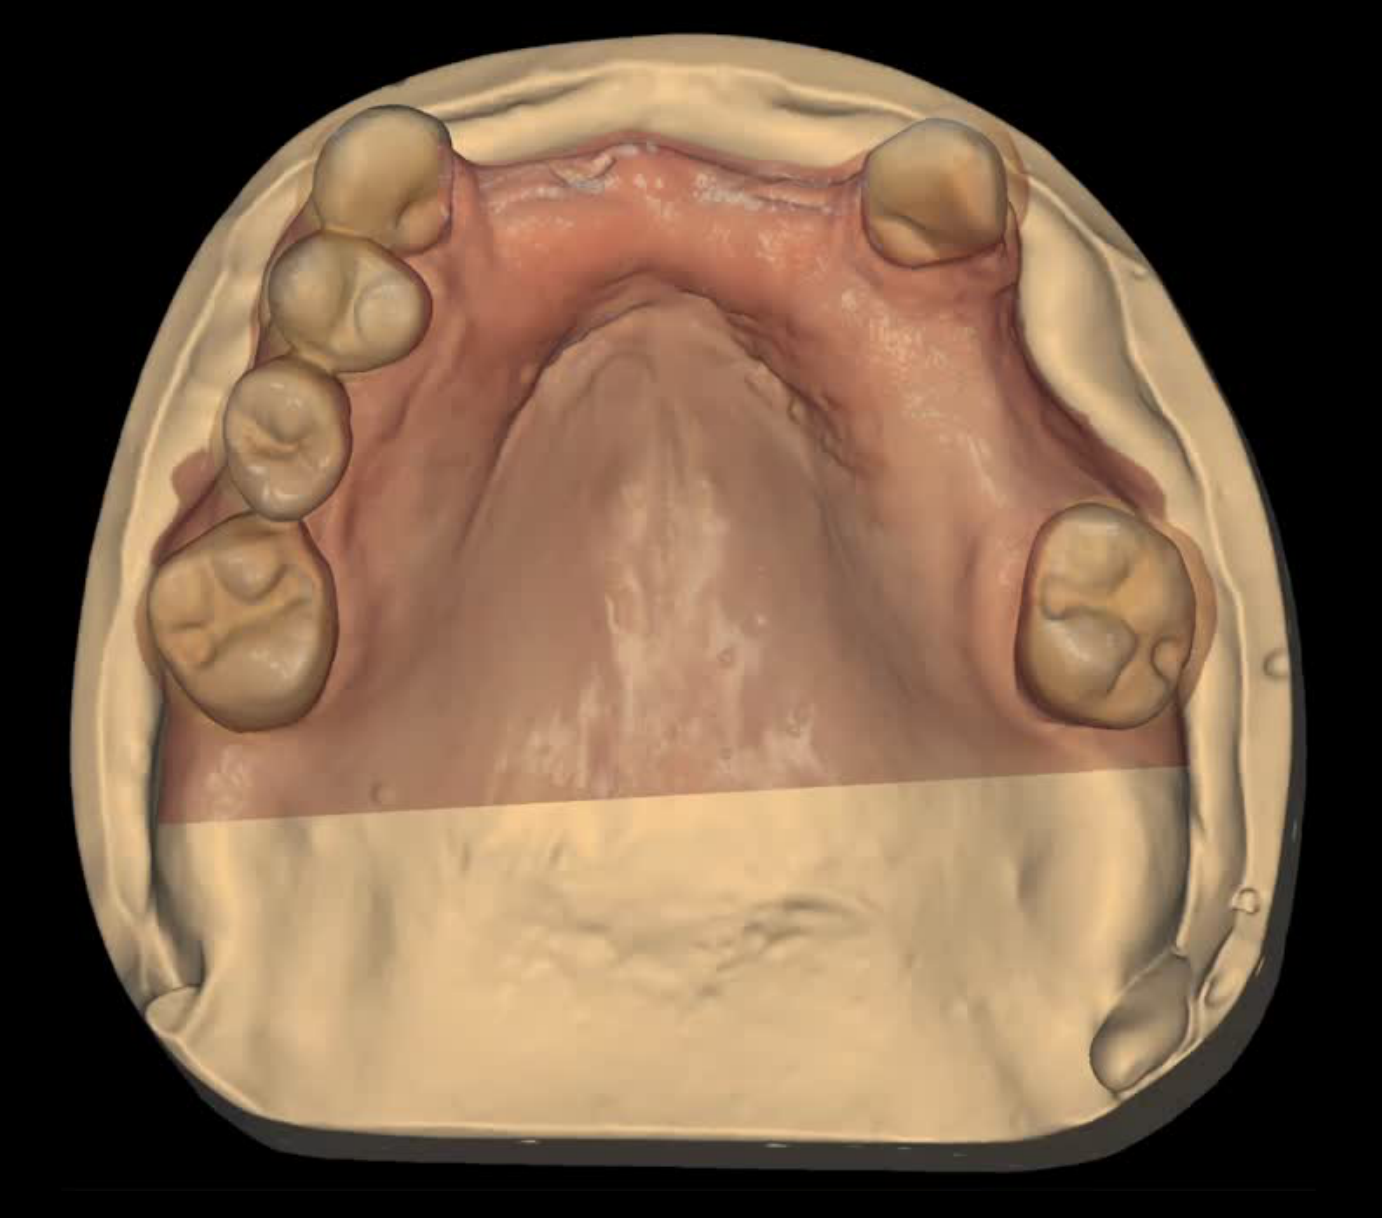 |
Indications for Diagnostic Tooth Arrangement
-
Anterior tooth position is uncertain
-
Class II or Class III interarch relationship
-
Limited prosthetic space
-
Framework must support an unusual tooth position
-
The case is complex
-
Denture teeth will be positioned labially rather than directly over the ridge
-
The clinician must determine whether teeth should be positioned on or away from the ridge
-
The cobalt-chromium framework must be extended labially to support the planned tooth position
-
The vertical dimension is being changed
Clinical Workflow Sequence
Establish tooth position first → Design framework accordingly
Lecturer — Conformative Record
A diagnostic base and rim may be requested from the laboratory, fabricated chairside on the diagnostic model, or formed intraorally using a warmed bite block.
- For an intraoral conformative record: take upper and lower alginate impressions, place a slightly tall bite block, warm or soften it, ask the patient to close into the existing maximum intercuspation position, take a PVS bite record over the wax if required, and send the impressions and record to the laboratory.
- A diagnostic base and rim may be unnecessary when the vertical dimension is not being changed and the patient can close predictably — a PVS bite registration may then suffice.
Surveying and Mouth Preparation
Stage 4: Survey and Design47
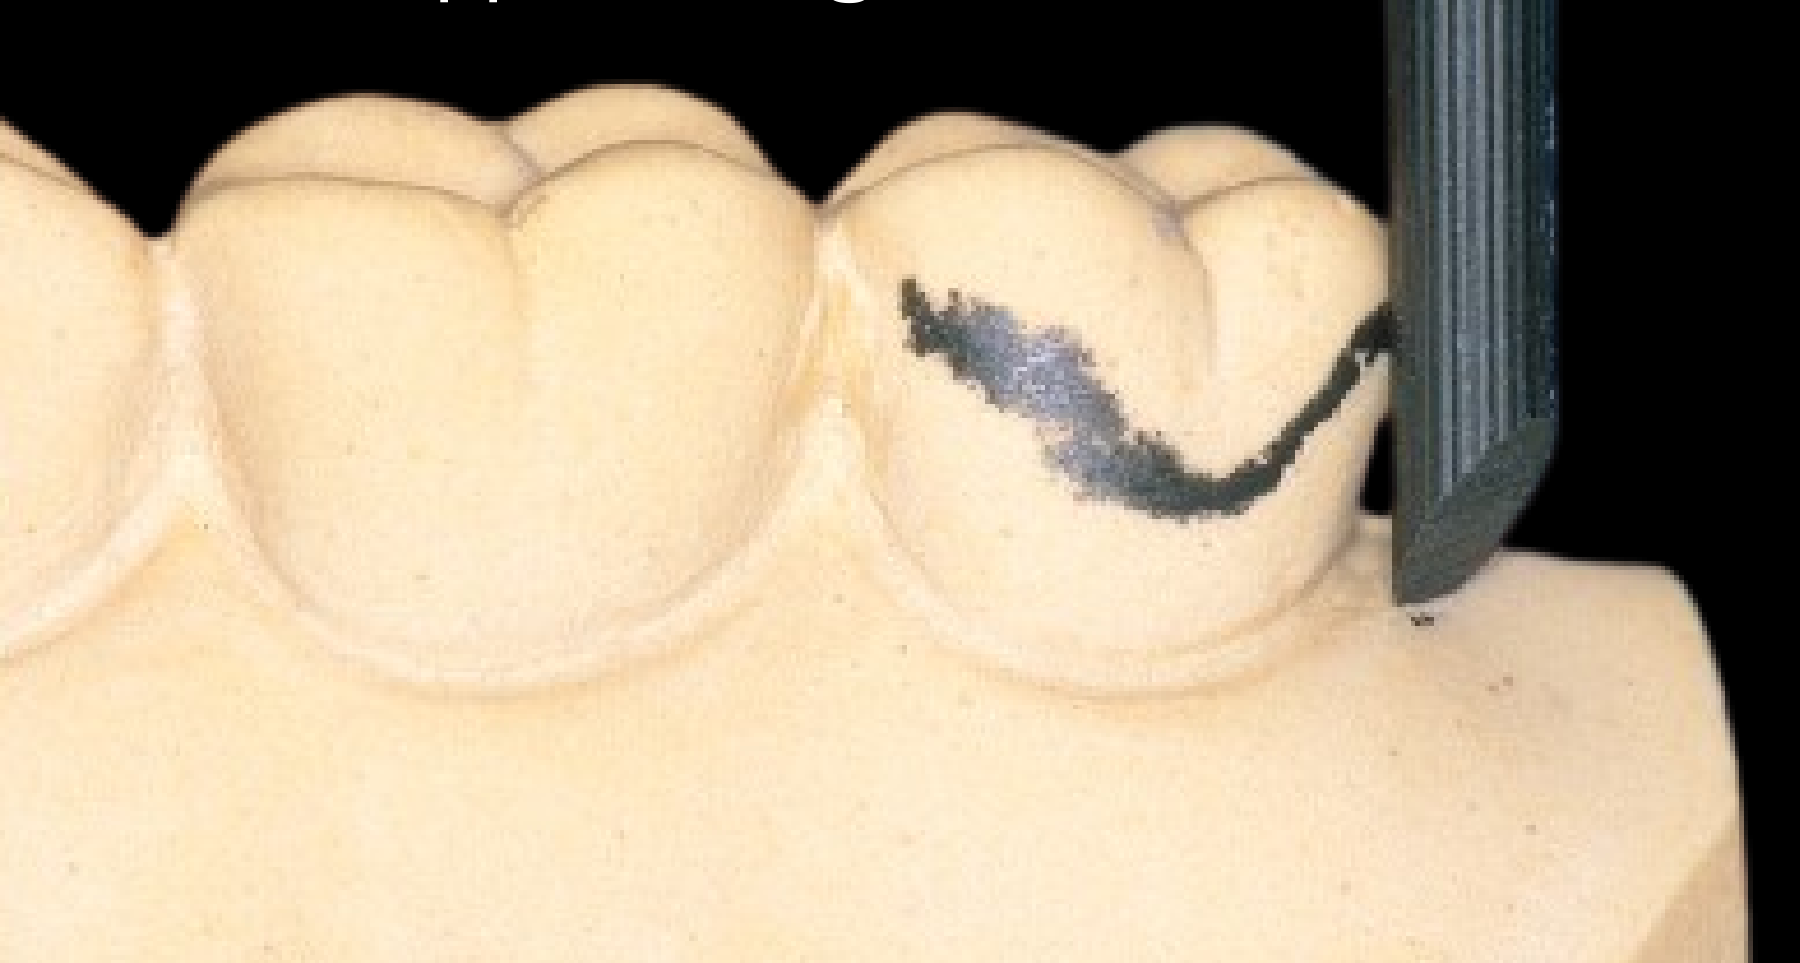 | 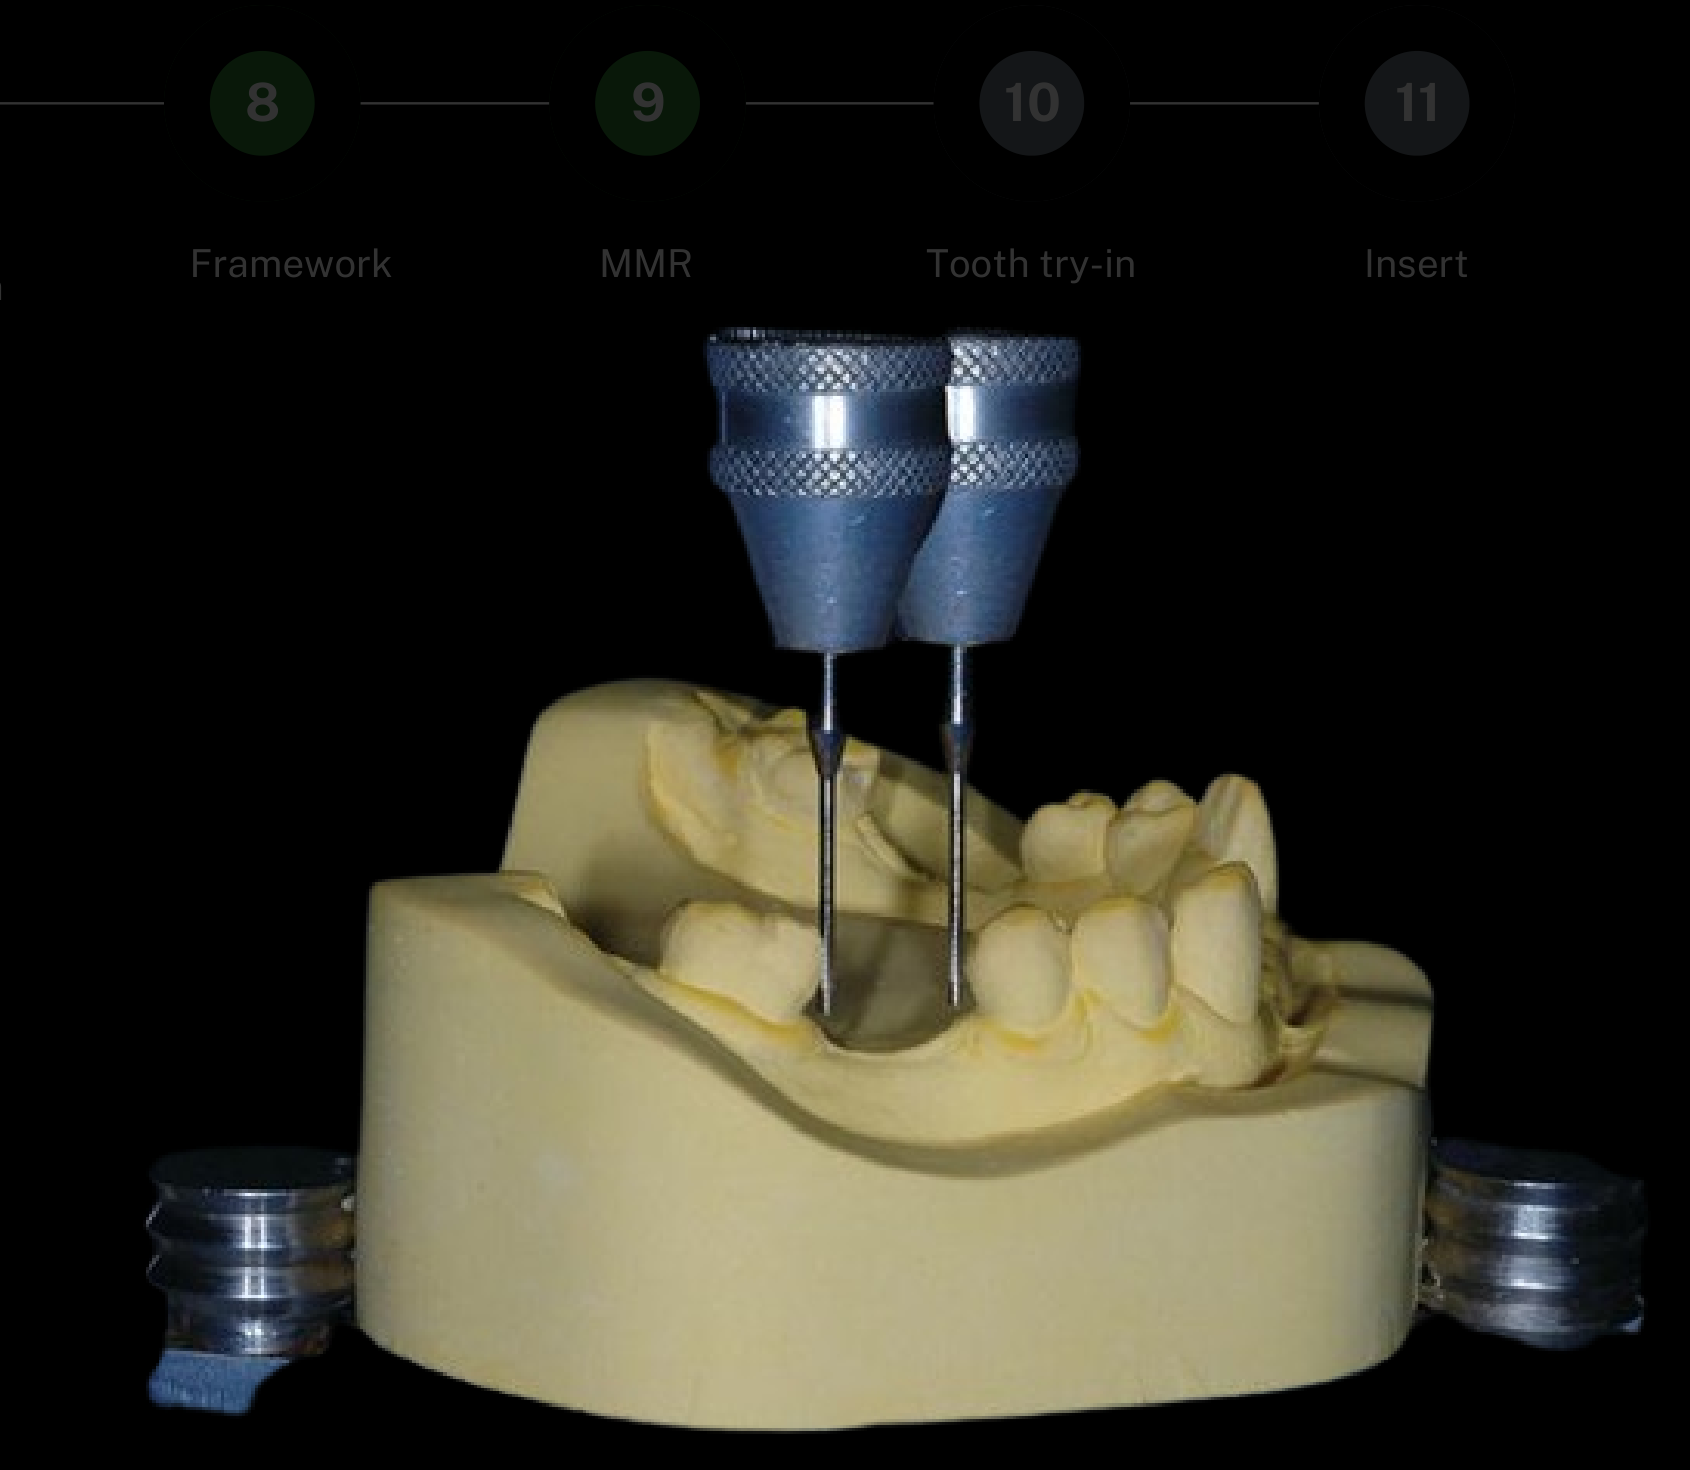 |
Diagnostic Information from Surveying
-
Undercuts (measured with undercut gauge)
-
Path of insertion (indicated by path arrow)
-
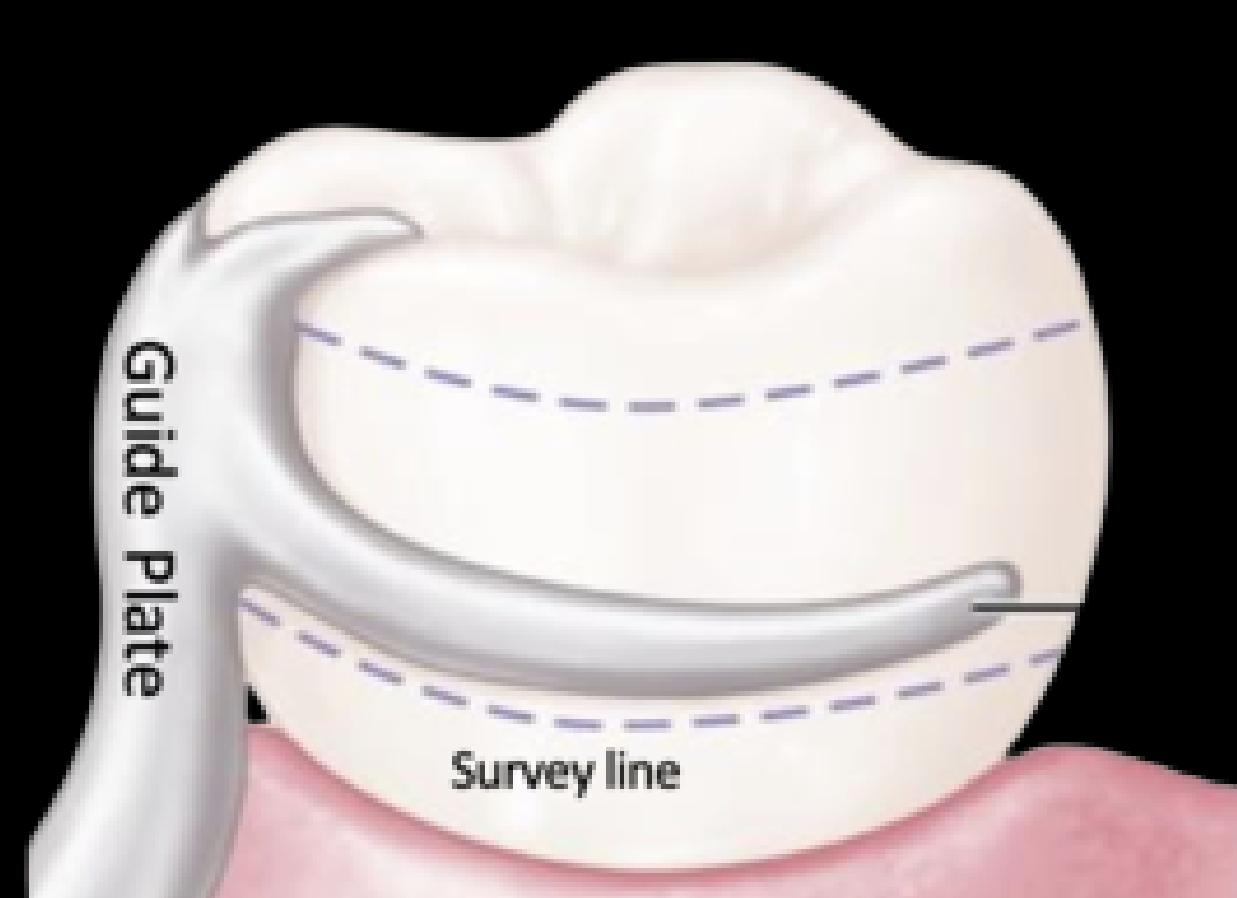
Interferences and survey lines
-
Support and guidance (proposed rest seats and guide planes)
-
Rest locations
-
Retentive clasp positions
-
Reciprocal clasp positions
-
Indirect retention
-
The available prosthetic space
-
The need for mouth preparation
Sequence of Execution
Survey → Design → Prepare
Lecturer — Survey Sequence
The primary model should be surveyed and designed before preparation begins, and the design is reviewed with the supervisor before treatment proceeds.
- Sequence: take primary impressions, articulate the primary models when required, survey the articulated models, plan rests, guide planes, clasps, and indirect retention, assess the prosthetic space, review the design with the supervisor, obtain approval, perform mouth preparation, take the definitive impression, and resurvey the master model.
- Bring the articulator with the models when the design is reviewed — two unattached casts do not provide sufficient information for assessing occlusion, prosthetic space, or mouth preparation.
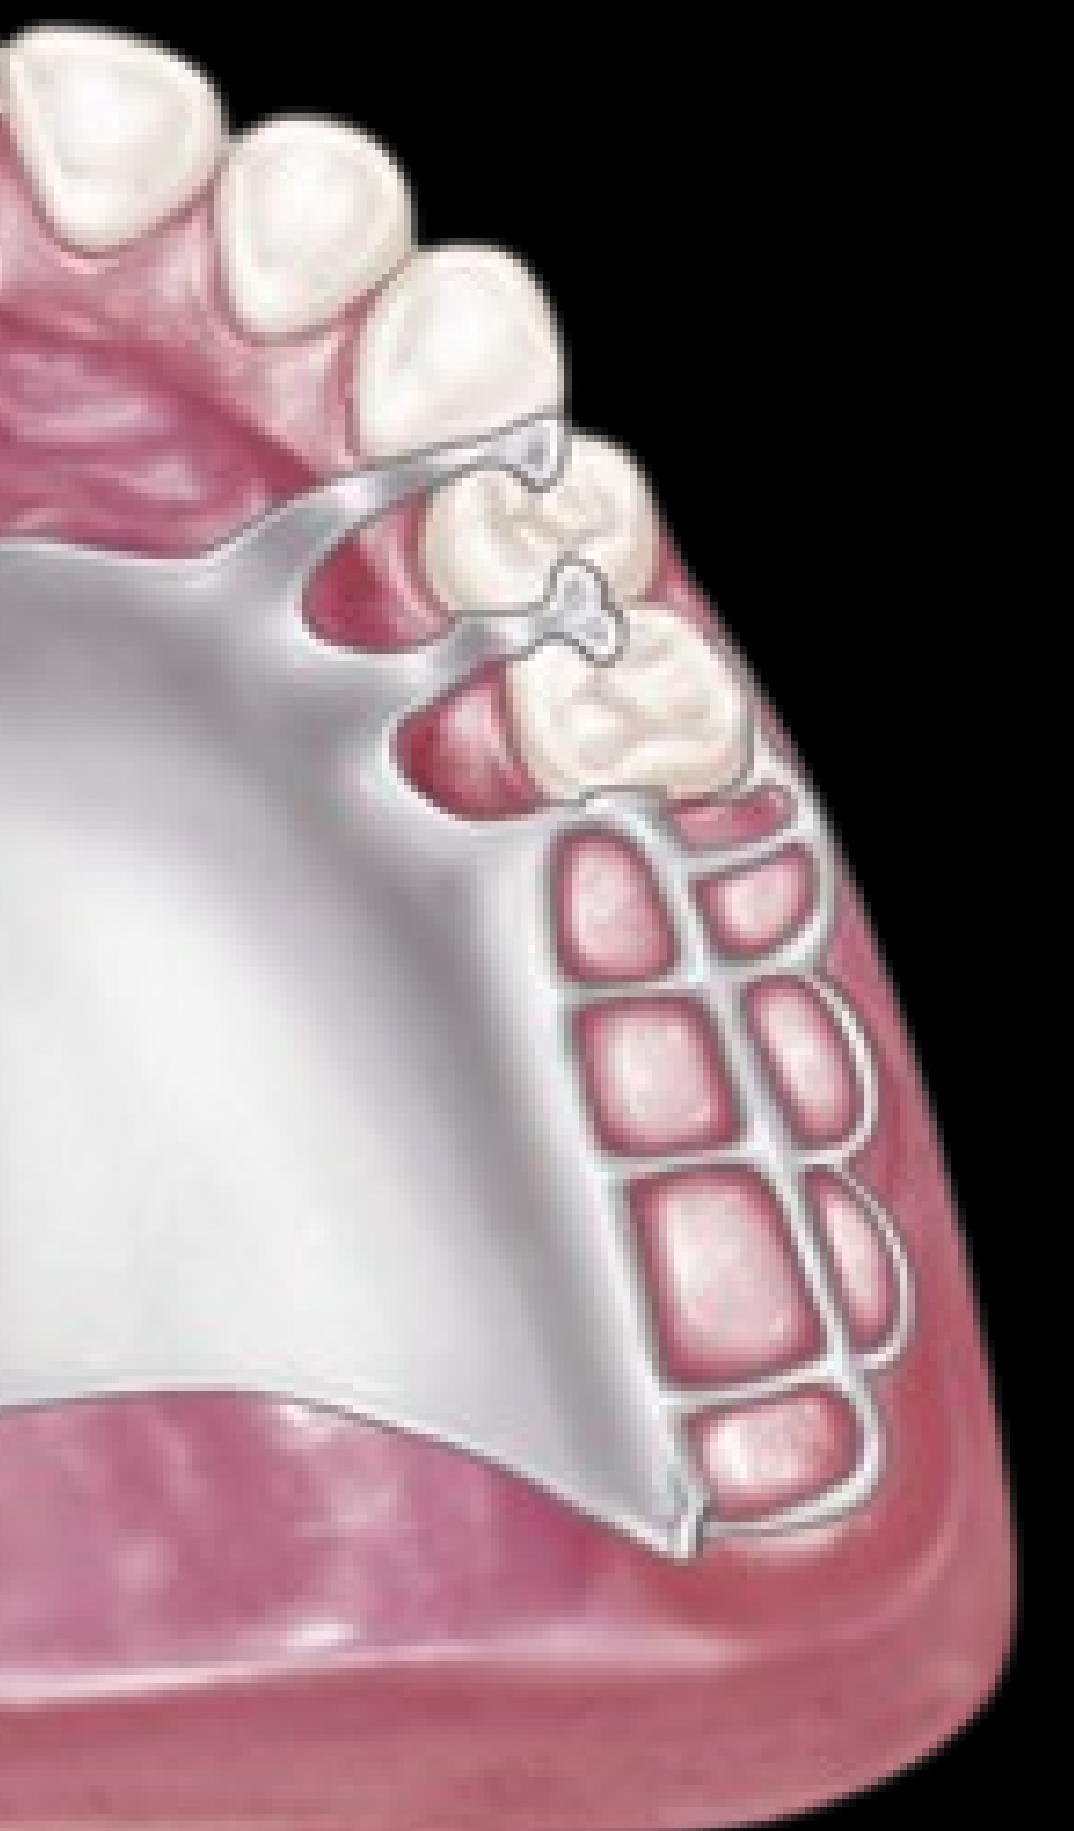
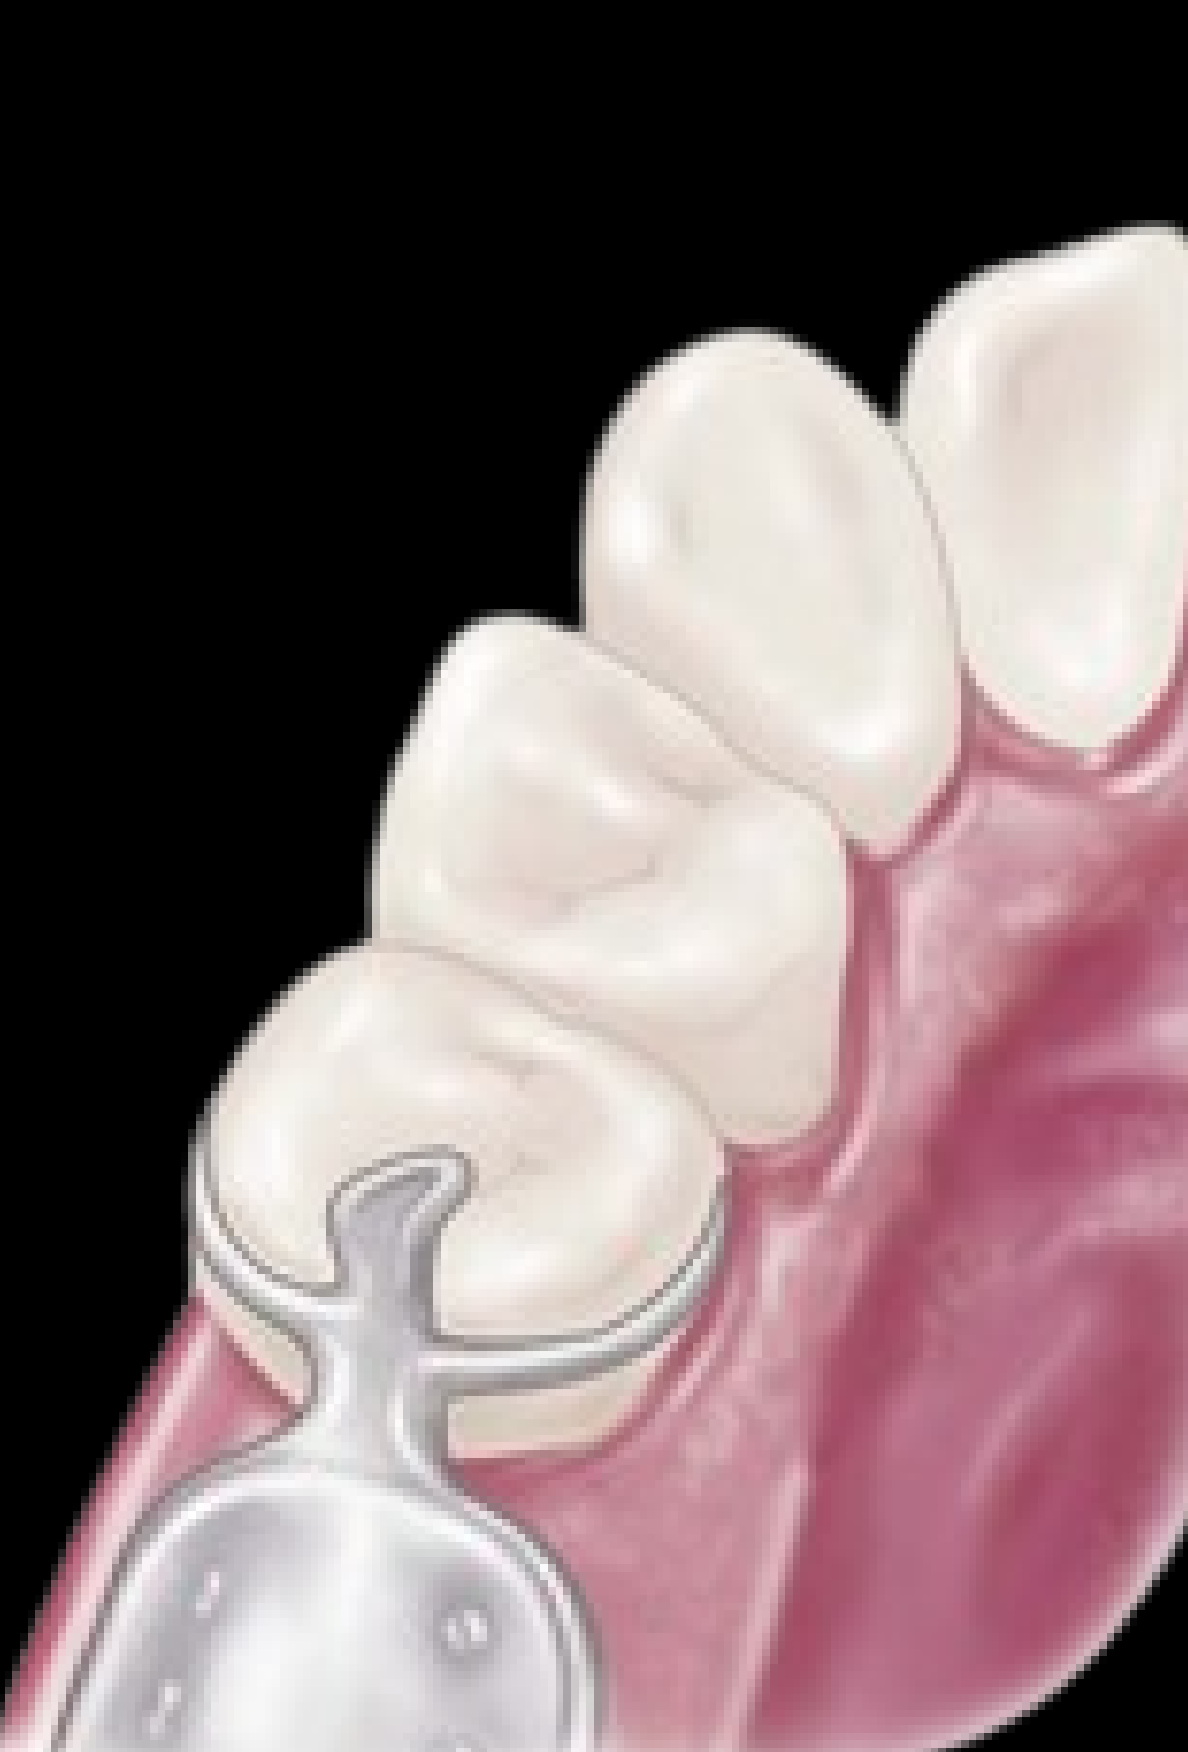
Stage 6: Mouth Preparation48
Mouth preparation is design-driven; every preparation should have a reason.
 |  |
 |
Key Procedures
-
Rest seats
-
Guide planes
-
Enamel recontouring
-
Interference reduction where appropriate
-
Adjustment of the occlusal plane
-
Modification of teeth according to the planned path of insertion
Clinical Workflow Progression49
Lecturer — Mouth Preparation
Enamel recontouring may be used to level an occlusal plane, such as when lower anterior teeth have over-erupted relative to missing upper anterior teeth.
- Interference reduction may be required when the planned framework path of insertion causes contact with a tooth surface that is not intended to interfere.
- The clinician should communicate with the technician about the planned path of insertion and confirm the proposed adjustments intraorally.
- Primary impression
- Preliminary articulation
- Preliminary try-in
- Survey + design
- Special tray
- Mouth preparation
- Definitive impression
- Framework try-in
- MMR
- Tooth try-in
- Insertion
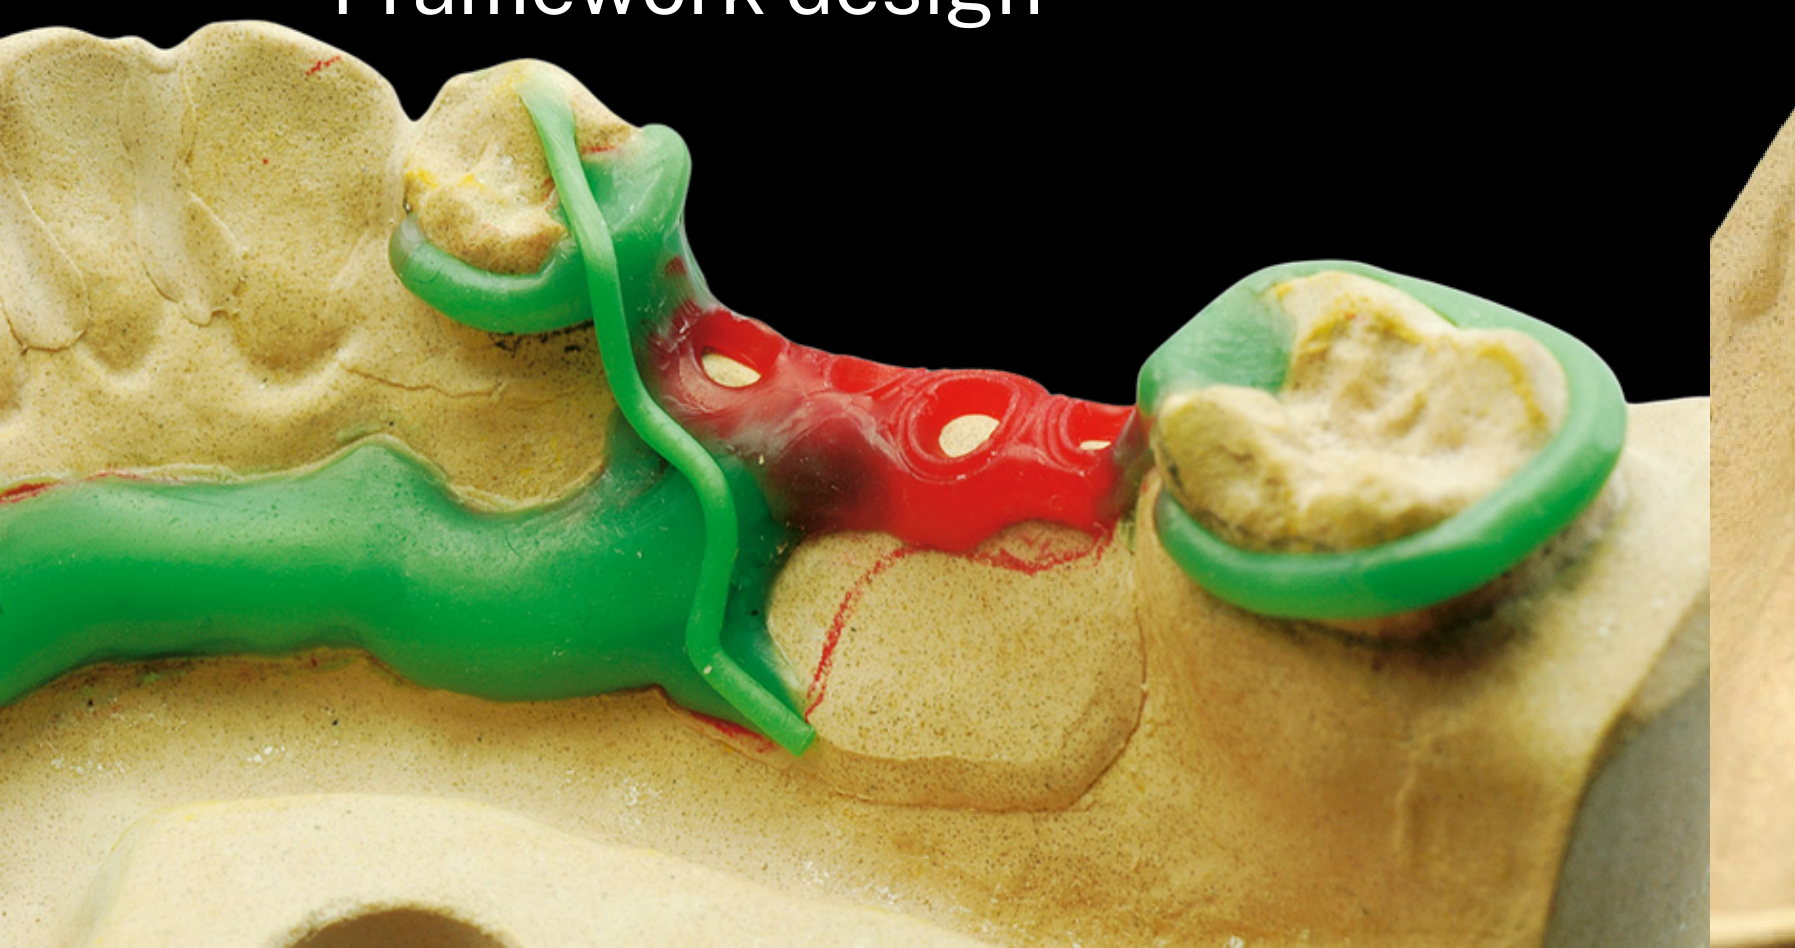
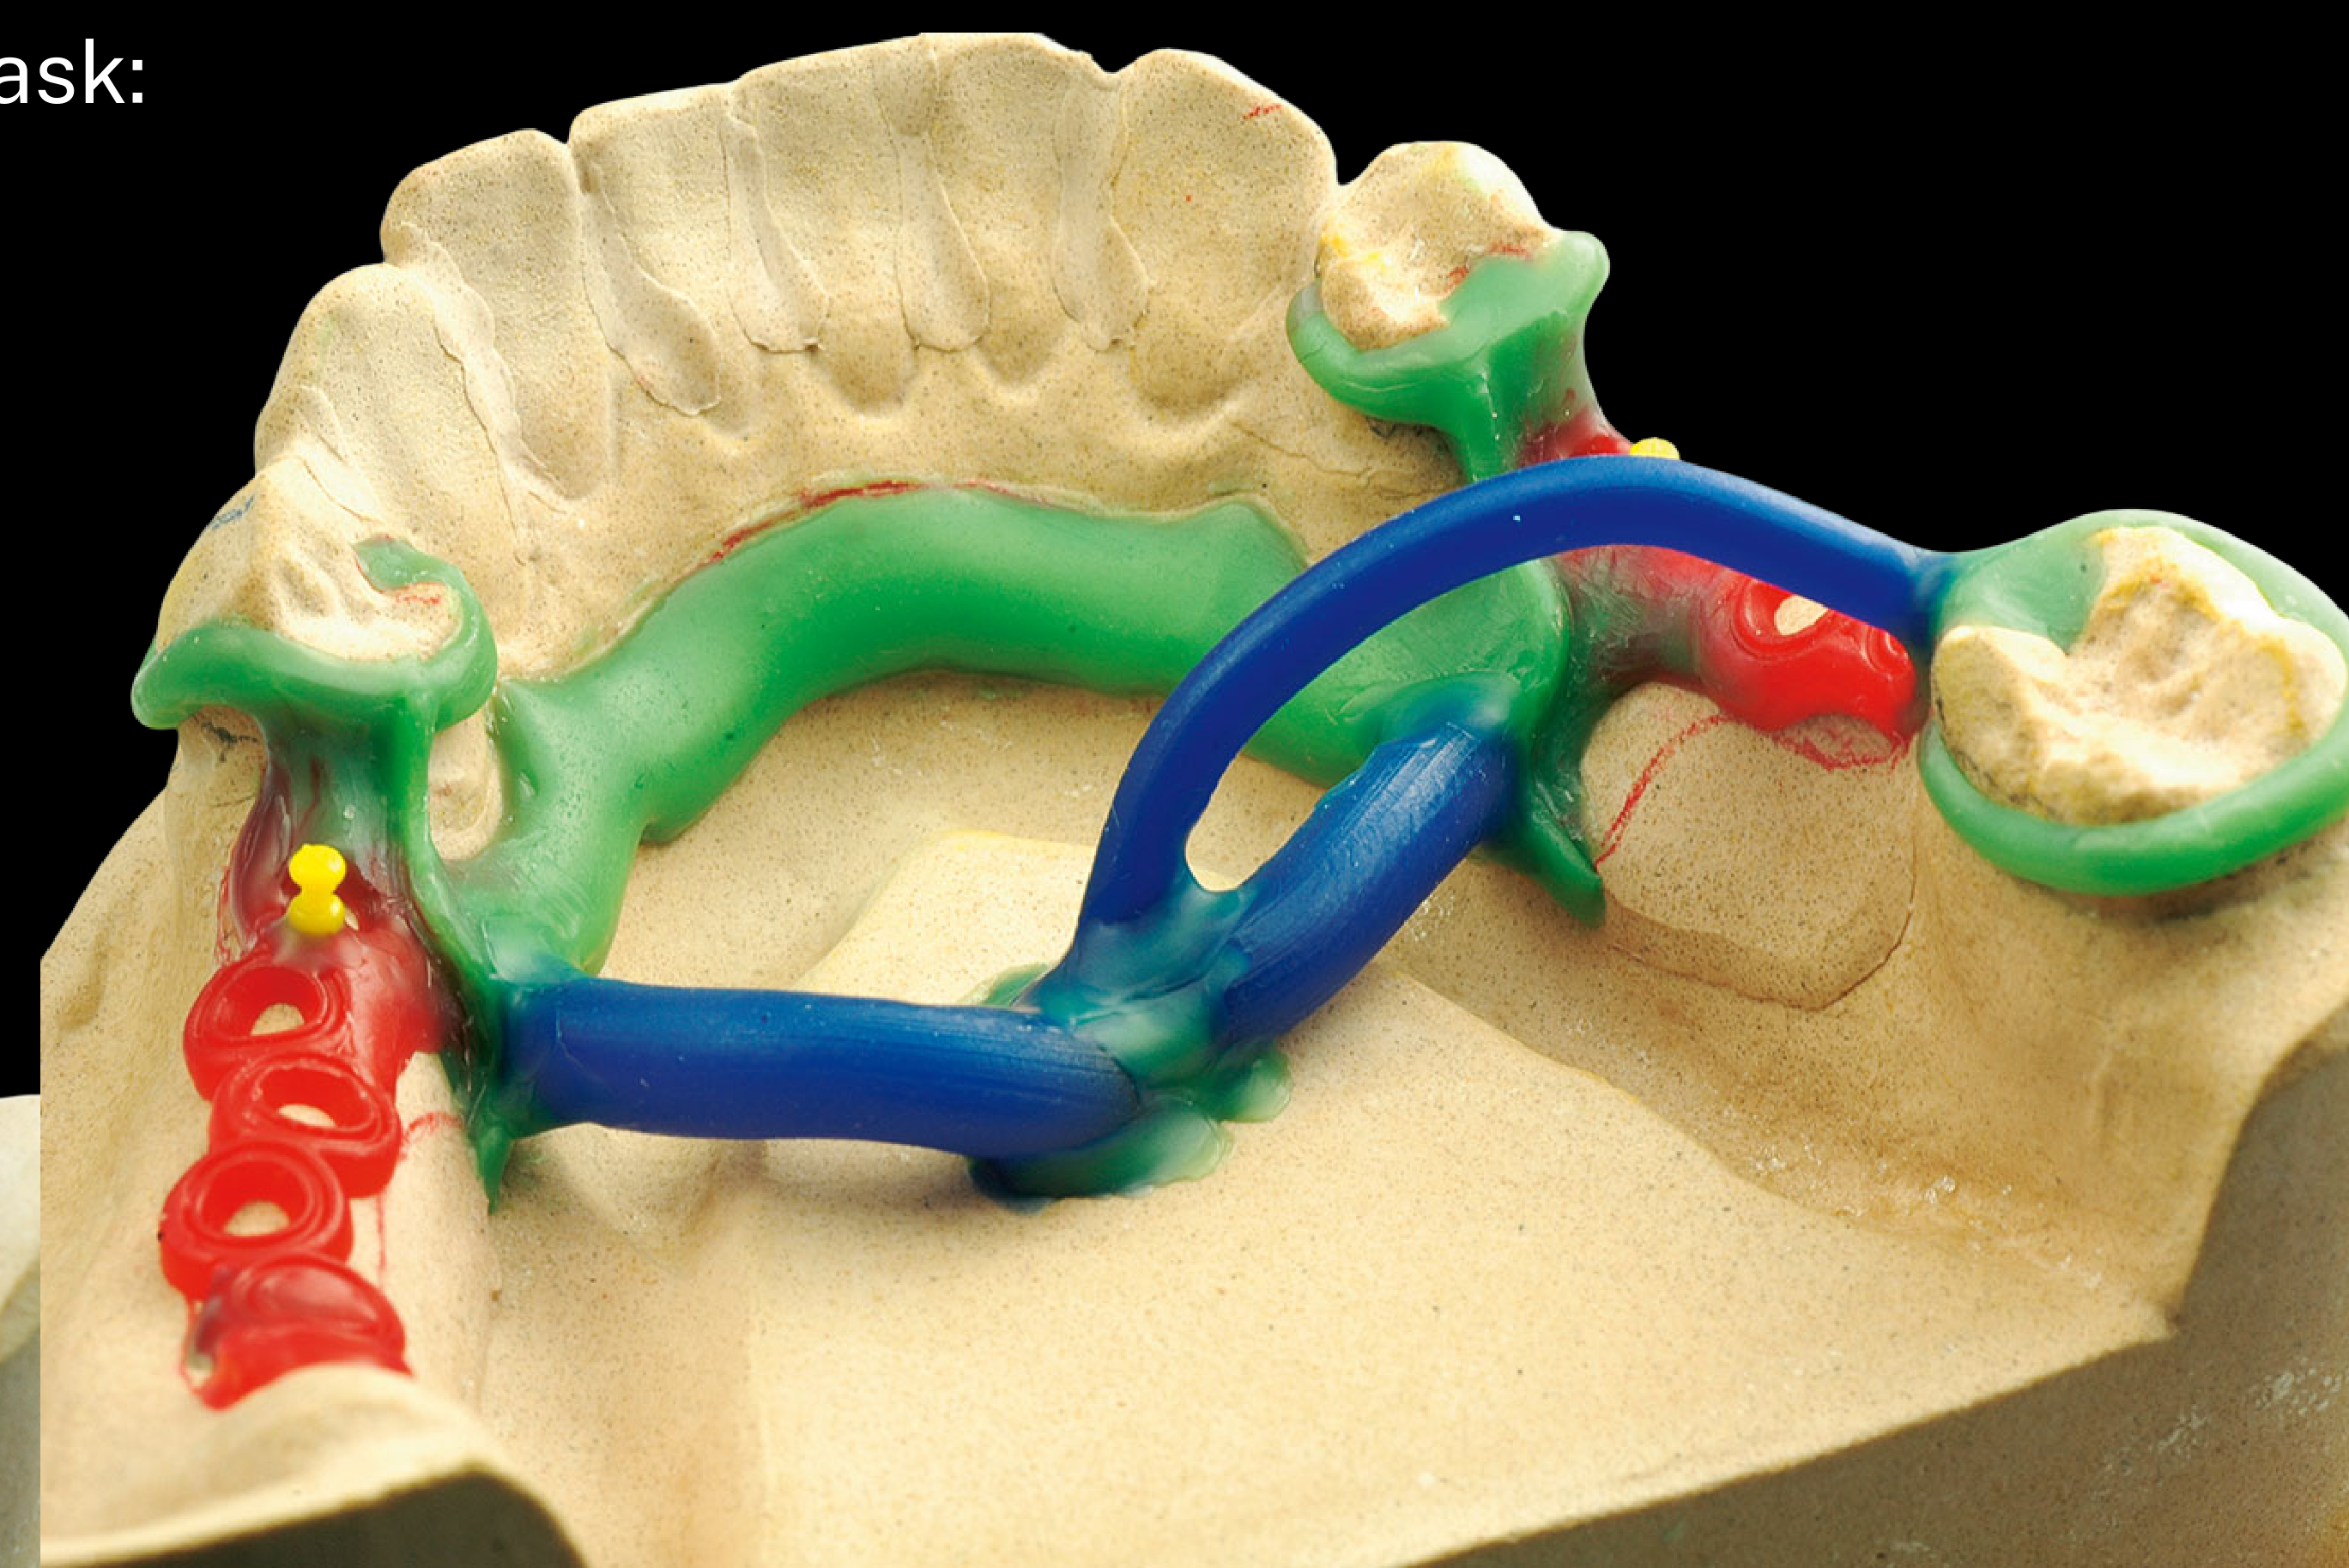
Lecturer — Master Model Survey
The definitive model must also be surveyed — the primary and master models may not survey identically because of differences in the path of insertion or the way the casts are positioned.
- Check the master model for consistency with the original plan: path of insertion, guide planes, undercuts, rest locations, and framework design.
- Differences between the primary and definitive models can help identify whether the path of insertion changed, a guide plane was inadequately prepared, a rest was inadequately prepared, or a tooth was not adjusted sufficiently.
 |  |
Framework Assessment and Trial
Stage 8: Framework Assessment50
Prove the framework before adding wax.
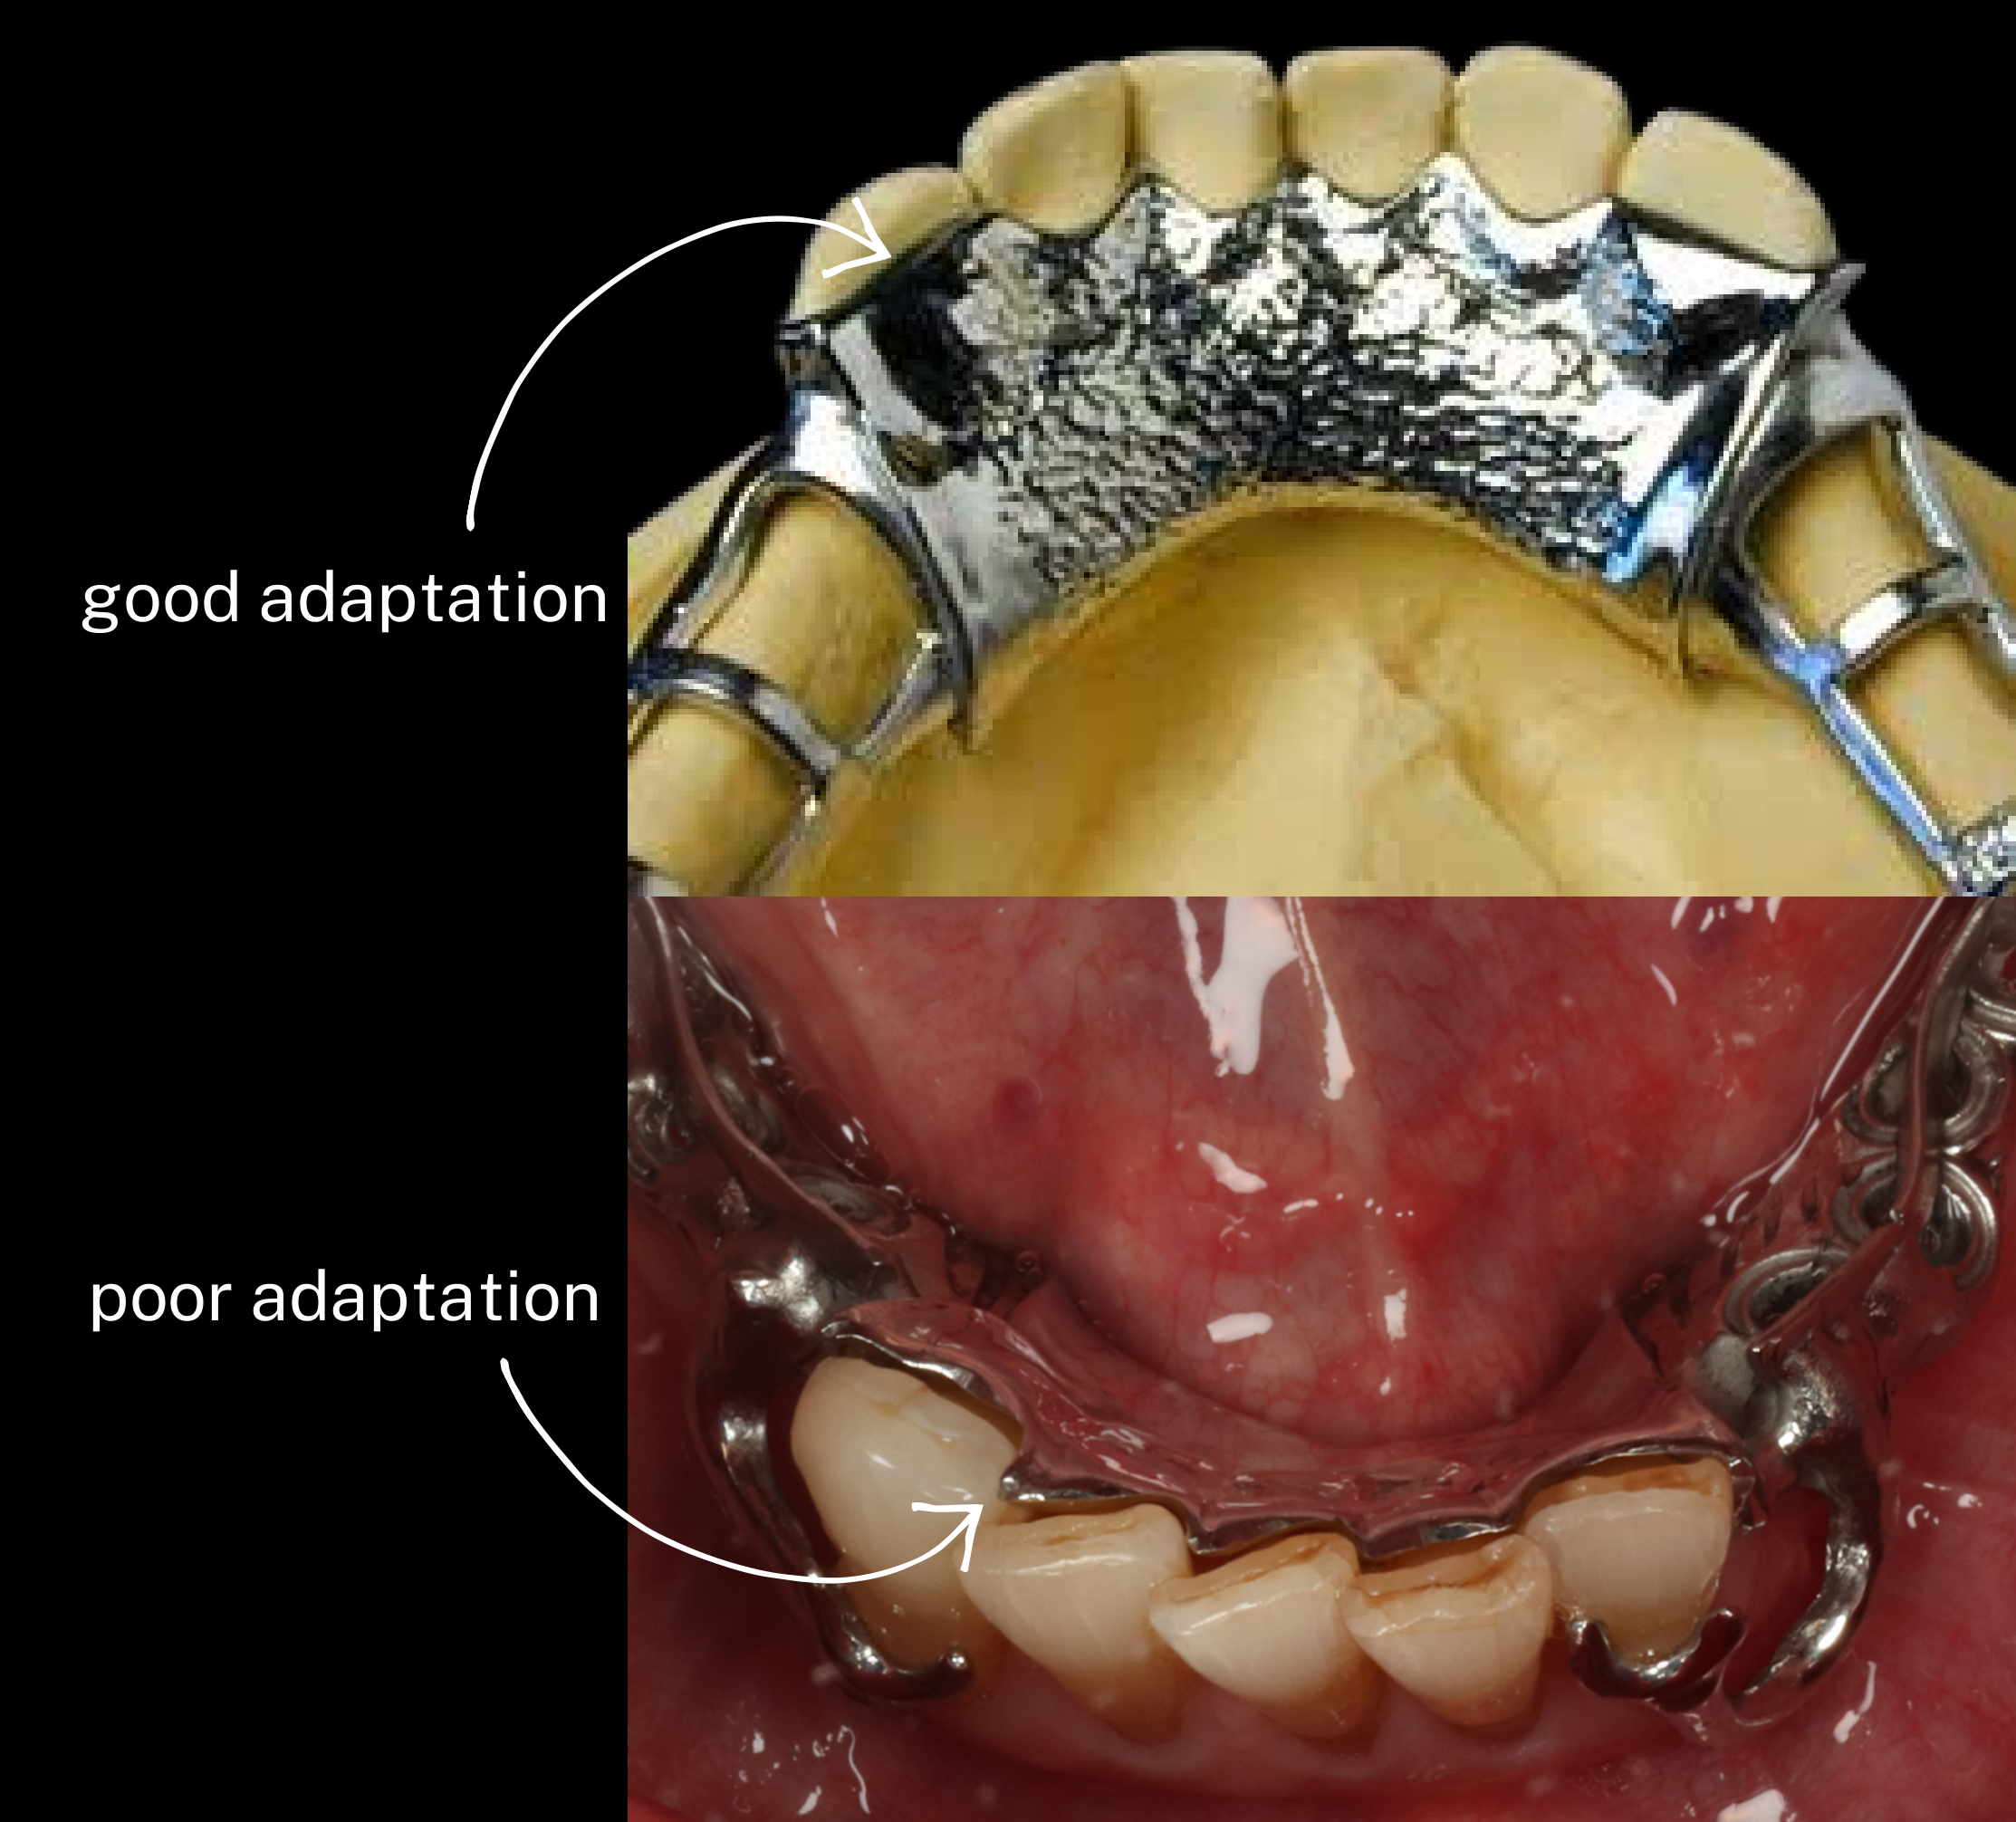
Master Model Assessment
Ensure initial evaluation starts on the master cast prior to clinical delivery.
Lecturer — Master Model Fit
Before trying the framework in the mouth, assess its fit on the master model, determine whether it is fully seated, check whether it is tight, and confirm that the design corresponds to the prescription.
- Some technicians may make frameworks deliberately tight to improve their fit intraorally, so the model assessment should be interpreted together with the clinical try-in.
Verification Checklist
- Seating: Full adaptation
- Support: Rest contact
- Stability: No rocking
- Retention: Clasp engagement
- Function: No occlusal or functional interference
- Reciprocal components
- Occlusal clearance
- Absence of occlusal interference
- Fit checker or occlusal spray may be used to locate contact points
Troubleshooting Framework Seating51
If the framework does not seat, do not force it.

Possible Sources of Interference
-
Tooth interference
-
Guide-plane discrepancy
-
Rest interference
-
Connector interference
-
Distorted framework
-
Incorrect path of insertion
-
Framework interference
-
Inaccurate definitive impression
-
Tooth position or movement issue
-
Discrepancy between the master model and the patient
-
Inadequate mouth preparation
Framework Adjustments52
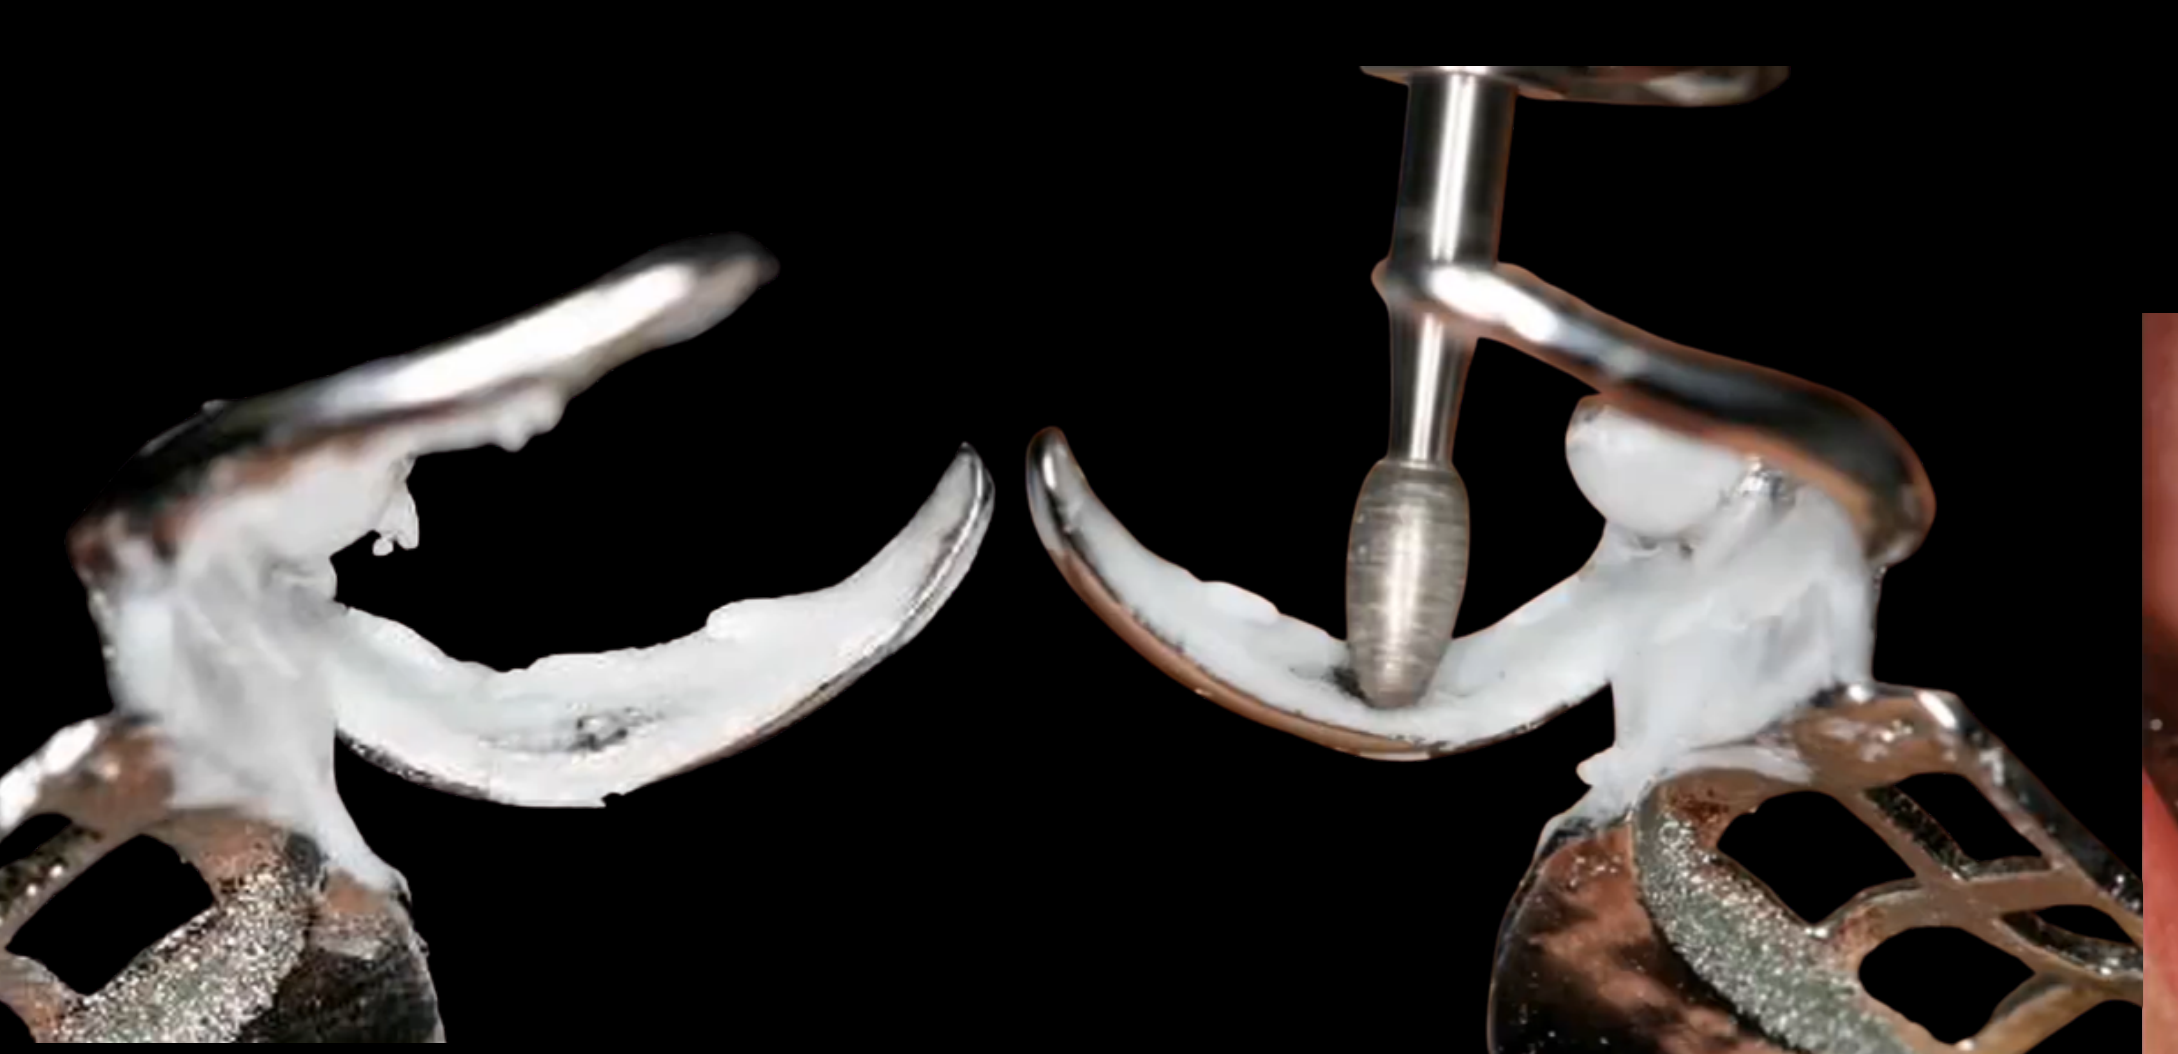
Permissible Adjustments
- Minor clasp adjustment
- Very limited rest adjustment
- Acrylic component adjustment
Lecturer — Framework Adjustments
For a localized interference preventing seating, identify the contact, make a minimal adjustment, reseat the framework, reassess, and repeat only when necessary.
- Adjustments should be conservative because many framework components are thin and may fracture if excessively reduced.
- Adjustments to clasp assemblies should be avoided unless specifically indicated and supervised.
Management of Major Errors
Major discrepancy ≠ more grinding → Remake framework
Lecturer — Major Errors
If the framework fits the master model but not the patient, check for clinical interference; if there is none, suspect the definitive impression.
- A remake using the same inaccurate model is unlikely to solve the problem — a new definitive impression may be required.
Combined Framework and MMR Recording
Stages 8 & 9: Managing Post-Framework Workflow53
Once the framework fits, consider whether a visit can be safely eliminated.
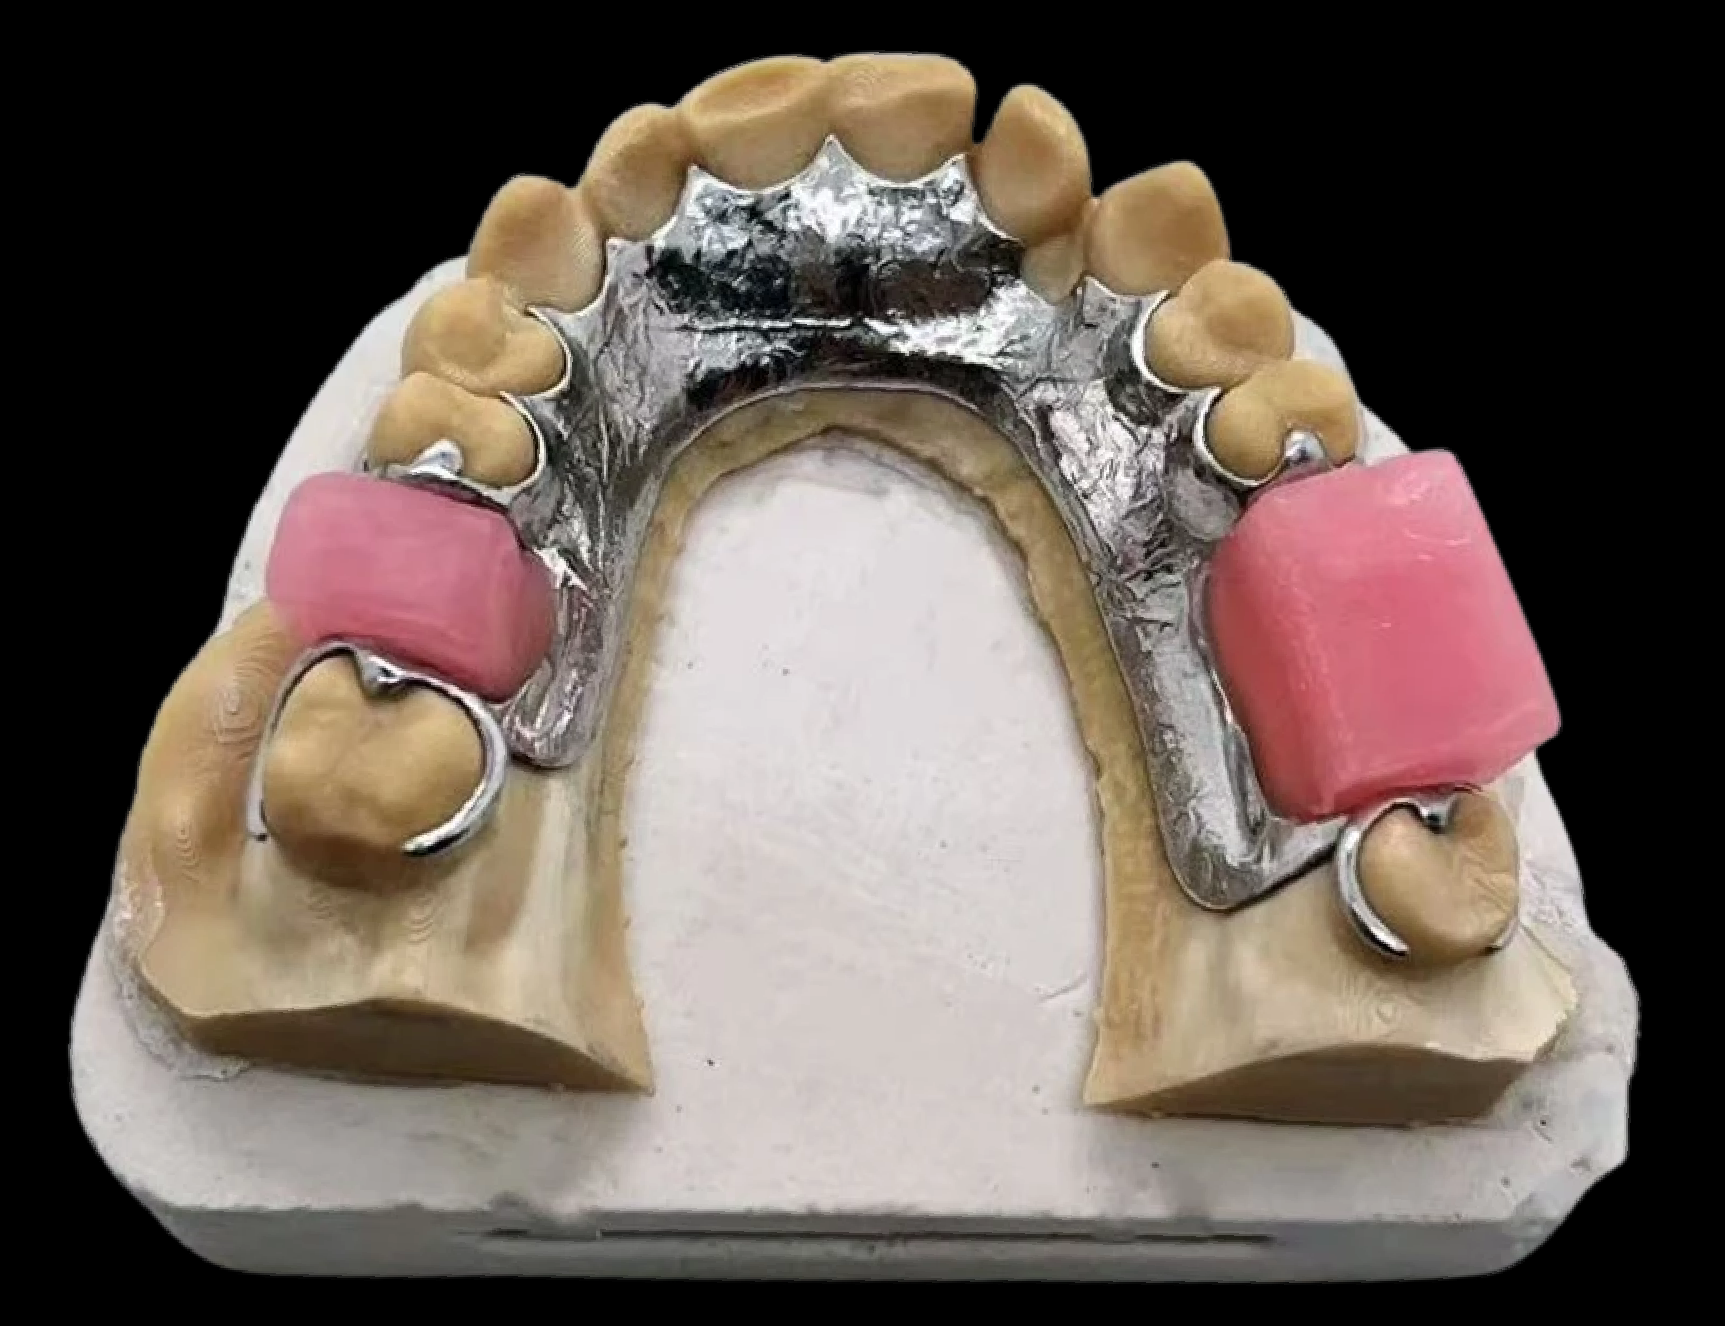
Option 1: Standard Laboratory Protocol
- Send framework to laboratory
- Laboratory adds recording rim
- Patient returns for appointment
- Record maxillomandibular relationship (MMR)
Indications for Option 1
-
Unstable rim
-
Major vertical dimension of occlusion (VDO) change
-
Complex jaw relationship
-
Uncertain tooth position
-
Inadequate time or clinical skill to make a reliable chairside record
-
A gap between the natural teeth
-
No natural tooth contact to stabilize a chairside rim
-
A stronger base is required
-
The edentulous span is large
-
A more complex case requires greater laboratory control
Framework and MMR Workflow Comparison54
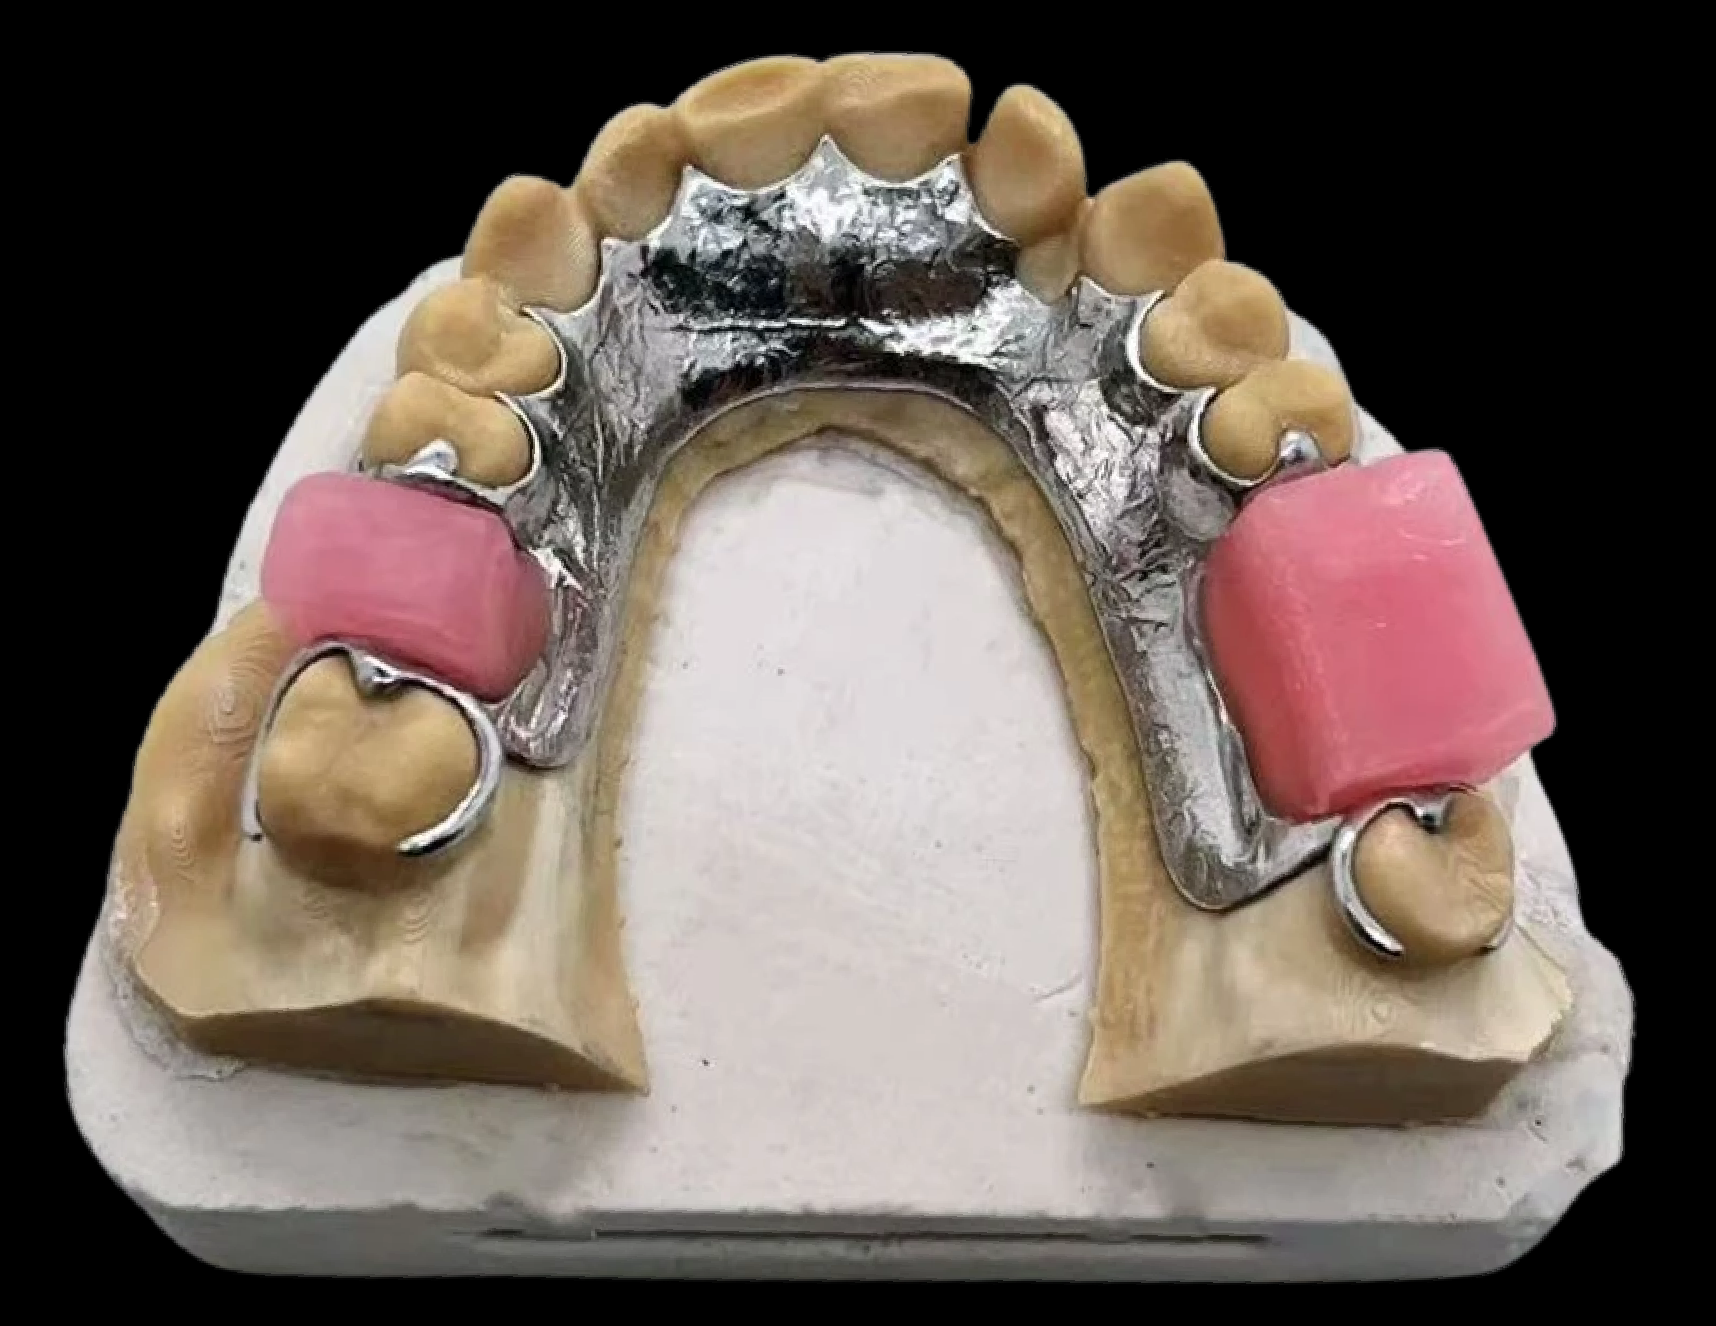
Option 1: Standard Protocol
- Send to laboratory
- Laboratory adds rim
- Patient returns
- Record MMR
Outcome: Standard multi-visit sequence.
Option 2: Combined Framework and Chairside MMR
- Adapt rim chairside
- Record MMR during the framework try-in visit
Outcome: Eliminates one clinical appointment and reduces laboratory fees.
Lecturer — Chairside MMR
Recording the MMR chairside may save an appointment when:
- the framework is stable
- the vertical dimension is not being increased
- the tooth position is predictable
- the patient has adequate natural tooth contacts
- the clinician can control the rim accurately
Chairside Rim Fabrication55
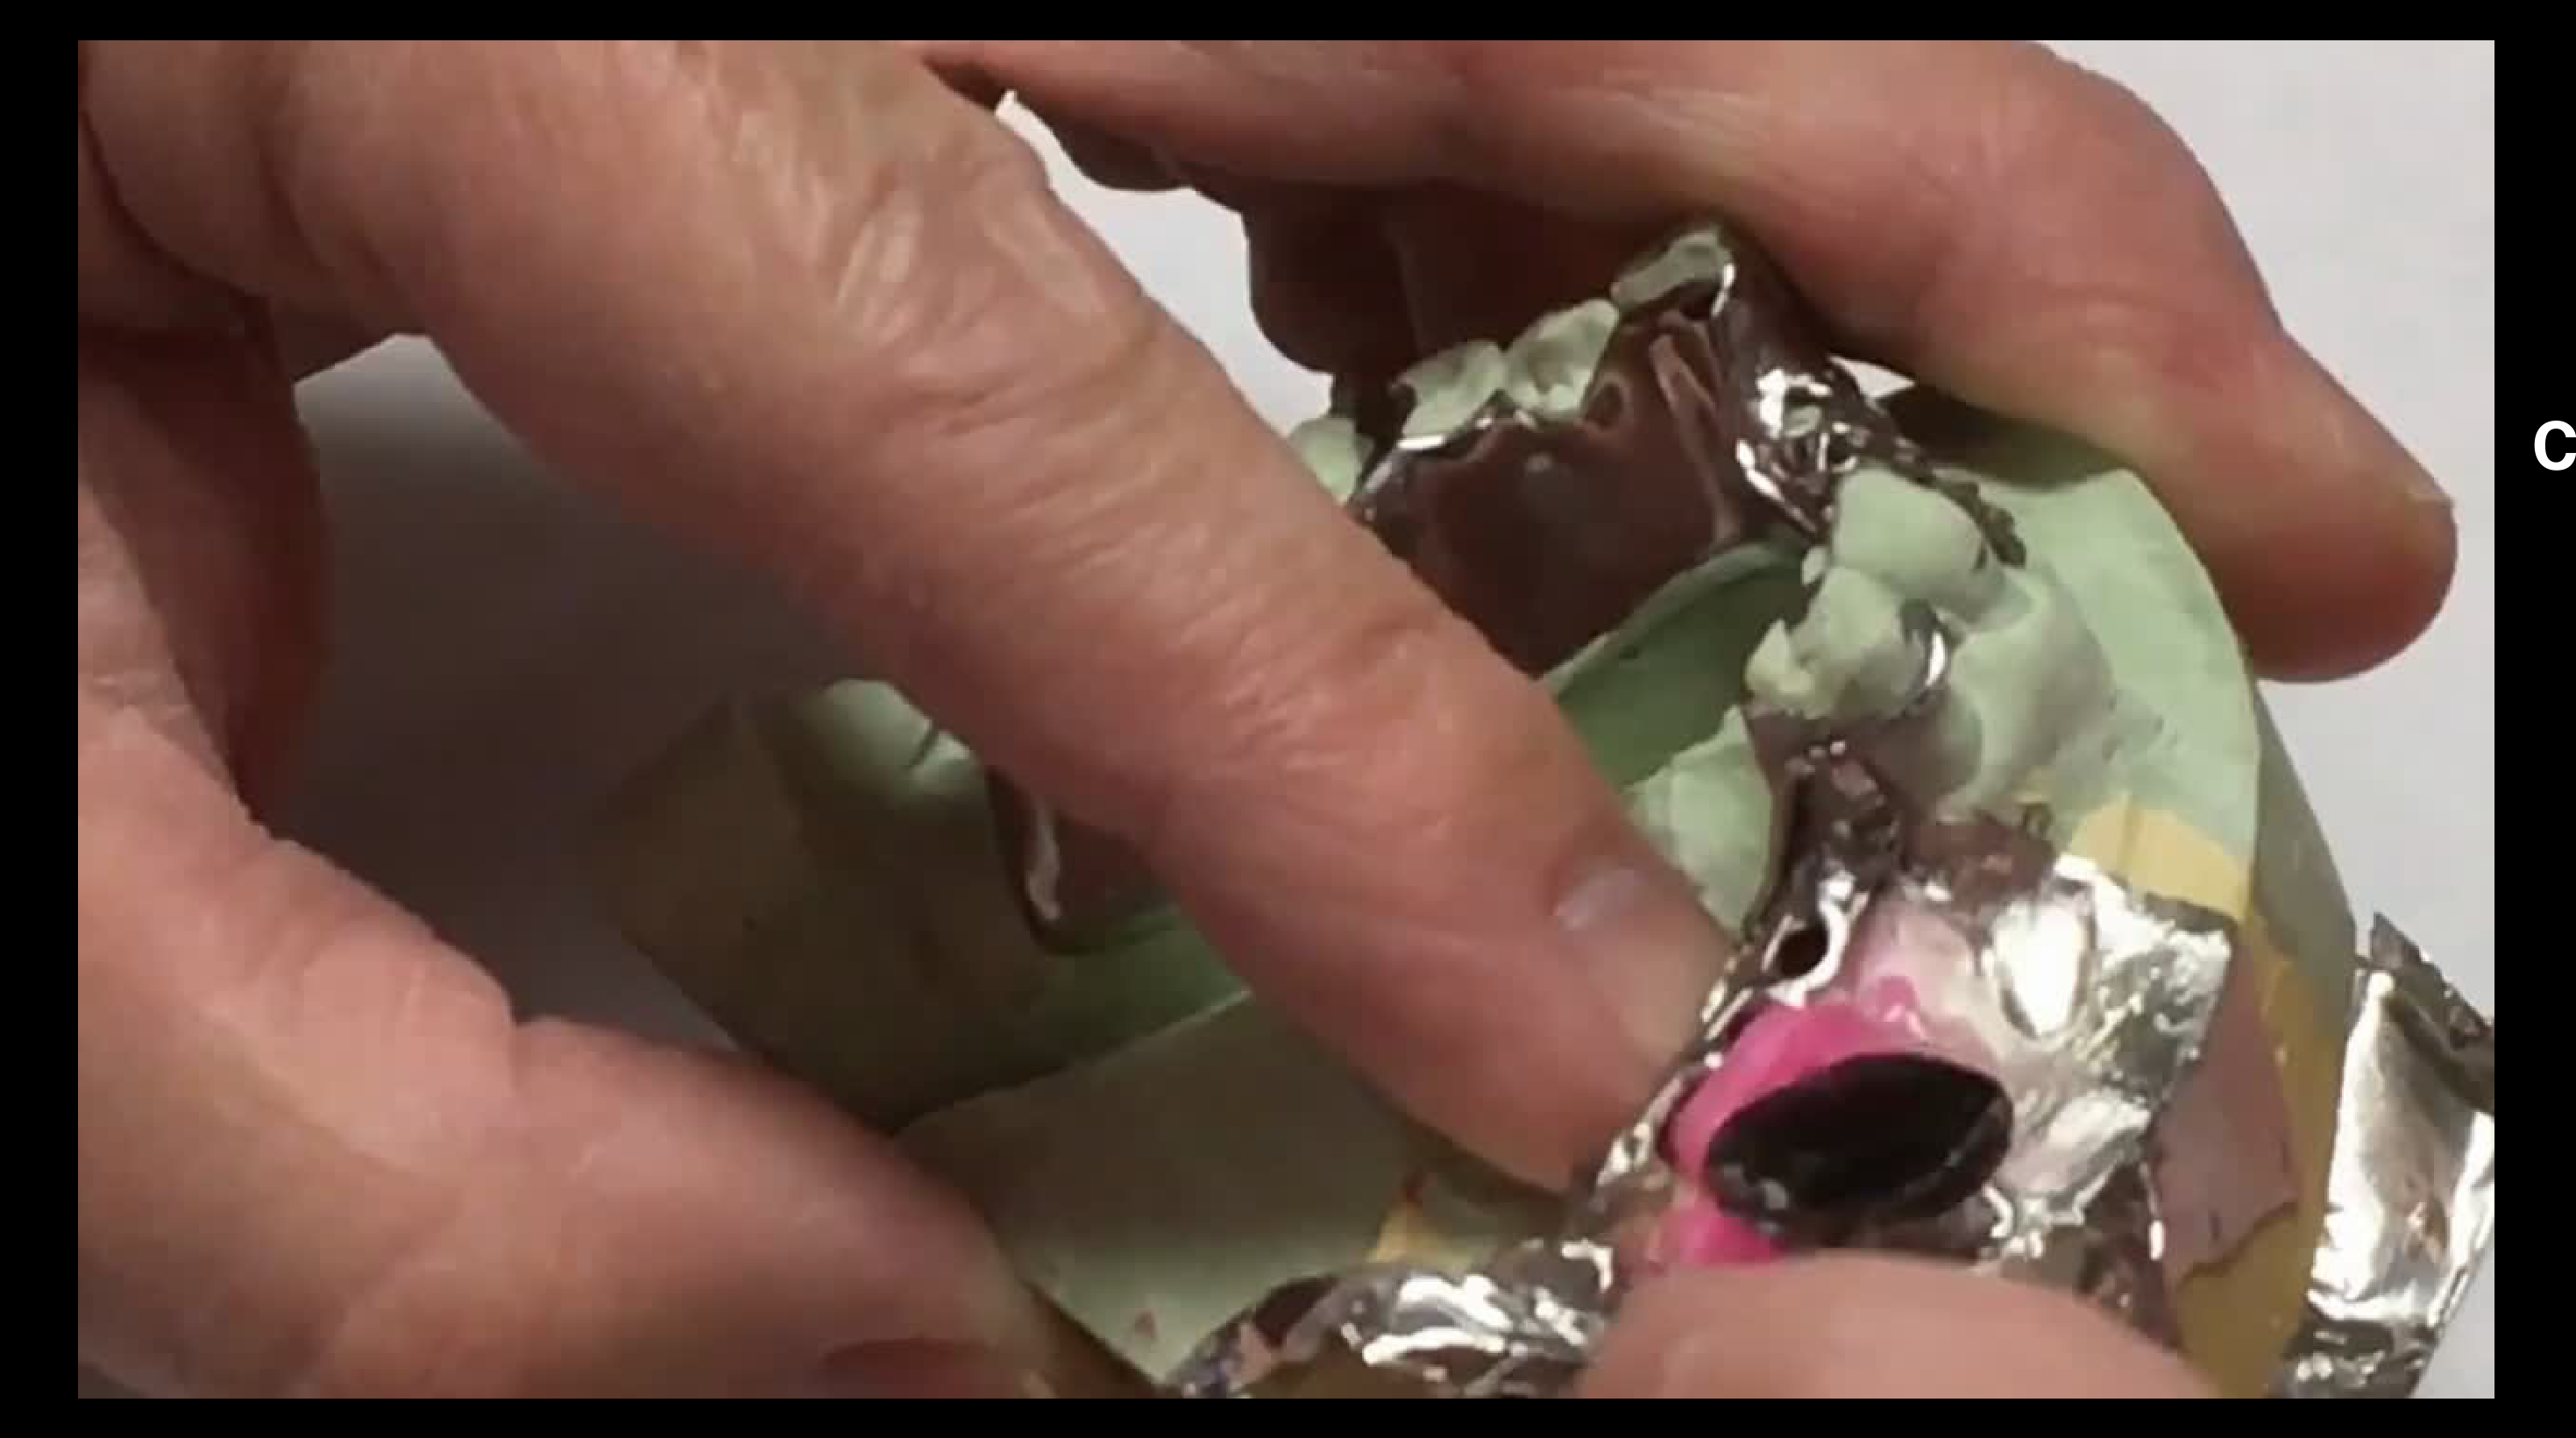
Stepwise Technique
Warm → Adapt → Support → Shape → Re-seat
Lecturer — Chairside Rim
The chairside process: place the framework in the mouth, adapt wax to the edentulous area, avoid excessive wax beneath the framework, ensure the wax does not tip or move the framework, shape the rim to the planned tooth position, record the MMR, add a PVS bite registration if required, and record aesthetic landmarks.
- A bite block may be cut from a modelling-wax block and adapted to the edentulous ridge.
Clinical Communication Parameters
- Tooth position
- Labial support
- Occlusal plane
- Overjet
- Overbite
- Arch form
Lecturer — Rim as Blueprint
The wax rim should communicate the intended tooth position to the technician — particularly important in Kennedy Class 4 cases.
- Record the smile line, canine line, midline, labial contour, tooth position, the intended curvature of the arch, and the planned vertical dimension.
- The rim acts as a blueprint for the final tooth position.
Tooth Try-In and Final Insertion
Stage 10: Tooth Try-In Assessment56
Assessment Checklist
-
Tooth position
-
Aesthetics
-
Phonetics
-
Occlusion
-
Retention and stability
-
Vertical dimension of occlusion (VDO), where relevant
-
Patient acceptance
-
Tooth size
-
Tooth shape
-
Tooth shade
-
Patient approval
-
Smile line
-
Canine line
-
Midline
-
Labial contour
-
Shim stock may be used to compare contacts with and without the denture to confirm the denture does not alter the established bite
Stage 11: Insertion Protocol57
Framework discrepancy? → Stop and reassess for remake.
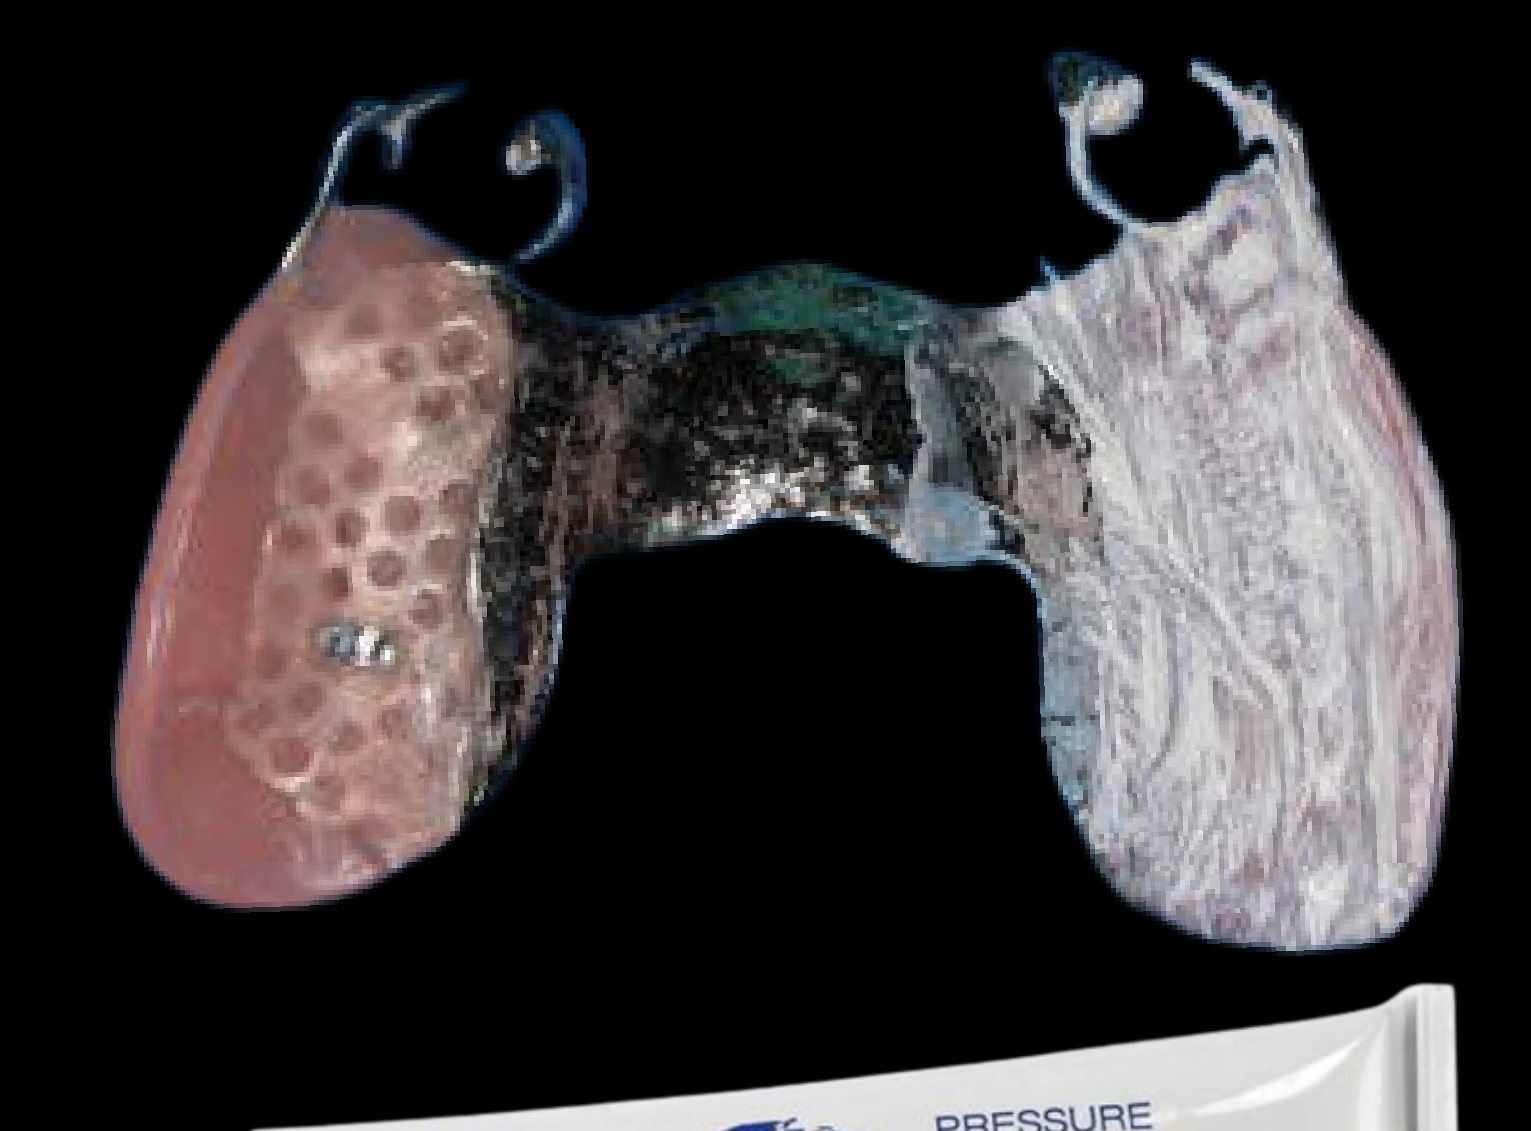
Final Insertion Checklist
- Seating: Full adaptation
- Support: Rest contact
- Stability: No rocking
- Retention: Clasp engagement
- Occlusion: No interference
- Tissues: No soft tissue impingement
- Insertion: Correct path confirmed
- Removal: Patient demonstrated to be capable
- Patient comfort Adjust acrylic and occlusion as indicated.
Lecturer — Processing Errors
If a processed denture does not fit as expected, assess the acrylic component first because processing may cause acrylic shrinkage or dimensional change.
- The framework should generally not be adjusted first if it was already verified before processing — the acrylic component is the more likely source of a new discrepancy.
Lecturer — Closing Remarks
The speakers thanked the attendees and invited further questions. A common technician, Gary, was acknowledged.
Communication with the laboratory is important;the technician fabricates the prosthesis and may have preferred methods for articulating casts, fabricating rims, surveying, managing the framework, and recording the MMR.
The checklists are intended primarily for the first several cases, teaching clinicians what to assess at each visit rather than becoming a box-ticking exercise. With experience, clinicians should be able to visualize the required workflow when they first see the patient.
Workflow Comparison and Clinical Checklist
Acrylic Workflow58
- Primary impression
- Special tray
- Definitive impression
- MMR
- Tooth try-in
- Insert
Lecturer — Acrylic Workflow Details
Additional steps in the acrylic workflow include:
- Assess the patient, teeth, periodontal condition, and prognosis.
- Review the previous prosthesis.
- Determine whether the primary impression is adequate.
- Decide whether a special tray is required.
- Decide whether a definitive impression is required.
- Decide whether border moulding is required.
- Decide whether an MMR is required.
- Record the bite when appropriate.
- Decide whether a tooth try-in is required.
- Confirm tooth position, aesthetics, occlusion, and vertical dimension.
Cobalt-Chromium (Co-Cr) Workflow
- Primary impression
- Preliminary articulation
- Preliminary try-in
- Survey + design
- Special tray
- Mouth prep
- Definitive impression
- Framework
- MMR
- Tooth try-in
- Insert
Lecturer — Co-Cr Workflow Details
Additional steps in the cobalt-chromium workflow include:
- Assess prognosis and material suitability.
- Articulate the diagnostic casts when required.
- Complete diagnostic tooth arrangement when indicated.
- Review the design with the supervisor.
- Prepare rests, guide planes, and other features.
- Resurvey the master model.
- Try the framework in the mouth.
- Verify seating, support, stability, retention, and occlusion.
- Record the MMR using a laboratory or chairside rim.
- Verify aesthetics, speech, occlusion, and vertical dimension.
Acrylic Removable Partial Denture Clinical Checklist59
- Primary Impression
- Alginate + suitable stock tray
- Accept only if relevant teeth and saddles are captured
- Decide: special tray / secondary impression?
- Lab instructions:
- Final impression material: _______________
- Perforations
- Spacer requirement: _______________
- Tissue stops
- Special Tray
- Assess on the model
- Check gross extension, seating, sharp edges, and interference
- Trim → smooth → reassess
- Border mould needed
- Definitive Impression
- Adhesive
- Identify and block undercuts
- Check extension, defects, distortion, and safety
- Lab instructions:
- Please pour impressions
- Can casts articulate predictably? If not: fabricate hard record base / rim
- Clasp position
- MMR
- Record a repeatable jaw relationship
- Same CD MMR principles
- Lab instructions:
- Setup teeth on the same hard base
- Tooth shape: _______________
- Shade: _______________
- Try-In
- Essential for multiple teeth, aesthetics, or occlusal uncertainty
- Direct finish may suit small bounded saddles
- Assess aesthetics, phonetics, occlusion, and VDO where relevant
- Document patient approval
- Lab instructions:
- Any changes: _______________
- Please process
- Insert
- Identify path of insertion: do not force
- If not seated: adjust
- Rigid acrylic interference
- Clasp retention
- Assess extensions and pressure areas
- Patient inserts/removes; hygiene and review arranged
Lecturer — Acrylic RPD Checklist Additions
Additional considerations for the acrylic RPD checklist include:
- Assess the periodontal, restorative, endodontic, occlusal, and patient-related prognosis.
- Determine whether the teeth are useful to the planned design.
- Identify whether the prosthesis is transitional or definitive.
- Evaluate the previous prosthesis.
- Modify the stock tray when necessary.
- Prescribe the correct tray type and spacer.
- Specify perforated or non-perforated design.
- Specify tissue stops when required.
- Decide whether a definitive impression is needed.
- Decide whether border moulding is needed.
- Block out undercuts when indicated.
- Assess the impression independently.
- Confirm the required ridge and vestibular extension.
- Always consider taking a bite record before deciding whether it is required.
- Assess articulation and occlusal contacts.
- Record shade and, preferably, provide a photograph.
- Insert conservatively.
- Adjust acrylic before adjusting clasps when seating is compromised.
- Avoid over-trimming embrasures.
 |  |
 |
Co-Cr Removable Partial Denture Clinical Checklist
- Primary Impression
- Alginate + suitable stock tray
- Accept only if relevant teeth and saddles are captured
- Decide if diagnostic base and rim is required for preliminary articulation
- Lab instructions:
- Pour primary impressions
- Fabricate diagnostic base and rim: clinically proceed with diagnostic MMR, then ask lab to articulate
- Articulate models using bite registration if diagnostic base and rim are not needed
- Preliminary survey
- Preliminary Articulation / Preliminary Tooth Try-In
- Assess interarch relationship and prosthetic space
- Ask for preliminary tooth setup in complex cases
- Lab instructions:
- Any changes: _______________
- Please process
- Survey + Design
- Survey diagnostic cast: path, undercuts, and interferences
- Plan support, bracing, reciprocation, and retention
- Design connector, rests, clasps, and bases
- Identify required mouth preparations
- Supervisor approval and design documented
- Lab instructions:
- Fabricate special tray (PVAm perforated with 3mm spacer and tissue stops)
- Special Tray
- Assess on the model
- Check gross extension, seating, sharp edges, and interference
- Trim → smooth → reassess
- Border mould if needed
- Mouth Prep & Definitive Impression
- Prepare what the design requires
- Verify preparations before impression
- Adhesive
- Identify and block undercut
- Light body on rests, guide plate-contact areas
- Check extension and defects
- Lab instructions:
- Please pour secondary impression
- Fabricate metal framework consistent with the design
- Framework Try-In
- Check on master cast first
- Assess seating, support, stability, and function
- If not seated: do not force; verify cause and adjust
- MMR
- Only after verified framework
- Can it be recorded today with a chairside rim?
- If yes: warm, adapt, support, shape, and re-seat
- Ensure framework still seats and rim is stable
- Record a repeatable jaw relationship
- Same CD MMR principles
- Lab instructions:
- Setup teeth
- Tooth shape: _______________
- Shade: _______________
- Attach full face photos with rim in mouth (smiling and at rest)
- Teeth Try-In
- Essential for multiple teeth, aesthetics, or occlusal uncertainty
- Assess aesthetics, phonetics, occlusion, and VDO where relevant
- Document patient approval
- Lab instructions:
- Any changes: _______________
- Please process
- Attach full face photos with try-in in mouth (smiling and at rest)
- Insert
- Identify path of insertion: do not force
- If not seated: adjust
- Check for initial interference using PIP, occlusal spray, or fit checker
- Assess extensions and pressure areas
- Patient inserts/removes; hygiene and review arranged
Lecturer — Co-Cr RPD Checklist Additions
Additional considerations for the cobalt-chromium RPD checklist include:
- Confirm that the dentition is suitable for a definitive cobalt-chromium prosthesis.
- Resurvey the master model.
- Compare the master model with the primary model.
- Check for occlusal interference.
- Adjust only minimally.
- If the framework fits the model but not the patient, investigate the definitive impression.
- Use a laboratory or chairside rim for the MMR as appropriate.
- Record smile line, canine line, midline, labial contour, and tooth position.
- Verify that the final processed denture maintains the planned framework fit.
- Adjust the acrylic before modifying the framework when possible.
- Seek supervisor assistance before making substantial framework adjustments.
Acknowledgments and Closing60
Thank you.
- Ahmad Hendawi
- Sheryl Teo (Prosthodontics)
Audio Appendix
Additional Audio Content
The following sections from the lecture audio did not correspond to any heading in the main document.
Complete Clinical Stages
The cobalt-chromium workflow includes:
- Preliminary impressions.
- Diagnostic articulation.
- Preliminary tooth arrangement when indicated.
- Surveying and design.
- Definitive mouth preparation.
- Definitive impression.
- Framework fabrication.
- Framework assessment.
- MMR recording.
- Tooth try-in.
- Final insertion.
Stage Emphasis by Material
Cobalt-Chromium
Compared with acrylic, cobalt-chromium requires greater emphasis on:
- Diagnostic articulation.
- Surveying.
- Framework design.
- Rest seats.
- Guide planes.
- Retentive and reciprocal clasp positions.
- Indirect retention.
- Mouth preparation.
- Master cast surveying.
- Framework seating and adjustment.
Patient Pathways
The lecture presented the clinical workflow as a patient journey from the first visit through insertion. The main questions are addressed at the relevant stage rather than answered independently.
The general acrylic pathway is:
- Primary impression.
- Special tray, when required.
- Definitive impression, when required.
- Maxillomandibular relationship recording, when required.
- Tooth try-in, when required.
- Insertion.
Some cases may not require every stage.
Diagnostic Evaluation and Tooth Prognosis
Clinical Examination Considerations
The lecture emphasized that removable partial denture planning should begin with the patient’s overall oral condition rather than with the missing-tooth classification alone. The initial questions include:
- What is the condition of the remaining teeth?
- Are the teeth mobile?
- What is the patient’s periodontal stage and grade?
- Are the teeth restorable?
- How much tooth structure remains?
- What are the endodontic, occlusal, and anatomical considerations?
- What patient-related factors may affect treatment?
- What prosthesis has the patient previously worn?
- What worked or did not work with the previous prosthesis?
A previous prosthesis can provide important information about:
- The patient’s tolerance of the denture.
- The position of the teeth.
- The amount of coverage the patient accepts.
- Features of the previous design that should be retained or improved.
The design of a new prosthesis should improve on the previous one rather than reproduce problems.
Tooth Contribution and Prognosis Assessment
The clinical question should not simply be whether a tooth is “good” or “bad.” Instead, assess whether the tooth is useful to the planned denture or overall rehabilitation.
- A restorable tooth with a good prognosis may still be extracted if it does not fit the treatment plan.
- A questionable or poor-prognosis tooth may be retained if it is essential to the design, such as a terminal abutment.
- Additional measures may be justified to retain a strategically important tooth.
- A sound tooth may still need extraction if it interferes with occlusion or prevents the construction of a balanced denture.
Periodontal Assessment and Staging
Classification Framework
The lecture emphasized the importance of assessing:
- Clinical attachment loss.
- The severity and complexity of the periodontal condition.
- The amount of existing destruction.
- The patient’s susceptibility to progression.
- Whether the disease is currently controlled.
- The rate at which the disease is progressing.
The periodontal risk assessment should be incorporated into the staging and grading approach associated with the 2017 World Health Organization workshop.
Periodontitis: Staging
The speakers grouped cases broadly according to the level of periodontal concern:
- Stage 1 and Stage 2 cases, particularly those with Grade A progression, generally present less of a dilemma when choosing between acrylic and cobalt-chromium.
- Stage 3 and Stage 4 cases, particularly Grade B and Grade C cases, require more careful consideration.
- Stage 4 patients have a higher risk of losing teeth, so a definitive denture may be followed shortly afterward by further extractions.
Periodontitis: Grading
Grading should consider how rapidly the condition is progressing and whether disease control has been achieved.
- The patient’s risk of future progression affects prosthesis selection.
- The possibility of further tooth loss should be considered before investing in a definitive prosthesis.
- Periodontal prognosis should be considered together with endodontic, restorative, occlusal, and patient-related factors.
Periodontitis: Staging Overview
The main clinical purpose of staging and grading in this context is to determine how predictable the remaining dentition is and whether a definitive prosthesis is appropriate.
Periodontitis: Grading Overview
A higher-risk patient may require a transitional approach until the condition is more stable.
Summary Matrix
The decision-making process should integrate:
- Periodontal prognosis.
- Tooth restorability.
- Remaining tooth structure.
- Endodontic prognosis.
- Occlusal function.
- The usefulness of each tooth to the planned design.
- Risk of further tooth loss.
- Patient expectations, finances, and tolerance.
- The patient’s previous prosthesis.
Diagnostic and Prognosis Charting
The clinical assessment should document the condition of the remaining teeth and their contribution to the planned prosthesis rather than recording only whether teeth are present or absent.
Tooth Prognoses Classification
A tooth may be considered:
- Favorable and useful to the design.
- Favorable but not useful to the planned rehabilitation.
- Questionable but strategically important.
- Poor in prognosis and unlikely to contribute predictably.
- Unsuitable because of occlusal or anatomical interference.
Material Selection: Acrylic Versus Cobalt-Chromium
Indications for Acrylic
Acrylic may be appropriate when:
- The dentition is changing.
- Teeth are extremely mobile.
- There is extensive caries.
- The restorability of teeth is uncertain.
- Further extractions are likely.
- The periodontal condition is not yet stable.
- A transitional prosthesis is needed while disease, caries, or emergency problems are managed.
- Additions or modifications are likely to be required.
- A lower-cost or more flexible treatment is needed.
- The patient requires teeth while treatment is carried out over several months.
Acrylic is often used as an intermediate prosthesis while the clinician manages:
- Emergency problems and caries.
- Periodontal disease.
- Further extractions or replacement decisions.
- Stabilization of the oral condition.
An acrylic denture is not necessarily temporary. A well-made acrylic denture can be definitive, although it generally provides more coverage than cobalt-chromium.
Indications for Cobalt-Chromium (Co-Cr)
Cobalt-chromium may be preferred when the remaining dentition is favorable and relatively stable.
Potential advantages include:
- Greater rigidity.
- A thinner denture.
- Less tissue coverage.
- Better access for cleaning.
- More controlled design.
- Support and bracing of the remaining teeth.
- Potentially greater flexibility of design for suitable patients.
Material Comparison
Acrylic:
- More flexible.
- Easier to add teeth or modify.
- Generally less expensive.
- Useful during periods of uncertain prognosis.
- Usually involves greater tissue coverage.
- May be used as a definitive prosthesis when appropriately constructed.
Cobalt-chromium:
- More rigid.
- Thinner.
- Has less tissue coverage.
- Allows a more controlled framework design.
- May support and brace the remaining dentition.
- Requires greater commitment to the planned design, mouth preparation, and laboratory stages.
Material selection must also account for:
- Biology.
- Prognosis.
- Maintenance.
- Cost.
- Time.
- Patient expectations.
- The patient’s willingness to accept the proposed material.
Standard Procedural Steps
The clinician should determine whether the patient requires:
- A special tray.
- A secondary or definitive impression.
- Border moulding.
- A maxillomandibular relationship record.
- A tooth try-in.
- Direct processing to the final denture.
Clinical Decision Making and Patient Assessment
Clinical Workflow for Removable Partial Denture
Streamlined Sequence (Acrylic Pathway)
An acrylic pathway may be shortened when:
- The primary impression is adequate.
- The saddle is tooth-supported.
- The occlusion is stable.
- The tooth arrangement and occlusion are predictable.
- A tooth try-in is not required.
Complete Sequence (Co-Cr Pathway)
The cobalt-chromium pathway includes additional diagnostic and design stages, including:
- Diagnostic articulation.
- Preliminary tooth arrangement in selected cases.
- Surveying.
- Mouth preparation.
- Definitive impression.
- Framework fabrication.
- Framework assessment.
- MMR recording.
- Tooth try-in.
- Final insertion.
Indications for Material Selection
Acrylic
Acrylic may be chosen for cobalt-chromium patients when:
- The prognosis is uncertain.
- The dentition is changing.
- Future extractions are likely.
- Further additions are anticipated.
- The patient needs a transitional prosthesis.
Cobalt-Chromium (Co-Cr)
Cobalt-chromium is considered when:
- The remaining teeth have favorable prognoses.
- The dentition is stable.
- A rigid framework is advantageous.
- Reduced tissue coverage is desired.
- A thinner prosthesis is preferred.
- The design can support and brace the remaining teeth.
- The patient accepts the financial and time commitments.
 |  |
 |
Clinical Cases
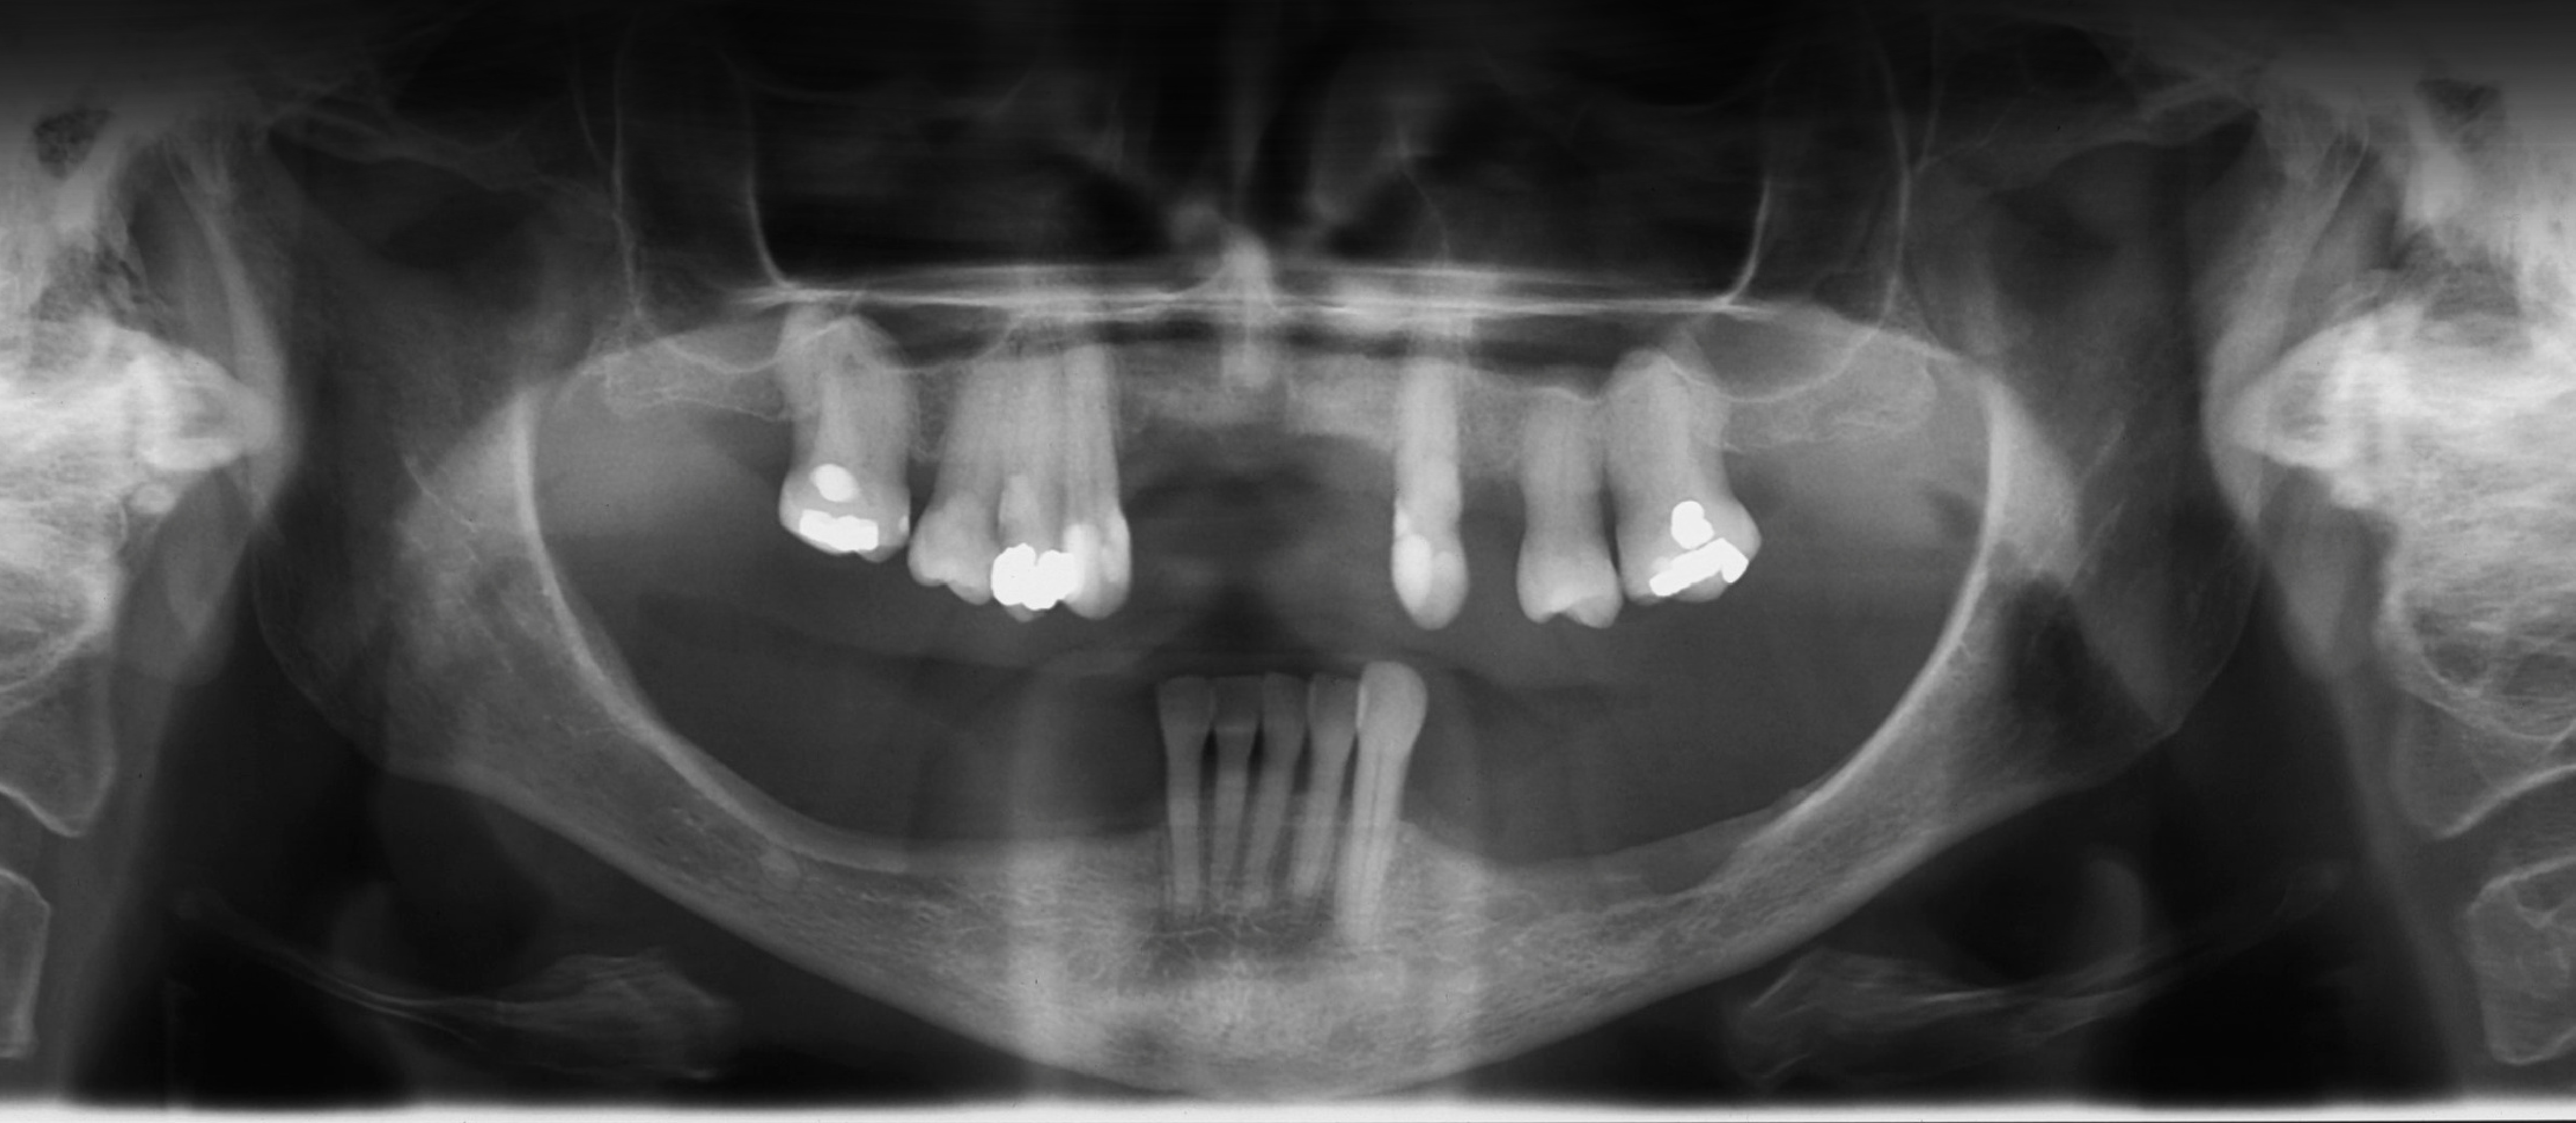
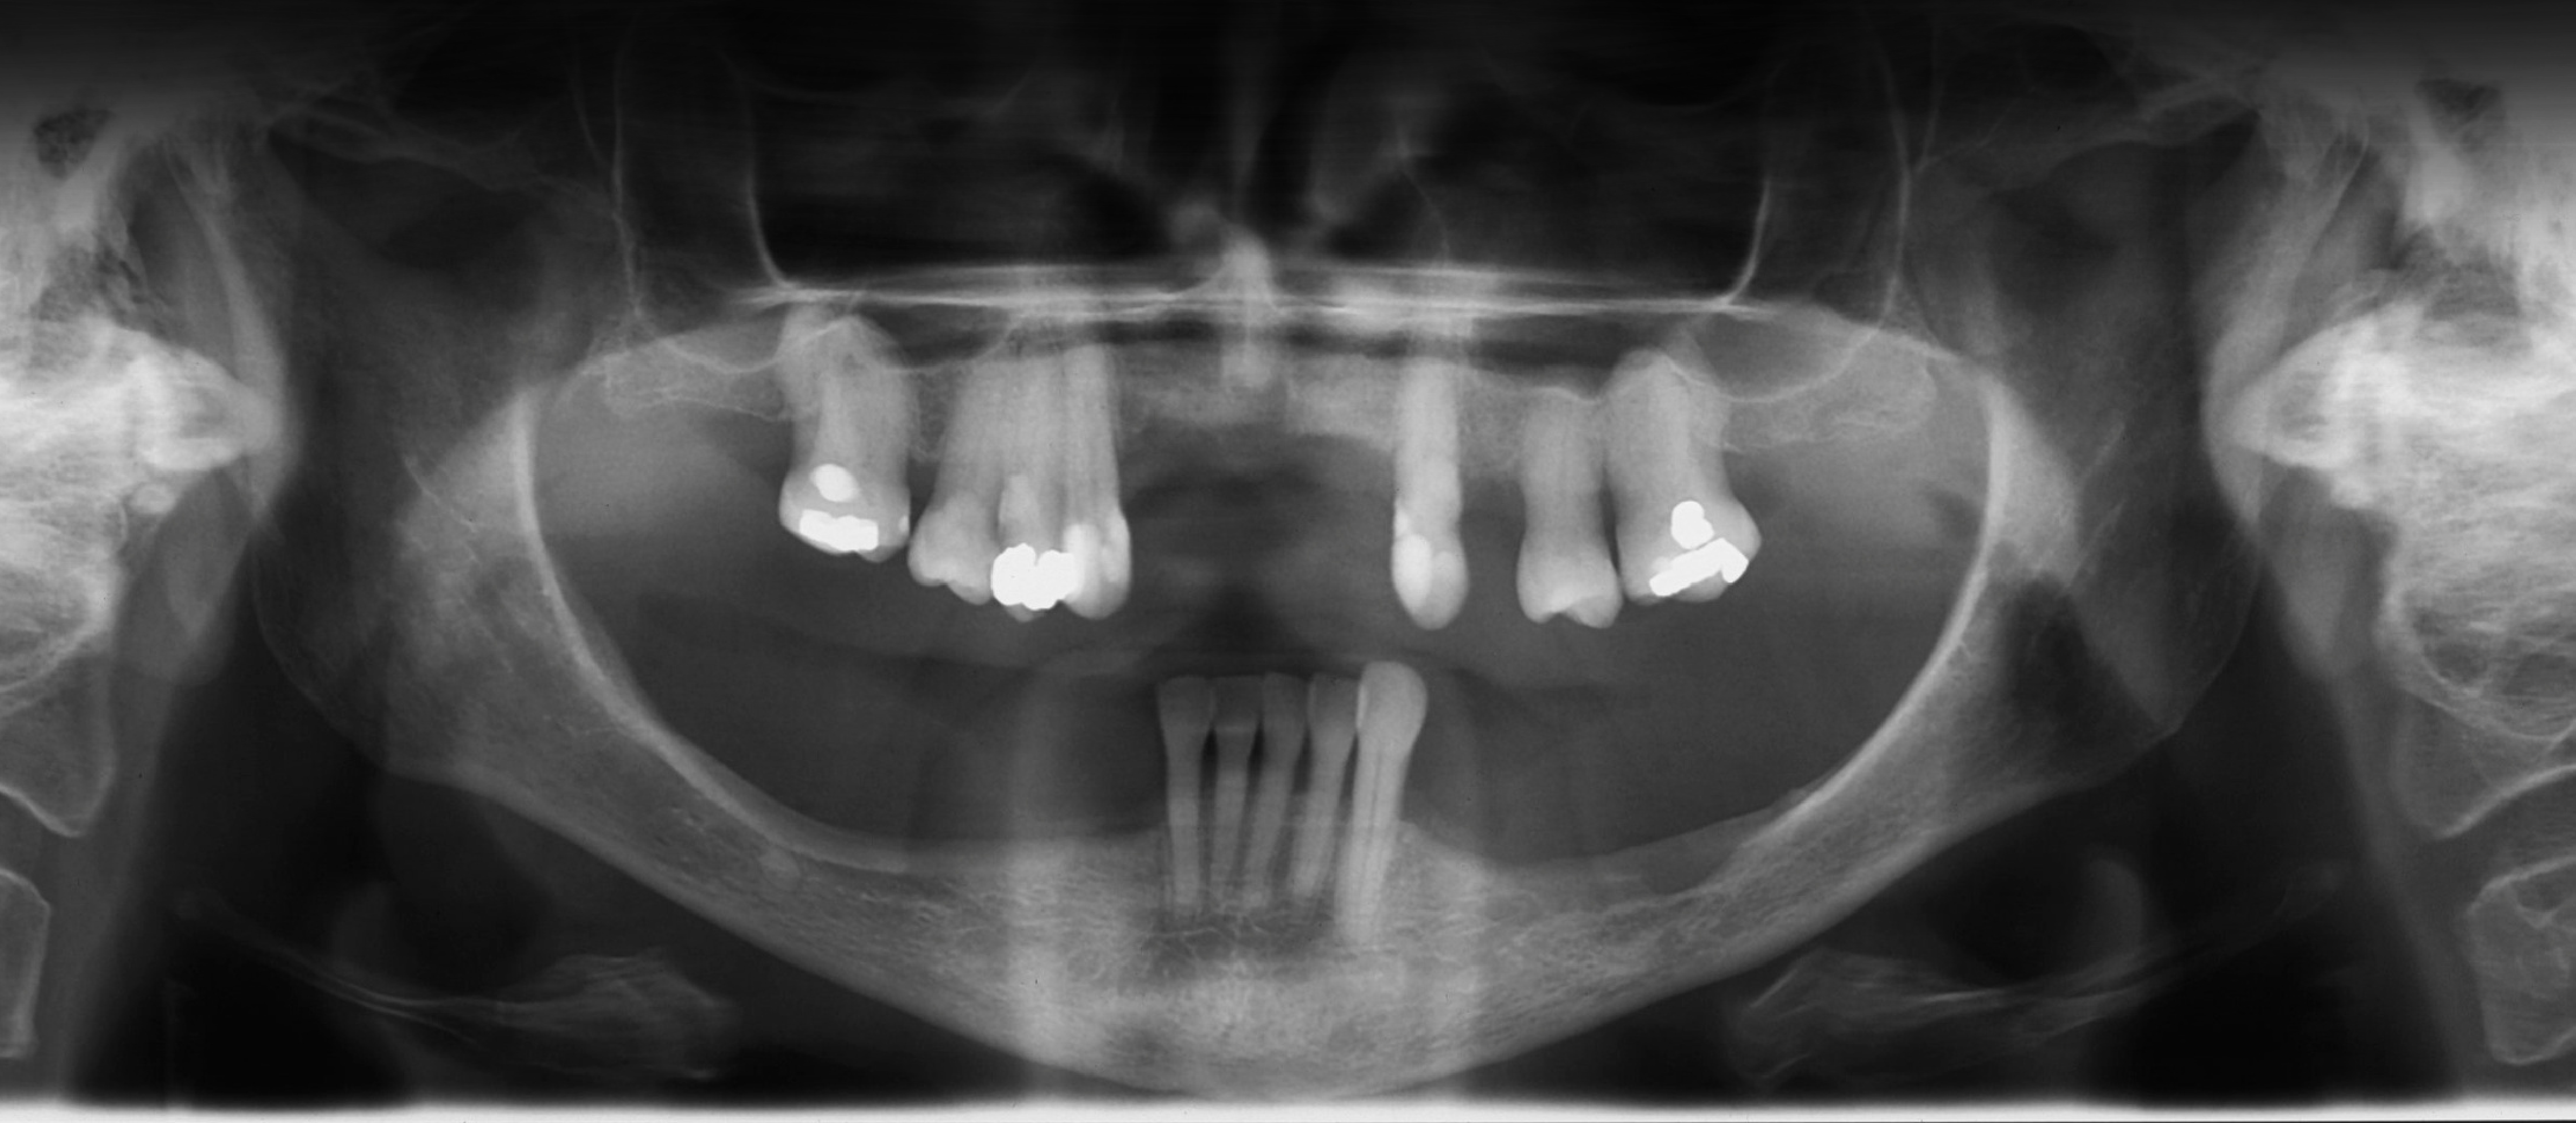
Case: OPG for Acrylic vs. Chrome Decision
Question
Scenario: A patient presents to the clinic with missing teeth, and an OPG is shown to the class.
What’s shown: An OPG of a patient with missing teeth.
Consider: How to decide between an acrylic or cobalt chrome denture based on the radiograph and clinical findings.
Answer
Observations:
- The OPG shows missing teeth, but the decision requires looking beyond just the edentulous spaces.
- The clinician must assess periodontal prognosis, mobility, stage/grade, restorability, occlusal function, and previous prosthesis.
Reasoning: The lecturer explains that the choice between acrylic and chrome isn’t just about Kennedy classification. It depends on the condition of the remaining teeth. For example, a mobile tooth due to trauma from occlusion might be saved after removing the trauma, whereas severe periodontal disease (Stage 3/4, Grade B/C) might favor an acrylic transitional denture because the teeth are at high risk of extraction.
Takeaway: The decision between acrylic and cobalt chrome depends on a comprehensive assessment of the remaining dentition’s prognosis, periodontal status, and patient factors, rather than just the pattern of missing teeth.
Case: Missing 15, 16, 17 (Free-End Saddle)
Question
Scenario: A patient presents missing teeth 15, 16, and 17, with all other teeth present.
What’s shown: A clinical scenario of a patient missing the right posterior teeth (15, 16, 17).
Consider: Whether a Maxillomandibular Relationship (MMR) record is needed for this patient.
Answer
Observations:
- The patient is missing 15, 16, and 17, creating a free-end saddle.
- There are no posterior occlusal stops on that side.
Reasoning: The lecturer explains that in a free-end saddle, even if the patient can bite in a stable spot using their muscles, the lab technician’s models can tilt during articulation because there is no posterior stop to stabilize the cast.
Takeaway: Free-end saddles lack posterior occlusal stops, making the models prone to tilting during articulation; therefore, an MMR is recommended to ensure stable lab fabrication.
Case: Missing Second Molar with Posterior Occlusal Stops
Question
Scenario: The previous scenario is modified: the patient has a first molar present but is missing the second molar, providing posterior occlusal stops.
What’s shown: A clinical scenario where a patient is missing a second molar but has stable posterior occlusal contacts.
Consider: Whether an MMR is still needed when the patient has stable occlusal stops.
Answer
Observations:
- The patient has a first molar and is missing the second molar.
- The patient has stable posterior occlusal stops.
Reasoning: Although the patient can bite in a stable spot, the lecturer notes that modern PVS bite registration material is “squishy” and can have movement. For an ideal outcome, the models need to be perfectly stable on the articulator. However, if there are three points of contact (tripod contact: two posteriors and one anterior), it might be sufficient to articulate without a full MMR.
Takeaway: While stable posterior occlusal stops (tripod contact) can sometimes allow for hand articulation without an MMR, the “squishiness” of modern bite registration materials may still necessitate an MMR for perfect model stability.
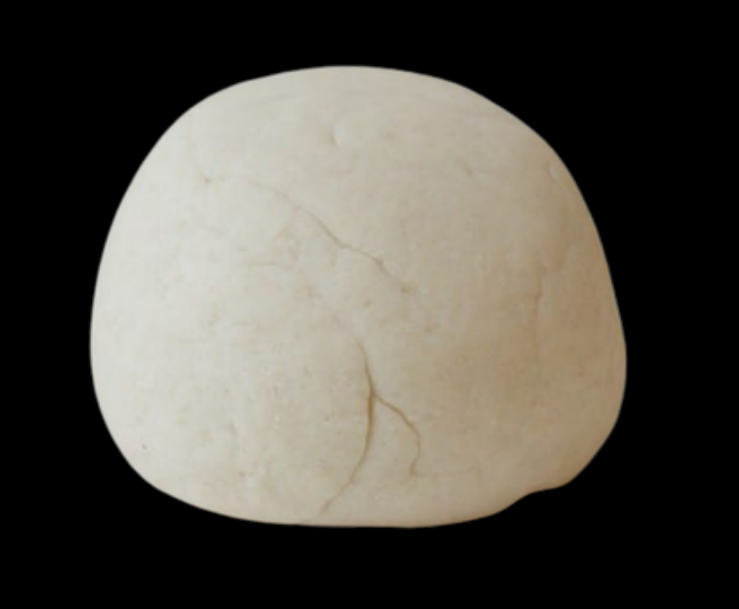
Case: Kennedy Class 3 Model for Articulation
Question
Scenario: A physical model of a Kennedy Class 3 partial edentulism is passed around the class.
What’s shown: A plaster model demonstrating a Kennedy Class 3 scenario (bounded saddle).
Consider: How to assess the need for an MMR and proper articulation for this specific model.
Answer
Observations:
- The model represents a Kennedy Class 3 (tooth-supported/bounded saddle).
- It is used to demonstrate tripod contact and articulation.
Reasoning: The lecturer uses the model to reinforce that in a Kennedy Class 3, if there are three points of contact (two posteriors and one anterior), the models can be stabilized. The focus is on making the lab technician’s job easier by providing a rigid, predictable articulation.
Takeaway: For tooth-supported cases like Kennedy Class 3, achieving tripod contact (two posteriors, one anterior) can provide sufficient stability for articulation without a full MMR, but a bite registration should always be taken.
Case: Replacing a Single Central Incisor (Tooth Try-In)
Question
Scenario: A patient needs a removable partial denture replacing only a single central incisor (tooth 11).
What’s shown: A clinical scenario of a single-tooth replacement (tooth 11) with stable occlusion and a taken bite registration.
Consider: Whether a tooth try-in appointment is necessary before processing the final denture.
Answer
Observations:
- Only one tooth (11) is being replaced.
- Occlusal contacts are stable, and a bite registration has been taken.
Reasoning: The lecturer explains that if the occlusion is stable, the articulation is correct, and only a single tooth is being replaced, a tooth try-in might not be strictly necessary. The clinician can proceed directly to the final denture, provided the correct shade was selected (ideally with a photo sent to the lab).
Takeaway: A tooth try-in can be skipped for simple, single-tooth replacements with stable occlusion, provided aesthetic parameters like shade are accurately communicated to the lab (e.g., via a photograph).
Case: Framework Try-In with Fit Checker
Question
Scenario: A cobalt-chrome framework is tried in the patient’s mouth but does not sit fully. Fit checker and occlusal spray are used to identify the issue.
What’s shown: A framework try-in where fit checker shows the entire framework is white except for one area exposing the metal, indicating a localized interference.
Consider: How to interpret the fit checker results and determine the next clinical step.
Answer
Observations:
- The fit checker shows the framework is not fully adapted; one specific area shows the metal (meaning the fit checker was wiped away or didn’t flow there due to contact).
- The rest of the framework shows the white fit checker material.
Reasoning: The lecturer explains that if the framework doesn’t sit, the first step is to identify the interference using fit checker or occlusal spray. The area showing the metal (or where spray is wiped away) is the point of contact/interference. Minimal adjustments should be made to that specific area. If the discrepancy is too large or the impression was faulty, the impression may need to be retaken rather than just remaking the framework.
Takeaway: When a framework fails to seat, use fit checker or occlusal spray to localize the interference, make minimal adjustments to that specific area, and ensure the underlying impression was accurate before blaming the lab.
Case: Combining Survey Crowns with RPD and Increased Vertical Dimension
Question
Scenario: A patient requires an acrylic RPD and a survey crown, and the clinician plans to increase the vertical dimension.
What’s shown: A clinical scenario involving the combination of a survey crown, an RPD, and an increase in vertical dimension.
Consider: The correct sequence of steps and records needed when combining these treatments.
Answer
Observations:
- The treatment involves a survey crown and an RPD.
- The vertical dimension needs to be increased.
Reasoning: The lecturer explains that a diagnostic MMR must be done first to determine the new vertical dimension. The crown should be waxed up at this new vertical dimension before preparation, so minimal occlusal reduction is needed. After preparing the tooth and taking the secondary impression, another MMR is sent to the lab to articulate the final models for crown design. Once the crown is inserted, a final MMR and impression are taken for the RPD.
Takeaway: When combining survey crowns and RPDs with an increased vertical dimension, a diagnostic MMR is essential first to establish the new vertical dimension and guide the crown wax-up and preparation.
Case: Cracked Tooth Requiring a Survey Crown
Question
Scenario: A student presents a case of a patient needing a survey crown on tooth 37, which has a large crack.
What’s shown: A clinical scenario of a cracked tooth (37) planned for a survey crown as part of an RPD design.
Consider: Whether to proceed with a survey crown on a cracked tooth and the associated risks.
Answer
Observations:
- Tooth 37 has a large crack.
- The treatment plan involves a survey crown to serve as an abutment for an RPD.
Reasoning: The lecturer notes that crowning the tooth can embrace it and reduce the potential for crack propagation. However, placing an occlusal rest on the crown increases the risk of the crack propagating. The clinician must warn the patient about this risk and obtain informed consent.
Takeaway: While a crown can help embrace and protect a cracked tooth, placing an occlusal rest on it increases the risk of crack propagation; the patient must be fully informed of this risk before proceeding.
Footnotes
-
Original PDF page 1: L5 RPD Hindawi, p.1 ↩
-
Original PDF page 3: L5 RPD Hindawi, p.3 ↩
-
Original PDF page 2: L5 RPD Hindawi, p.2 ↩
-
Original PDF page 4: L5 RPD Hindawi, p.4 ↩
-
Original PDF page 6: L5 RPD Hindawi, p.6 ↩
-
Original PDF page 8: L5 RPD Hindawi, p.8 ↩
-
Original PDF page 5: L5 RPD Hindawi, p.5 ↩
-
Original PDF page 7: L5 RPD Hindawi, p.7 ↩
-
Original PDF page 9: L5 RPD Hindawi, p.9 ↩
-
Original PDF page 12: L5 RPD Hindawi, p.12 ↩
-
Original PDF page 10: L5 RPD Hindawi, p.10 ↩
-
Original PDF page 11: L5 RPD Hindawi, p.11 ↩
-
Original PDF page 13: L5 RPD Hindawi, p.13 ↩
-
Original PDF page 14: L5 RPD Hindawi, p.14 ↩
-
Original PDF page 15: L5 RPD Hindawi, p.15 ↩
-
Original PDF page 18: L5 RPD Hindawi, p.18 ↩
-
Original PDF page 16: L5 RPD Hindawi, p.16 ↩
-
Original PDF page 17: L5 RPD Hindawi, p.17 ↩
-
Original PDF page 19: L5 RPD Hindawi, p.19 ↩
-
Original PDF page 20: L5 RPD Hindawi, p.20 ↩
-
Original PDF page 21: L5 RPD Hindawi, p.21 ↩
-
Original PDF page 22: L5 RPD Hindawi, p.22 ↩
-
Original PDF page 23: L5 RPD Hindawi, p.23 ↩
-
Original PDF page 24: L5 RPD Hindawi, p.24 ↩
-
Original PDF page 25: L5 RPD Hindawi, p.25 ↩
-
Original PDF page 26: L5 RPD Hindawi, p.26 ↩
-
Original PDF page 27: L5 RPD Hindawi, p.27 ↩
-
Original PDF page 28: L5 RPD Hindawi, p.28 ↩
-
Original PDF page 29: L5 RPD Hindawi, p.29 ↩
-
Original PDF page 30: L5 RPD Hindawi, p.30 ↩
-
Original PDF page 31: L5 RPD Hindawi, p.31 ↩
-
Original PDF page 32: L5 RPD Hindawi, p.32 ↩
-
Original PDF page 33: L5 RPD Hindawi, p.33 ↩
-
Original PDF page 34: L5 RPD Hindawi, p.34 ↩
-
Original PDF page 40: L5 RPD Hindawi, p.40 ↩
-
Original PDF page 35: L5 RPD Hindawi, p.35 ↩
-
Original PDF page 36: L5 RPD Hindawi, p.36 ↩
-
Original PDF page 37: L5 RPD Hindawi, p.37 ↩
-
Original PDF page 38: L5 RPD Hindawi, p.38 ↩
-
Original PDF page 39: L5 RPD Hindawi, p.39 ↩
-
Original PDF page 41: L5 RPD Hindawi, p.41 ↩
-
Original PDF page 42: L5 RPD Hindawi, p.42 ↩
-
Original PDF page 43: L5 RPD Hindawi, p.43 ↩
-
Original PDF page 44: L5 RPD Hindawi, p.44 ↩
-
Original PDF page 45: L5 RPD Hindawi, p.45 ↩
-
Original PDF page 46: L5 RPD Hindawi, p.46 ↩
-
Original PDF page 47: L5 RPD Hindawi, p.47 ↩
-
Original PDF page 48: L5 RPD Hindawi, p.48 ↩
-
Original PDF page 49: L5 RPD Hindawi, p.49 ↩
-
Original PDF page 50: L5 RPD Hindawi, p.50 ↩
-
Original PDF page 51: L5 RPD Hindawi, p.51 ↩
-
Original PDF page 52: L5 RPD Hindawi, p.52 ↩
-
Original PDF page 53: L5 RPD Hindawi, p.53 ↩
-
Original PDF page 54: L5 RPD Hindawi, p.54 ↩
-
Original PDF page 55: L5 RPD Hindawi, p.55 ↩
-
Original PDF page 56: L5 RPD Hindawi, p.56 ↩
-
Original PDF page 57: L5 RPD Hindawi, p.57 ↩
-
Original PDF page 58: L5 RPD Hindawi, p.58 ↩
-
Original PDF page 59: L5 RPD Hindawi, p.59 ↩
-
Original PDF page 60: L5 RPD Hindawi, p.60 ↩