Cementation Options1
- Temporary cements
- Conventional (Non-adhesive) cements
- Resin based (Adhesive) cements
Temporary Cements2
Ideal Properties for Provisional Cements3
-
Low strength
-
No effect on dental pulp
-
Easy to use
-
Easy to remove
-
Don’t interfere with definitive cementation
-
Be strong enough to keep the provisional restoration in place.
-
Be inexpensive.
-
Mostly based on Zinc Oxide, with or without Eugenol
-
Introduced in the late 1800’s
-
Non-eugenol formulations are now commonly used.
Cements Containing Eugenol4
- Have an anodyne effect on the pulp
- BUT — Eugenol inhibits free radicals which are necessary to initiate addition polymerisation of resin-based composite and dentine bonding systems
- NB: That includes IRM (Polymer reinforced ZnOE)
Lecturer — Eugenol in Practice
Eugenol can interfere with subsequent bonding and composite polymerisation, so using IRM before bonding a definitive restoration is discouraged.
- On the clinic, “NE” on a temporary cement indicates “no eugenol.”
- Zinc oxide eugenol cements set only in the presence of water, and adding water can accelerate setting.
- If protected from water, a zinc oxide eugenol cement can remain unset for a long time; cement mixed in the morning remained usable throughout the day when stored in a covered desiccator containing silica gel.
Definitive Cements5
Conventional or Adhesive
Cementation (Luting) vs Bonding (Adhesive)
Lecturer — Luting vs Bonding
Luting fills the space between a mechanically retentive restoration and the tooth, whereas bonding is intended to adhere to both surfaces.
- Historically, restorations were designed to be mechanically retentive, with cement mainly covering dentine and filling the gap rather than creating true adhesion.
Conventional Cements6
- Zinc phosphate
- Zinc polycarboxylate
- Conventional GIC
- Resin modified GIC
- (? Glass hybrid cements)
Zinc Phosphate
Strengths
- Used for 100 years
- Application is less technique sensitive
Weaknesses
- Low hardness
- High solubility
- No bonding to tooth
- Acidic — occasional post-op sensitivity
- Mixing is technique sensitive (powder liquid)
Lecturer — Zinc Phosphate Handling
Zinc phosphate can provide a long working time when mixed on a cold glass slab with cold water and cold liquid.
- This may be useful when cementing multiple units that fit together sequentially.
- Its working time, solubility, hardness and film thickness can vary, and film thickness affects how easily a restoration seats.
- It remains available clinically but is generally reserved for particular or specialised situations.
ZnO + phosphoric acid
Zinc Polycarboxylate
POLY-F PLUS, DURELON, HY-BOND, POLY ZINC+
Strengths
- 100+ years of use (since 1890’s)
- Some fluoride ion release
- Adhesion to tooth substance
- Low post-op sensitivity
- Easy to use
Weaknesses
- Medium hardness
- Somewhat soluble
- Some weak bonding to tooth
ZnO + polyacrylic acid
- It can be mixed as a cement or made much thicker and rolled into a ball for use as a putty.
Glass Ionomer Cement
Strengths
- 30+ years of use
- Fluoride ion release
- Bonding to tooth
- Dimensionally stable
- Adequate strength
Weaknesses
- Low pH — occasional post-op sensitivity
- Possible marginal dissolution if not protected from moisture during setting phase
Lecturer — Conventional Glass Ionomer
Conventional glass ionomer has properties similar to restorative glass ionomer, but its smaller particles make it less viscous.
- It is vulnerable to dissolution before fully setting, with wider margins particularly susceptible if the cement is not protected during setting.
- Fuji I was identified as the GC version of a pure glass ionomer cement.
Resin Modified Glass Ionomer Cement
Strengths
- Easy to use
- Bonding to tooth
- Low solubility
- Adequate strength
- Less technique sensitive than composite cements
- Low post-op sensitivity
Weaknesses
- Shorter shelf life
- Hygroscopic swelling with exposure to water
- Not suitable for weaker ceramic restorations due to hygroscopic expansion with time
Lecturer — Resin Modified Glass Ionomer
Earlier resin modified glass ionomer cements gained a poor reputation with glass ceramic restorations because hygroscopic expansion could cause weak restorations to crack.
- Swelling of the cement beneath the restoration could contribute to fracture.
- Both the cements and ceramics have improved, so this is considered less problematic than previously.
- Fuji Plus was identified as a commonly used conventional cementing material.
Composite Resin Cements7
Strengths8
- 10 years of use
- Good adhesion (with bonding and self-etch)
- Bonding to ceramic (with appropriate pre-treatments)
- Good aesthetics
Weaknesses
- 10 years of use
- Multi step
- Technique sensitive
- ? Bonding with deep subgingival margins
- Excess difficult to remove
- Some post-op sensitivity
- No fluoride release
Lecturer — Composite Cement Limitations
The clinical procedures for composite resin cements may involve several steps, and some systems require separate priming and bonding.
- Excessively thick bonding resin can prevent a restoration from seating.
- The technique may be too complicated or technique-sensitive for routine student use.
- The long-term clinical performance of newer materials is not yet fully established, requiring careful control of contamination, curing and excess removal.
Composite based and can be:
-
Self cure
-
Light cure
-
Dual cure
-
Adhesive (separate bonding steps)
-
Self adhesive (self etching, no separate bonding steps)
-
They may be used where mechanical retention is inadequate.
-
They can contribute to the strength of glass ceramic restorations.
-
MDP-containing resin systems can bond to metal oxides and zirconia.
-
Some products are unavailable in Australia because manufacturers have not completed the required local approval process.
Cementation Decision Framework9
Cements
What
 |  |
 |
Restorative Materials10
Restorative Material
-
Metal (precious / non-precious)
-
PFM (metal ceramic) (PBM) (615 = full crown, veneered, indirect) (VMK)
-
Glass ceramic (monolithic / layered)
-
Zirconia (monolithic / layered)
-
Glass ceramics include lithium disilicate restorations such as e.max.
-
Veneers and other thin anterior restorations are also considered.
Cement or Bond11
First decision:
- cement
- bond
For all restorative materials:
Conventional Cementation12
Conventional cementation is the most straightforward, simplest and most reproducible, with the fewest steps involved.
Lecturer — Treatment Planning
Cementation decisions should be made at the beginning of treatment, rather than only when the restoration is ready to be placed.
- The more complicated the procedure, the greater the likelihood that something will go wrong.
- A mechanically retentive restoration can often be placed with conventional cement rather than bonded.
Provided you have:
- Sufficient retention/resistance for your restoration
- Sufficient restoration thickness and strength
Cementation of Metal Restorations
Precious and Non-Precious Metals13
-
Precious (Gold) alloys (>60% noble metal)
-
Semi-precious (>25% noble metal)
-
Non-precious (<25% noble metal; Nickel, Cobalt, Chromium, Beryllium)
-
The lecturer described non-precious metal as containing less than 20% precious metal.
~4g: approximately 40
Lecturer — Precious Metal Costs
The final cost of a precious metal crown can be difficult to predict.
- The laboratory determines the actual amount of metal used and provides the final bill.
- Patients should contact the laboratory for an estimate before treatment.
Using MDP Primers for Metal Alloys
Gold and Non-Precious Metal Alloys14
- Cement with any cement if there is sufficient mechanical retention.
If there is insufficient mechanical retention:
-
An MDP primer will bond resin cements to noble alloys, but the bond is more reliable with non-precious alloy.
-
MDP is not new (introduced 20+ years ago).
-
MDP is a functional monomer which bonds to HA, metal oxides (zirconia), and metal alloys.
-
Present in Monobond Plus, Panavia primer and cement, Scotchbond Universal, and many other “ceramic or universal primers”.
-
MDP was also described as bonding to enamel.
-
RelyX products were discussed as additional products containing or associated with MDP.
-
Universal primers may combine MDP with silane and other functional monomers.
-
Panavia was presented as the preferred option for bonding metal when sufficient mechanical retention is absent.
Cementation of Glass Ceramics15
Because of its reduced strength compared to zirconia, consider bonding e.max
If it’s thick enough with adequate mechanical retention — especially with subgingival margins — it can be cemented conventionally.
- Pressed glass is stronger than milled, particularly when bonded
- Mechanically unretentive restorations require bonding with adhesive cement
Lecturer — E.max Strength
Pressed e.max may have better margins, and its bonding procedure does not differ from that of milled e.max.
- The strength of thin glass ceramic restorations depends not only on the inherent material strength but also on bonding.
Bonding Protocol for Emax16
To achieve bonding with a resin cement for glass ceramics (e.max) — crowns and onlays:
- Ask lab to air abrade and etch fit surface with hydrofluoric acid (chairside is preferable)
- Clean with Ivoclean after trying in
- Silane on fit surface
- Bond with resin cement — self-etching or with dentine bonding
- Students are not permitted to use hydrofluoric acid chairside in the clinic, so the restoration should be requested from the laboratory already air-abraded and etched
- Silane should be air-thinned
- Silane should not be left pooled in the internal angles because it sets and may interfere with seating
Silane Bonding Agents
- Bifunctional (bipolar) molecules
- Hydrolysable group (X) + organofunctional group (R)
X — bonds to alkoxy groups (glass/silica)17
R — bonds to organic groups (epoxy/methacrylate)
Lecturer — Silane Application
After try-in, the fitting surface is contaminated with saliva and blood and must be cleaned before silane is applied. The silane should be air-thinned and not left pooled in the internal angles of the restoration because it sets and may interfere with seating.
Prime and Bond Options at OHCWA18
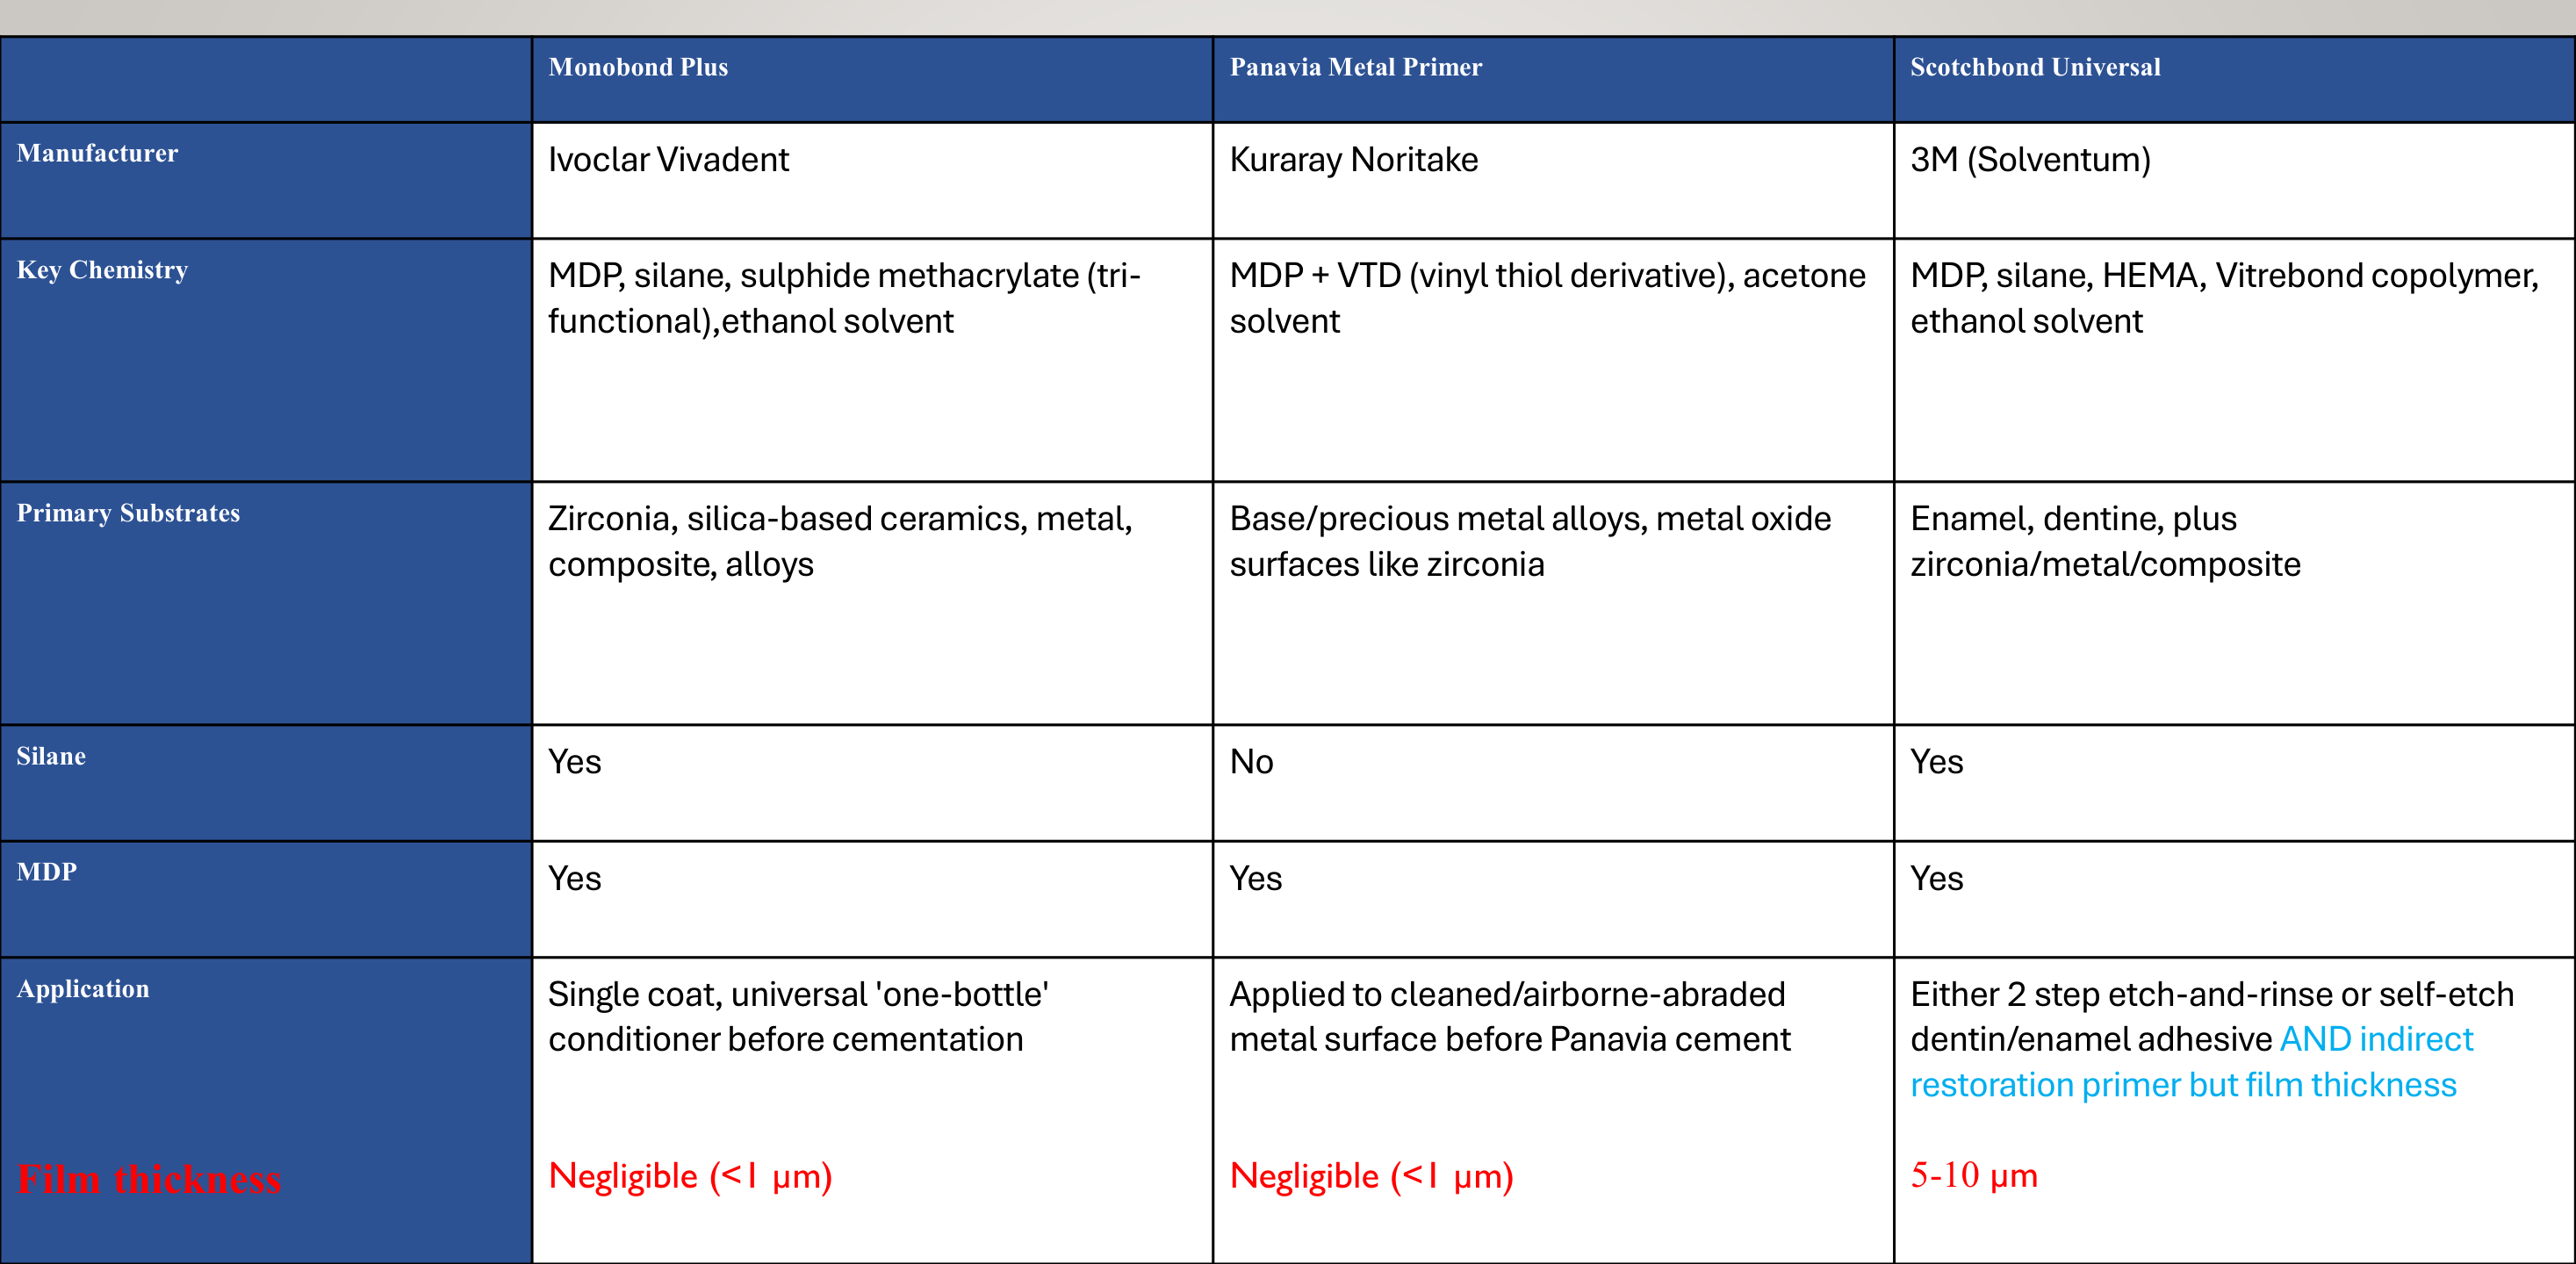
| Monobond Plus | Panavia Metal Primer | Scotchbond Universal | |
|---|---|---|---|
| Manufacturer | Ivoclar Vivadent | Kuraray Noritake | 3M (Solventum) |
| Key Chemistry | MDP, silane, sulphide methacrylate (tri-functional), ethanol solvent | MDP + VTD (vinyl thiol derivative), acetone solvent | MDP, silane, HEMA, Vitrebond copolymer, ethanol solvent |
| Primary Substrates | Zirconia, silica-based ceramics, metal, composite, alloys | Base/precious metal alloys, metal oxide surfaces like zirconia | Enamel, dentine, plus zirconia/metal/composite |
| Silane | Yes | No | Yes |
| MDP | Yes | Yes | Yes |
| Application | Single coat, universal ‘one-bottle’ conditioner before cementation | Applied to cleaned/airborne-abraded metal surface before Panavia cement | Either 2-step etch-and-rinse or self-etch dentin/enamel adhesive AND indirect restoration primer, but film thickness 5–10 µm |
| Film thickness | Negligible (<1 µm) | Negligible (<1 µm) | 5–10 µm |
Lecturer — Primer Selection
A newer Ivoclar product etches and primes lithium disilicate in one step.
- It avoids hydrofluoric acid but was described as having approximately half the bond strength of the conventional approach.
- Scotchbond Universal is a partially filled resin, and its greater film thickness may interfere with seating when it is used to prime the restoration.
- Monobond Plus was recommended as the easier priming option.
Bonding Zirconia19
Lecturer — Zirconia Types
Zirconia is available in multiple forms, and increasing yttria content generally improves translucency while reducing strength.
- The lecturer distinguished original, stronger and less translucent zirconia from more translucent, lower-strength zirconia.
- Other forms include uniformly coloured zirconia, multilayer zirconia with different translucency levels, and polychromatic materials.
- Zirconia was described as generally stronger than e.max, although lithium disilicate should not automatically be considered insufficiently strong.
Zirconia Cement or Bond
Cement When There Is20
-
A retentive preparation
-
Sufficient occlusal/palatal thickness
-
For many full-crown situations, the lecturer recommended keeping the procedure simple and using a suitable cement such as RelyX.
Bond When There Is
-
A lack of retention/resistance
-
Thin occlusal/palatal area
-
Any concern with strength/parafunction
-
Bonding may provide additional strength when the restoration is thin or mechanically unretentive.
The Bonding Problem21
Unlike Lithium Disilicate, Silane doesn’t bond to zirconia.
Practical Considerations
- Attempts to attach a layer of silica to zirconia by sandblasting with Rocatec (3M) may be beneficial.
- MDP does bond to metal oxides, including zirconia.
Lecturer — Silica Modification
The Rocatec approach uses silica-coated aluminium oxide particles blasted into the internal zirconia surface.
- The kinetic energy was described as converting to heat, allowing some particles to become embedded or welded into the zirconia.
- Silane can then bond to the silica associated with the surface, although the approach was described as complicated, messy and not necessarily a major advantage.
Lecturer — MDP Bonding
MDP was described as the more relevant approach for bonding zirconia.
- The bond formed between MDP and calcium in enamel or dentine was described as hydrolytically stable.
Lecturer — Zirconia Cleaning
Zirconia must be cleaned after try-in before bonding.
- Air abrasion was described as the best cleaning method, although it is not available in the clinic.
- Ivoclean was identified as a clinical option, and sodium hypochlorite was stated to be better than water in the context discussed.
- Water may be preferable to phosphoric acid for certain contaminants because phosphoric acid can leave salts on the surface and between the restoration and tooth.
- Ivoclean was described as nearly as effective as chairside etching for cleaning.
Lecturer — Material Selection
Zirconia is not automatically the best restorative material simply because it is stronger.
- Lithium disilicate may provide better appearance, and carefully selected lithium disilicate crowns can perform well.
- Zirconia can be difficult to remove, requiring substantial time and multiple burs, so the consequences of failure and removal should be considered when selecting the material.
The APC Concept22
Blatz, M. B., Alvarez, M., Sawyer, K., and Brindis, M. — How to Bond Zirconia: The APC Concept. Research output: Contribution to journal > Article > peer-review. 57 Scopus citations.
Abstract23
Zirconia has become one of the most popular materials in dentistry. New high-translucent zirconia ceramics have favorable optical properties and can be applied as monolithic full-contour restorations in various clinical indications for posterior and anterior teeth. However, having reliable cementation protocols is fundamental for clinical success of indirect ceramic dental restorations, including those made from zirconia materials. Resin bonding supports ceramic restorations and is necessary for onlays, laminate veneers, and resin-bonded fixed dental prostheses.
The APC zirconia-bonding concept is based on decades of research on how to achieve high and long-term durable bond strengths to high-strength ceramics. It includes three practical steps:
- (A) Air-particle abrasion
- (P) Zirconia primer
- (C) Adhesive composite resin
This article discusses the history and development of high-translucent zirconia and explains the necessity for proper cementation. The rationale and science behind a simplified zirconia-bonding concept is explained and illustrated with a clinical case presentation.
Lecturer — APC Origins
The APC concept was associated with Marcus Blatz and Jerry S. from the University of Louisiana.
- The lecturer stated that the concept became prominent after being given the acronym, although the underlying procedures were not entirely new.
Publication Details
-
Original language: English (US)
-
Pages: 611–618
-
Number of pages: 8
-
Journal: Compendium of Continuing Education in Dentistry (Jamesburg, N.J. : 1995)
-
A — Air abrasion of fit (intaglio) surface
-
P — Primer (containing MDP)
-
C — Composite cement
-
The tooth surface must also be cleaned; when intraoral air abrasion is unavailable, alternative cleaning materials must be used.
Lecturer — Biomimetic Bonding
Biomimetic dentistry challenges the simple hierarchy that enamel bonding is predictable while dentine bonding is less predictable.
- Although enamel bonding may be strong, stress can fracture the enamel prisms adjacent to the bonded area.
- A strong bond to enamel therefore does not necessarily prevent adjacent enamel from fracturing.
Bonding to Tooth Structure2425
Evolution of Adhesive Dentistry26
enamel etching (1955) to today:
| Process | Description |
|---|---|
| Acid etching enamel | 1955 discovery (Buonocore); clinical adoption through the 1960s |
| Generation 1 (1960s–70s) | Weak dentine bond, ionic/chelation attachment |
| Generation 2 (1970s–80s) | Smear layer left intact, unreliable bond. Fusayama total etch + caries dye 70’s |
| Generation 3 (late 1980s) | Separate dentine priming step introduced. |
| Generation 4 (early 1990s) | Total-etch, 3-step: etch + prime + bond — gold standard. |
| Generation 5 (mid 1990s) | Total-etch, 2-step: combined primer/adhesive |
| Generation 6 (late 1990s) | Self-etch, 2-step: self-etch primer + separate bond |
| Generation 7 (2000s) | Self-etch, 1-step, all-in-one adhesive |
| Generation 8 (2010s–present) | Universal / multi-mode adhesives, any etch strategy |
Lecturer — Adhesive System Evolution
Adhesive dentistry developed through early enamel and dentine etching work and successive generations of bonding systems.
- Current systems contain different combinations of functional monomers and other components.
- The large number of available systems suggests that the profession does not have complete certainty about which approach is best in every situation.
- Dentine etching initially encountered resistance but was later adopted into routine dentistry.
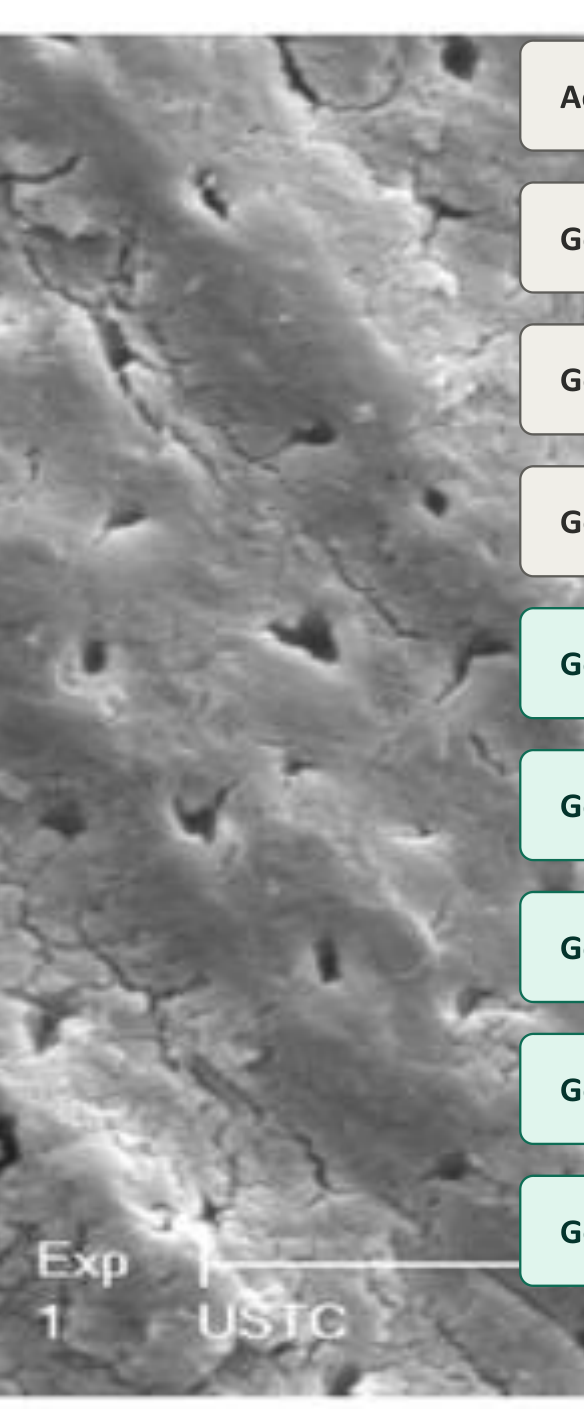
Enamel Versus Dentine Bonding2728
Our traditional thinking/teaching is:
- Enamel bond good
- Dentine bond not so good
Depends on who you listen to and what you believe:
- Decoupling with time
- Decoupling with fibre and split increment
- Hierarchy of bondability
Decoupling with Time29
- Dentine bond does not reach maximum strength immediately; it takes time to develop
- The dentine bond improves as the hybrid layer starts to mature
- Depends on the quality of substrate
Lu H, Stansbury JW, Bowman CN. Towards the elucidation of shrinkage stress development and relaxation in dental composites. Dent Mater. 2004 Dec;20(10):979-86.
Lecturer — Decoupling with Time
When dentine is bonded and composite is immediately placed and cured, polymerisation contraction can stress the developing hybrid layer.
- This may create gaps within the hybrid layer or between the hybrid layer and dentine.
- “Decoupling with time” means allowing the dentine bond to mature before subjecting it to the stress of the composite restoration.
- The exact required time was not specified.
Hierarchy of Bondability30
| Material | Bondability (MPa) |
|---|---|
| Superficial dentine | 50 MPa |
| Inner carious dentine | 30 MPa |
| Outer carious dentine | 15 MPa |
| Enamel | 30 MPa |
Lecturer — Practical Bondability
Good dentine may be more practically bondable than enamel, despite enamel bonding often being strong.
- Stress can fracture enamel prisms adjacent to the bonded area.
- Dentine bonding may therefore be more favourable in practical situations than the traditional hierarchy suggests.
Immediate Dentine Sealing3132
The dentine of your preparation is sealed immediately following preparation before everything else including impression taking/scanning.
Perceived benefits of IDS:
-
Prevents dentine contamination.
-
Allows maturation of the hybrid layer.
-
Improves bond strength.
-
Avoids gap formation.
-
Protects the tooth against bacterial leakage.
-
Prevents retention of temporary cement remnants.
-
Eliminates fit issues caused by pooling of dentine bonding resin at fit stage.
-
Prevents temporary cement from entering preparation grooves and indentations.
-
Allows the hybrid layer to mature while the provisional restoration is being worn.
-
May still provide benefits when conventional cementation is planned by reducing contamination and protecting the dentine.
IDS Procedure33
-
Dentine bonding with a more filled resin
-
+/- a thin layer of flowable composite (the so-called “Resin coating”) = Reinforced IDS or IDS Plus
-
Apply the bonding agent soon after preparation and complete sealing before scanning or taking the impression where possible.
-
Place the provisional restoration after the dentine has been sealed.
-
These variations were mentioned but were not presented as procedures the lecturer routinely advocated.
Heated Composite for Cementation34
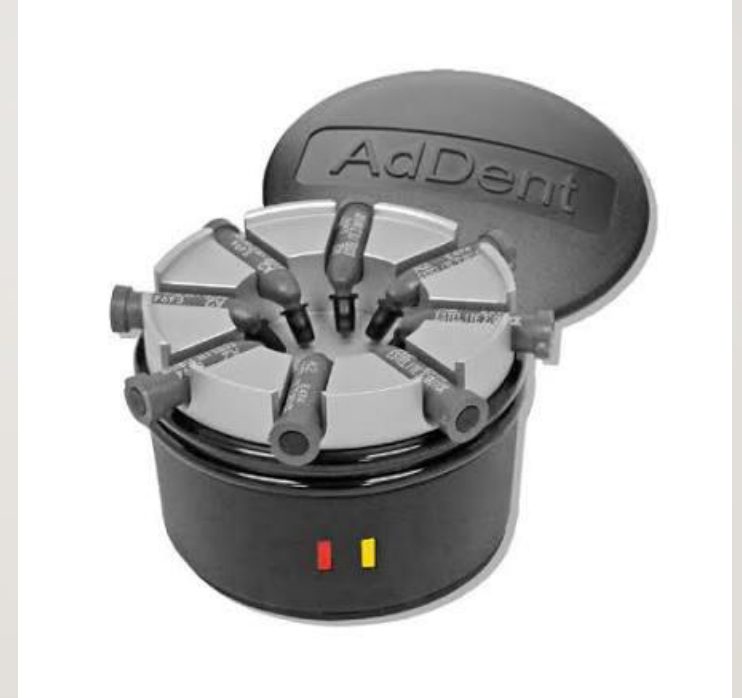
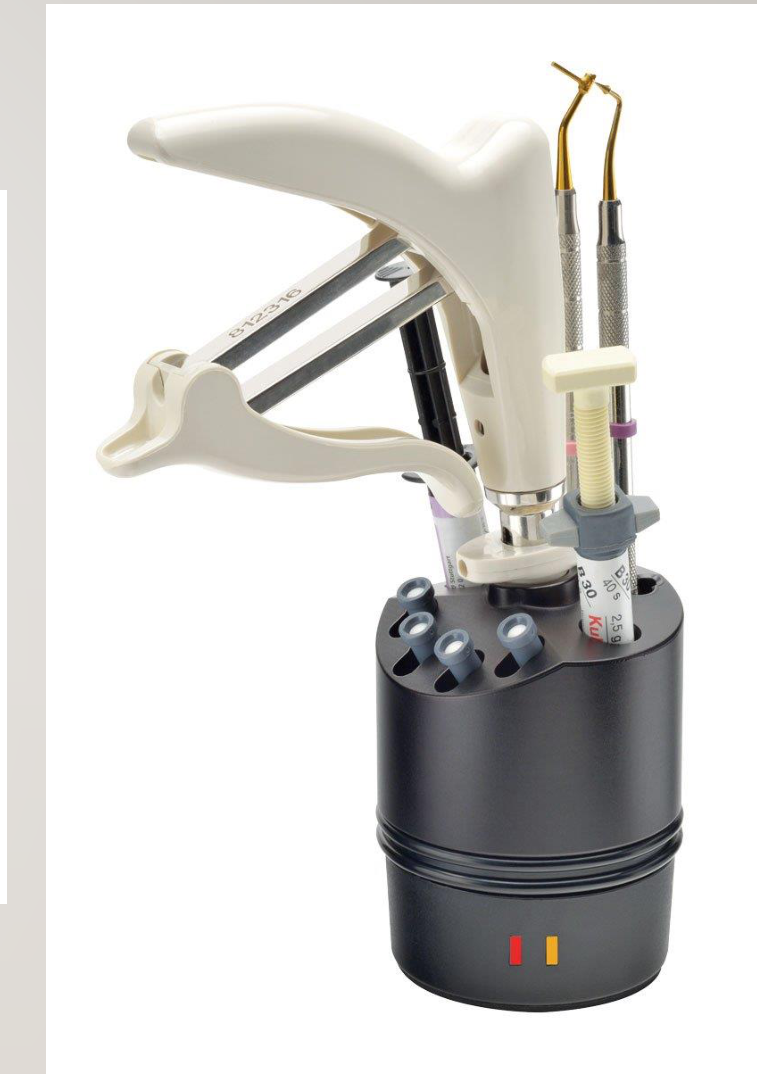
Heated composite for cementation of indirect restorations?
AdDent
Uncured bond applied to tooth and fit surface of the restoration and heated composite used as the cement.
Lecturer — Heated Composite
Heated composite uses ordinary restorative composite heated so that it flows more like a cement.
- The composite may be heated to approximately 68°C for cementation of an indirect restoration.
- The technique may be highly technique-sensitive because the composite can thicken before the restoration is fully seated.
- If the restoration is partly seated when the composite thickens, it may become difficult to remove or seat.
- The material is not dual-cured in the same way as some resin cements, and curing may be difficult beneath a thick restoration.
- The effect on the pulp was raised as a question but not resolved.
 |  |
Definitive Cements Recap35
- Zinc phosphate
- Zinc polycarboxylate
- Conventional GIC
- Resin modified GIC
- Resin cements
Cements Available at OHCWA Clinics36
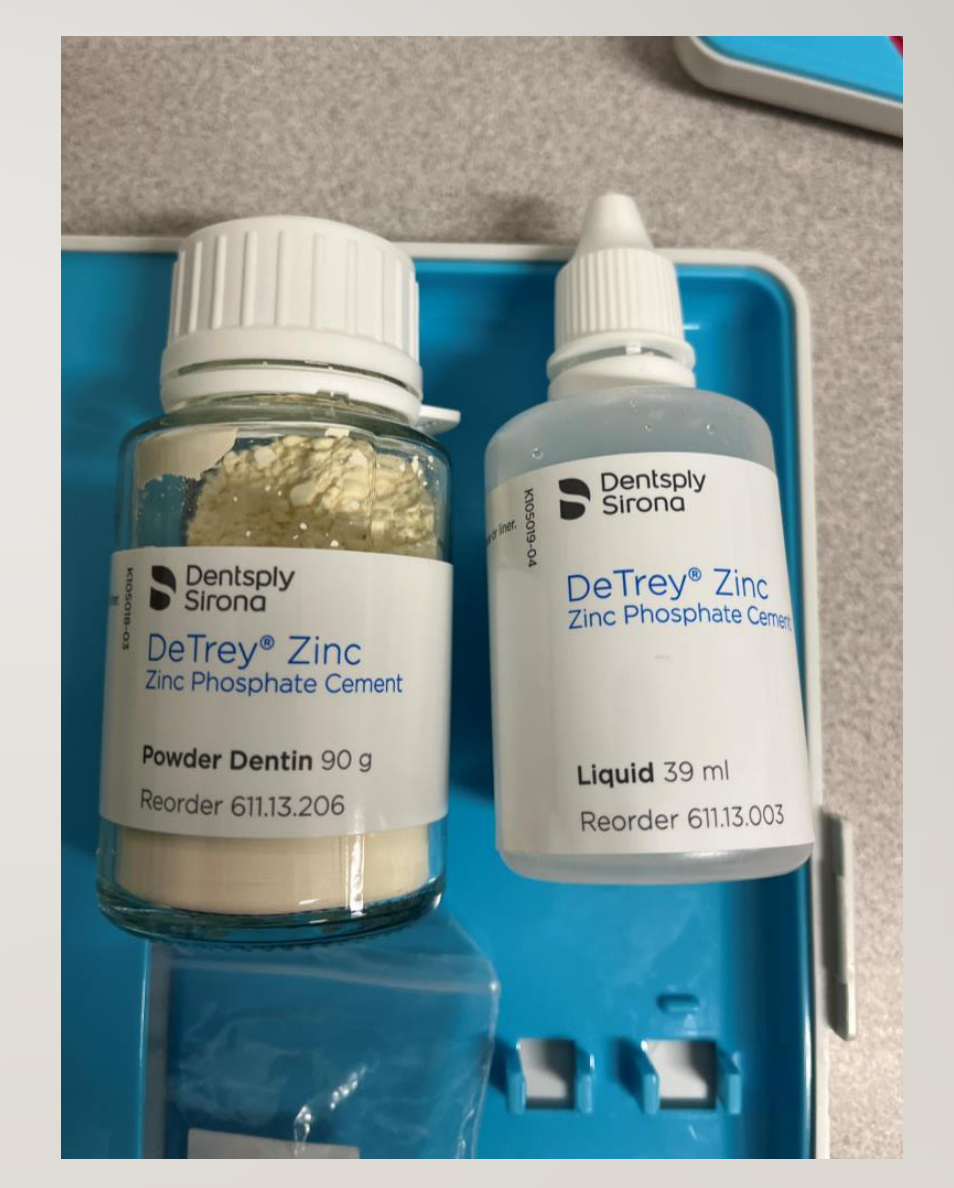
OHCWA Clinic 137
- Tempocem NE
- Composite
- Zinc phosphate
Lecturer — Clinic Materials
The clinic options were limited compared with the large number of products available internationally.
- The clinic had one principal temporary cement type and composite cement options.
- Zinc phosphate may not be readily located in the main clinic area.
- Resin modified glass ionomer and other conventional cement options were available in the broader clinical environment.
- Students were advised to use the provided systems until they became independent practitioners.
Zinc phosphate
Composite Options38
- Rely-X Unicem (3M)
- Panavia (Kuraray)
- Variolink (Ivoclar)
Specific Cement Products
RelyX Unicem3940
-
Dual-cure
-
Self-adhesive resin cement
-
RelyX was presented as the simpler composite cement option for straightforward cases.
-
It may be used when a mechanically retentive restoration does not require a more complex bonding protocol.
-
The lecturer preferred RelyX over Variolink for many straightforward situations because of its simpler procedure.
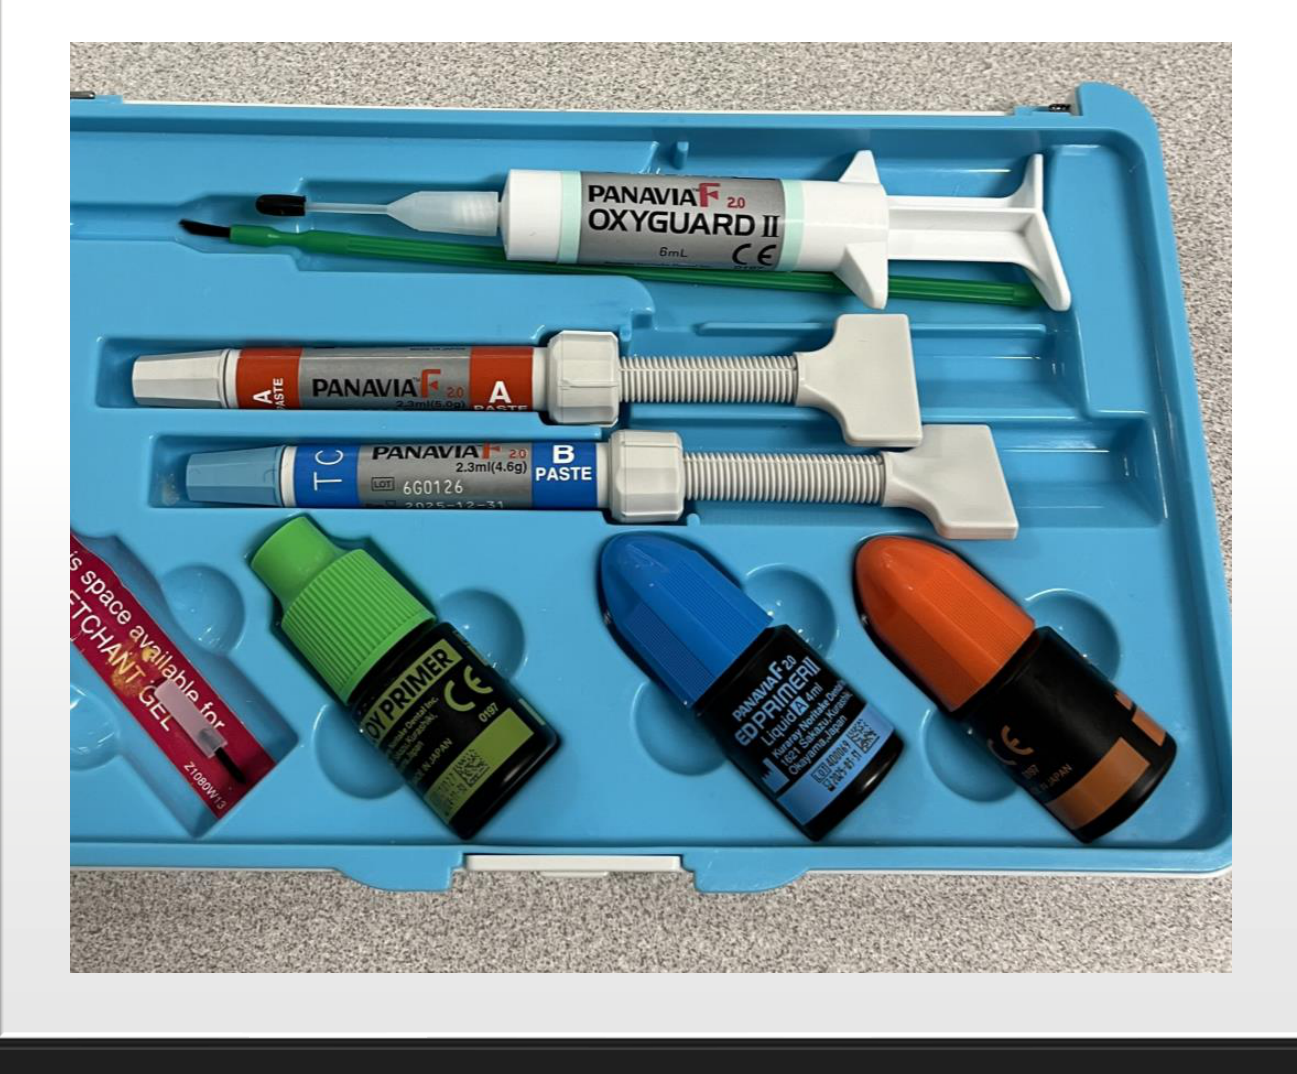
Panavia F 2.04142
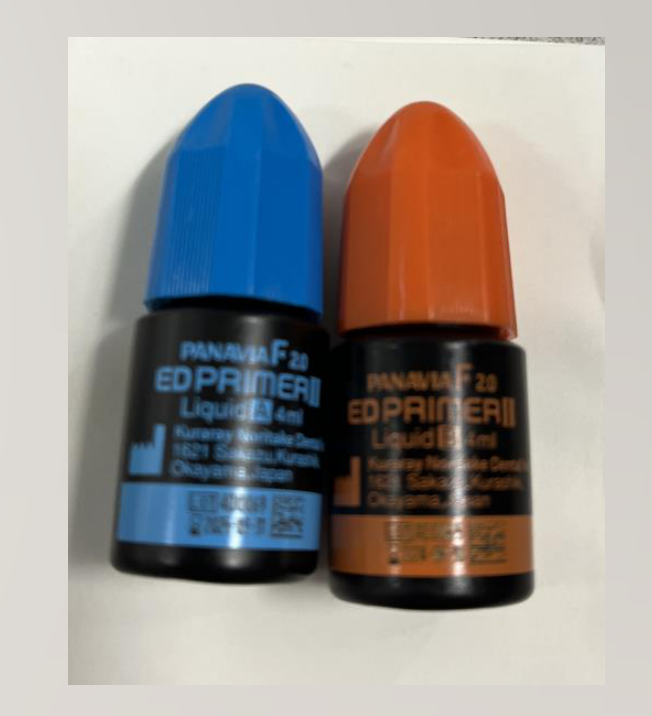
Dual-cure resin cement.
Requires separate self-etching primer system (A+B) as initiator for chemical curing.
Lecturer — Panavia Indications
Panavia contains MDP in the cement and is also associated with an MDP-containing metal primer.
- It was presented as a preferred option for bonding metal restorations when mechanical retention is insufficient.
- It may also be used for zirconia bonding where the appropriate MDP-based protocol is followed.
 |  |
 |
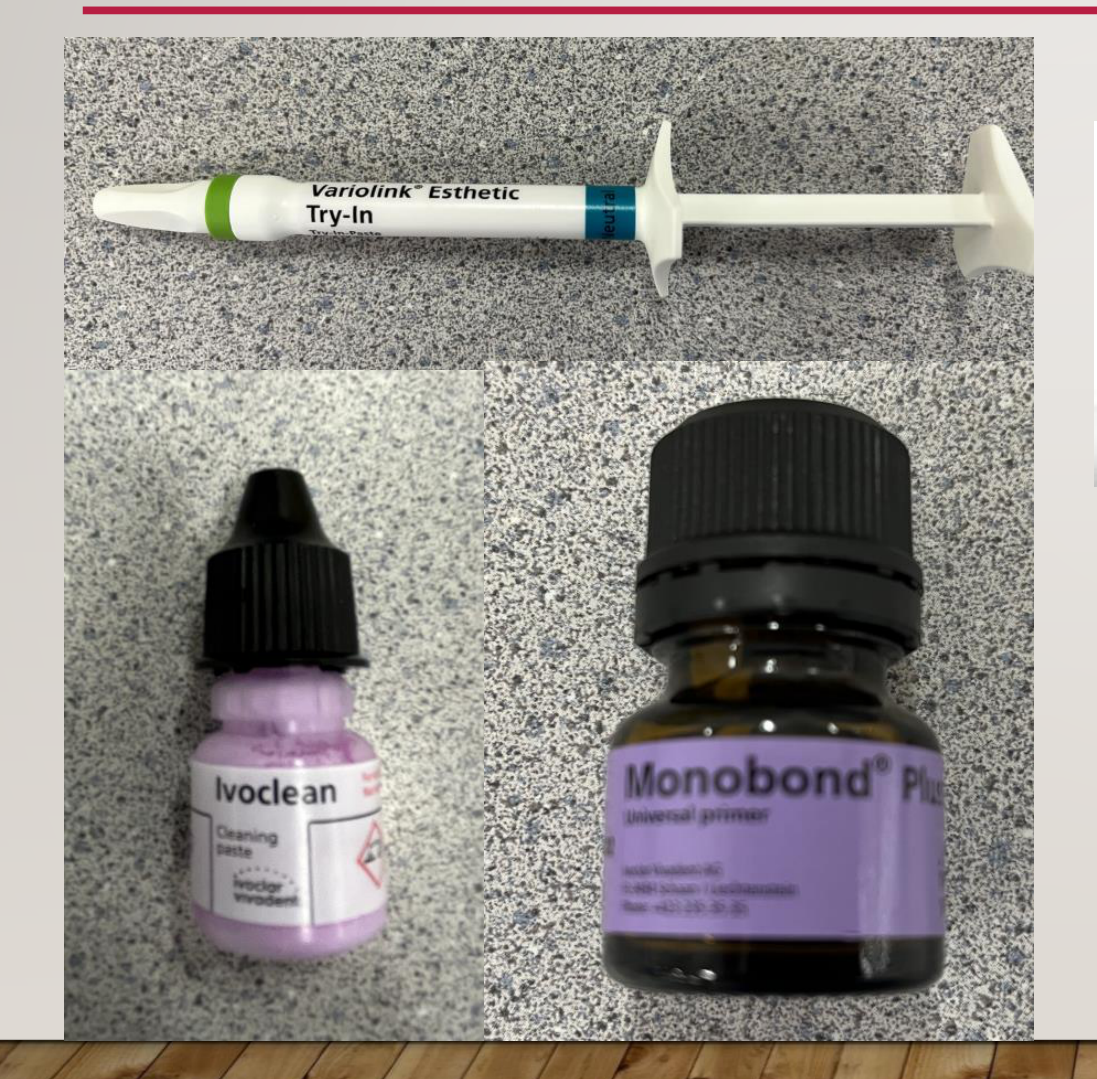
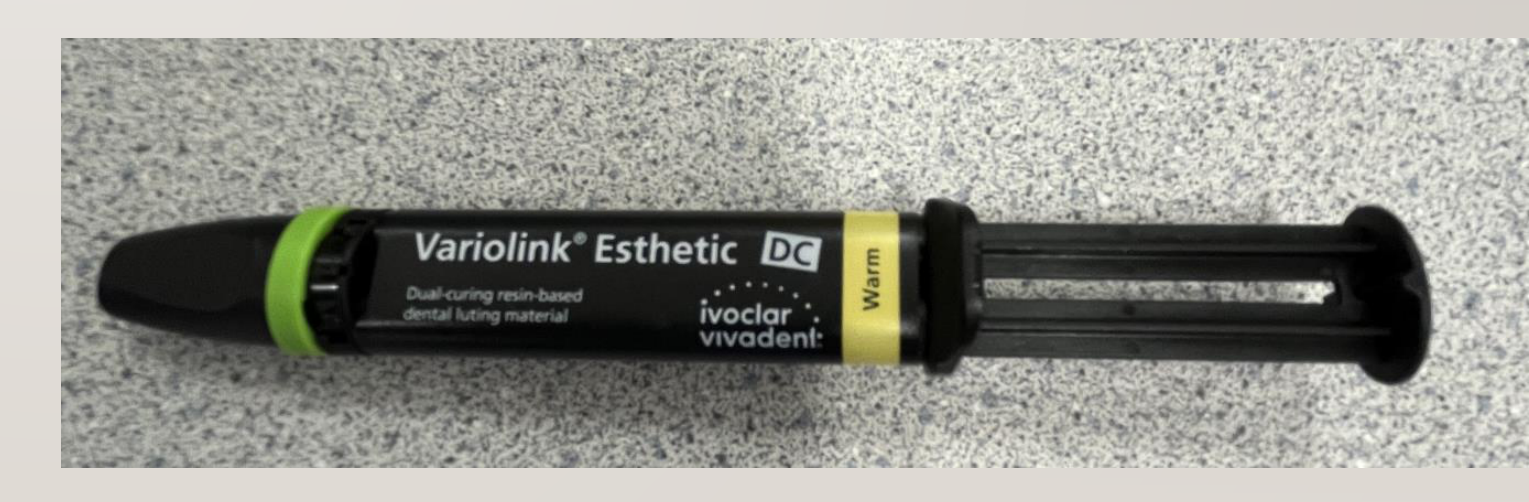
Variolink Esthetic4344
 |  |
 |
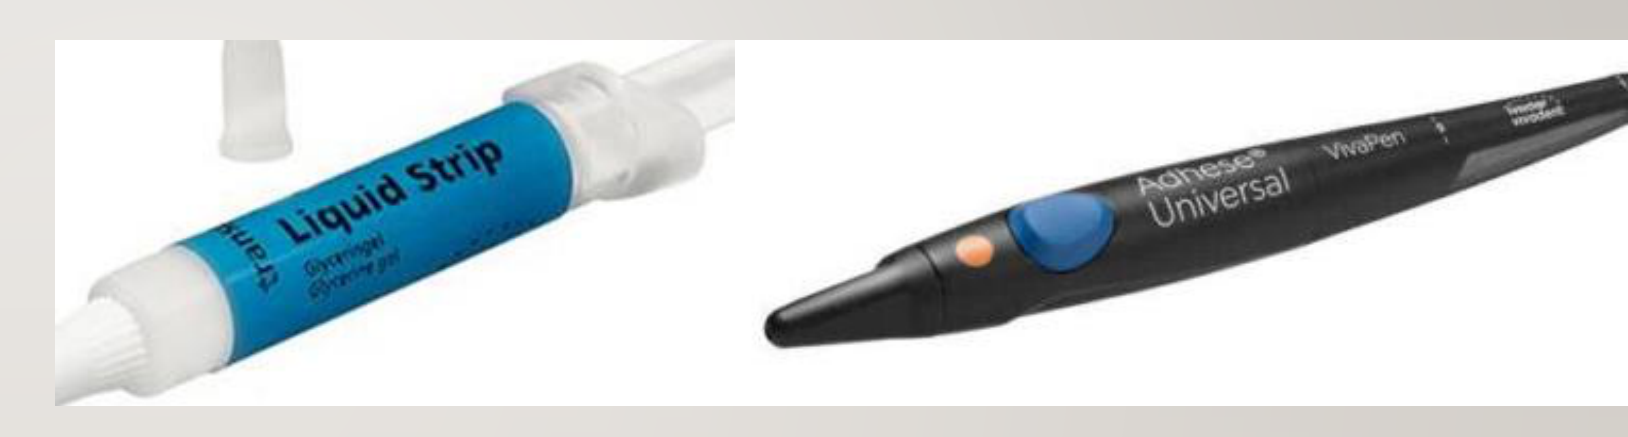
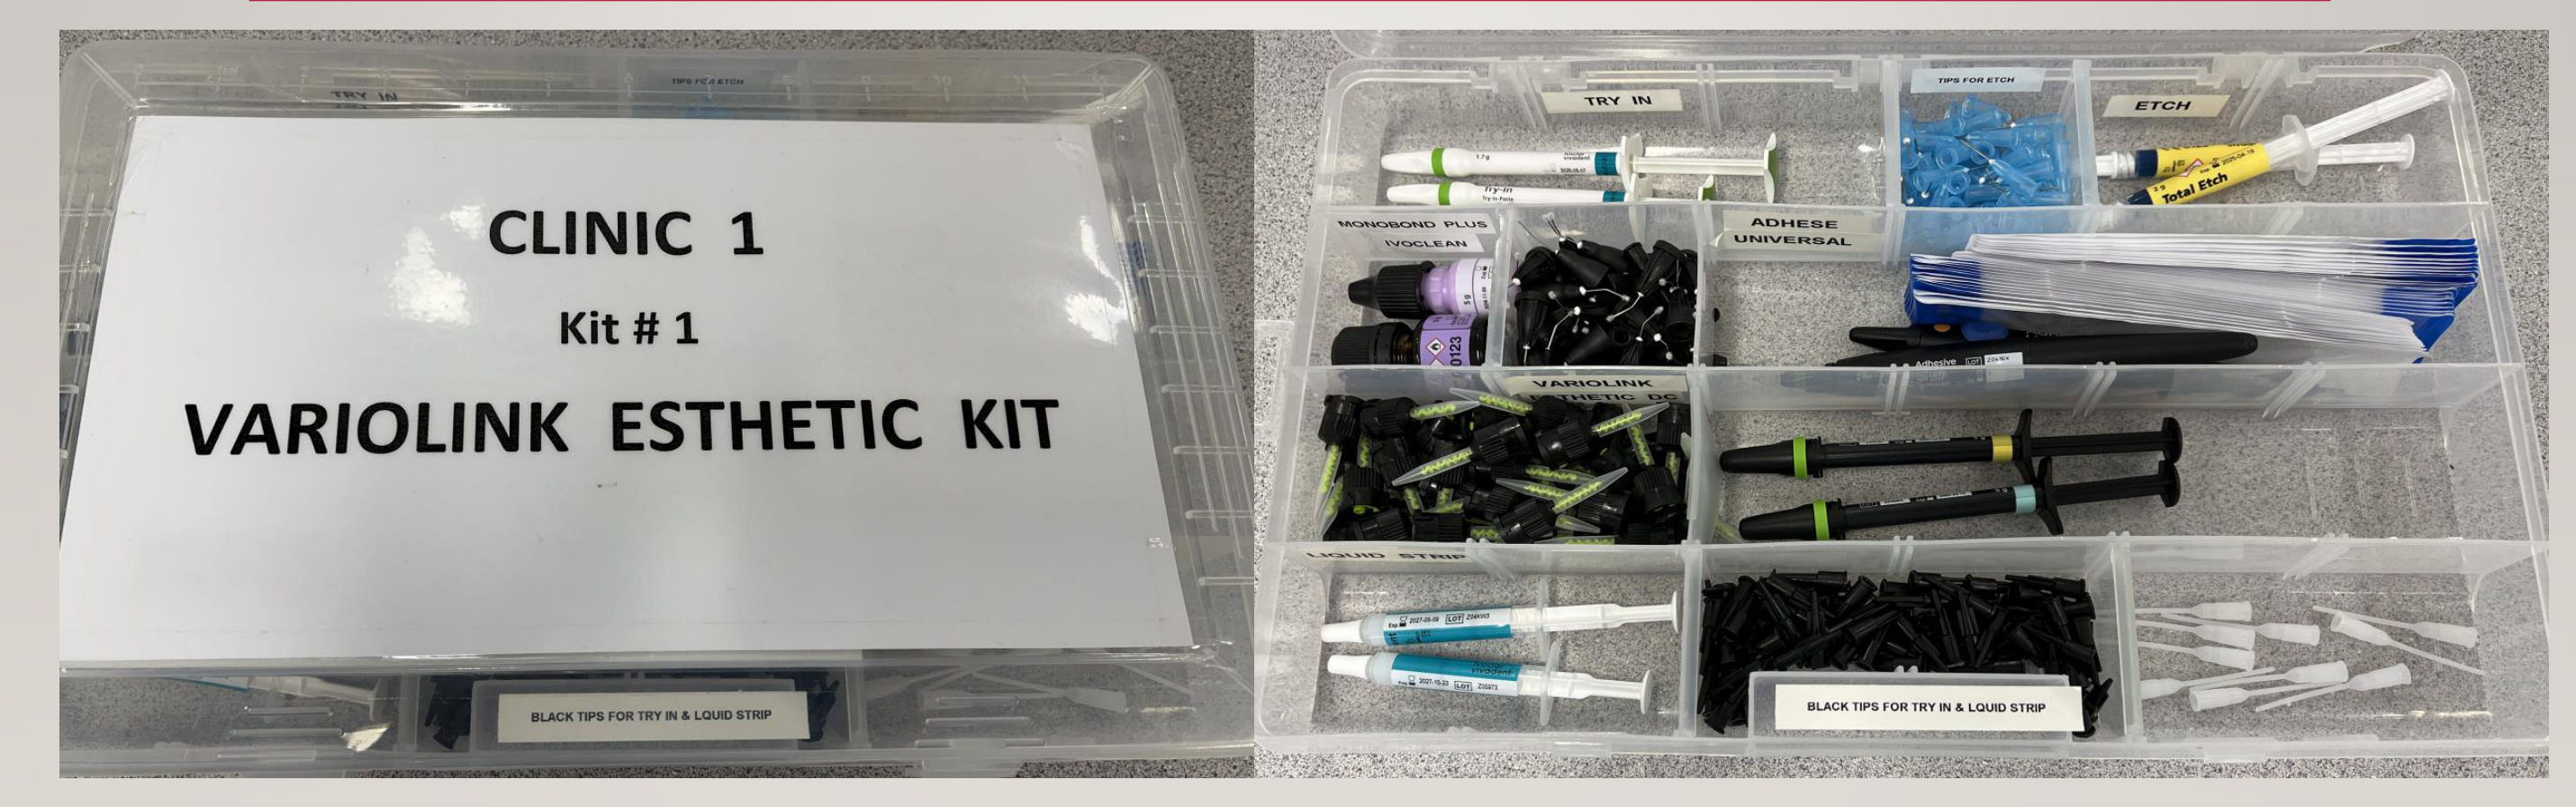
Clinic 1 — Kit #1: Variolink Esthetic Kit45
- Try-in (black tips for try-in & liquid strip)
- Etch (tips for etch)
- Monobond Plus
- Ivoclean
- Variolink
- Adhese Universal
- Liquid Strip
Black tips for try-in & liquid strip.
Dual-cure resin cement.
Requires combined primer/bond dentine bonding agent (Adhese Universal).
Lecturer — Variolink Procedure
Variolink involves multiple steps and separate bonding or priming procedures, making it more complicated than RelyX.
- The bonding resin is relatively highly filled and may be thick.
- If applied too thickly, it can prevent the restoration from seating.
- The instructions refer to achieving a glossy, immobile film, although the lecturer questioned how consistently this can be judged.
Monobond Plus “universal primer” has MDP and silane.
Lecturer — Kit Complexity
The most useful component of the kit was described as the primer, but the full system may be unnecessarily complicated for students.
- Students were advised to avoid using the full system unless they were confident with each step.
- Manufacturer instructions do not remove the need to understand film thickness, seating and cleanup.
Lecturer — Retentive Cementation
For a mechanically retentive restoration that is sufficiently strong, conventional cementation is usually the simplest choice.
- There is no need to bond merely for the sake of bonding.
- The lecturer recommended using the simplest reproducible cementation approach.
- For a straightforward restoration that is not expected to fracture, RelyX or Variolink may be used, with RelyX preferred because it is simpler.
Lecturer — Emax Cementation
E.max can be conventionally cemented when it is sufficiently thick, mechanically retentive, and does not require additional bonded strength.
- Bonding is preferable when the restoration is thin, mechanically unretentive, or requires additional strength.
- Variolink may be used, but its additional steps require careful control of primer, bonding resin, and film thickness.
- RelyX provides a simpler alternative, although the restoration still requires the correct laboratory surface treatment and cleaning.
Lecturer — Zirconia Cementation
Zirconia may be conventionally cemented when it is thick enough, mechanically retentive, and does not require additional bonding.
- Bonding should be considered when the restoration is thin, retention is inadequate, or additional strength is desired.
- Variolink can be used when the complete bonding procedure is performed correctly, but its multiple stages may make it less suitable as a routine student option.
- RelyX was presented as the simpler option for many retentive zirconia restorations.
- <mark>MDP is the important component for bonding to metal, and the appropriate metal primer may also be used.</mark>
- Different cement shades can significantly affect the appearance of thin anterior restorations, and try-in paste can be washed off before definitive cementation.
Clinical Recommendations by Restoration Type46
My suggestions based on personal preference
Retentive Restorations47
All restorations with adequate mechanical retention and strength:
- RelyX Unicem
Emax Restorations
Variolink48
- Unretentive restorations (onlays, tabletop, etc.)
- Below minimum thickness
- Supragingival margins
RelyX
- Unretentive restorations (onlays, tabletop, etc.)
- Below minimum thickness
- Subgingival margins
Remember the etching, cleaning and silane primer of the restoration
Zirconia Restorations
Variolink49
- Unretentive restorations (onlays, tabletop, etc.)
- Below minimum thickness
- Supragingival margins
RelyX
- Unretentive restorations (onlays, tabletop, etc.)
- Below minimum thickness
- Subgingival margins
Remember the air abrasion, cleaning and MDP primer of the restoration
Metal Without Sufficient Retention
Panavia50
- Non-precious metal vs precious metal
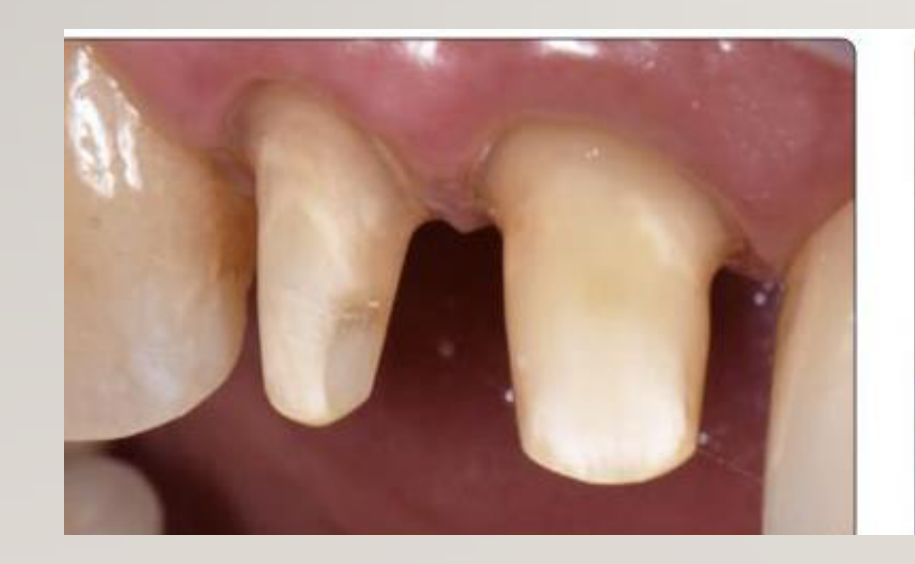
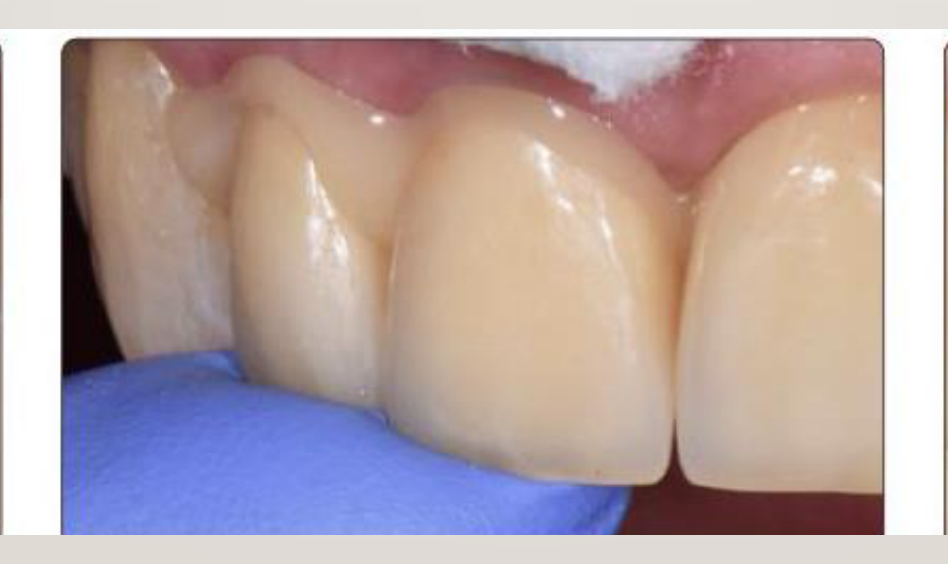
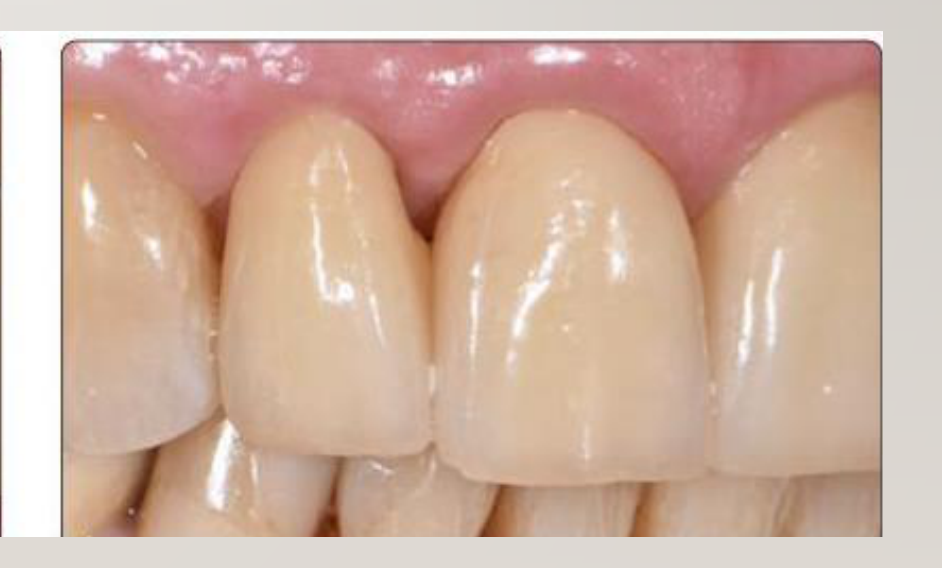
Veneers5152
Variolink — ideally LC only if available.
(Amine DC initiator causes yellowing over time.)
- Try-in paste
- Water soluble, non-setting
- Shade/Opacity/Translucency — same shade, opacity/translucency as the resin cement
Cementation Procedure Tips5354
When all else fails, follow the manufacturer’s instructions (IFU).
With all resin cements:
- Do not attempt more than 2 units at a time.
- Tack cure 2–4 seconds only — remove excess with a probe, and floss interproximal excess thoroughly before final light curing.
- If you light cure you probably don’t need an oxygen inhibitor (Oxyguard, liquid strip), but there is an oxygen-inhibited layer.
DO NOT leave any excess — you will regret it, because it is a nightmare to remove later.
Audio Appendix
Additional Audio Content
The following sections from the lecture audio did not correspond to any heading in the main document.
Control the Number of Units
- Do not attempt to cement more than two units at a time with resin cement.
- Resin cement can become extremely difficult to remove once it has set.
Avoid Contamination
- Try-in contaminates the restoration with saliva and blood.
- The restoration must be cleaned before priming and cementation.
- Cleaning with phosphoric acid is not always the best approach because it may leave salts.
- Ivoclean and other cleaning options were discussed for contaminated restoration surfaces.
- Air abrasion was described as a strong cleaning method where available.
Tack-Curing and Excess Removal
- Tack-cure excess cement for less than approximately five seconds.
- Under-curing initially allows further cleanup.
- If more curing is required, the restoration can be cured again.
- Five seconds may sometimes be enough to set the excess hard, making removal difficult.
- Leaving excess cement behind can cause significant problems.
- Removing set excess may damage the restoration.
A cement-retained implant restoration was described in which residual composite cement caused damage to the surrounding bone.
Use a Standardised Procedure
- Keep the cementation procedure as simple as possible.
- Develop a standardised sequence.
- Ensure that the laboratory has been given clear instructions.
- Have all required materials available before beginning.
- Use an assistant where possible.
- Check that the restoration, primer, cement, light and cleanup instruments are ready.
Manage Shade Carefully
For e.max and thin anterior restorations:
- Take the shade early in the appointment.
- The tooth can change appearance as it dries.
- The dentine colour changes less than the overall tooth appearance, but shade selection should still be performed as early as possible.
- The laboratory needs information about:
- The intended final shade.
- The type of restoration.
- The underlying tooth shade.
- The restoration thickness.
- The laboratory uses these factors to determine the appropriate ceramic ingot and final appearance.
- Try-in paste should be used when the cement shade may affect the final result.
Read the Manufacturer’s Instructions
- Manufacturer instructions should be followed when using resin cements.
- The lecturer emphasised that clinicians should not assume they can manage more complexity than they are familiar with.
- If the cement sets unexpectedly, removal can be difficult and may damage the restoration.
Avoid Vaseline
- Vaseline should not be used as a separator on the clinic.
- It is difficult to remove completely.
- Residual Vaseline can interfere with bonding of both the provisional and definitive restoration.
- If a separator is needed after immediate dentine sealing or placement of a composite core, glycerine or KY jelly may be used instead.
 |  |
 |
Clinical Cases
Case: Excess cement around a cement-retained implant
Question
Scenario: A presented image of a cement-retained implant restoration.
What’s shown: An image showing a cement-retained implant with visible excess composite cement left around the margins.
Consider: What are the clinical consequences of leaving excess composite cement around a cement-retained implant, and how should this be managed?
Answer
Observations:
- Excess composite cement is visible around the implant restoration.
- There is visible damage to the surrounding bone.
Reasoning: Composite cement is very difficult to remove once set. Leaving excess cement around an implant margin causes severe inflammatory reactions and subsequent bone loss.
Takeaway: When cementing implant restorations, meticulous cleanup of excess cement is critical to prevent iatrogenic bone damage. Keep the cementation process simple and do not overestimate your ability to clean up excess material after it sets.
Case: Anterior veneer replacement in a demanding patient
Question
Scenario: A demanding female patient presented to replace discolored anterior veneers. The lecturer re-prepared the teeth but failed to take a shade. The lab produced “fridge white” veneers, which the patient rejected. The lab then stained them, resulting in a poor aesthetic outcome. Frustrated and rushed, the lecturer attempted to try them in but accidentally used permanent cement instead of try-in paste, skipping etching, bonding, and cleaning.
What’s shown: The clinical scenario and an image of the four veneers cemented with visible excess cement.
Consider: Identify the errors in the clinical workflow and cementation process, and evaluate the consequences of these mistakes.
Answer
Observations:
- The lecturer failed to take a shade, leading to poor lab communication and unacceptable aesthetics.
- The lecturer accidentally used permanent cement instead of try-in paste.
- Essential bonding steps (etch, bond, clean) were skipped.
- Excess cement was left around the veneers.
Reasoning: The lecturer was frustrated by the demanding patient, leading to a cascade of errors driven by being “hungry, angry, late, or tired.” Despite the complete lack of proper bonding protocol and excess cement, the first veneer took 10 years to debond, highlighting that even without optimal bonding, some retention might occur, but it was a significant clinical error.
Takeaway: When dealing with difficult patients, it is crucial to remain calm and adhere to standardized, simple procedures. If a patient consistently causes frustration, it may be best to refer them to another practitioner to avoid clinical errors.
Footnotes
-
Original PDF page 1: W3 CDP Seating Crowns, p.1 ↩
-
Original PDF page 3: W3 CDP Seating Crowns, p.3 ↩
-
Original PDF page 2: W3 CDP Seating Crowns, p.2 ↩
-
Original PDF page 4: W3 CDP Seating Crowns, p.4 ↩
-
Original PDF page 5: W3 CDP Seating Crowns, p.5 ↩
-
Original PDF page 6: W3 CDP Seating Crowns, p.6 ↩
-
Original PDF page 12: W3 CDP Seating Crowns, p.12 ↩
-
Original PDF page 7: W3 CDP Seating Crowns, p.7 ↩
-
Original PDF page 13: W3 CDP Seating Crowns, p.13 ↩
-
Original PDF page 14: W3 CDP Seating Crowns, p.14 ↩
-
Original PDF page 15: W3 CDP Seating Crowns, p.15 ↩
-
Original PDF page 16: W3 CDP Seating Crowns, p.16 ↩
-
Original PDF page 17: W3 CDP Seating Crowns, p.17 ↩
-
Original PDF page 18: W3 CDP Seating Crowns, p.18 ↩
-
Original PDF page 19: W3 CDP Seating Crowns, p.19 ↩
-
Original PDF page 20: W3 CDP Seating Crowns, p.20 ↩
-
Original PDF page 21: W3 CDP Seating Crowns, p.21 ↩
-
Original PDF page 22: W3 CDP Seating Crowns, p.22 ↩
-
Original PDF page 23: W3 CDP Seating Crowns, p.23 ↩
-
Original PDF page 24: W3 CDP Seating Crowns, p.24 ↩
-
Original PDF page 25: W3 CDP Seating Crowns, p.25 ↩
-
Original PDF page 27: W3 CDP Seating Crowns, p.27 ↩
-
Original PDF page 26: W3 CDP Seating Crowns, p.26 ↩
-
Original PDF page 28: W3 CDP Seating Crowns, p.28 ↩
-
Original PDF page 29: W3 CDP Seating Crowns, p.29 ↩
-
Original PDF page 30: W3 CDP Seating Crowns, p.30 ↩
-
Original PDF page 31: W3 CDP Seating Crowns, p.31 ↩
-
Original PDF page 32: W3 CDP Seating Crowns, p.32 ↩
-
Original PDF page 33: W3 CDP Seating Crowns, p.33 ↩
-
Original PDF page 34: W3 CDP Seating Crowns, p.34 ↩
-
Original PDF page 35: W3 CDP Seating Crowns, p.35 ↩
-
Original PDF page 36: W3 CDP Seating Crowns, p.36 ↩
-
Original PDF page 37: W3 CDP Seating Crowns, p.37 ↩
-
Original PDF page 38: W3 CDP Seating Crowns, p.38 ↩
-
Original PDF page 39: W3 CDP Seating Crowns, p.39 ↩
-
Original PDF page 41: W3 CDP Seating Crowns, p.41 ↩
-
Original PDF page 40: W3 CDP Seating Crowns, p.40 ↩
-
Original PDF page 42: W3 CDP Seating Crowns, p.42 ↩
-
Original PDF page 43: W3 CDP Seating Crowns, p.43 ↩
-
Original PDF page 44: W3 CDP Seating Crowns, p.44 ↩
-
Original PDF page 45: W3 CDP Seating Crowns, p.45 ↩
-
Original PDF page 46: W3 CDP Seating Crowns, p.46 ↩
-
Original PDF page 48: W3 CDP Seating Crowns, p.48 ↩
-
Original PDF page 49: W3 CDP Seating Crowns, p.49 ↩
-
Original PDF page 47: W3 CDP Seating Crowns, p.47 ↩
-
Original PDF page 50: W3 CDP Seating Crowns, p.50 ↩
-
Original PDF page 51: W3 CDP Seating Crowns, p.51 ↩
-
Original PDF page 52: W3 CDP Seating Crowns, p.52 ↩
-
Original PDF page 53: W3 CDP Seating Crowns, p.53 ↩
-
Original PDF page 54: W3 CDP Seating Crowns, p.54 ↩
-
Original PDF page 55: W3 CDP Seating Crowns, p.55 ↩
-
Original PDF page 56: W3 CDP Seating Crowns, p.56 ↩
-
Original PDF page 57: W3 CDP Seating Crowns, p.57 ↩
-
Original PDF page 58: W3 CDP Seating Crowns, p.58 ↩