Pediatric and Adjunctive Orthodontics
Front Matter123
Course Overview and Arch Alignment
- The lecture opens with a brief review from the 3A unit, specifically work done on the rectangular wire.
- The 3B unit is described as more clinical, less content-heavy, and more interesting because it involves cases and clinical discussion.
- This portion of the course covers space management in children, crossbites, vertical problems, and some adjunctive orthodontic procedures.
- At the end, the lecturer noted that the next session would cover orthodontic devices, retention, and special-need patients. Special-need patients were noted as a multidisciplinary topic that can drift away from orthodontics, but a few interesting cases would be discussed.
Third Order4
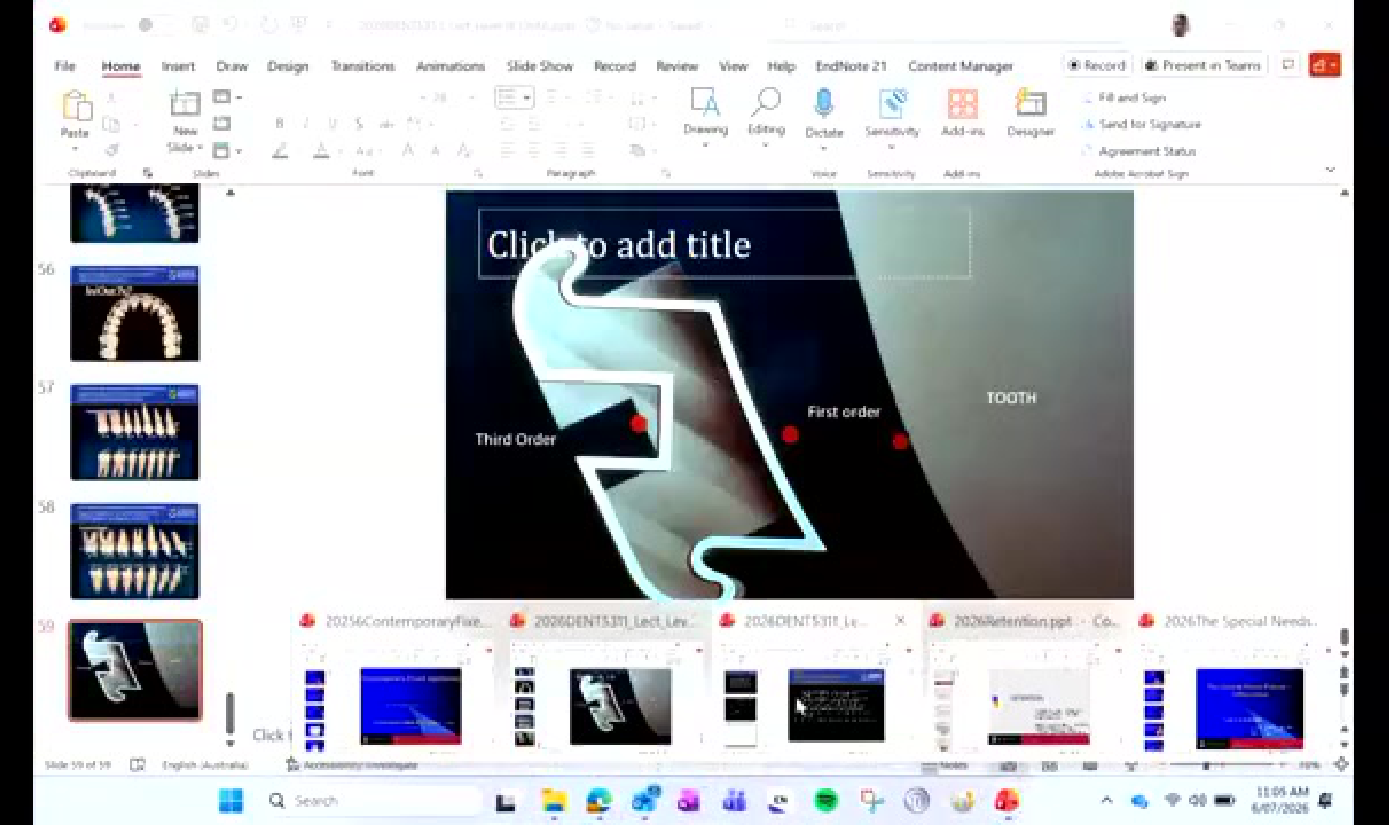
First Order
Tooth
- Thumbnail slide 56: Dental arch image
- Thumbnail slide 57: Tooth alignment diagram
- Thumbnail slide 58: Tooth alignment diagram
- Thumbnail slide 59: Dental arch diagram with highlighted tooth
Space Management in Preadolescent Children
- This topic is relevant to the early treatment clinic, held on Wednesday afternoons.
- Clinicians must decide whether to use a space maintainer or whether space needs to be regained.
- The first question in any case: Is there enough space for all the teeth?
- Other questions include: How does the leeway space come into the mix? Do we need a space maintainer? Do we need to regain space after early loss of primary molars (E’s)?
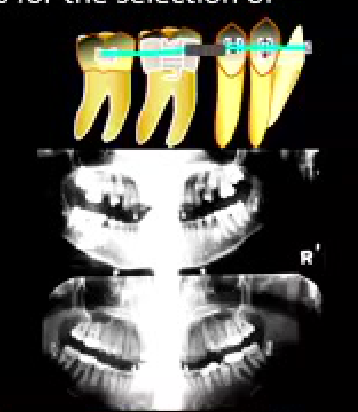
- Discuss the indications and contraindications for the selection of space maintaining appliances.
- Discuss the indications and contraindications for the selection of various space regaining appliances.
- Discuss the construction of different appliances.
- Describe the timing and sequence of treatment.
- Identify the possible causes of midline diastemas and spacing.
- Discuss the relationship between spacing and protrusion
Space Maintenance Objectives and Indications567
Clinical Example: Early Loss of a Primary Molar with Adequate Space
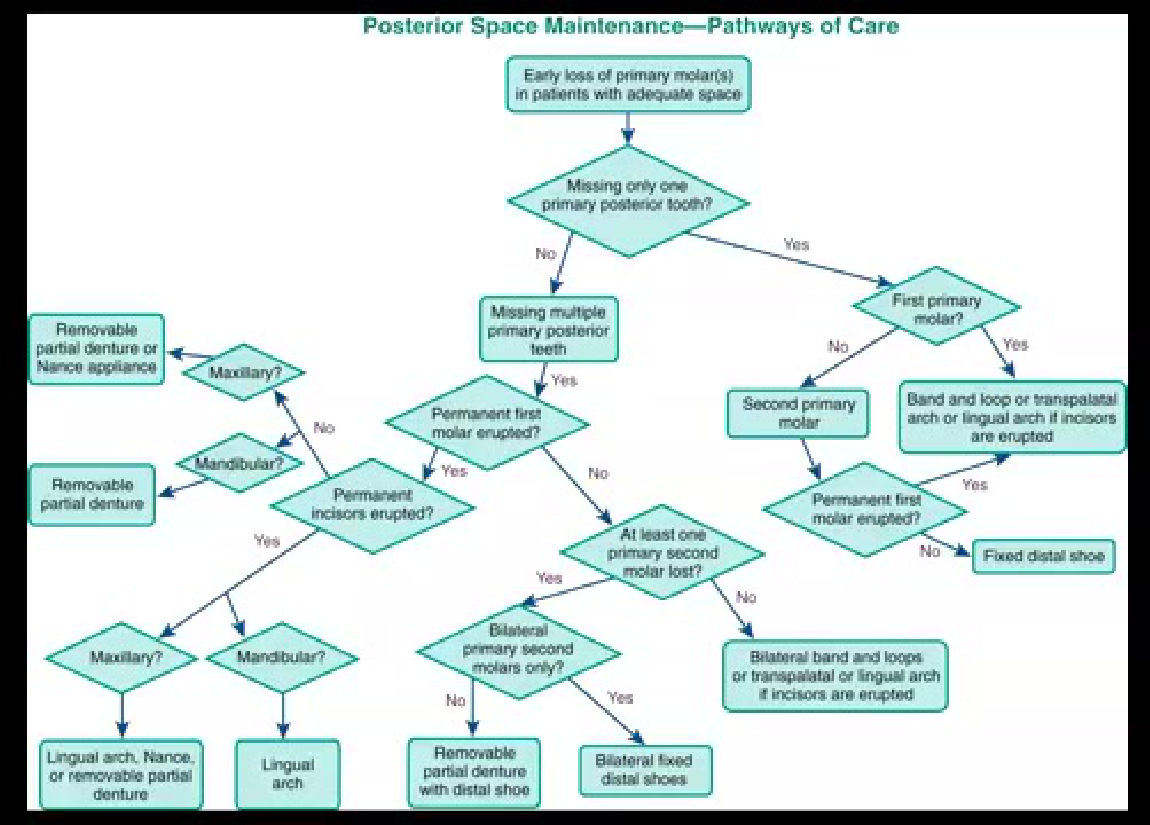
The lecturer gave an example of a patient with early loss of a primary molar who still had adequate space; only one primary molar was missing. This type of case can be used with the flowchart to work through possible space maintainer options. Using a flowchart in this way was recommended as a good method for memorising the information and linking it to clinical work.
- The main problem with removable appliances is that they require patient collaboration; given the patient’s age, supervision by parents or carers is usually needed.
- A clinical flowchart was presented to guide decision-making.
- Recommendation: use the flowchart, follow all possible pathways, and use it as an orientation for diagnosis and treatment planning.
- If a patient has adequate space, the pathway is space maintenance.
- If space has been lost, the clinician may be able to regain space, but only up to the “magic number” of 3 mils.
- If space loss is beyond 3 mils, it is hard to regain.
-
Discuss the indications and contraindications for the selection of space maintaining appliances.
-
Discuss the indications and contraindications for the selection of various space regaining appliances.
-
Discuss the construction of different appliances.
-
Describe the timing and sequence of treatment.
-
Identify the possible causes of midline diastemas and spacing.
-
Discuss the relationship between spacing and protrusion
-
Discuss the indications and contraindications for the selection of space maintaining appliances. [space analysis]
Fixed
- Band and loop
- Lingual arch
- Nance holding arch
- Distal shoe
Removable
Posterior Space Maintenance Pathways8
- When adequate space is present, the goal is to prevent space loss.
- Lingual arch can be used to prevent mesial drift of lower six-year molars.
- The distal shoe is used in very early E loss before the sixes have erupted.
- The Nance holding arch serves a similar function in the upper arch.
- Removable acrylic plates can also be used, provided the patient cooperates.
graph TD
    A["Early loss of primary molar(s)<br/>in patients with adequate space"] --> B{"Missing only one<br/>primary posterior tooth?"}

    B -- Yes --> C{"First primary<br/>molar?"}
    B -- No --> D["Missing multiple<br/>primary posterior<br/>teeth"]

    C -- Yes --> E["Band and loop or transpalatal<br/>arch or lingual arch if incisors<br/>are erupted"]
    C -- No --> F["Second primary<br/>molar"]

    F --> G{"Permanent first<br/>molar erupted?"}
    G -- Yes --> E
    G -- No --> H["Fixed distal shoe"]

    D --> I{"Permanent first<br/>molar erupted?"}

    I -- Yes --> J{"Permanent<br/>incisors erupted?"}
    I -- No --> K{"At least one<br/>primary second<br/>molar lost?"}

    J -- No --> L{"Mandibular?"}
    L -- No --> M{"Maxillary?"}
    L --> N["Removable<br/>partial denture"]
    M --> O["Removable<br/>partial denture or<br/>Nance appliance"]

    J -- Yes --> P{"Maxillary?"}
    J -- Yes --> Q{"Mandibular?"}

    P --> R["Lingual arch, Nance,<br/>or removable partial<br/>denture"]
    Q --> S["Lingual arch"]

    K -- Yes --> T{"Bilateral<br/>primary second<br/>molars only?"}
    K -- No --> U["Bilateral band and loops<br/>or transpalatal or lingual arch<br/>if incisors are erupted"]

    T -- No --> V["Removable<br/>partial denture<br/>with distal shoe"]
    T -- Yes --> W["Bilateral fixed<br/>distal shoes"]
Space Regaining Appliances and Indications9
Example: Lower Crowding with Large Primary Second Molars
The lecturer showed a case with some lower anterior crowding, but not significant. The patient had large E’s, providing roughly 3 mils per side considering the space in the lower arch. A lingual arch can be used even without early loss. In normal development, the six drifts mesially to engage in a Class I molar relationship; a lingual arch prevents this mesial drift. The leeway space can then be transferred anteriorly to improve lower anterior alignment. The trade-off is that the lower molar may not end up in Class I, so the upper molar may later need distalization to achieve Class I.
- Lingual arch with activation loop: The loop can be activated to upright mesially tipped molars. Molars often tip after early loss of E’s. In the first six months after loss, tipping of the sixes is common. If the fives do not have two-thirds of their root developed, they can become blocked.
- Removable appliance with a spring: The spring can be placed in different locations. Example: a lower removable appliance with a spring can upright a lower six and provide up to 3 mils of space for the five to erupt.
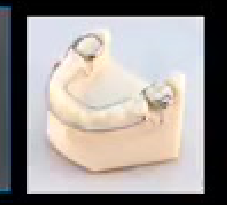
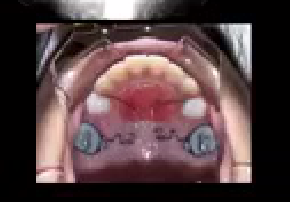
- Lip bumper: A simple device with an arch and an anterior shield. It uses the force of the lower lip muscles, transferring that force to the molars. It can help upright/support molars and reopen around 3 mils of space.
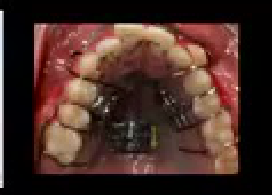
- Pendulum: Used to distalize upper molars. Has two springs on the sixes; the springs are bent backwards and then engage in the tubes. Can distalize both upper molars at the same time. Bonded on the premolars, with an acrylic palatal plate similar to a Nance button. Can correct a Class II dental relationship. It is patient-independent; no cooperation is needed. Previously, headgear was used, but patients often did not wear it; the pendulum was developed as a compliance-free alternative.
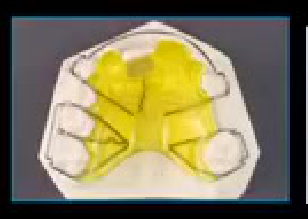
- Discuss the indications and contraindications for the selection of various space regaining appliances.
Up to 3mm
Fixed
- Spring appliances with braces
- Active lingual arches
- Fixed distalising appliances
Removable
- URA with spring
- URA with screw
- Lip bumper
 |  |  |
 |  |
Appliance Construction and Treatment Sequence1011
- Discuss the construction of different appliances.
Removable - Impression → Insertion
Fixed
Separators → Fit bands → placed in impression → wire bent and soldered → Cemented in Mouth
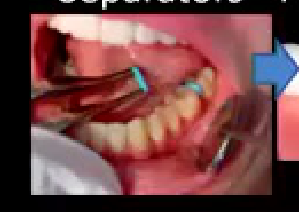
- Place separators on the mesial and distal of the sixes to open space for a band.
- Without proximal space, the band cannot be adjusted.
- Perform clinical adjustment of the band.
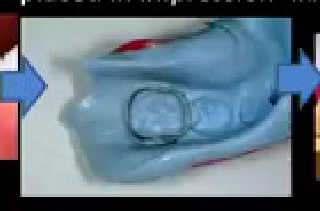
- Take an impression and transfer the band into the impression.
- When the model is cast, the band is in the correct position.
- Bend the lingual arch or send it to the lab.
- Use silver soldering to connect the lingual arch wire to the band.
- Place separators again when the bands are sent to the lab.
Separators usually stay for about one week. The amount of movement achieved with separators is less than the band thickness, about 0.1 mil; the goal is only to remove the contact point. If the separators are removed, the space generally closes within a week. A removable upper appliance with a band loop was also mentioned.
- Describe the timing and sequence of treatment.
URA
Fixed space maintainer
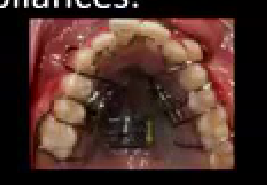
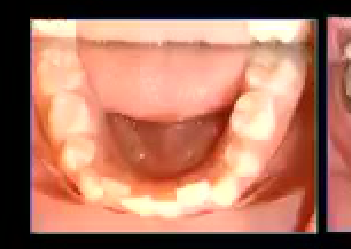
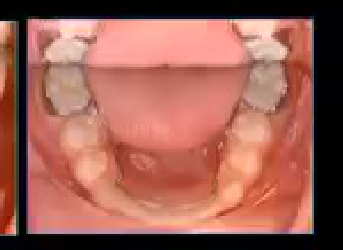
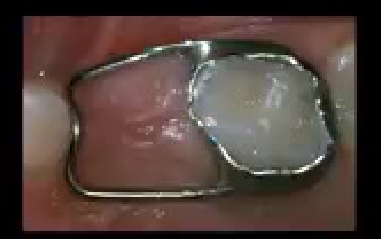
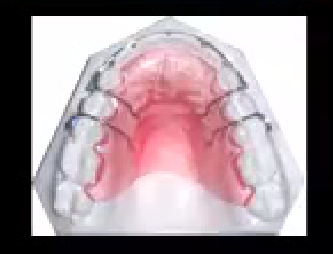
URAs are removable appliances used in pediatric dentistry to manage space, maintain occlusion, and improve esthetics. A fixed space maintainer is an appliance that is placed in the mouth to maintain space for a missing tooth.
 |  |  |
 |  |  |
 |  |  |
Causes and Effects of Spacing1213
-
Identify the possible causes of midline diastemas and spacing.
-
Discuss the relationship between spacing and protrusion
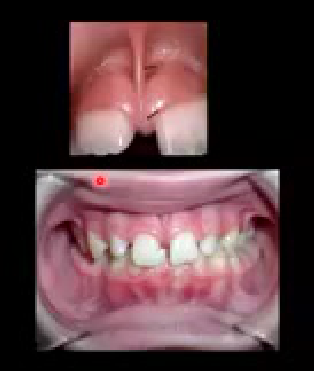
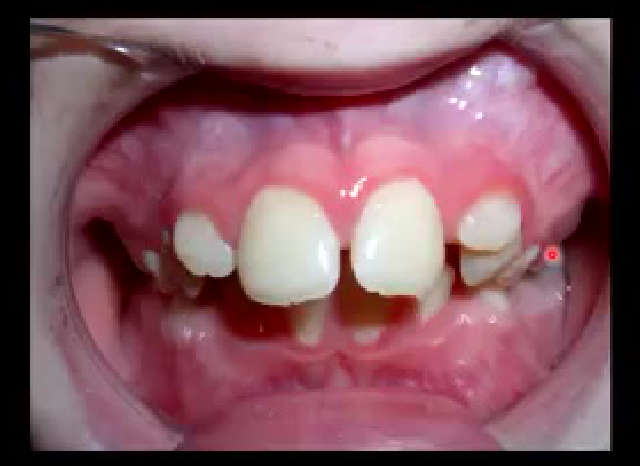
Proclination/Protrusion: overestimate the space available
- Ugly duckling phase: Midline spacing is a normal developmental feature. Laterals may be distally tilted because the canines are waiting to erupt. Parents may be alarmed and want immediate closure or rotation correction. The recommendation is to wait; when the canine erupts, the space can close physiologically. If any tooth movement is done, avoid moving the root of the lateral against the crown of the canine, otherwise root resorption of the lateral can occur. This is particularly important in the era of aligners.
- Lower frenum: A lower frenum may need surgical removal. Spacing up to 2 mils can close spontaneously. Spacing beyond 2 mils should be monitored.
- Other causes of spacing: A mesial dent or supernumerary-type finding, missing permanent laterals.
- Spacing and protrusion: Cephalometric analysis is important. If the upper incisors are proclined more than 22 degrees, there is a false impression of more space. Flared or protruded incisors cause the clinician to overestimate the available space. Once the flaring is closed, the true lack of space becomes visible.
 |  |
Diagnostic Information and Space Analysis1415
- Describe diagnostic information necessary to make decisions concerning space maintenance or management.
- If deciduous tooth lost early (When?)
- How much space loss? (>3mm?)
- Dental age and future eruption/growth changes (6 months)
- Agenesis? (maintenance for prosthetic or closure?)
- Facial form - lip competence and fullness (regain space by exs)
- Identify and discuss alternative space analysis procedures.
-
With an OPG, the clinician should: Check how much space has been lost. Assess the dental age and root formation of the premolars. If the fives have more than two-thirds of root developed, the five is about to erupt; if space is present, the tooth will not be blocked, and only follow-up is needed. If the fives do not have two-thirds of root developed, and the patient is young (e.g. around 7 years old, with fives expected around 11–12 years), a lingual arch is likely needed to prevent mesial tipping of the sixes.
-
Also check for: Agenesis, missing permanent teeth, amount of root development, whether adequate space exists.
-
In early mixed dentition, model analysis should be used.
-
Tanaka-Johnson prediction tables are used.
-
Model analysis predicts whether there will be enough space.
-
Important reminder: Tanaka-Johnson considers the lower incisors only.
-
The leeway space contribution is around 3 mils.
-
Measuring radiographs and teeth
-
Using tables
-
Correlation tables, measuring incisors and predicting 3-4-5
- Moyers
- Tanaka and Johnston
-
Case Study: Pseudo Class III Anterior Crossbite Treated with Partial Braces
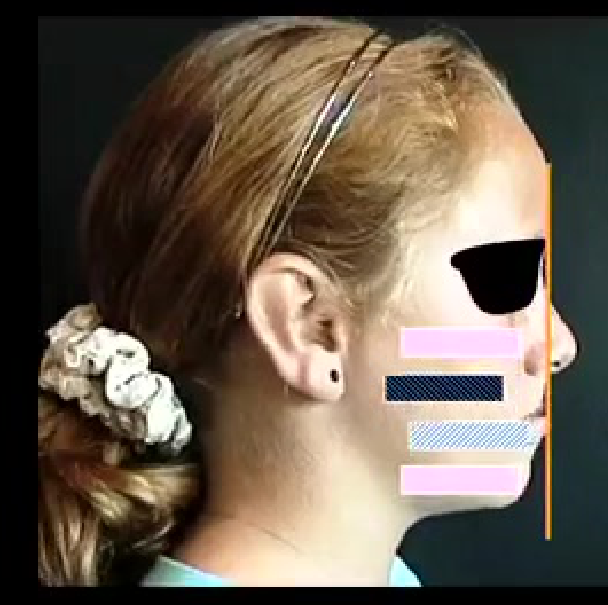
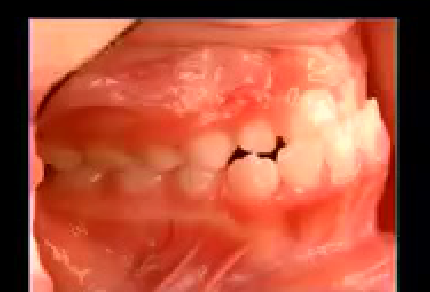
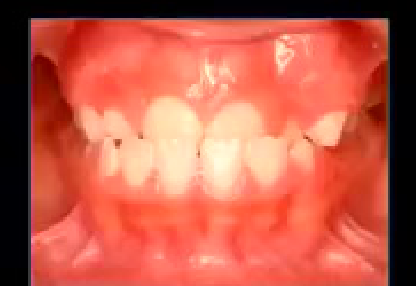
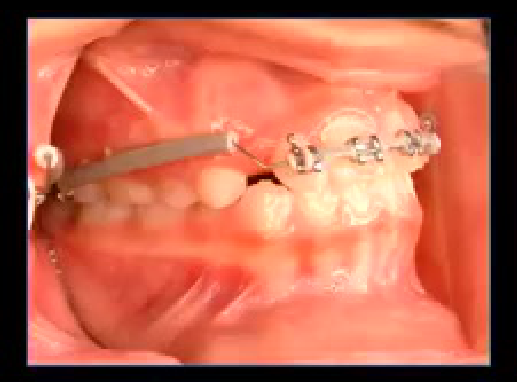
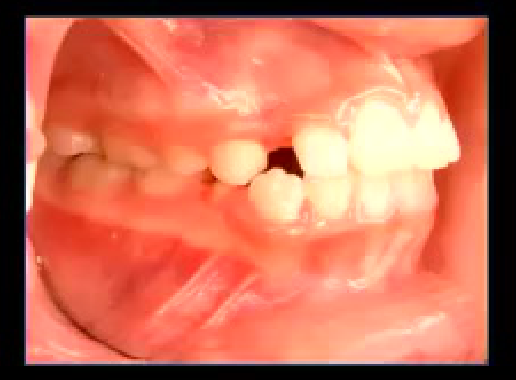
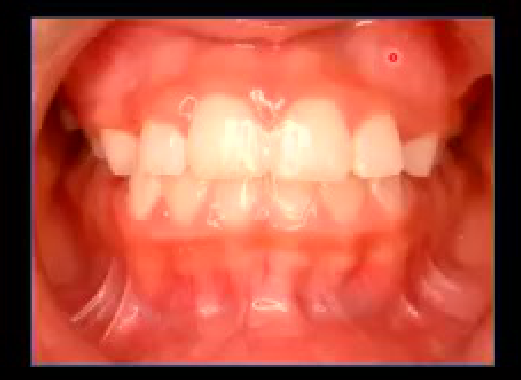
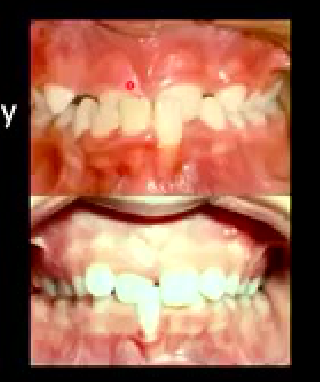
- A patient presented in the intercuspal position with an anterior crossbite.
- On manipulation, the incisors were edge-to-edge; the molar relationship was Class I.
- The patient had shifted the mandible anteriorly, producing the anterior crossbite.
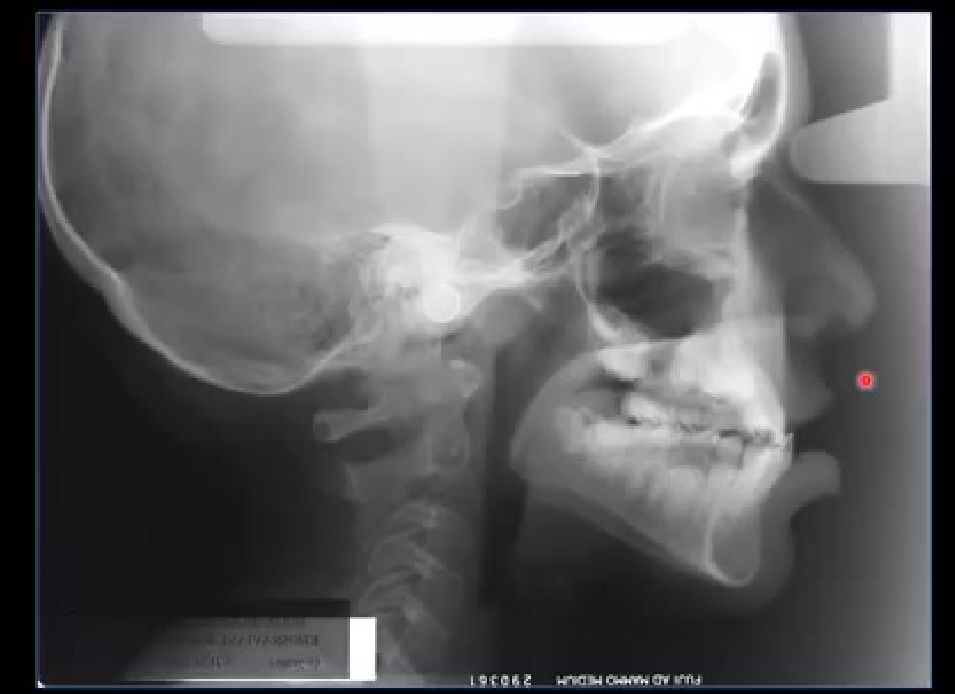
- Point A and point B indicated this was not a true Class III relationship.
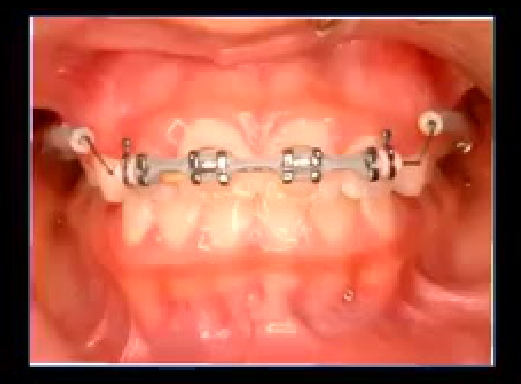
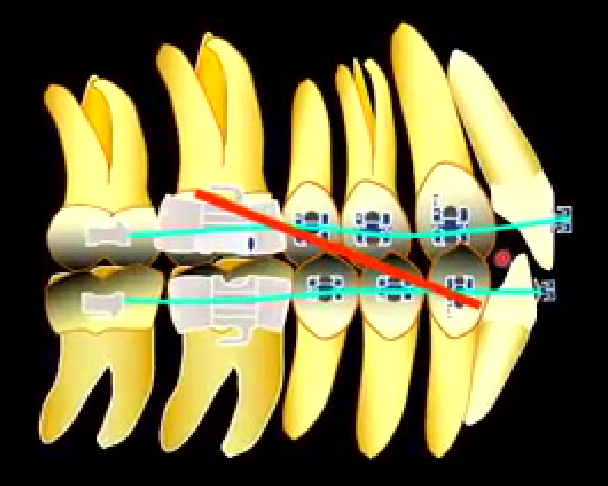
- Treatment consisted of partial braces: incisors and molars were bonded, and the arch wire was activated to protrude the incisors.
- The incisors had been retroclined, so this was a dental anterior crossbite.
- After correction, the incisors were proclined, a Class I molar relationship was maintained, and the crossbite was corrected.
- In some patients, the incisors are in an edge-to-edge relationship.
- When manipulated into the retruded contact position (RCP), the condyles are in their most retruded position and the incisors are edge-to-edge.
- This position is unstable and uncomfortable; the patient slides the lower jaw forward to achieve a more comfortable intercuspal position (ICP).
- This creates an anterior crossbite due to the anterior shift.
- This condition is called pseudo Class III because it is not a true Class III skeletal relationship; it is a functional shift from RCP to ICP.
Anterior and Posterior Crossbites
- Identify skeletal contributions to anterior crossbites.
- Identify dental contributions to anterior crossbites.
- Identify the significance of functional shifts in anterior crossbites.
- Evaluate space, tooth orientation and position, intermaxillary relationships, and eruption timing and sequence regarding the teeth involved in the anterior crossbites as etiologic and treatment factors.
- State rationale for correcting anterior crossbites.
- Recommend appropriate treatment for anterior crossbites including timing and appliance design.
- Explain the relevance of facial form to posterior crossbite diagnosis.
- List the etiologic factors of posterior crossbite.
- Describe the clinical findings consistent with a bilateral maxillary constriction, a bilateral constriction accompanied by a mandibular shift, and a true unilateral maxillary constriction.
- Describe the rationale for correcting posterior crossbites.
- Describe the appropriate timing and appliance design for posterior crossbite treatment.
Overview of Crossbite Objectives16
Skeletal and Dental Contributions to Anterior Crossbites1718192021222324
- Identify skeletal contributions to anterior crossbites.
Maxilla back Mandible forward
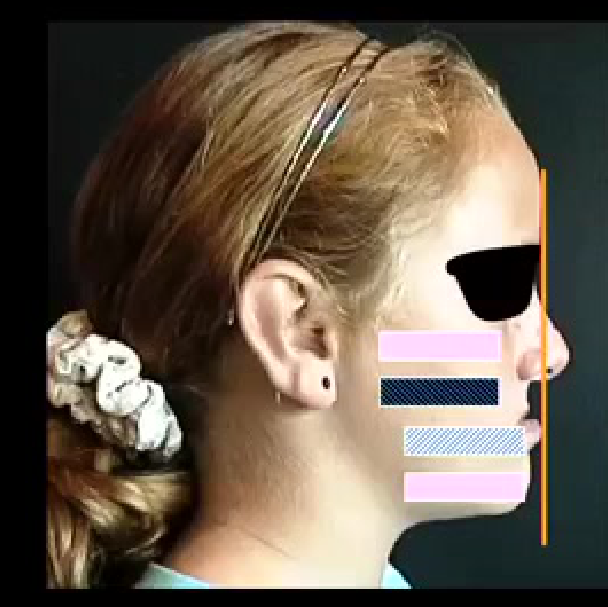
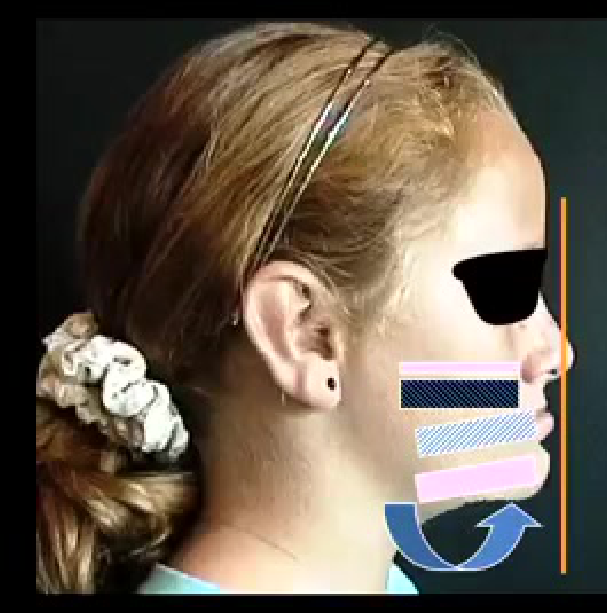
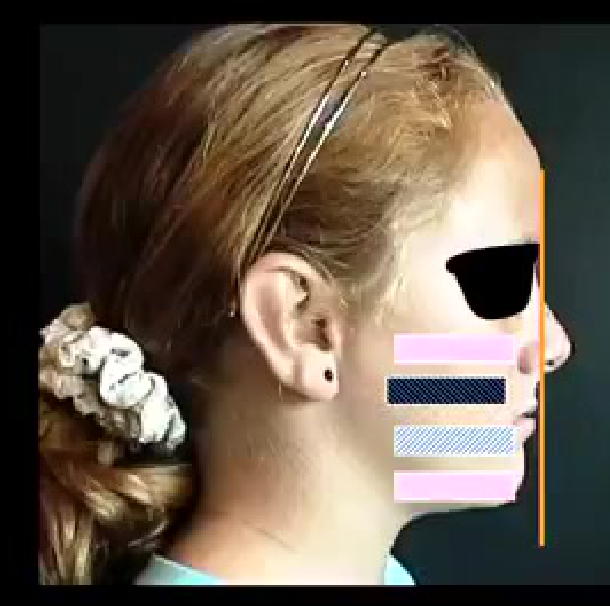
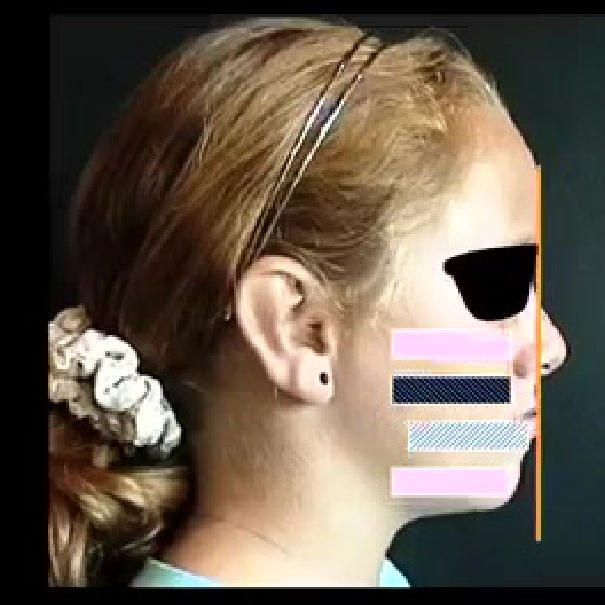
Maxilla vertically deficient Mandible rotated up and forward
- Anterior crossbite can be a skeletal result or a combination of skeletal factors.
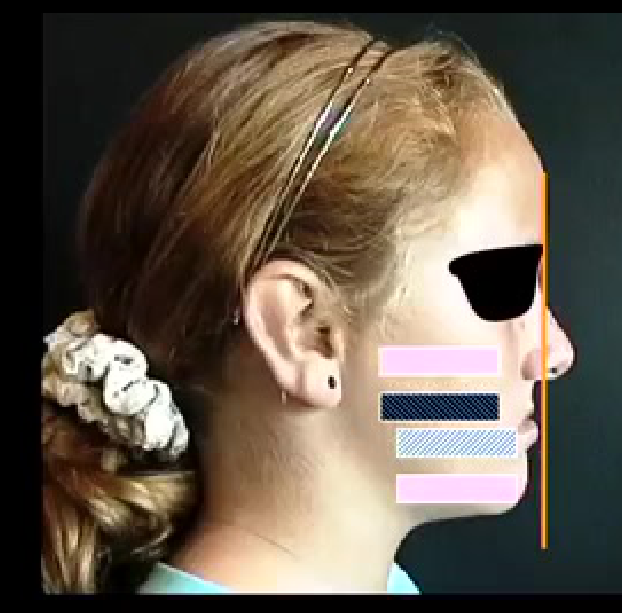
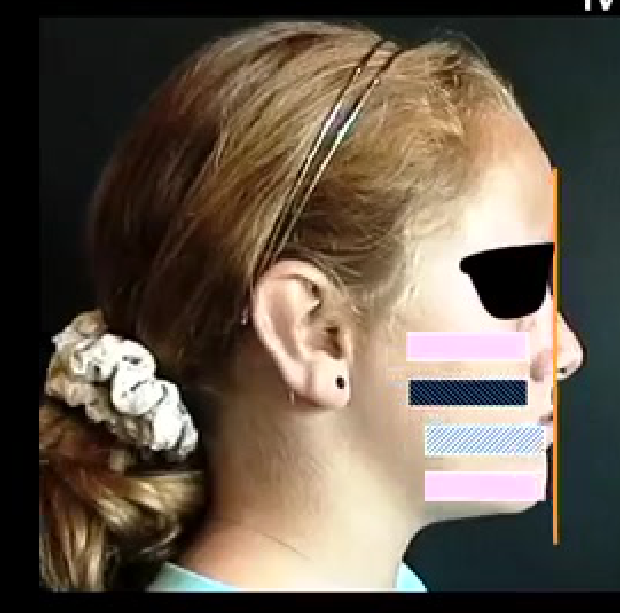
- Retruded maxilla: lower lip appears more protruded; midface appears flattened.
- Protruded mandible
- Both: skeletal retruded maxilla and protruded lower jaw
- Vertically deficient maxilla: the mandible rotates counterclockwise/anticlockwise to achieve contact, producing an anterior crossbite.
- Dental contributions: the skeletal jaw relationship can be completely normal; cephalometric assessment can confirm normal cranial base, A point, B point, and A-B relationship.
- Class II Division 2: upper incisors retroclined.
- Lower crowding: lower incisors proclined.
- In these cases, the anterior crossbite is dental, not skeletal.
Maxillary teeth back
Mandibular teeth forward
Maxillary teeth back Mandibular teeth forward
 |  |  |
 |  |  |
 |
Pseudo Class III and Dental Class III Malocclusions25262728
Pseudo Class III’s are special
Teeth hit edge to edge in Retruded Contact Position
Dental Class III
PELVIS RIGHT LATERAL PELVIS LEFT LATERAL 2100151
 |  |  |
 |  |  |
 |
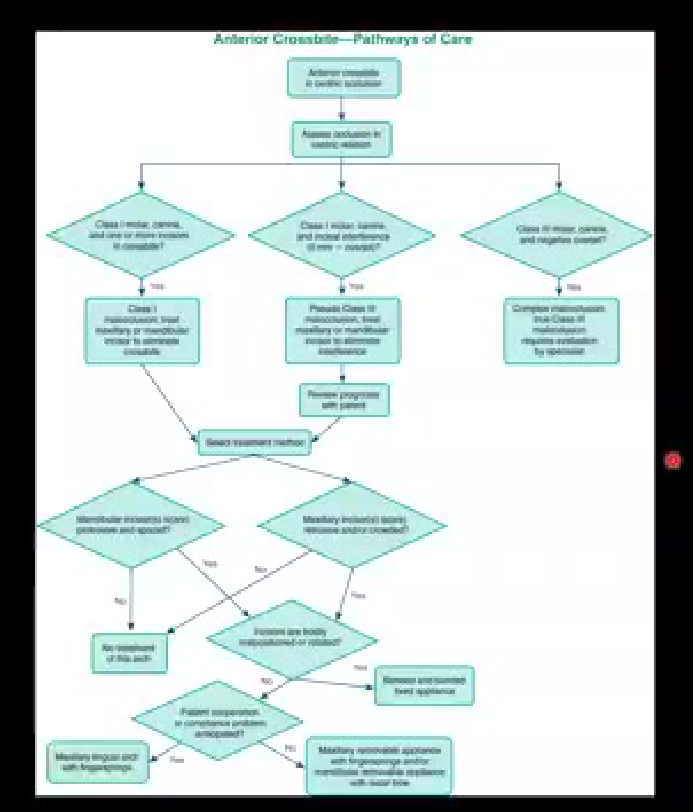
Rationale and Treatment for Anterior Crossbites29
Anterior crossbite in centric occlusion
Assess occlusion in excursive motion
Class I molar, canine, and one or more incisors in crossbite?
- Yes → Class I malocclusion, fixed/mandibular or removable prosthesis to eliminate crossbite
- No → Proceed to next decision
Class I molar, canine, and most incisors in crossbite?
- Yes → Pseudo Class II malocclusion (?): fixed mandibular or removable prosthesis to alter non-interference
- No → [Pathway not shown]
Class III molar, canine, and negative cusp? → Complete malocclusion due to Class III malocclusion; requires evaluation by specialist
Review progress with patient ↓ Select treatment method
Interdental increase in incisor protrusion and occlusion?
- Yes → No treatment of this arch
- No → Proceed
Mandibular incisor(s) also retroclined and/or crowded?
- Yes → Incisors are truly malpositioned or rotated?
- Yes → Removable and bonded fixed appliance
- No → Mandibular lingual arch with lingual springs
- No → Patient cooperation to compliance problems anticipated?
- Yes → Mandibular lingual arch with lingual springs
- No → Mandibular removable appliance with tongue-breakage and/or mandibular removable appliance with total bite
Rationale for Correcting Anterior Crossbites30
-
Prevent displacement and aberrant movement patterns/wear
-
Prevent perio problems
-
Function RCP/MI problems
-
Create space for alignment - expand anteriorly
-
Prevent the functional shift.
-
Prevent trauma — particularly important when there is a single lower incisor in crossbite; a single crowded lower incisor can be pushed constantly by all the upper incisors, and over time can detach from bone, develop recession, and move out of the symphysis.
-
Intercept problems related to the retruded contact position or mandibular interference during the shift.
Treatment for Anterior Crossbites31
-
Single tooth - URA ASAP/inclined bite plate - Space? Strip, extract
-
Multiple teeth? Class III? Shift
-
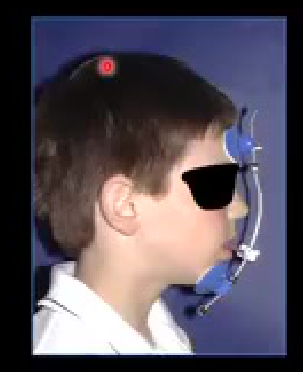
URA or Facemask protraction
-
Part bands - comprehensive treatment
-
Partial braces (as in the case above).
-
For a single tooth, a spring on an upper removable appliance can be used.
-
For a skeletal problem, assessed by cephalometric X-ray, protraction of the maxilla can be used.
 |  |
 |
Adult Class III Management32333435
| Compensation | Surgery |
|---|---|
| - Elastics, Extractions, TADS | - Orthognathics, Distraction |
Elastics
- Class III malocclusions are often associated with anterior crossbite.
- In adults, if compensation/camouflage is possible, options include elastics, extractions, and TADs / mini-screws; if the problem is surgical and cannot be camouflaged or compensated, orthognathic surgery is required.
- Example of camouflage: a Class III dental relationship can be corrected with elastics from the canine to the upper six; this is only valid if the problem is dental and can be camouflaged.
- Retention is needed to prevent relapse.
End to end occlusion RCP
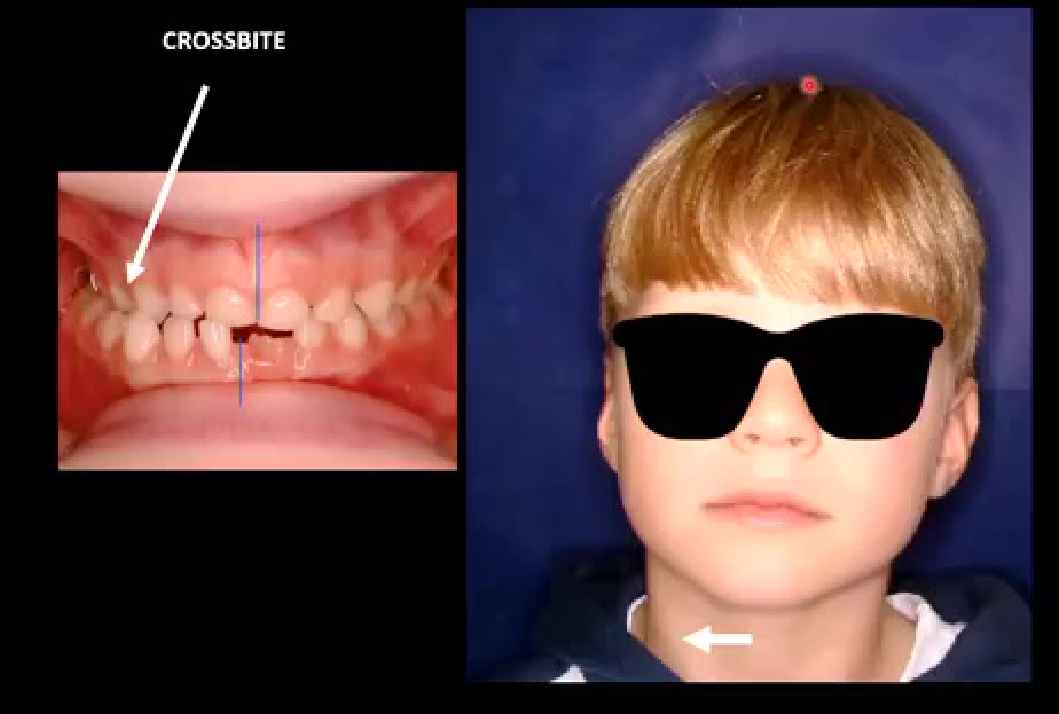
MANDIBLE HAS MOVED FORWARDS ON RIGHT
Shift to right ICP
 |  |
Differential Diagnosis and Management of Posterior Crossbites363738
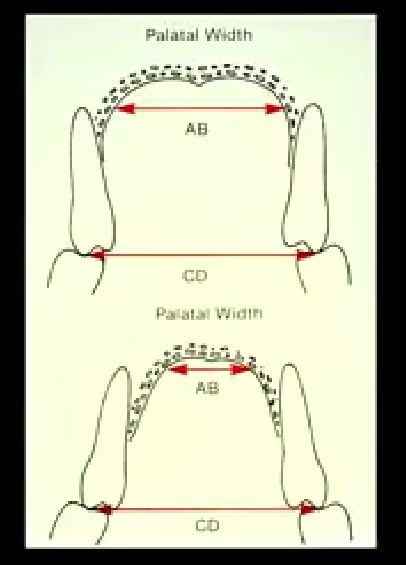
- Skeletal crossbite
- Dental crossbite
TRANSVERSE RELATIONSHIPS
44
 |  |
 |  |
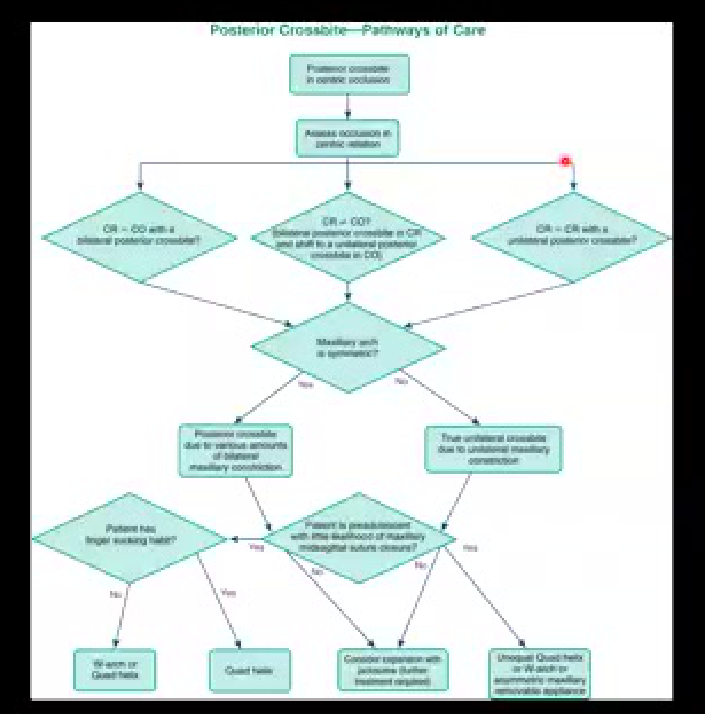
Posterior Crossbite - Pathways of Care39
Posterior crossbite in centric occlusion
Assess occlusion in centric relation
-
CR - CO with a bilateral posterior crossbite?
-
CR = CO? Bilateral posterior crossbite in CR and shift to a unilateral posterior crossbite in CO?
-
CR = CR with a unilateral posterior crossbite?
-
Posterior teeth may be in an edge-to-edge relationship, which is unstable; the patient shifts to one side to achieve ICP.
-
Example: a shift to the right can produce a unilateral posterior crossbite on the left side.
-
When manipulated into RCP, the posterior teeth are edge-to-edge.
-
The usual approach is expansion of the upper arch to eliminate the unstable condition and improve intercuspidation.
-
The chin asymmetry seen in these patients is often not a true asymmetry; it is the result of a functional shift, and the lower midline may be deviated because the lower jaw has shifted.
-
Skeletal vs dental posterior crossbite: if the palatal width is very constricted, the upper sixes may be constrained by the lower sixes, and no shift occurs; a shift is more likely when there is an edge-to-edge relationship from six to six.
-
During expansion, expansion should continue to the point of edge-to-edge, and then slightly beyond, to achieve a stable relationship with the lower sixes.
Maxillary arch is symmetric?
- Yes:
- Posterior crossbite due to various amounts of bilateral maxillary constriction
- Patient has longer working heals?
- No: Right arm or Quad helix
- Yes: Quad helix
- No:
- True unilateral crossbite due to unilateral maxillary constricture
- Patient is complicated with the presence of maxillary midpalatal suture closure?
- No: Consider expansion with appliances (ortho treatment required)
- Yes: Unpalta Quad helix or W-arch or asymmetrically localization orthodontic appliance
Rationale for Correcting Posterior Crossbites40
-
Abnormal soft tissue growth modification
-
Abnormal wear
-
Dental Compensation
-
Insufficient space - narrow arches
-
The edge-to-edge posterior relationship is unstable; correction allows a better intercuspidation.
-
Expansion removes the unstable condition and produces a more stable occlusion.
-
It prevents the functional shift and associated chin/midline deviation.
Timing and Appliance Design for Posterior Crossbite Treatment41
Suture morphology
OPTIONS FOR APPLIANCE
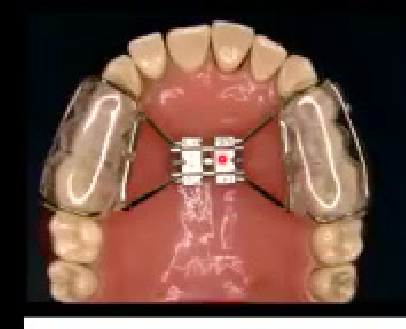
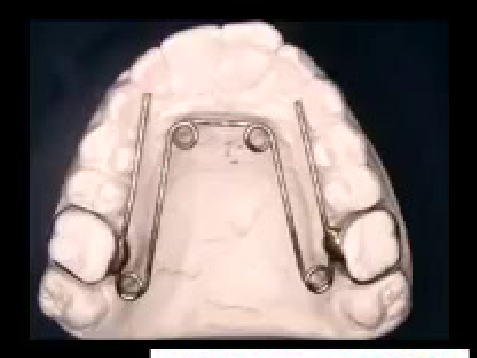
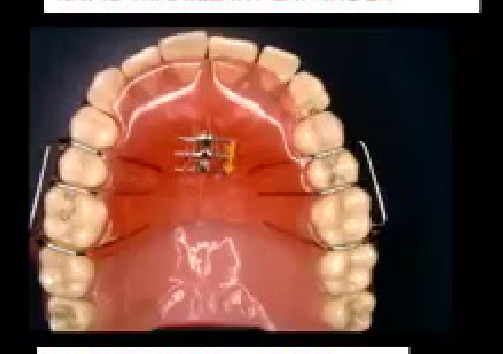
- RAPID MAXILLARY EXPANDER
- QUAD HELIX and W-ARCH
- SLOW EXPANSION PLATE
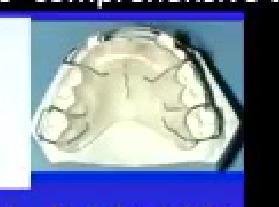
Case Study: Combined Posterior Crossbite and Anterior Crossbite of a Lateral
- A patient presented with a posterior dental crossbite and an anterior crossbite of a lateral incisor.
- Treatment used a device similar to a quad helix/W arch, with an extension and a soldered spring.
- This single device treated both the posterior and anterior crossbites; correction was achieved in two months.
- It removed the anterior shift caused by the lateral incisor interference and the posterior shift caused by the edge-to-edge relationship of the sixes.
- Maxillary expansion enlarges the palatal suture.
- By about 12 years old, the suture begins to show interdigitation, so the response becomes more dental and less skeletal.
- ==Slow expansion plate: used when the patient cannot cooperate with a fixed appliance; expansion is very slow (one activation per week or every second week); one activation = 0.25 mil of expansion, or 0.125 mil per side; the space must be maintained, otherwise the upper plate will not stay in position.==
- Quad helix or W-arch: used for dental crossbites when the palatal width is acceptable; activated on both sides to produce expansion; very useful before fixed appliances; can overcorrect a dental crossbite in about 1.5 to 2 months; an arm can be extended and a spring soldered to treat a co-existing anterior crossbite of a lateral incisor.
 |  |
Vertical Problems and Oral Habits
- Define vertical problem and its classification, i.e., dental, skeletal, and possible etiologies.
- Describe epidemiology relating to vertical problems and malocclusion.
- Identify skeletal patterns predisposing patients to deep bite and open bite.
- Explain oral-facial growth patterns and physiology as they relate to vertical problems.
- Identify treatment and timing for vertical problems.
Classification and Etiology of Vertical Problems424344
- Define vertical problem and its classification, i.e., dental, skeletal, and possible etiologies.
Open Bite → Skeletal Open Bite → Dental Open Bite → Both
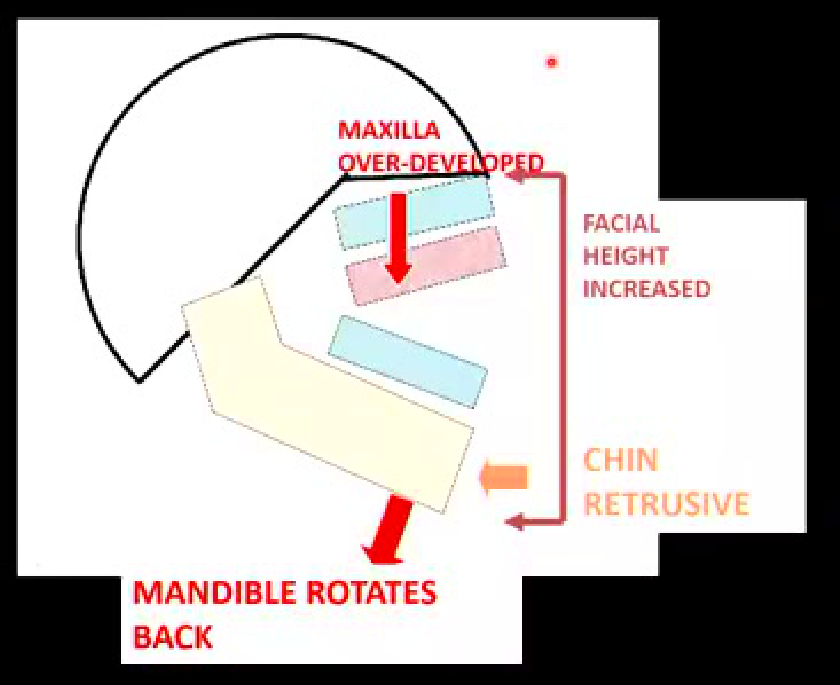
- Can result from a maxilla that is overdeveloped vertically.
- Midface height is increased.
- Mandible rotates clockwise to accommodate.
- Chin appears retrusive.
- Facial height is increased.
- Can produce an anterior open bite.
- Can also result from a tongue habit.
Deep Bite → Skeletal Deep Bite → Dental Deep Bite → Both
- The opposite type of vertical problem.
- Discussed further under deep bite management.
MAXILLA OVER-DEVELOPED FACIAL HEIGHT INCREASED CHIN RETRUSIVE MANDIBLE ROTATES BACK
Oral Habits and Anti-Habit Appliances4546
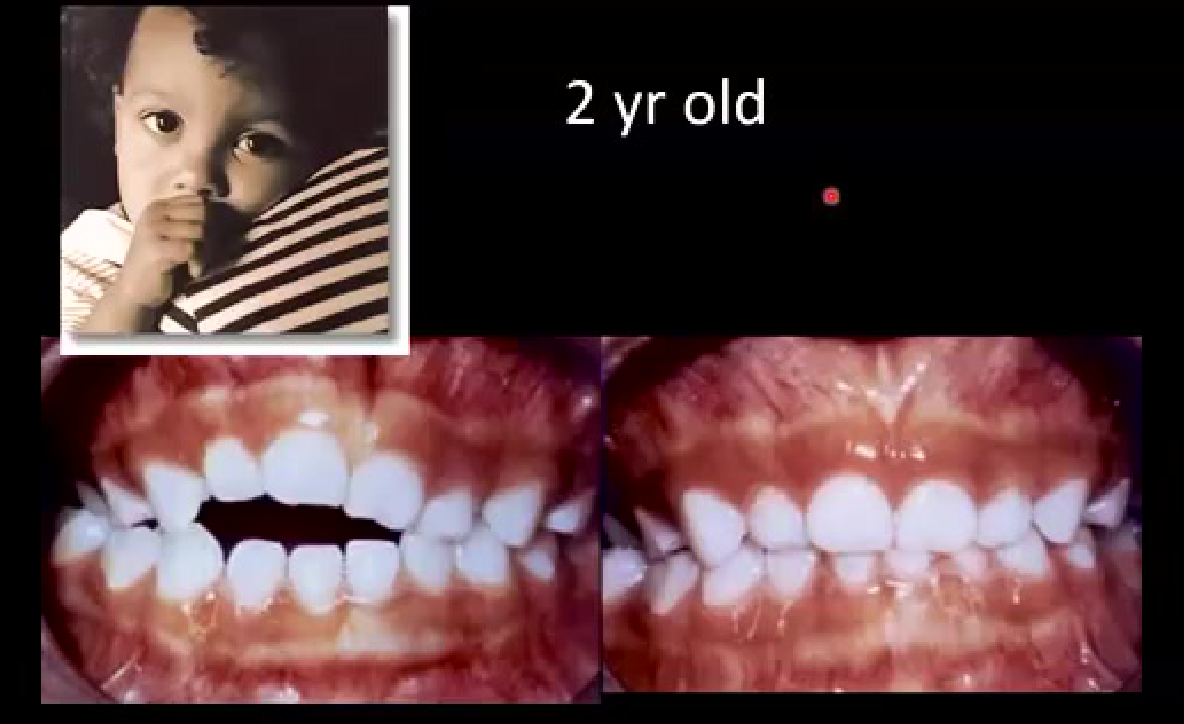
2 yr old
THUMB SUCKING
6 MONTHS AFTER CEASING
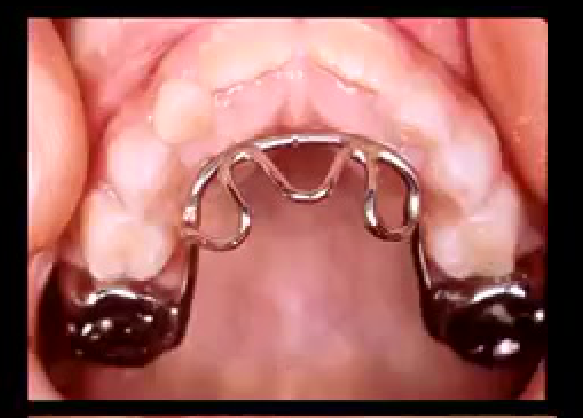
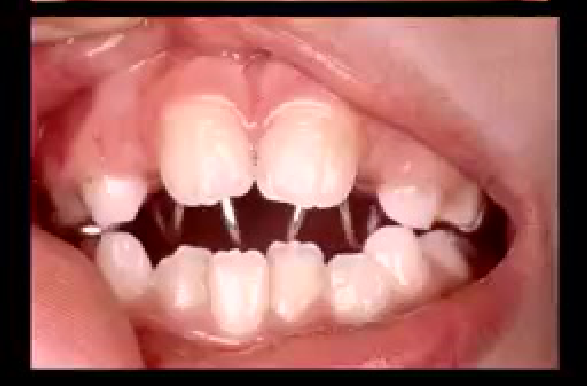
- A crib can be used to control a tongue habit.
- Soldered to bands, same construction as a lingual arch.
- Can resolve open bite in about six months if vertical growth remains.
- Keeps the tongue under control.
- In adults, may need another device as well.
ANTI-HABIT APPLIANCE
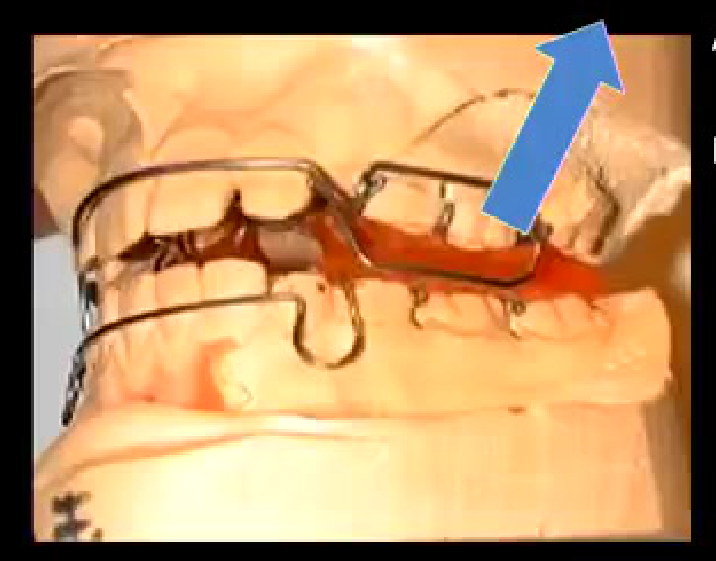
- High-pull headgear can:
- Block or control posterior tooth eruption
- Control vertical dimension
- Reduce extrusion mechanics
- Help close anterior open bite while tongue is controlled
- Can be incorporated into other appliances to control vertical maxillary growth.
 |  |
 |
Headgear Interventions and Deep Overbite Management474849505152
HEADGEAR ELASTICS OLDER CHILD
HEADGEAR
ADD HEADGEAR TO INTRUDE POSTERIOR TEETH
DEEP OVERBITE
**POSTERIOR EXTRUSION
- Intrusion of incisors (upper, lower, or both, often 50/50)
- Proclination of incisors (useful in Class II Division 2)
- Allowing posterior teeth to erupt (anterior bite plane, clockwise rotation)
- Stability depends on condylar growth. **
Perhaps BP
Needs condylar growth
 |  |
Adjunctive Orthodontic Treatment Procedures
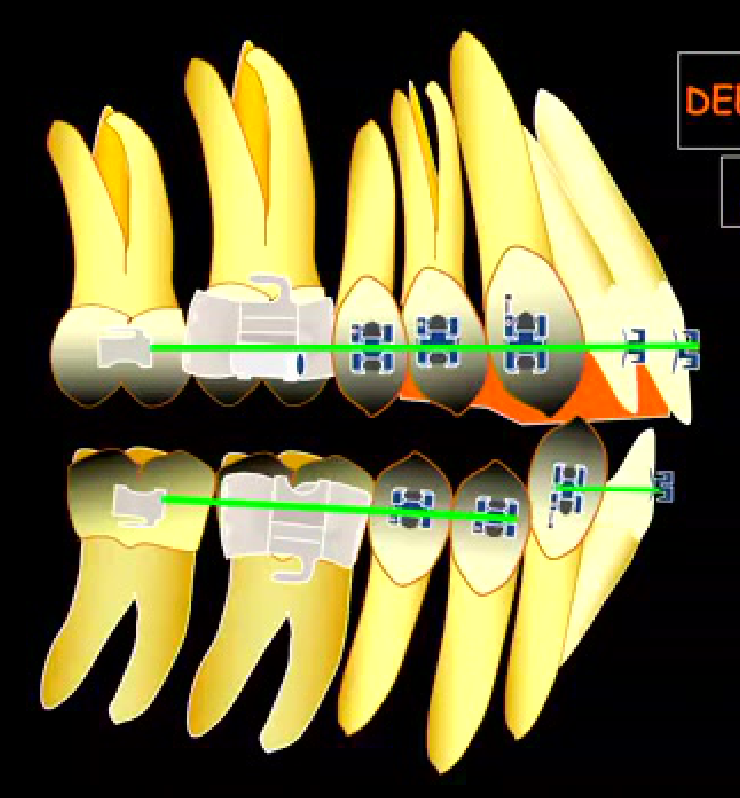
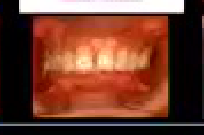
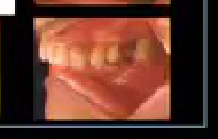
- Describe indications for repositioning anterior teeth in adults.
- Discuss use of diagnostic set-ups in planning adjunctive incisor positioning.
- Describe indications and methods for extrusion of fractured teeth.
- Describe periodontal implications of orthodontic treatment in adults.
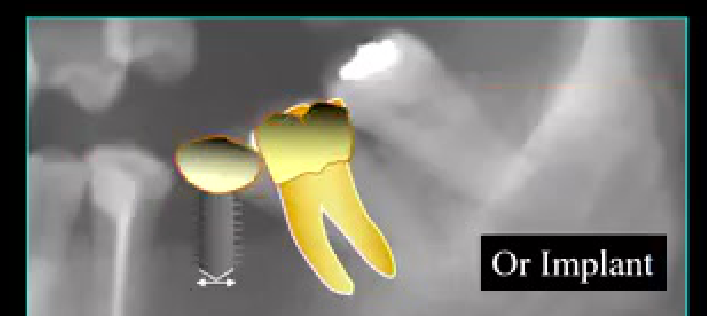
- Explain the indications for molar uprighting in adjunctive orthodontic treatment as part of general dental care.
- Describe the technique used to upright a tipped molar.
- Identify appropriate appliances for different clinical problems.
- Explain types of appliances, in terms of active and reactive units.
- Explain appliance placement, adjustments and timing.
- Identify potential side effects or sequela of treatment.
- Describe patient tolerance of the appliances.
- Identify expected treatment time.
- Describe retention procedures.
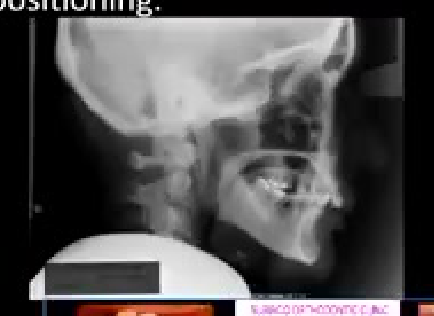
Diagnostic Setups and Incisor Repositioning5354
- Discuss use of diagnostic set-ups in planning adjunctive incisor positioning.
 |  |  |
 |  |  |
 |  |
Indications and Periodontal Aspects of Molar Uprighting555657
- Explain the indications for molar uprighting in adjunctive orthodontic treatment as part of general dental care.
Tipped Molars
- Wise, R.J. and Kramer, G. M. (1983). Predetermination of osseous changes associated with uprighting tipped molars by probing. International Journal of Periodontics and Restorative Dentistry, 3, 68-81.
Tipped Molars
Technique and Mechanics for Molar Uprighting585960
- Describe the technique used to upright a tipped molar.
Helical uprighting spring “hooked” over segmental arch wire
- 3,4,5 feels this
- 40 g
- 40 g
- 1000 gmm
- 25 mm
Clinical Cases
Case: Management of mild anterior crowding using leeway space
Question
Scenario: A patient presents with mild anterior crowding in the lower arch and no history of early tooth loss. What’s shown: The patient’s dental arches showing significant primary second molars (“big E’s”) providing substantial leeway space, alongside mild anterior crowding. Consider: How to utilize the available space to resolve the anterior crowding without extracting teeth or losing space to molar drift.
Answer
Observations:
- Mild anterior crowding in the lower arch.
- Large primary second molars (E’s) present, providing approximately 3 mm of leeway space per side.
- No early loss of primary teeth. Reasoning: By placing a lower lingual arch, the mesial drift of the permanent first molars (sixes) is prevented. This preserves the leeway space, which can then be transferred to the anterior segment of the arch to resolve the crowding. (Note: This prevents the molars from settling into a Class I relationship, which may require subsequent distalization of the upper molars). Takeaway: A lower lingual arch can be used to prevent mesial molar drift and transfer leeway space to the anterior segment to resolve mild anterior crowding, even in the absence of early tooth loss.
Case: Correction of a functional anterior shift (pseudo Class III)
Question
Scenario: A patient presents with an anterior crossbite and a Class I molar relationship. What’s shown: Clinical and cephalometric findings showing an anterior crossbite in the intercuspal position (ICP), but an edge-to-edge incisor relationship when the mandible is manipulated into the retruded contact position (RCP). Point A and Point B indicate a Class I skeletal relationship. Consider: How to diagnose the cause of the anterior crossbite and determine the appropriate treatment approach.
Answer
Observations:
- Anterior crossbite in ICP.
- Edge-to-edge incisor relationship in RCP.
- Class I molar relationship.
- Class I skeletal relationship (normal Point A and Point B). Reasoning: The discrepancy between ICP and RCP, combined with a Class I skeletal base, indicates that the anterior crossbite is not a true skeletal Class III. Instead, it is a “pseudo Class III” caused by a functional anterior shift of the mandible to achieve a comfortable bite from an unstable edge-to-edge position. Treatment involves using partial braces on the incisors and molars, activating the archwire to procline the retroclined upper incisors, thereby eliminating the crossbite and the functional shift while maintaining the Class I molar relationship. Takeaway: An anterior crossbite with a Class I skeletal and molar relationship that resolves to edge-to-edge in RCP is a functional shift (pseudo Class III), which can be corrected by proclining the upper incisors with partial braces.
Case: Functional shift causing apparent asymmetry in posterior crossbite
Question
Scenario: A patient presents with a unilateral posterior crossbite on the left side and apparent facial asymmetry. What’s shown: A clinical picture showing the chin deviated to the right and a lower midline deviation to the right. When the patient is manipulated into the retruded contact position (RCP), the posterior teeth exhibit an edge-to-edge relationship. Consider: How to interpret the facial asymmetry and midline deviation, and how to treat the posterior crossbite.
Answer
Observations:
- Chin deviation to the right.
- Lower midline deviation to the right.
- Unilateral posterior crossbite on the left in ICP.
- Edge-to-edge posterior relationship in RCP. Reasoning: The apparent facial asymmetry and lower midline deviation are not true skeletal asymmetries. They are the result of a functional shift of the mandible to the right to achieve a stable intercuspal position from an unstable edge-to-edge posterior relationship. Treatment involves expanding the upper arch (e.g., with a rapid maxillary expander) to eliminate the edge-to-edge relationship, which removes the functional shift and resolves the apparent asymmetry. Takeaway: Apparent facial asymmetry and midline deviation associated with a unilateral posterior crossbite can be caused by a functional shift from an unstable edge-to-edge posterior relationship, which is resolved by maxillary expansion.
Case: Simultaneous correction of posterior and anterior crossbites
Question
Scenario: A patient presents with both a dental posterior crossbite and an anterior crossbite of a lateral incisor. What’s shown: A custom orthodontic appliance featuring an expansion mechanism (similar to a quad-helix or W-arch) with an extended arm and a soldered spring. Consider: How to efficiently treat both the posterior and anterior crossbites using a single appliance.
Answer
Observations:
- A modified expansion appliance.
- An extended arm with a soldered spring designed to engage the lateral incisor. Reasoning: By combining the expansion arms with an extended spring, the single device can simultaneously expand the posterior arch to correct the posterior crossbite and procline the lateral incisor to correct the anterior crossbite. This approach addresses both issues and eliminates the associated functional shifts in approximately two months. Takeaway: A modified expansion appliance with an extended soldered spring can efficiently correct concurrent dental posterior and anterior crossbites in a single device.
Case: Biomechanics of uprighting a proclined molar with a cantilever spring
Question
Scenario: A patient requires uprighting of a proclined (mesially tipped) first molar, either to unblock a premolar or to prepare the site for a bridge or dental implant. What’s shown: A biomechanical setup using a cantilever spring (cancellable lever) anchored to the canine and both premolars to upright the proclined first molar. A force of 40 grams is applied at a distance of 25 mm from the molar. Consider: How to calculate the forces and moments applied to the molar and the anchor teeth when using this cantilever setup.
Answer
Observations:
- A proclined first molar being uprighted using a cantilever spring.
- The spring is anchored to the canine and both premolars.
- An applied force of 40 grams at a distance of 25 mm from the molar. Reasoning: The moment applied to the molar is calculated by multiplying the force by the distance (40 grams x 25 mm = 1000 gram-mm). Because the force is applied far from the molar’s center of resistance, the reactive intrusive force on the anchor segment (canine and premolars) is minimal (only 40 grams). This provides a sufficient moment to upright the molar without causing significant, unwanted intrusion of the anchor teeth. Takeaway: Using a cantilever spring with a long lever arm allows for the application of a large moment to upright a tipped molar while exerting minimal intrusive force on the anchor teeth.
Footnotes
-
Original PDF page 1: L2 3b review slides, p.1 ↩
-
Original PDF page 2: L2 3b review slides, p.2 ↩
-
Original PDF page 3: L2 3b review slides, p.3 ↩
-
Original PDF page 4: L2 3b review slides, p.4 ↩
-
Original PDF page 5: L2 3b review slides, p.5 ↩
-
Original PDF page 6: L2 3b review slides, p.6 ↩
-
Original PDF page 7: L2 3b review slides, p.7 ↩
-
Original PDF page 8: L2 3b review slides, p.8 ↩
-
Original PDF page 9: L2 3b review slides, p.9 ↩
-
Original PDF page 10: L2 3b review slides, p.10 ↩
-
Original PDF page 11: L2 3b review slides, p.11 ↩
-
Original PDF page 12: L2 3b review slides, p.12 ↩
-
Original PDF page 13: L2 3b review slides, p.13 ↩
-
Original PDF page 14: L2 3b review slides, p.14 ↩
-
Original PDF page 15: L2 3b review slides, p.15 ↩
-
Original PDF page 16: L2 3b review slides, p.16 ↩
-
Original PDF page 17: L2 3b review slides, p.17 ↩
-
Original PDF page 18: L2 3b review slides, p.18 ↩
-
Original PDF page 19: L2 3b review slides, p.19 ↩
-
Original PDF page 20: L2 3b review slides, p.20 ↩
-
Original PDF page 21: L2 3b review slides, p.21 ↩
-
Original PDF page 22: L2 3b review slides, p.22 ↩
-
Original PDF page 23: L2 3b review slides, p.23 ↩
-
Original PDF page 24: L2 3b review slides, p.24 ↩
-
Original PDF page 25: L2 3b review slides, p.25 ↩
-
Original PDF page 26: L2 3b review slides, p.26 ↩
-
Original PDF page 27: L2 3b review slides, p.27 ↩
-
Original PDF page 28: L2 3b review slides, p.28 ↩
-
Original PDF page 29: L2 3b review slides, p.29 ↩
-
Original PDF page 30: L2 3b review slides, p.30 ↩
-
Original PDF page 31: L2 3b review slides, p.31 ↩
-
Original PDF page 32: L2 3b review slides, p.32 ↩
-
Original PDF page 33: L2 3b review slides, p.33 ↩
-
Original PDF page 34: L2 3b review slides, p.34 ↩
-
Original PDF page 35: L2 3b review slides, p.35 ↩
-
Original PDF page 36: L2 3b review slides, p.36 ↩
-
Original PDF page 37: L2 3b review slides, p.37 ↩
-
Original PDF page 41: L2 3b review slides, p.41 ↩
-
Original PDF page 38: L2 3b review slides, p.38 ↩
-
Original PDF page 39: L2 3b review slides, p.39 ↩
-
Original PDF page 40: L2 3b review slides, p.40 ↩
-
Original PDF page 42: L2 3b review slides, p.42 ↩
-
Original PDF page 43: L2 3b review slides, p.43 ↩
-
Original PDF page 44: L2 3b review slides, p.44 ↩
-
Original PDF page 45: L2 3b review slides, p.45 ↩
-
Original PDF page 46: L2 3b review slides, p.46 ↩
-
Original PDF page 47: L2 3b review slides, p.47 ↩
-
Original PDF page 48: L2 3b review slides, p.48 ↩
-
Original PDF page 49: L2 3b review slides, p.49 ↩
-
Original PDF page 50: L2 3b review slides, p.50 ↩
-
Original PDF page 51: L2 3b review slides, p.51 ↩
-
Original PDF page 52: L2 3b review slides, p.52 ↩
-
Original PDF page 53: L2 3b review slides, p.53 ↩
-
Original PDF page 54: L2 3b review slides, p.54 ↩
-
Original PDF page 55: L2 3b review slides, p.55 ↩
-
Original PDF page 56: L2 3b review slides, p.56 ↩
-
Original PDF page 57: L2 3b review slides, p.57 ↩
-
Original PDF page 58: L2 3b review slides, p.58 ↩
-
Original PDF page 59: L2 3b review slides, p.59 ↩
-
Original PDF page 60: L2 3b review slides, p.60 ↩