Orthodontic Instruments and Emergencies1
Dr Richard Lee BDSc (Hons), BScDent (Hons), DClinDent (Ortho) Senior Lecturer - Orthodontics
Outline
Orthodontic Instruments
- Adjustment Pliers
- Insertion Pliers
- Appliance Removal Pliers
- Special Use Instruments
- Cutting instruments
- Others
Orthodontic Emergencies
- Protruding wire
- Debonded Bracket
- Loose band
- Broken wire
- Wire out
- Periodontal inflammation / abscess
- Trauma
- Broken retainer
Orthodontic Instruments2
Adjustment Pliers
- Adam’s
- Bird beak, 139’s
- Light wire
- Arch bending
- Three Jaw or three prong
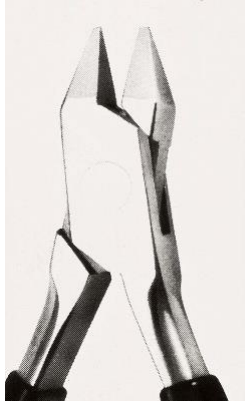
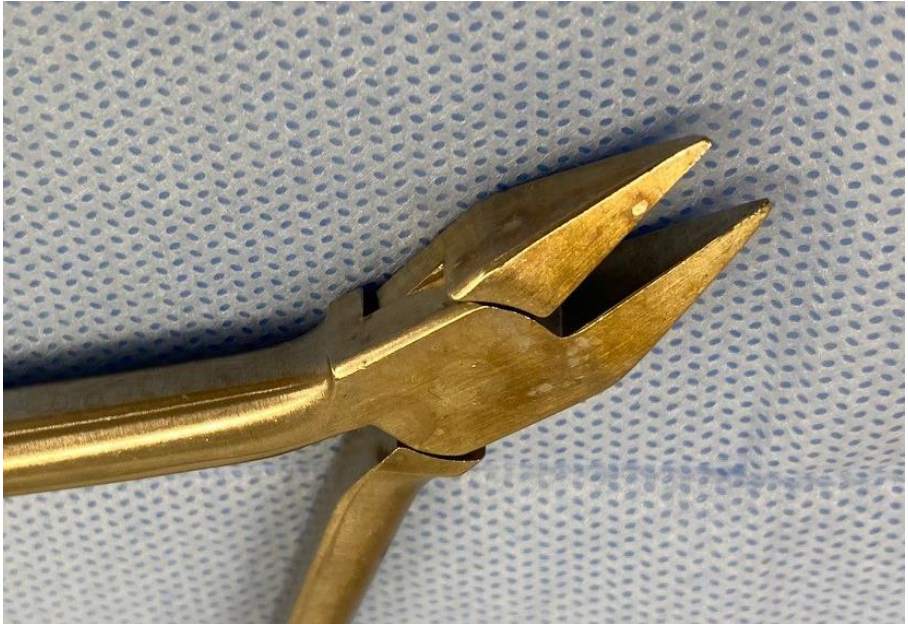
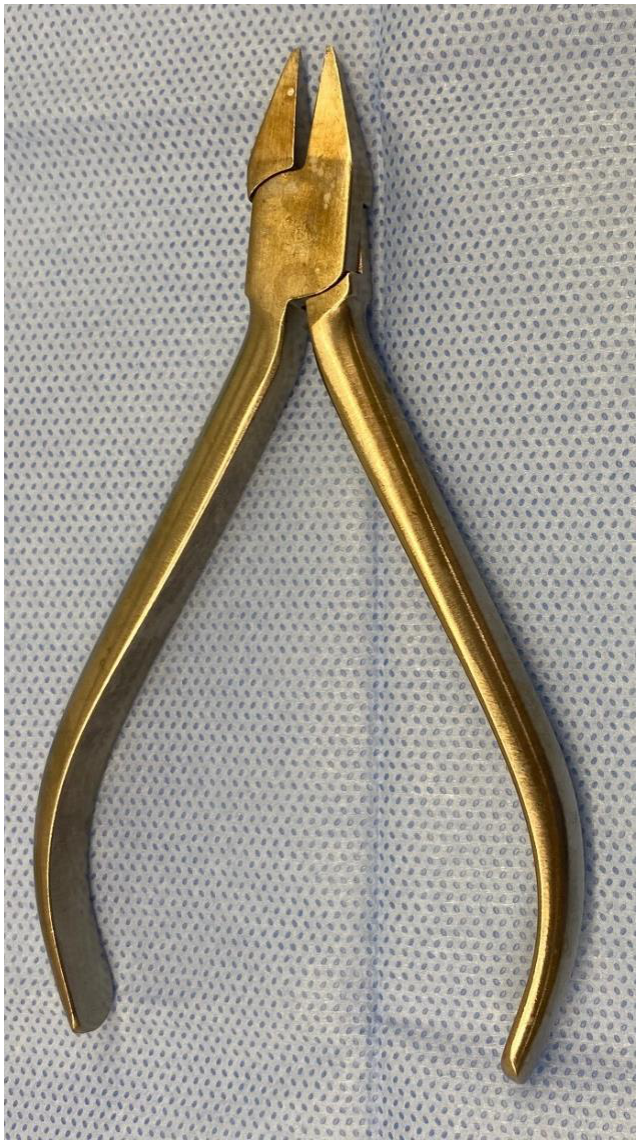
Adam’s Pliers34
Used to adjust most, if not all, removable appliances.
Lecturer — Adam's Pliers
Adam’s pliers are suitable for harder wires, including approximately 0.7 mm and 0.8 mm wires. They can also be used for components such as the Hawley clasp.
 |  |
 |
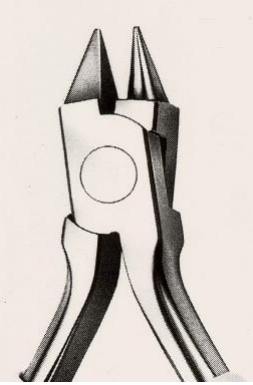
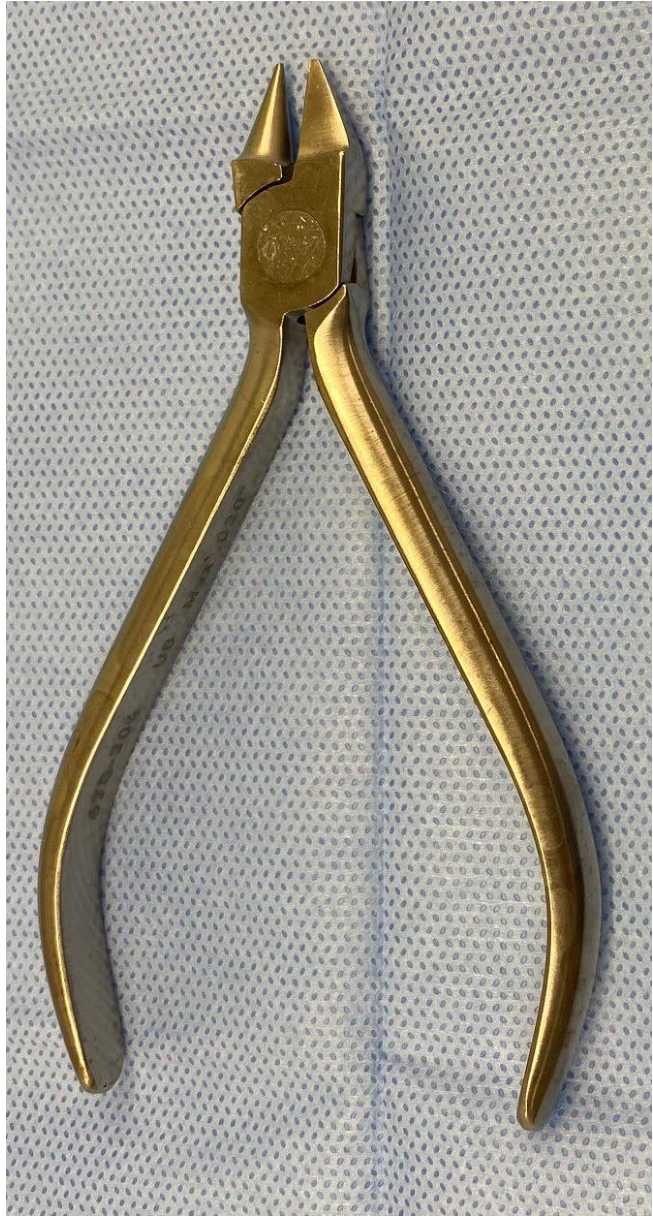
Bird Beak Or 139’s Pliers5
Used to adjust smaller wire aspects of removable appliances such as springs.
Orthodontic arch wire adjustments — first, second and third order bends and bending loops.
A thinner, more narrow beaked version is known as the light wire plier — designed to only bend small diameter wire.
Lecturer — Bird Beak Tips
Bird beak pliers are highly versatile for orthodontic wire adjustments. The round part of the tip creates rounded bends, while the squared part creates sharper bends such as approximately 90-degree bends; the center can be used for heavier wires and the end for lighter wires.
 |  |
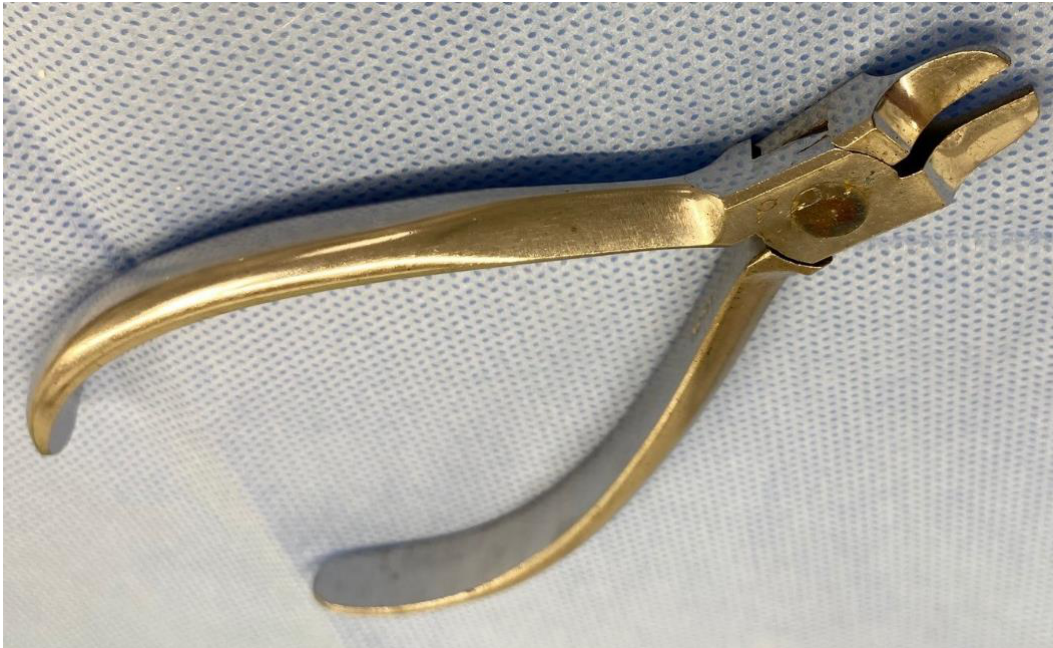
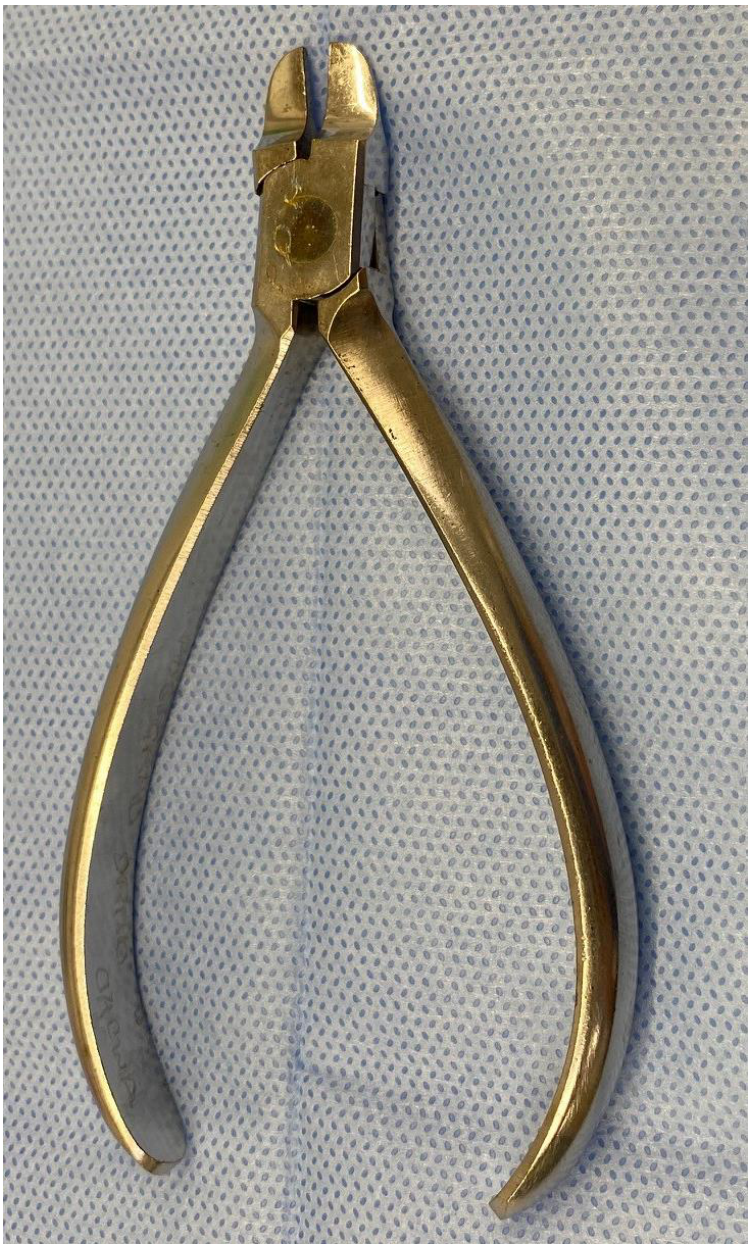
Arch Bending Pliers6
Arch Bending (Tweed)
Used to bend and adjust orthodontic arch wire — first, second and third order bends.
Lecturer — Arch Bending
Arch bending pliers have a completely flat tip and are particularly useful for twisting rectangular wires when torque or other rectangular-wire adjustments are required. Keep the fingers slightly away from the wire during bending to reduce the risk of creating kinks.
 |  |
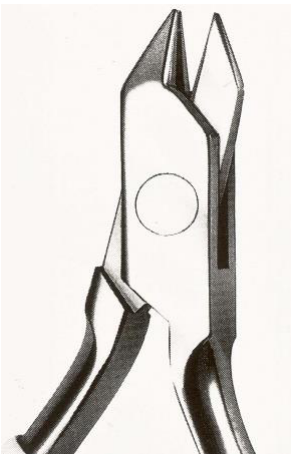
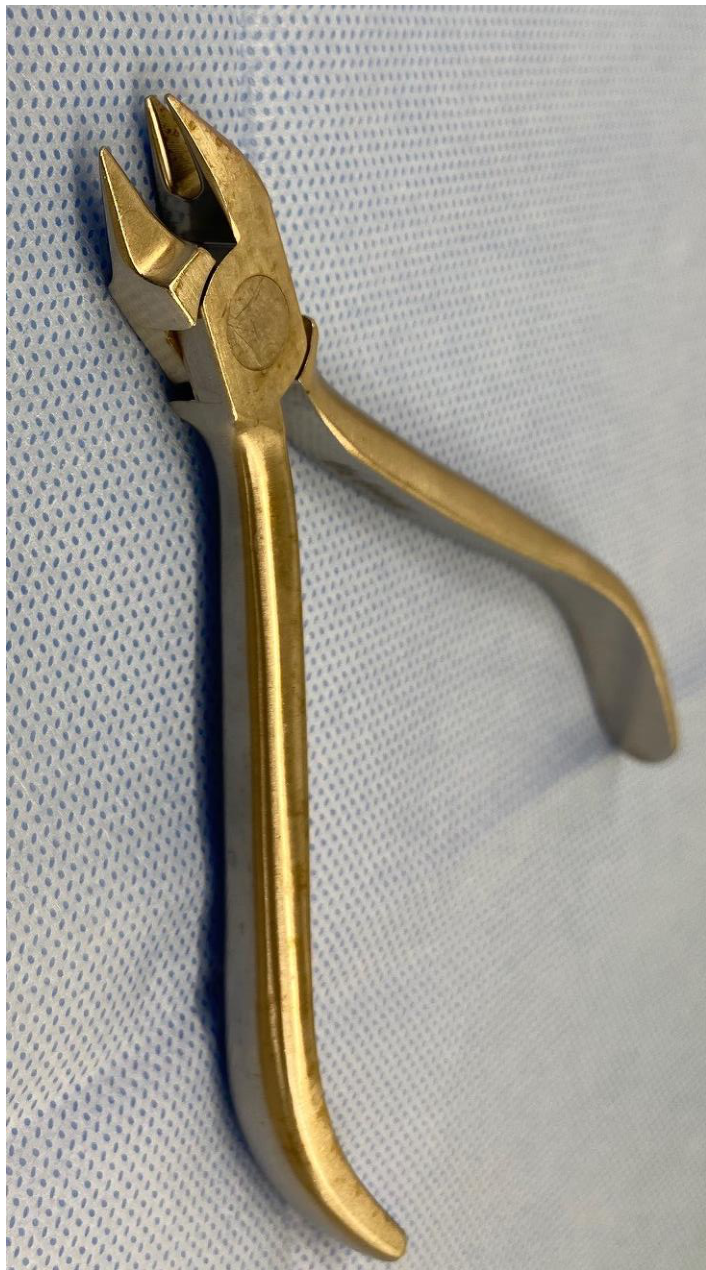
Three Jaw Or Three Prong Pliers7
Used to adjust wire aspects of removable appliances. Can be used to make bends in auxiliary wires such as a transpalatal bar and V bends in main arch wires.
Lecturer — V-Bends
A V-bend consumes part of the wire and can shorten it. This can shorten a transpalatal bar without removing it when the bar extends toward or irritates the palate, helping to prevent inflammation.
 |  |
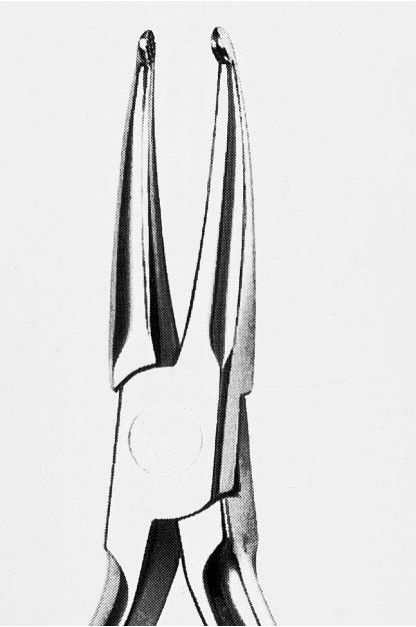
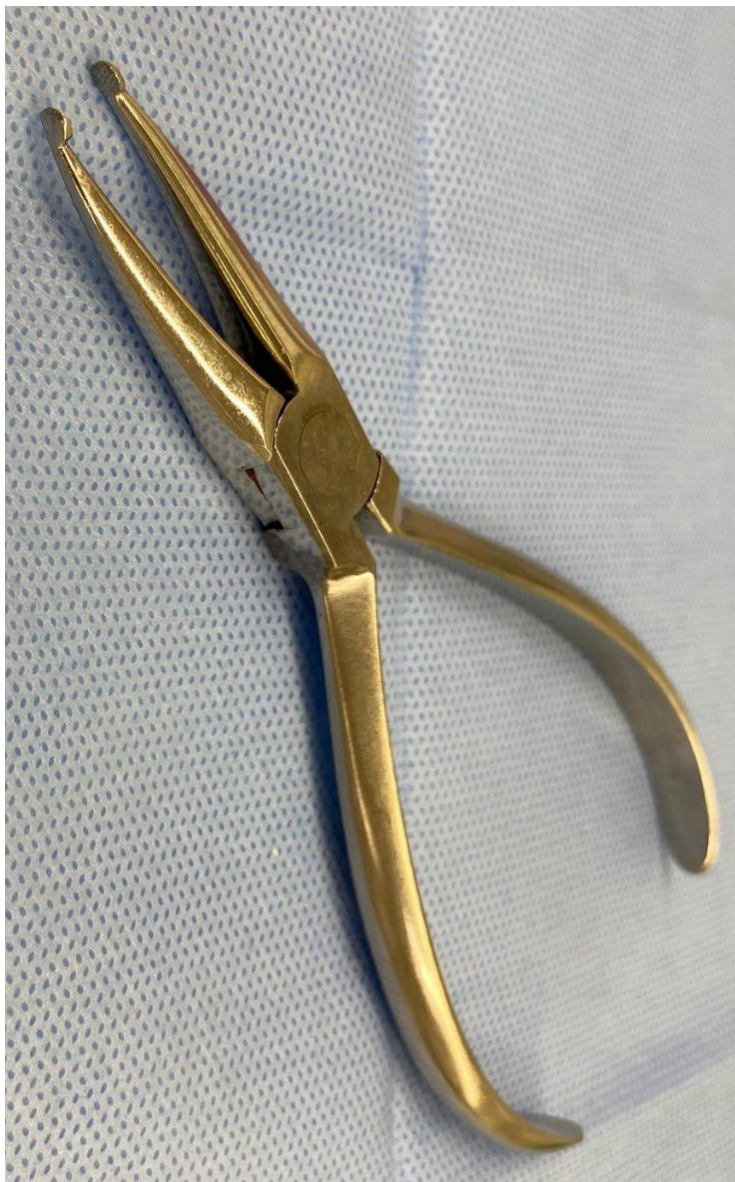
Wire Insertion Pliers
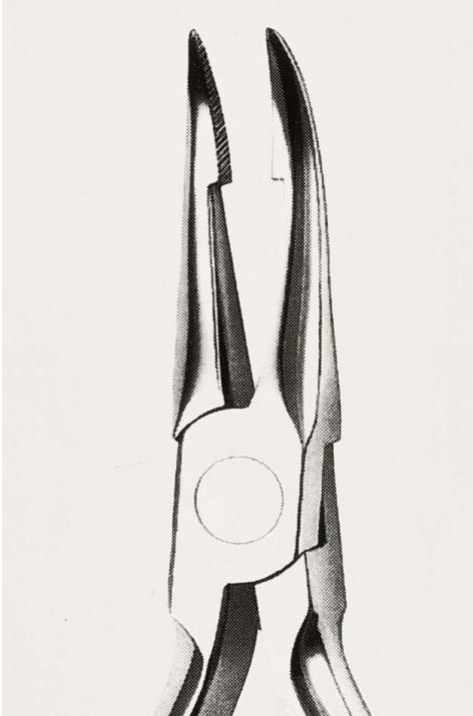
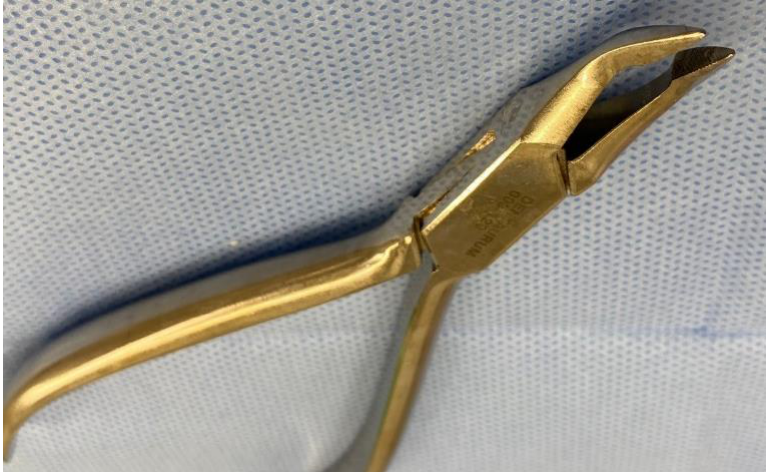
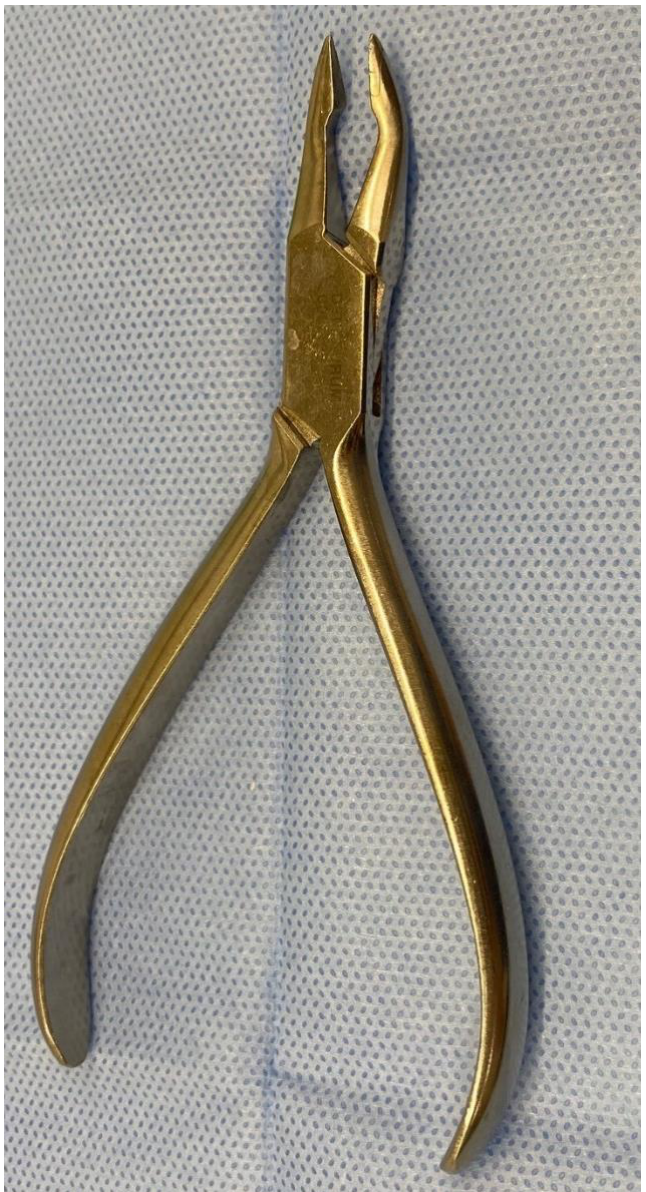
Weingart Plier8
Primarily used to insert orthodontic arch wire into slot or tube of the orthodontic appliance.
 |  |
 |
How(e) Plier9
Primarily used to insert orthodontic arch wire into slot or tube of the orthodontic appliance.
Lecturer — Weingart Plier
The Weingart plier has a longer, slightly curved tip and is routinely used to grasp and insert arch wires into posterior tubes, particularly on the sixes and sevens. Its longer design is especially useful for upper posterior tubes.
Lecturer — How(e) Plier
A straight How(e) plier can also be used to tie wires when elastic O-rings are not being used and to lace metallic wire into the bracket slot. For posterior insertion, a longer instrument such as a Weingart or straight How(e) plier may make access easier.
 |  |
Appliance Removal Pliers
Use - Self-explanatory
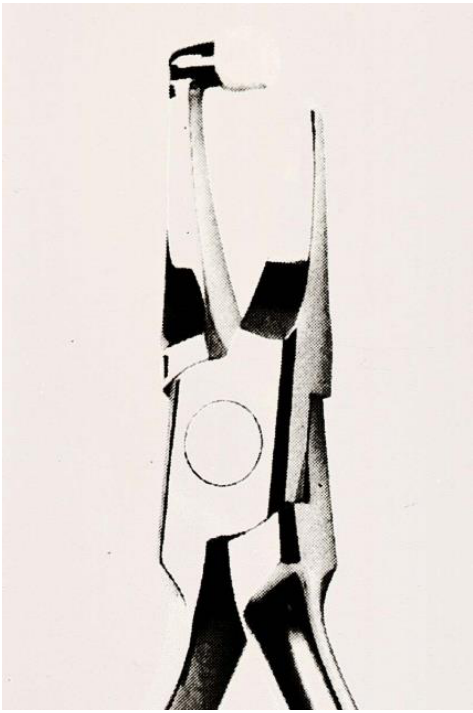
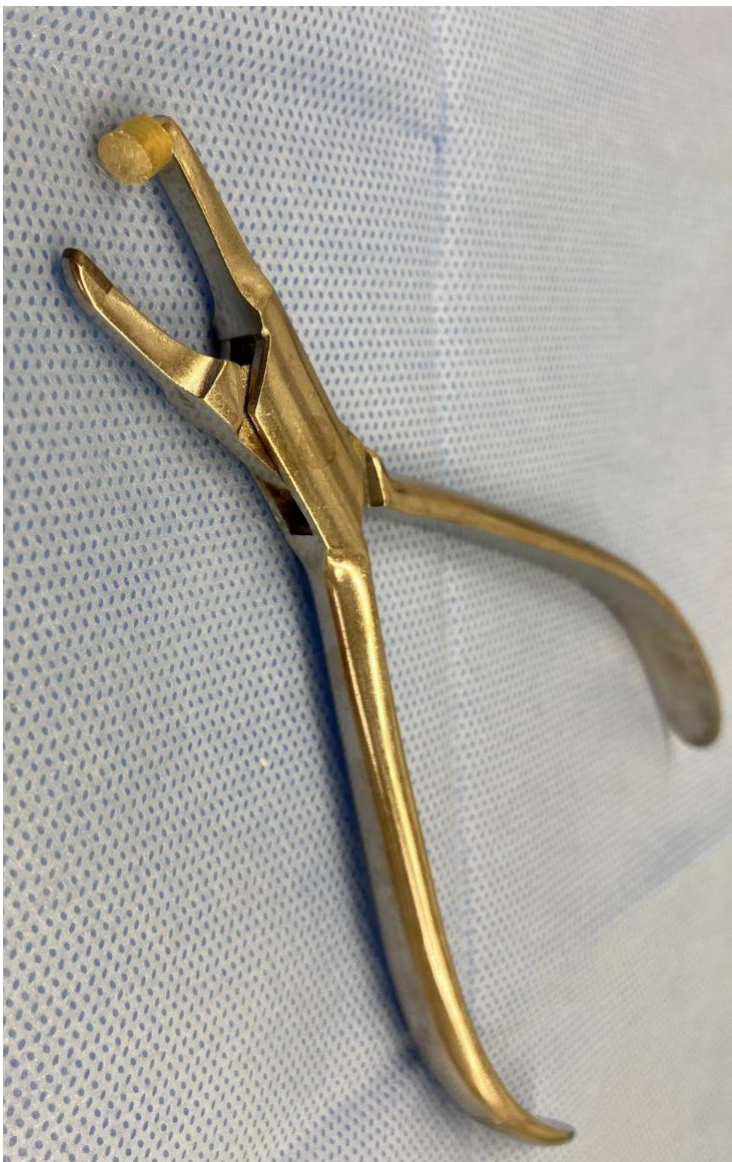
Band Removing Pliers10
Caution to use only the plastic tip on the occlusal surface of the tooth
Lecturer — Band Removal
The sharp tip engages beneath the band while the rubber component rests on the molar’s occlusal surface. The resulting shearing force breaks the cement bond, but the sharp tip must be properly engaged because slipping can cause a significant soft-tissue cut.
 |  |
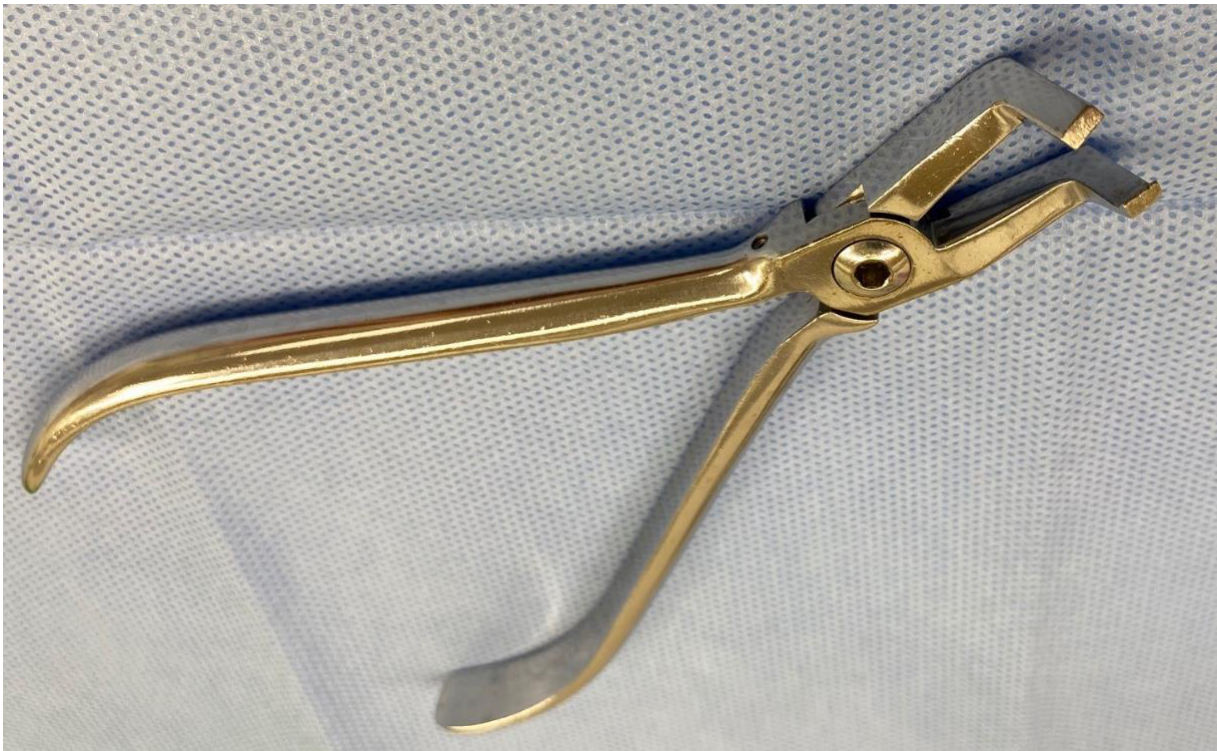
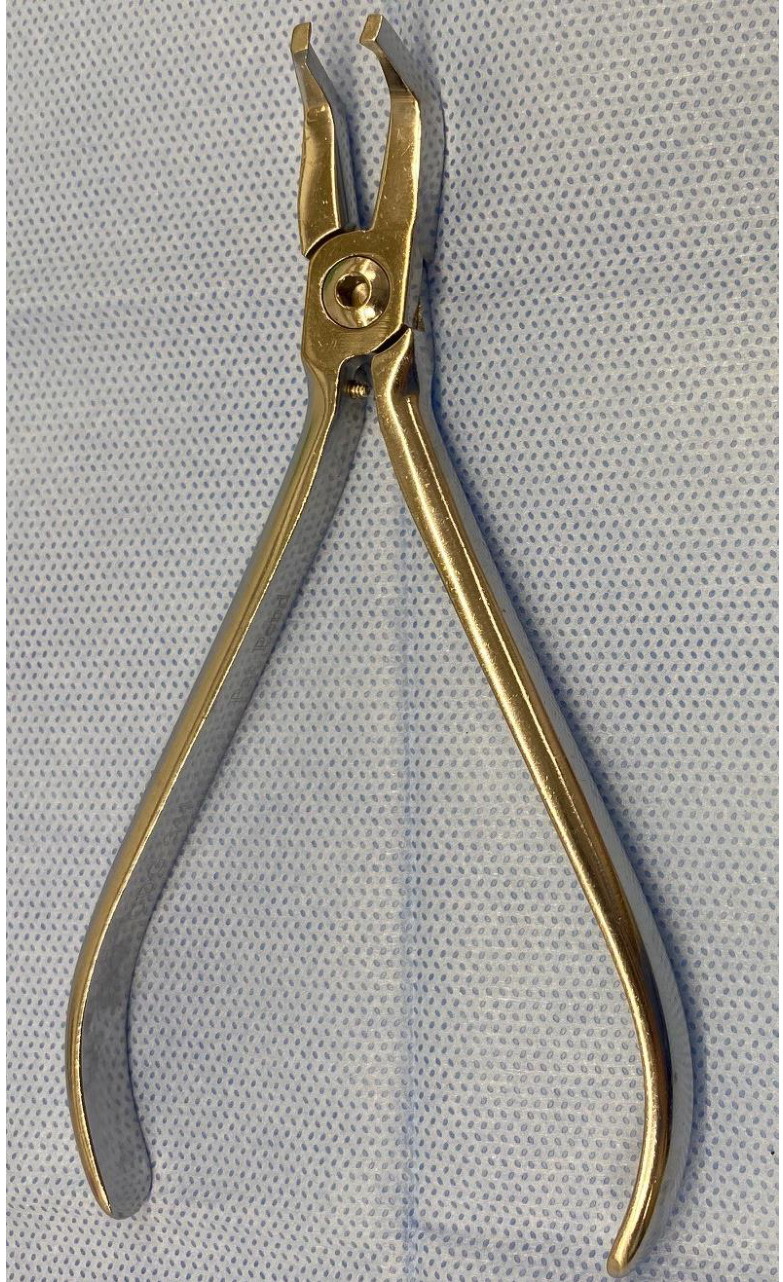
Bracket Removing Pliers11
Use - Self-explanatory
Lecturer — Bracket Removal
Bracket-removing pliers engage at the very bottom of the bracket and apply pressure to bend it and break the bond with enamel. Metallic brackets generally bend more readily, whereas ceramic brackets may fracture or explode, leaving fragments that can require additional bur work.
 |  |
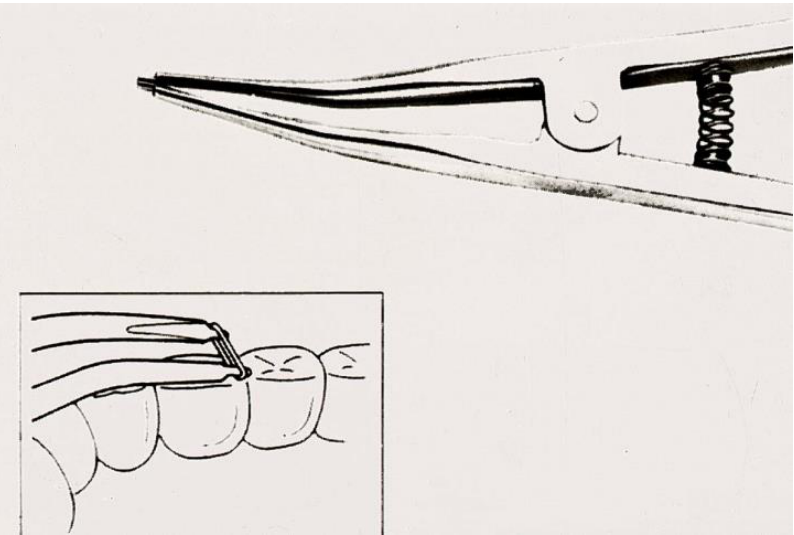
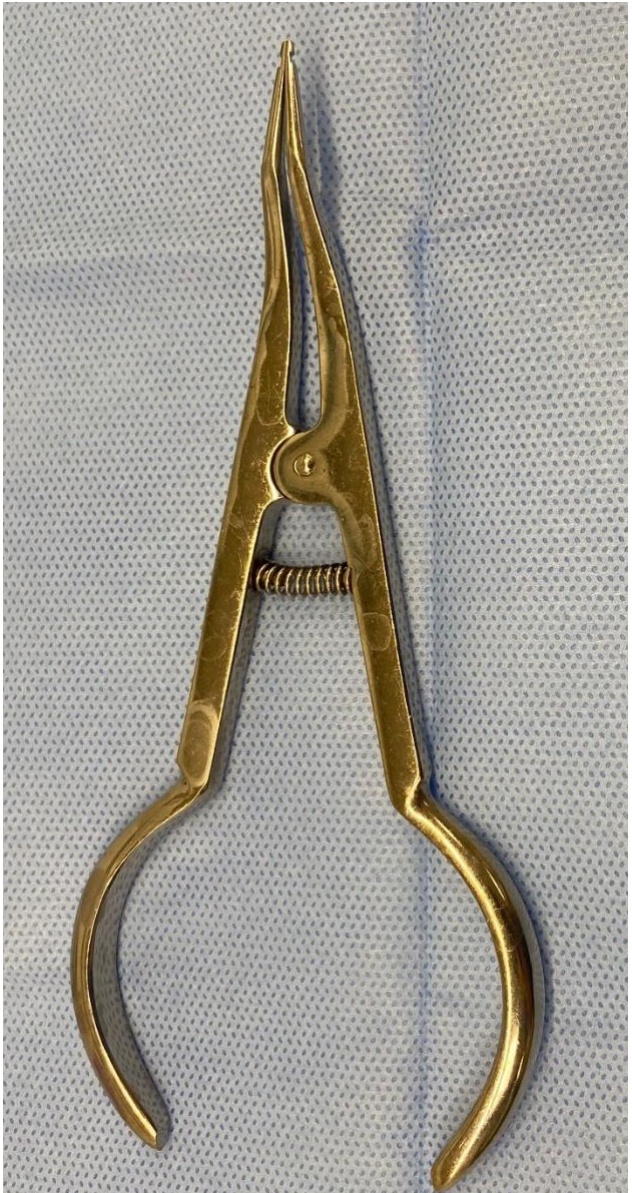
Special Use Pliers
Separating pliers are specifically used to place orthodontic separators. As an alternative, two pieces of floss can also be used.
Separating Pliers12
 |  |
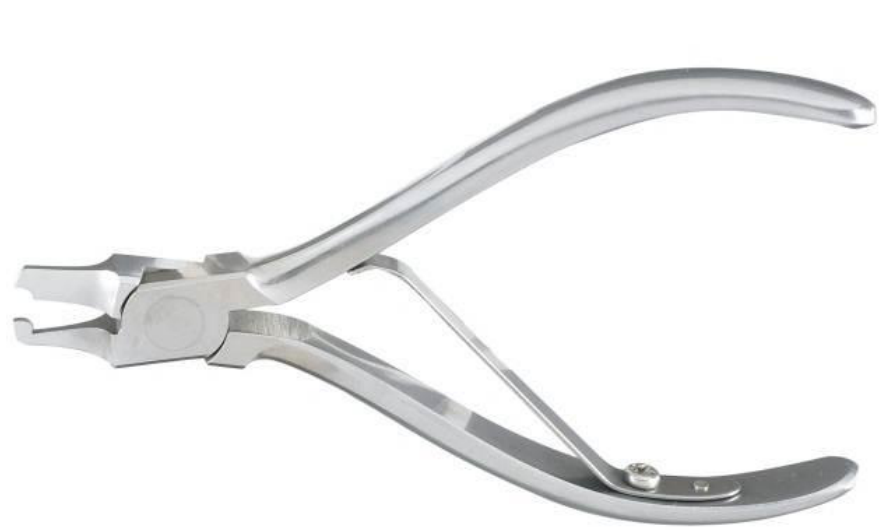
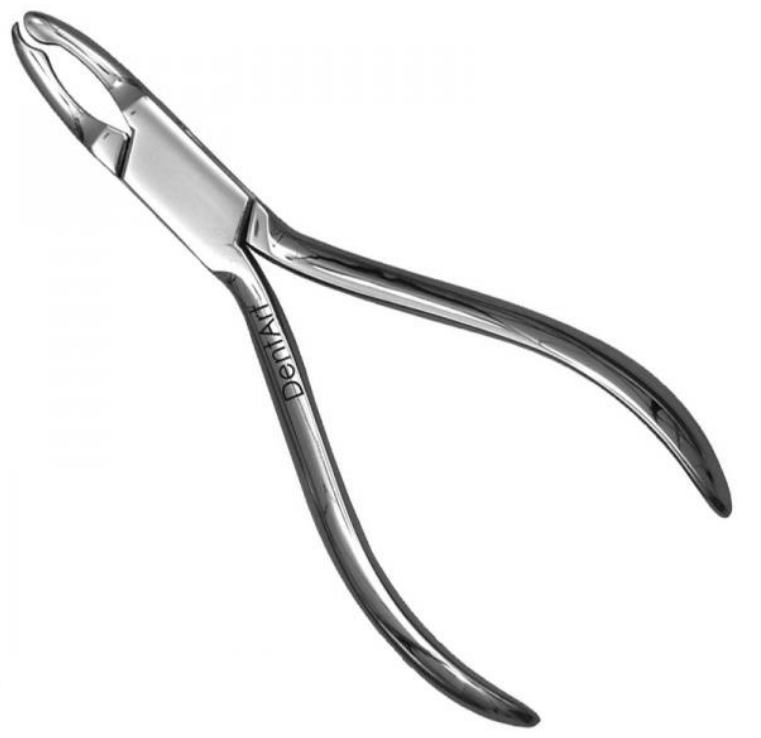
Crimping And Crown Forming Pliers13
Crimping and crown forming or contouring pliers are used to form a band or to crimp (tighten) a band on a tooth.
Lecturer — Crown Forming
These pliers reshape the upper part of a band to improve adaptation to the molar’s occlusal table and cusps. Their convex and concave tips work together to establish the required curvature, including an approximately zero angle with the cusp surfaces.
 |  |
Cutting Instruments
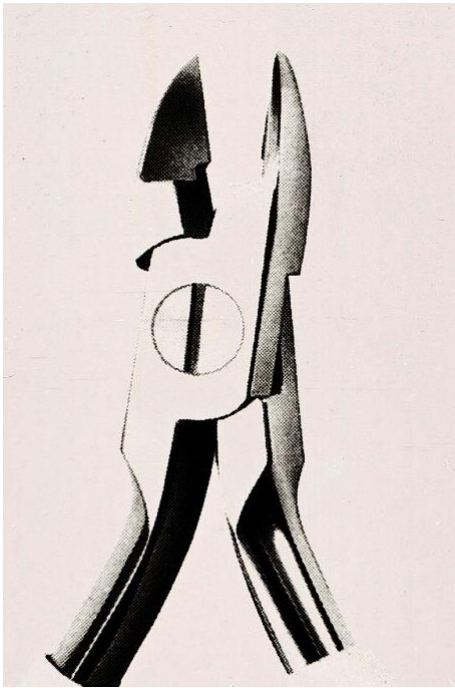
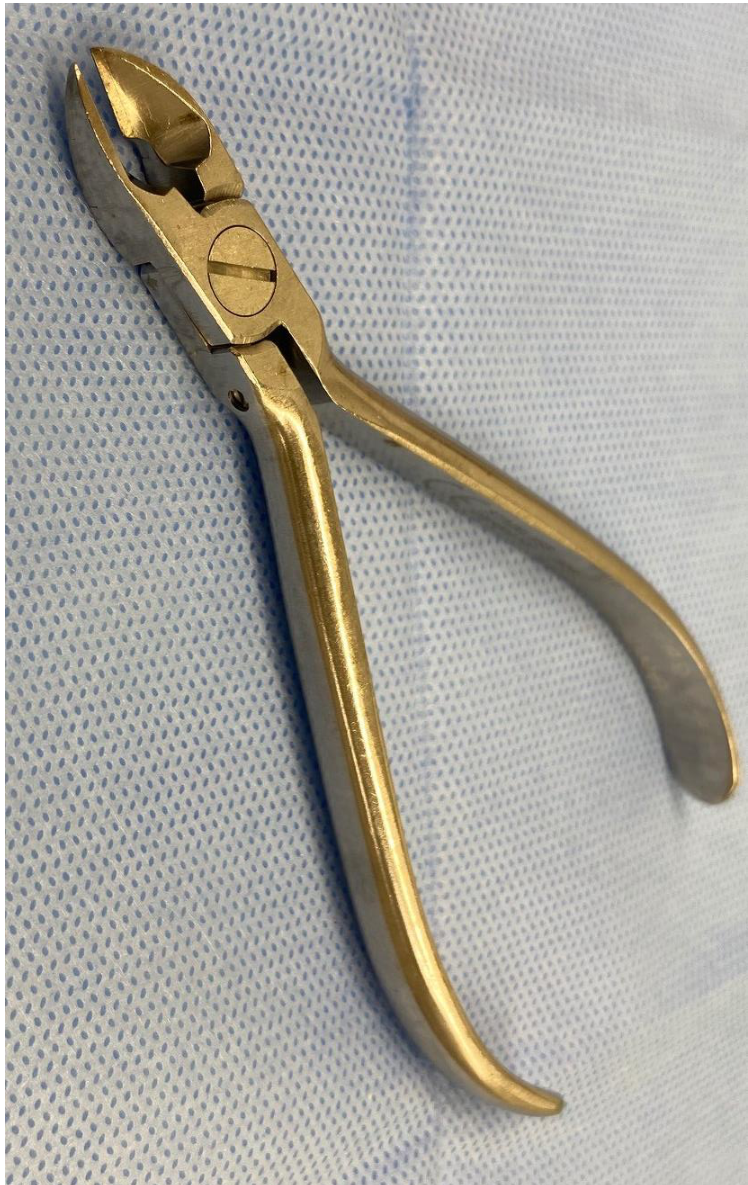
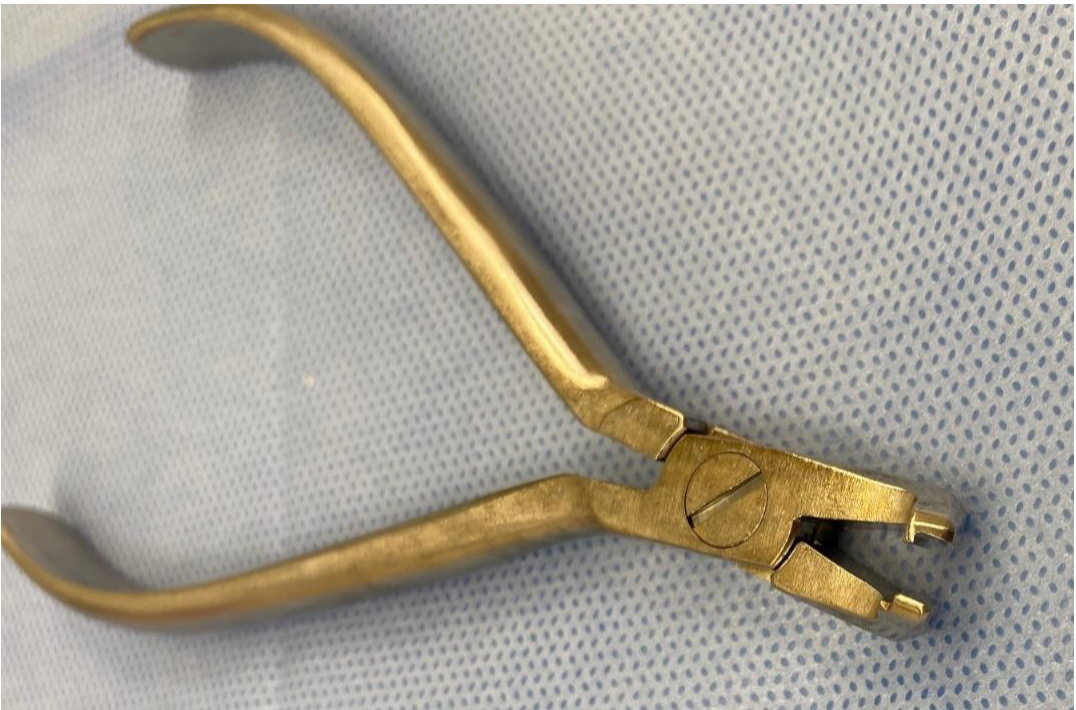
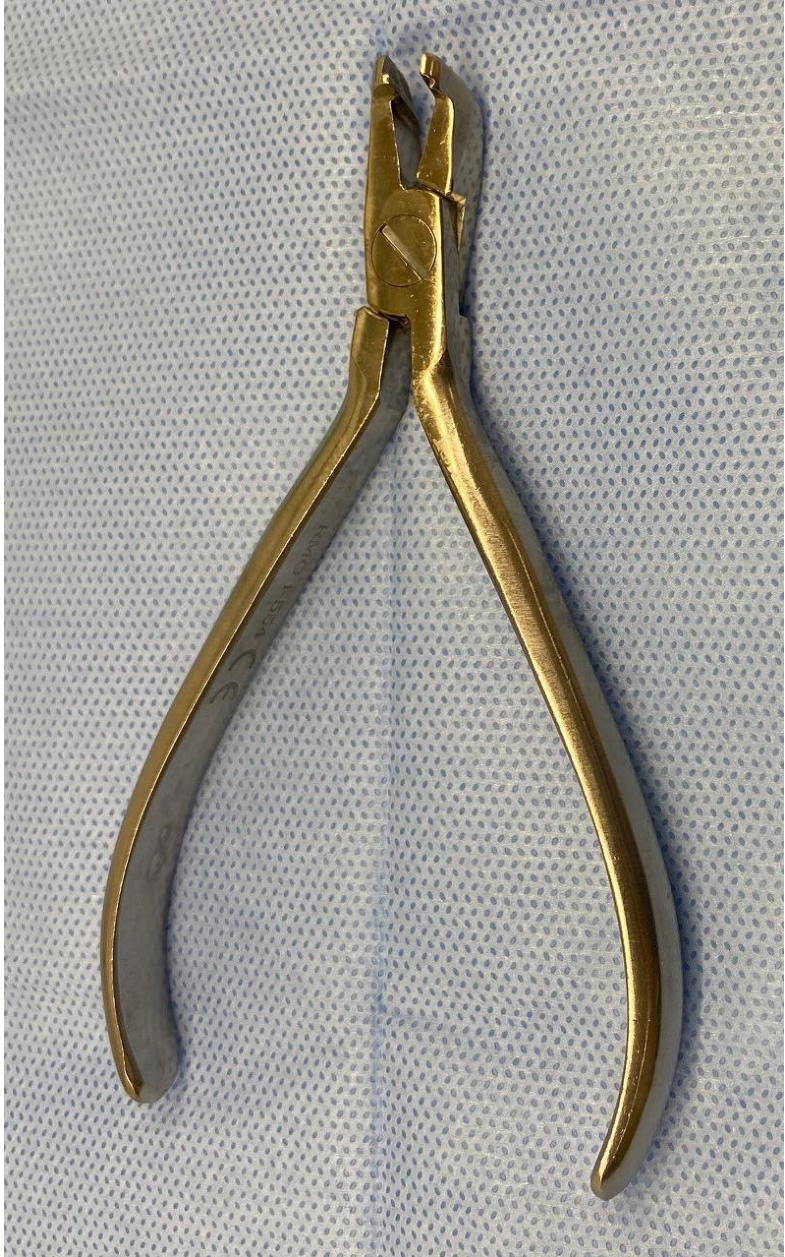
Cutting instruments are used to trim and remove orthodontic wires during treatment.
Ligature Cutter1415
Specifically used for very fine wires:
Lecturer — Ligature Cutter
Ligature cutters can cut steel ligatures and polymeric materials such as power chains, but they should not be used for orthodontic arch wires. Even relatively small arch wires can rapidly blunt the blade.
- Steel ligatures
Exclusively used for cutting orthodontic arch wires.
 |  |
 |  |
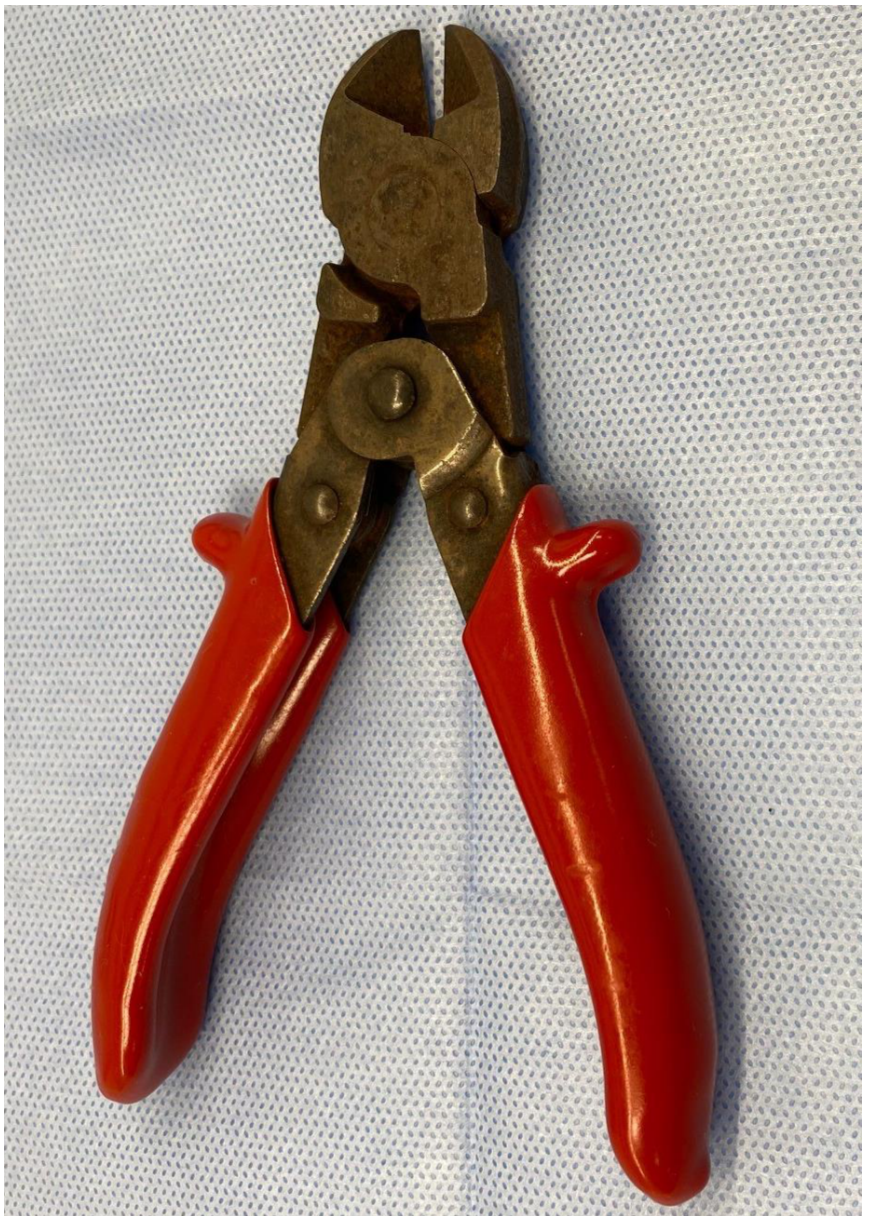
Hard Wire Cutter16
Cutting large diameter wire.
Lecturer — Hard Wire Cutter
A distal cutter has a sharp cutting portion and a recessed portion that holds the cut wire, preventing the fragment from injuring the patient. A heavier cutter can shorten preformed wires outside the mouth before insertion, while the final intraoral cut is completed with the distal cutter.
Other Instruments17
- Mathieu Needle Holder
- Mosquito forceps
- Mershon Band Pusher
- Nylon Band seater
- Schure scaler and band pusher
- Direct bond bracket holder
- Boone gauge
- Ligature director/tucker
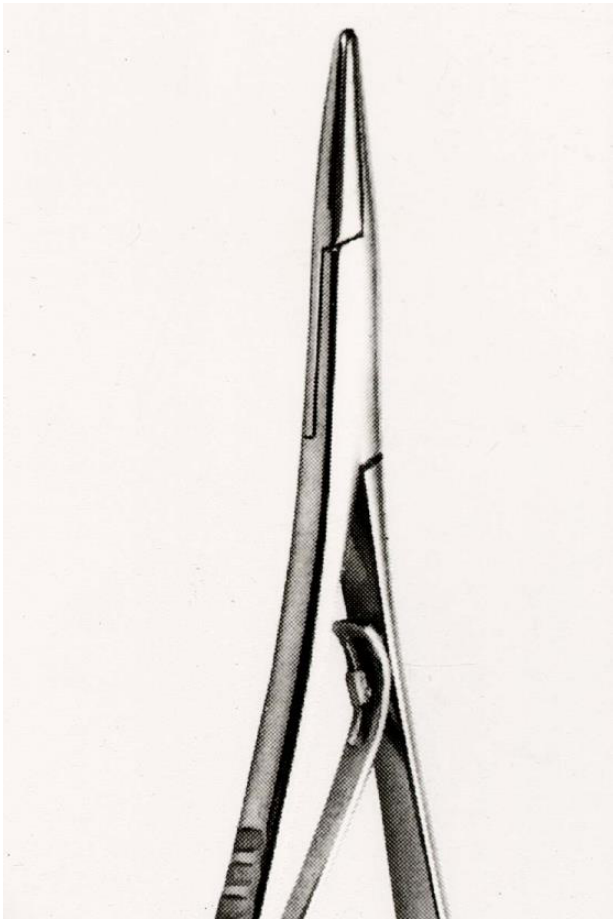
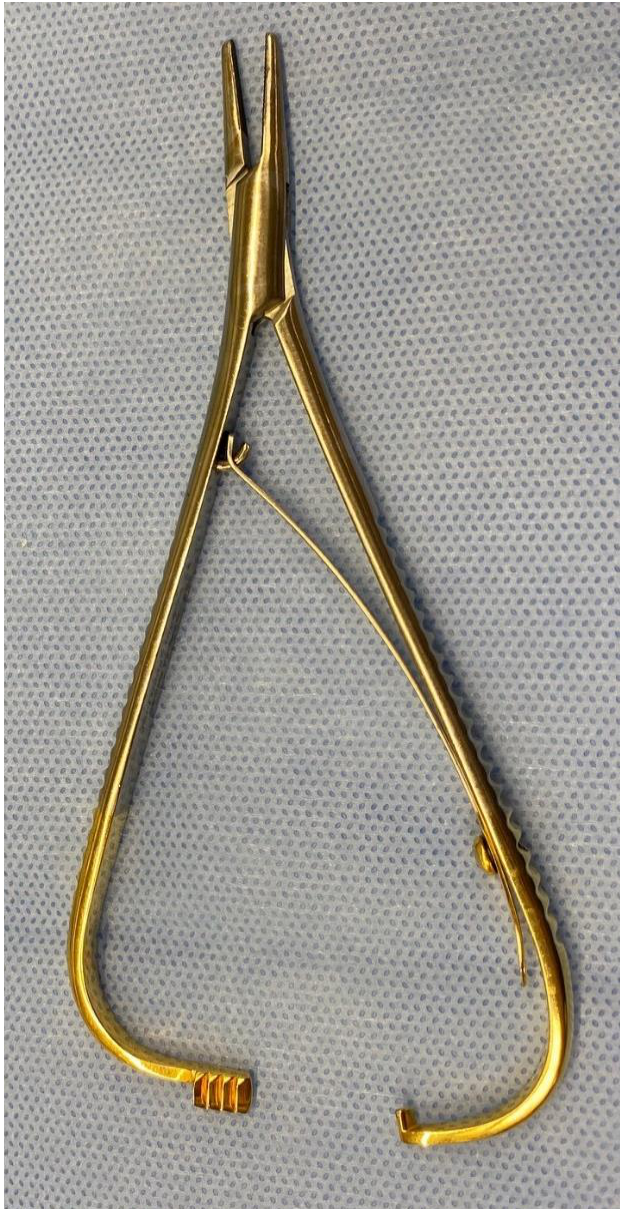
Mathieu Needle Holder18
Placement of elastomeric ligatures/chain and steel ligatures.
 |  |
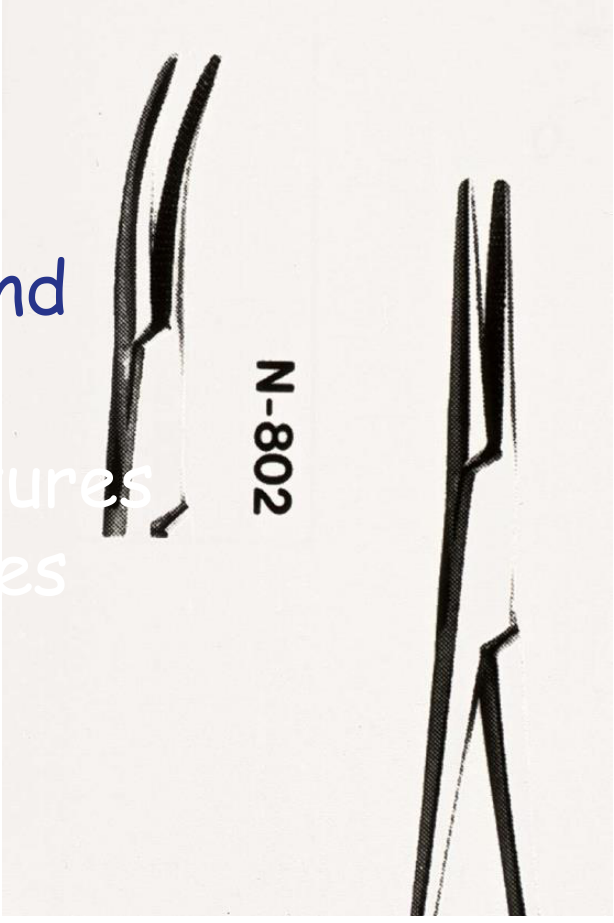
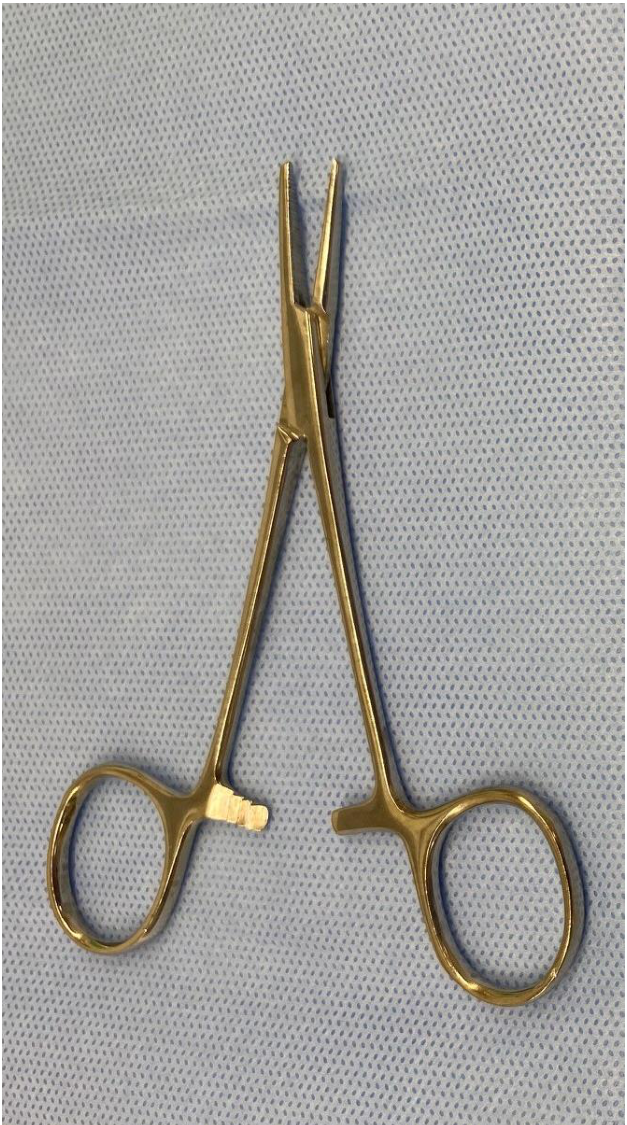
Mosquito Forceps19
Placement of elastomeric ligatures/chain and steel ligatures.
Lecturer — Mathieu Needle Holder
The Mathieu needle holder acts as a clamp for grasping power chains, elastics and other polymeric materials while adjustments are made. It can also be used when tying wire ligatures.
N-802
Lecturer — Mosquito Forceps
Mosquito forceps are smaller than standard forceps and have a smaller tip. This provides increased control when handling small O-rings or other materials used to lace the bracket slot.
 |  |
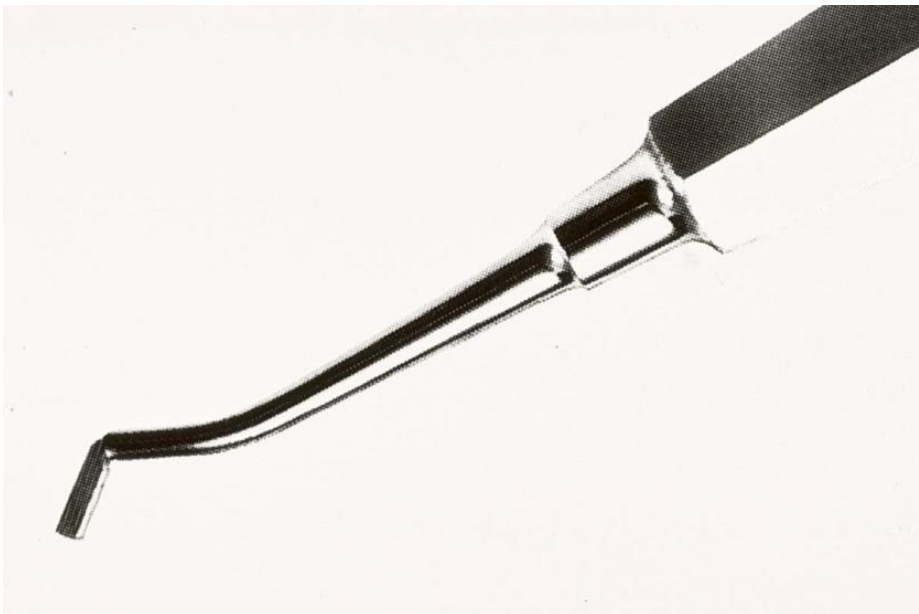
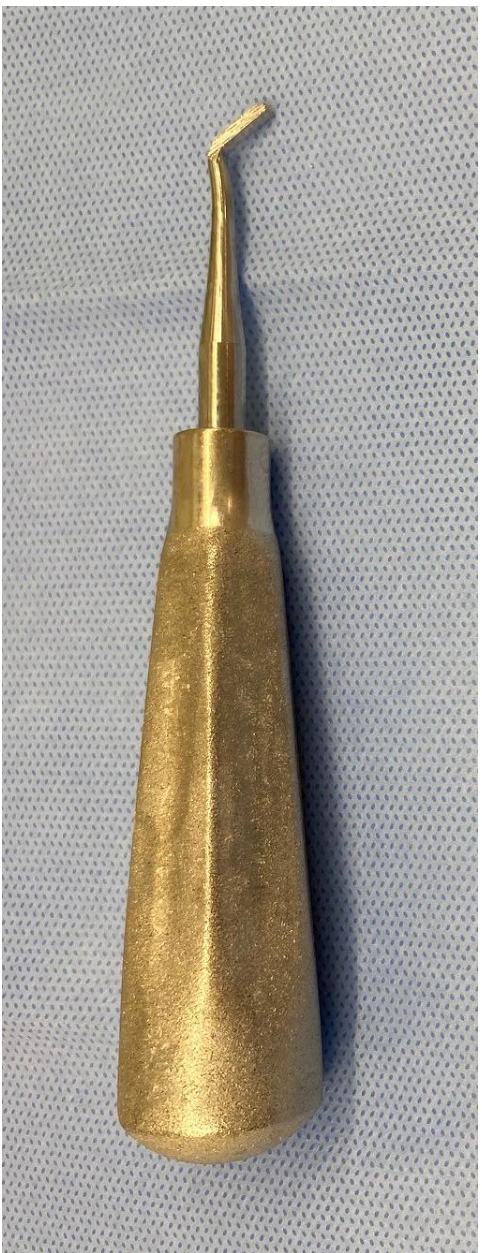
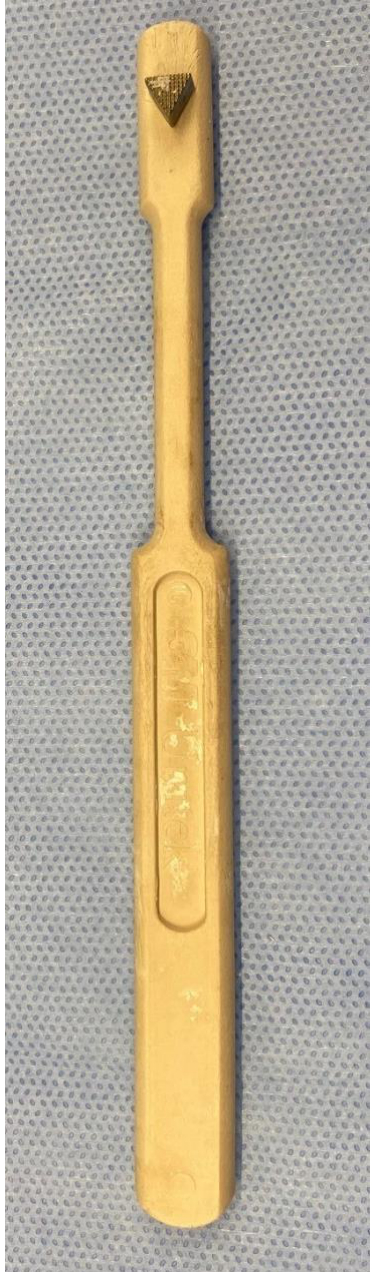
Mershon Band Pusher2021
Specialised instrument to force band down at contact areas of adjacent teeth.
Specialised instrument to force band down at contact areas of adjacent teeth.
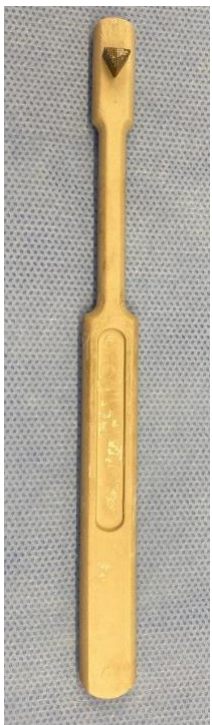
Caution to only use edge of triangular portion of the head on the metal band!
Lecturer — Band Seating
The Mershon band pusher can help reshape the top anatomy of the band near the occlusal table. Because it is heavy, support the instrument with the fingers near the band to prevent slipping and injury; the patient may also bite on it to help seat the band.
 |  |
 |
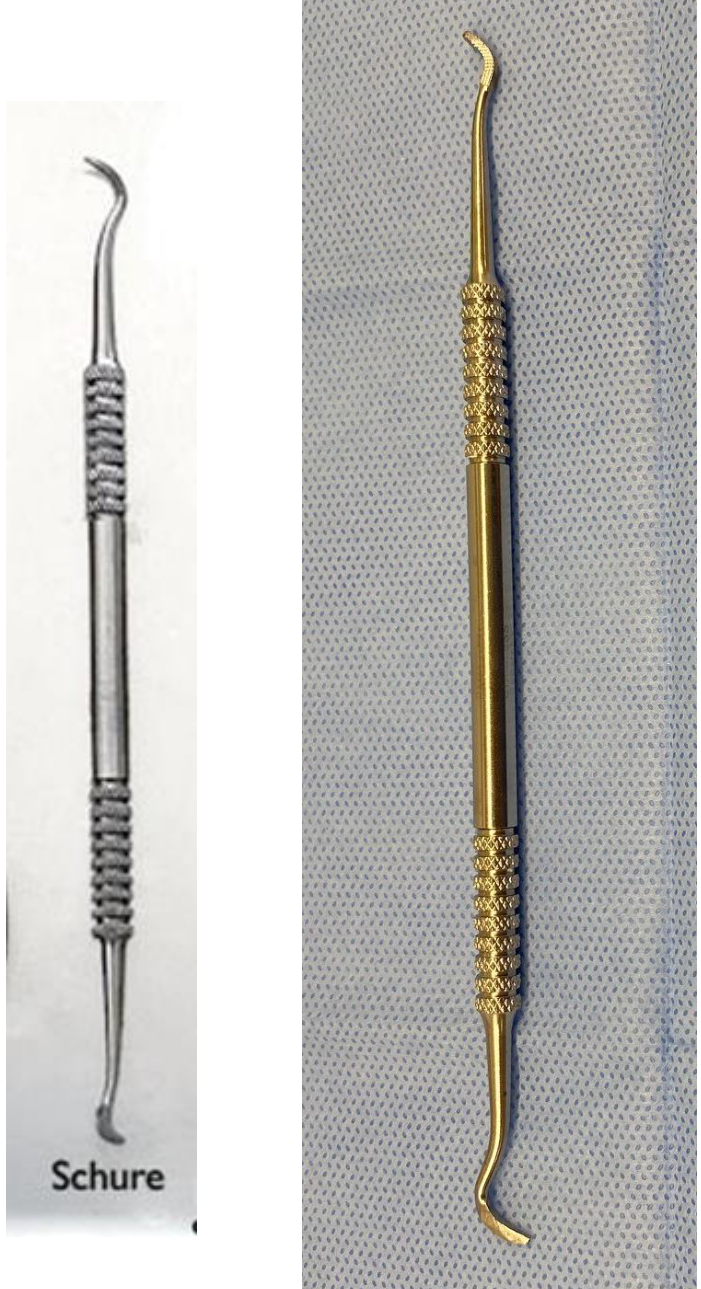
Schure Scaler And Band Pusher22
Specialised instrument for scaling away cement and to use as a small band pusher.
Also commonly used to position brackets.
Lecturer — Schure Instrument
The Schure instrument has a sharp end for wire adjustment, tying wires and other intraoral procedures, and a posterior end that functions as a band pusher or band seater. It is lighter than the Mershon band pusher, which may reduce the risk of an incident caused by excessive force or slipping.
Direct Bond Bracket Holder23
Used to hold and transfer orthodontic brackets from tray to tooth.

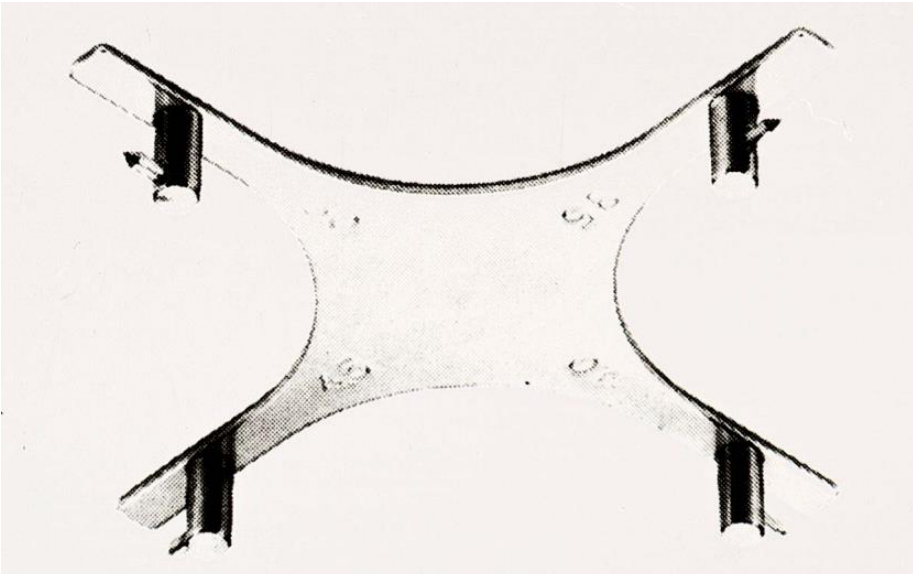
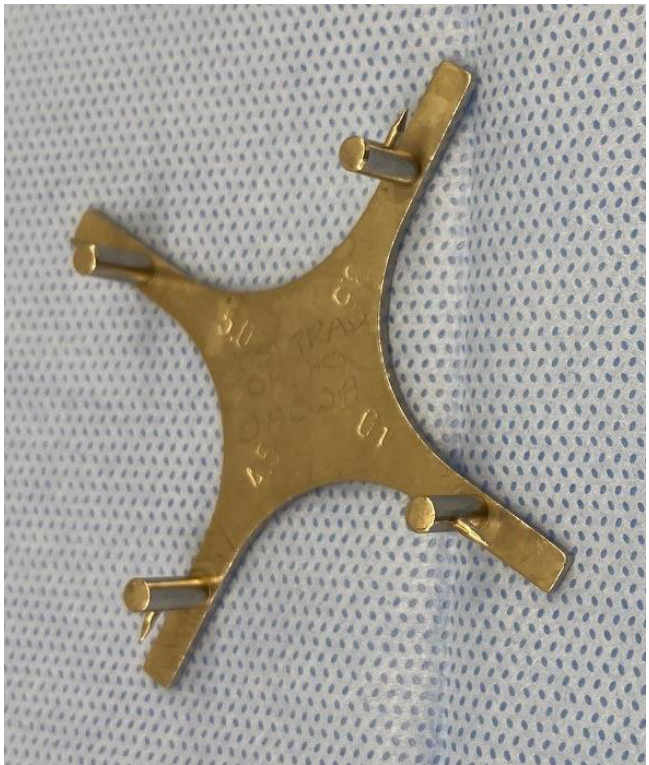
Boone Gauge24
Used to check bracket heights:
- 3.5mm
- 4.0mm
- 4.5mm
- 5.0mm
Lecturer — Boone Gauge
The flat portion of the Boone gauge rests on the incisal edge or occlusal surface, while the sharp tip engages the bottom of the bracket slot. This is particularly useful when rebonding a bracket directly in the mouth, where using a ruler is difficult because the slot is very small.
 |  |
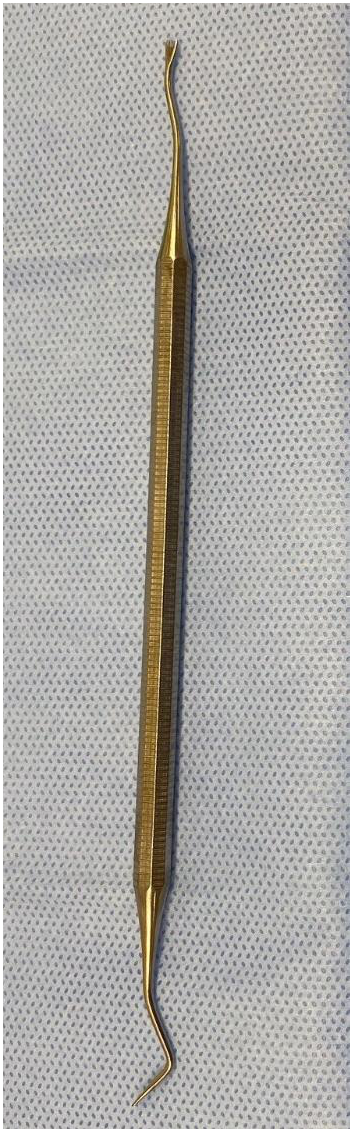
Ligature Tucker And Director25
Used to turn ligature ends in. Can be used to assist turning in the ends of the orthodontic arch wire.
Lecturer — Ligature Safety
After a steel ligature is cut, its remaining sharp end must be bent underneath the wire. This prevents the ligature from acting like a needle point and injuring the patient, and the instrument can also push the ligature away from soft tissues.
Instrument Trolley Review26
Do Not stop here! Go to the Post-Graduate clinic and review the instruments in the orthodontic instrument trolley.
Lecturer — Tray Setup
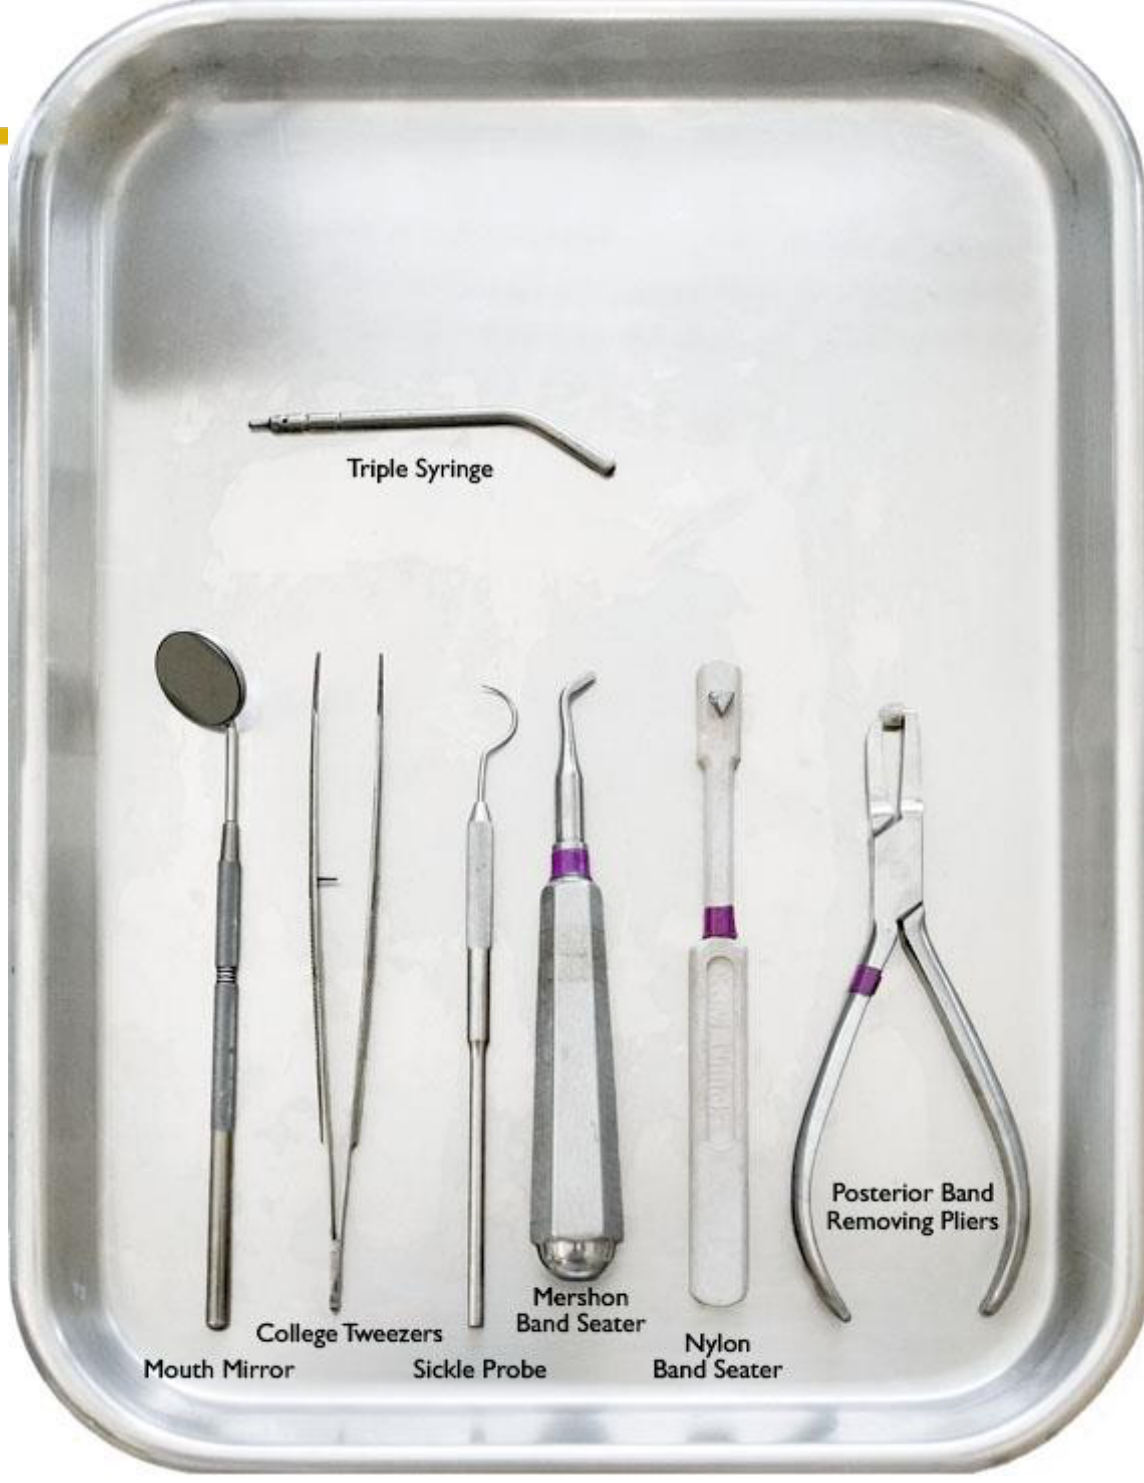
A basic orthodontic adjustment tray may include a mirror, tweezers, probe, band pusher or band seater, Mershon band pusher, Schure scaler and band pusher, and band-removing pliers. Band-removing instruments are needed before a band can be rebonded or recemented.
Clinical Setup Procedures
Band try-in setup performed on bracket.
Band Try In Setup27
- Triple Syringe
- Mouth Mirror
- College Tweezers
- Sickle Probe
- Mershon Band Seater
- Nylon Band Seater
- Posterior Band Removing Pliers
Band Cementation Setup28
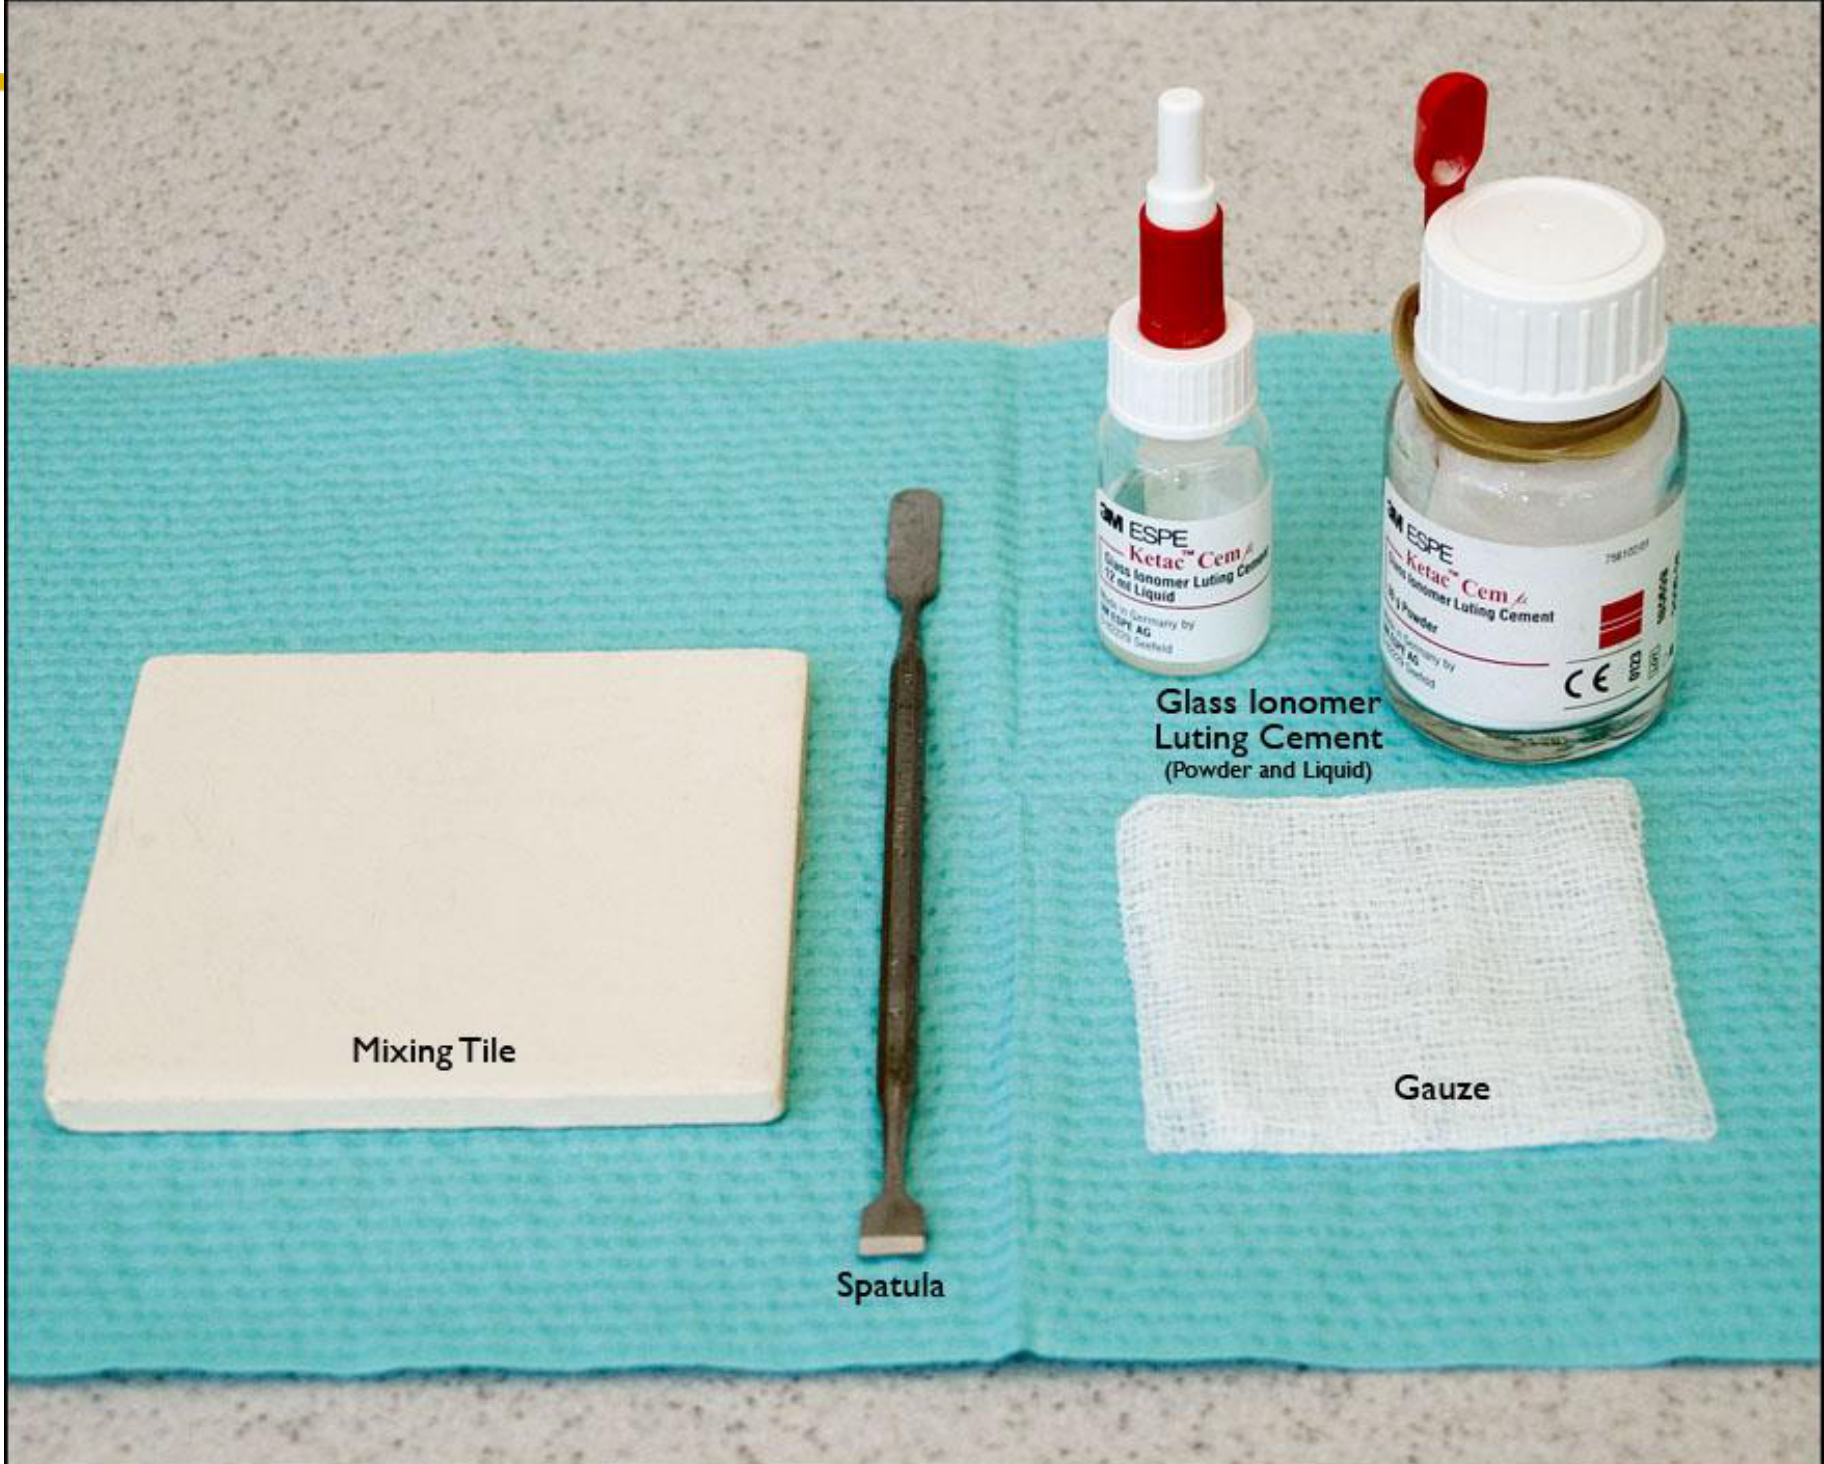
Band cementation setup at the DCA mixing bench.
 |  |
Glass Ionomer Luting Cement (Powder and Liquid)29
- Mixing Tile
- Spatula
- 3M ESPE Ketac™ Cem Glass Ionomer Luting Cement — 12 ml Liquid, made in Germany by 3M ESPE AG, 22203 Seefeld
- 3M ESPE Ketac™ Cem Glass Ionomer Luting Cement — 5 g Powder, made in Germany by 3M ESPE AG, 22203 Seefeld
- Gauze
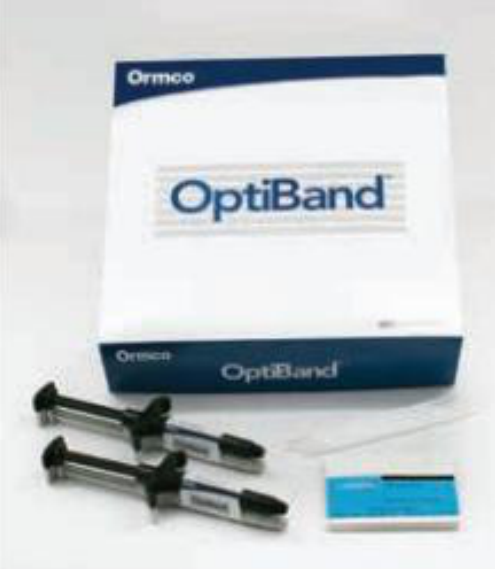
OPTIBAND™ Band Cement30
OptiBand is a resin-based band cement formulated in a two-paste dual syringe system that eliminates messy powder and liquid mixing. With a consistent mix every time, OptiBand delivers reliable band cementation and the dual cure feature also gives you the choice of light curing or self-curing.
Lecturer — Band Cementation
Self-curing materials provide limited manipulation time, which has encouraged a move toward light-cured materials.
- Moisture control remains important during cementation.
- A rubber dam is not required; cotton rolls can be used to control the field.
Ormco OptiBand
 | 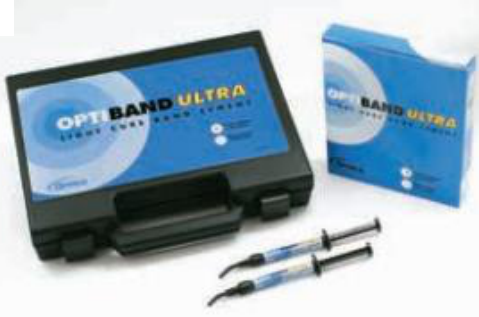 |
OPTIBAND™ ULTRA — Single-Paste, Light-Cure Band Cement
OptiBand Ultra is the ideal choice for reliable and convenient banding.
Lecturer — Band Cement Loading
OptiBand Ultra should be loaded into the cervical portion of the band so that it flows toward the occlusal portion of the molar when the band is seated.
- Excess cement should be removed carefully before light curing.
- If cement enters the tube or bracket slot and is light cured there, the tube may become blocked.
- Less experienced operators can use wax to protect the tube before light curing.
- Correct moisture control remains important.
- Quick-Setting, Single-Paste, Light-Cure Formula means no more mixing and no more mess
- Disposable Tips allow direct application directly into the band for no waste and reduced risk of cross-contamination
- Optional blue color helps make cleanup of excess adhesive easier at both banding and debanding appointments
https://ormco.com/download/ormco-catalog
Lecturer — Band Height
The band seater is used to place the band at the correct height, and the Boone gauge confirms the height of the band and tube.
- If the band or tube is positioned too high, the molar may be extruded.
- This can contribute to an anterior open bite.
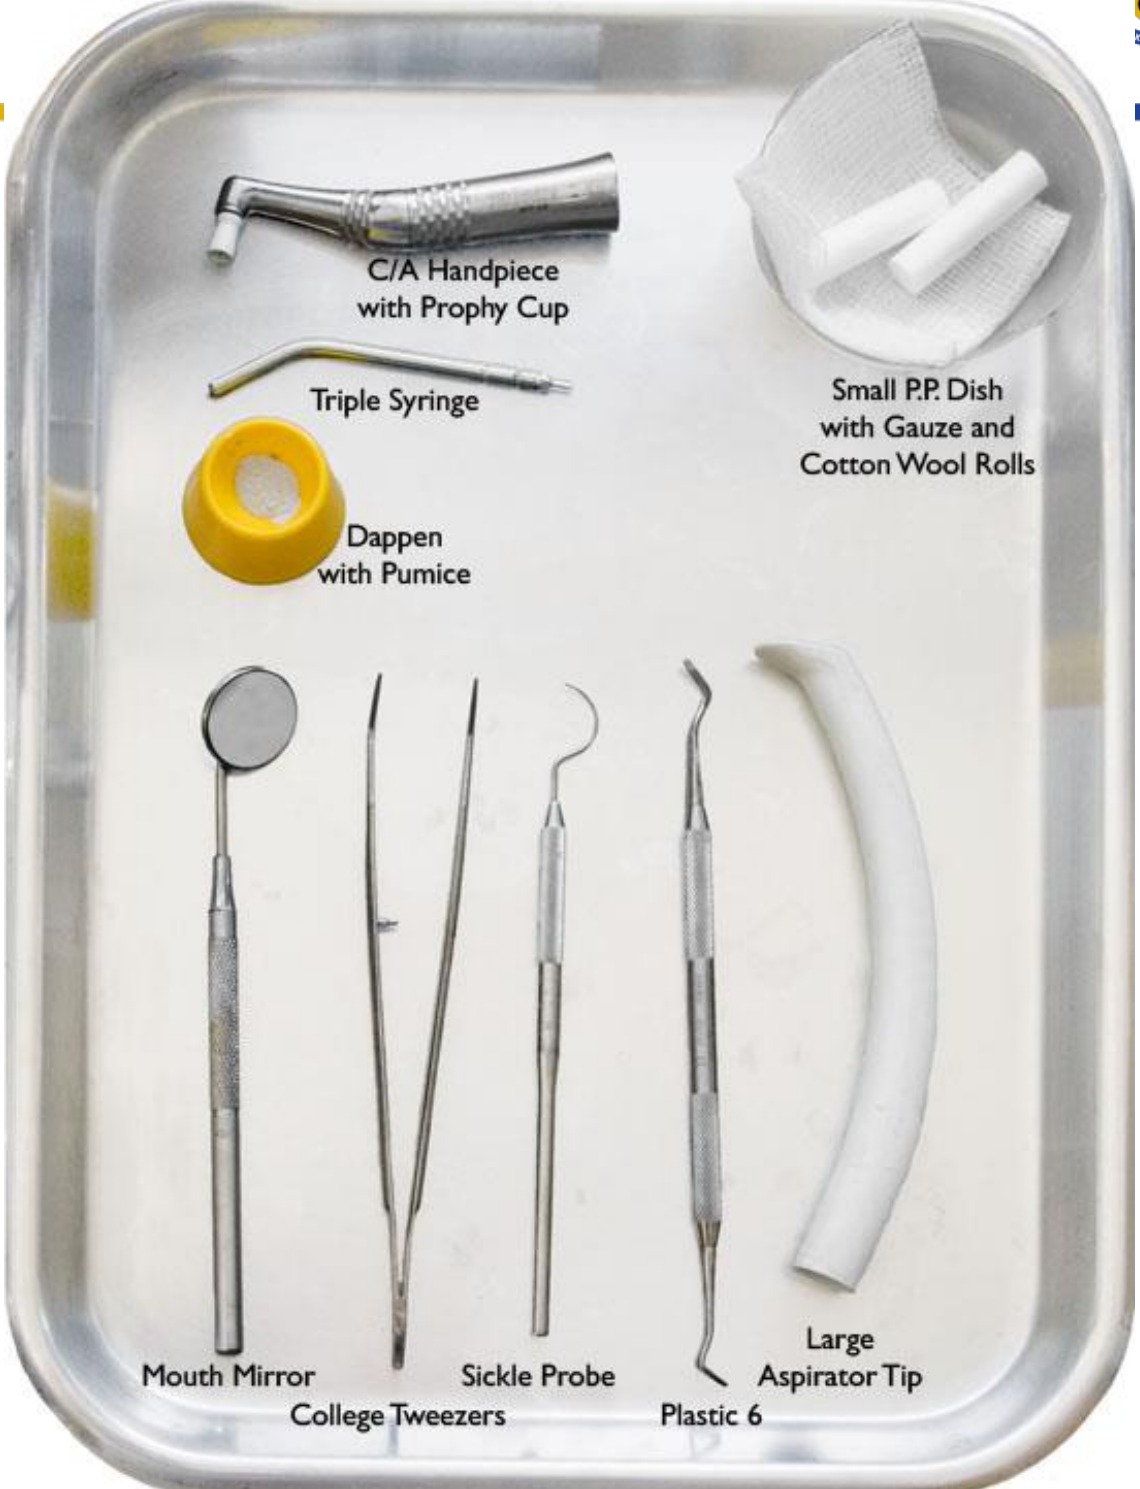
- C/A Handpiece with Prophy Cup
- Triple Syringe
- Small P.P. Dish with Gauze and Cotton Wool Rolls
- Dappen with Pumice
- Mouth Mirror
- College Tweezers
- Sickle Probe
- Plastic 6
- Large Aspirator Tip
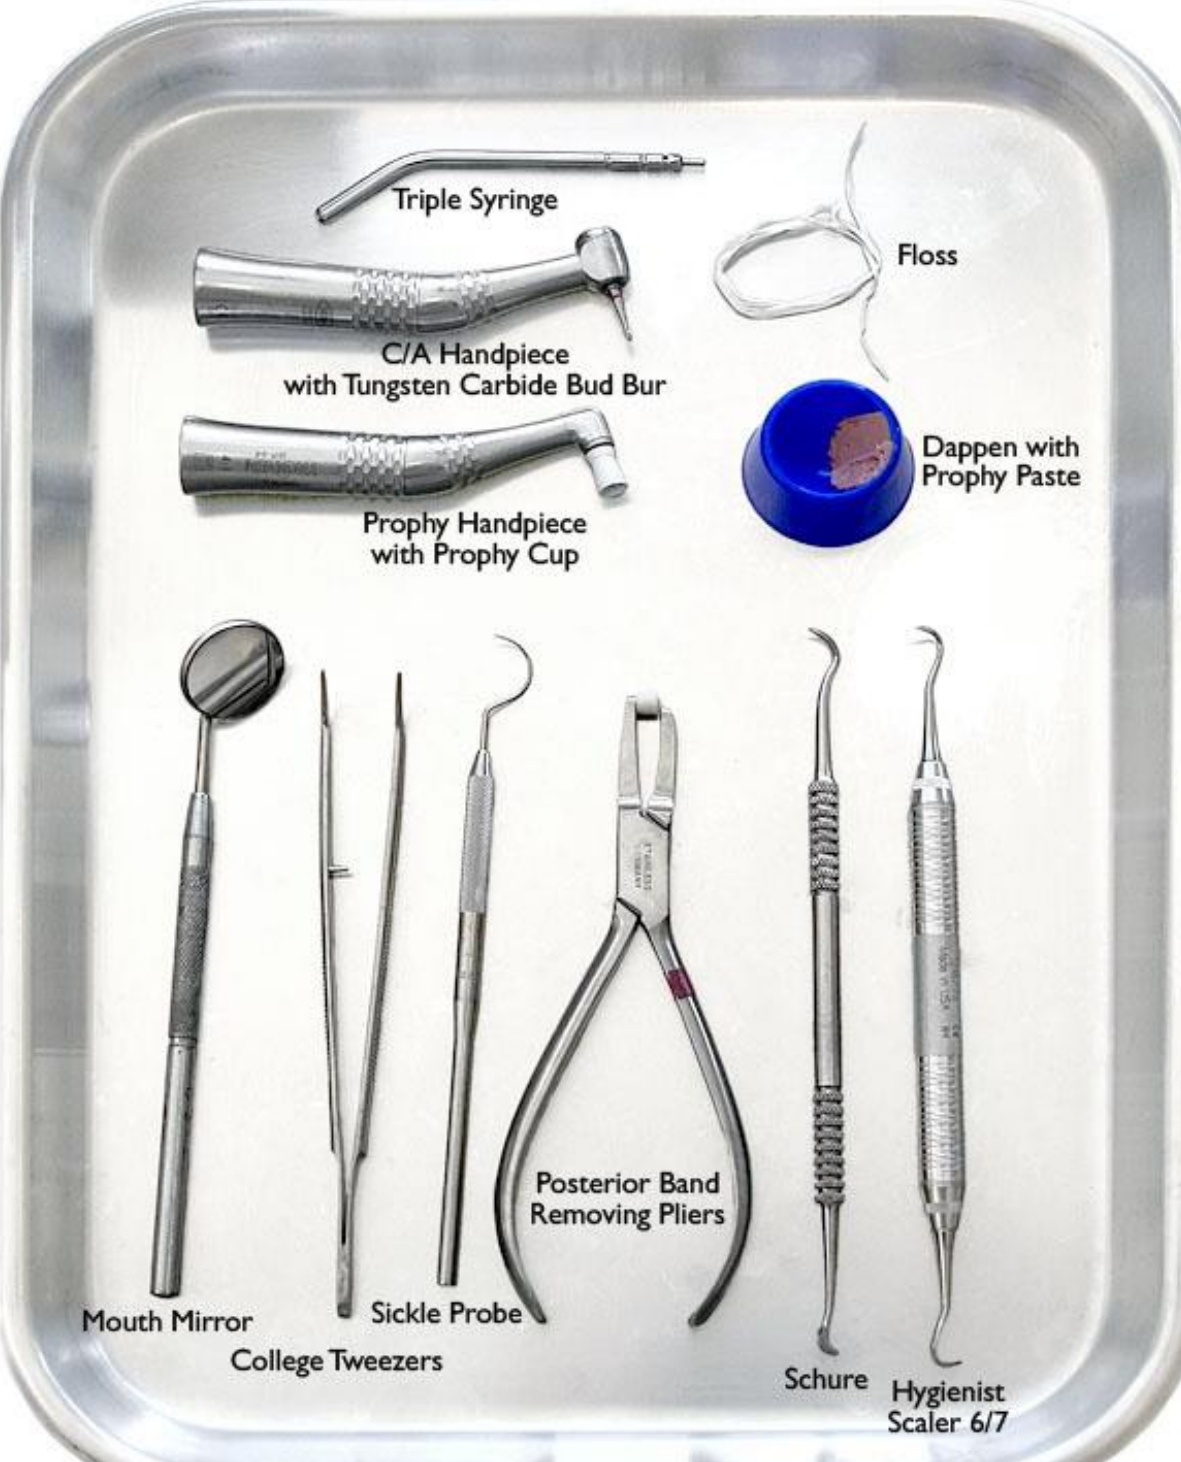
Deband Setup31
-
Triple Syringe
-
Floss
-
C/A Handpiece with Tungsten Carbide Bud Bur
-
Dappen with Prophy Paste
-
Prophy Handpiece with Prophy Cup
-
Mouth Mirror
-
College Tweezers
-
Sickle Probe
-
Posterior Band Removing Pliers
-
Schure Hygienist Scaler 6/7
-
Boone gauge is used to check the height of the tube or band.
-
The band seater allows the patient to bite down while the band is pushed into position.
Orthodontic Emergencies
Most Orthodontists would prefer to complete their own repairs for their patients.
When To Refer Repairs32
Sometimes this is not logistically possible:
- After hours
- Distance from clinic
- Patient has moved
Lecturer — Referral Responsibility
General dentists may provide temporary management for simple emergencies, such as cutting or bending a wire.
- Patients should generally contact the treating orthodontist when the problem involves long-term bracket displacement, periodontal inflammation, dental trauma or a broken retainer.
- The treating orthodontist remains responsible for assessing issues that may affect tooth movement, occlusion or the treatment plan.
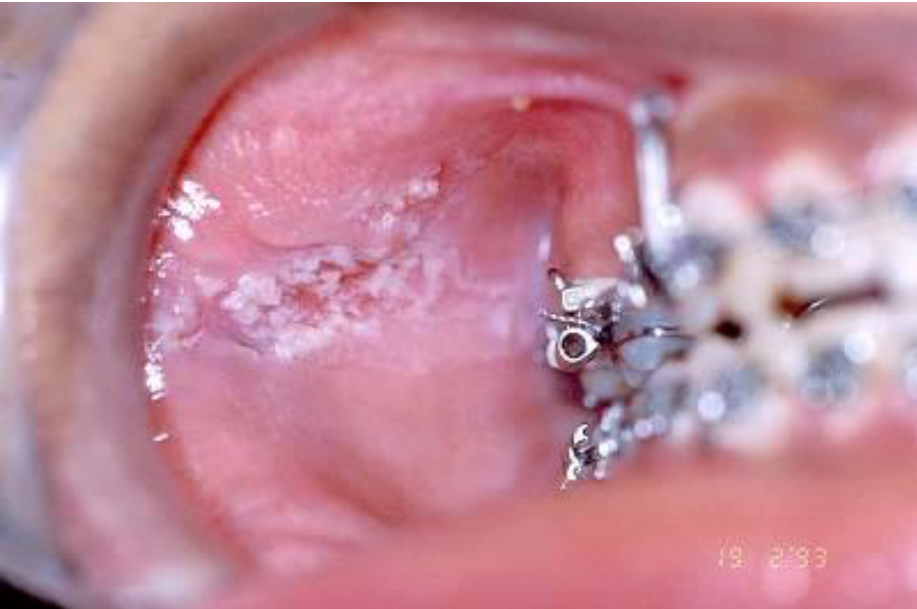
Protruding Wire Or Hook33
Most commonly the treatment is to trim, cut away or polish offending wire. Occasionally a hook on a band or wire or loop on a wire will need an adjustment to reduce the soft tissue irritation.
Lecturer — Wire Irritation
Protruding wires commonly become problematic during alignment and leveling as the posterior end extends and traumatizes the soft tissues.
- A steel ligature can form a sharp spur if it is not tucked beneath the arch wire or protected by the tube.
- Temporary management includes bending or tucking the wire or ligature away from the tissue and applying wax when it will retain.
- Although the adjustment may take only a few seconds, the pain can be significant, so the orthodontic office should make space for urgent appointments.
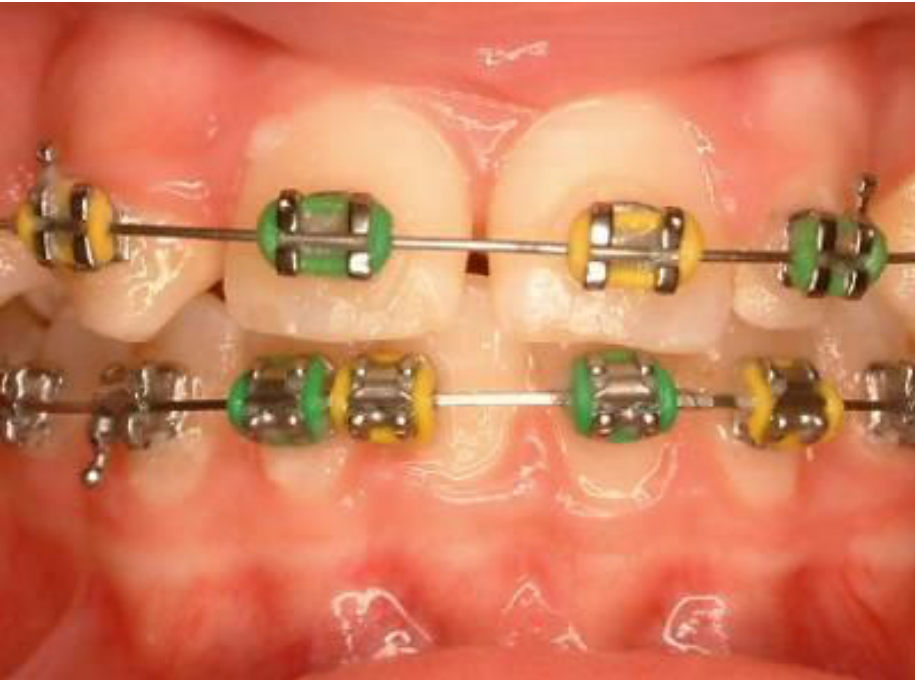
Debonded Bracket And Loose Band34
- Debonded Bracket
- Loose Band
- Broken Wire
- Wire out of Tube
Lecturer — Bracket Delays
A debonded bracket may remain attached to the arch wire by its elastic O-ring, but a prolonged delay can cause the tooth to fall behind as the rest of the arch aligns.
- After two or three months, the rectangular wire may no longer engage the bracket slot.
- Treatment may need to return to a thinner or round wire, with at least two additional appointments required.
- A loose band requires removal, management of the area and recementation at the correct height.
Most Orthodontists would prefer to complete their own repairs for their patients.
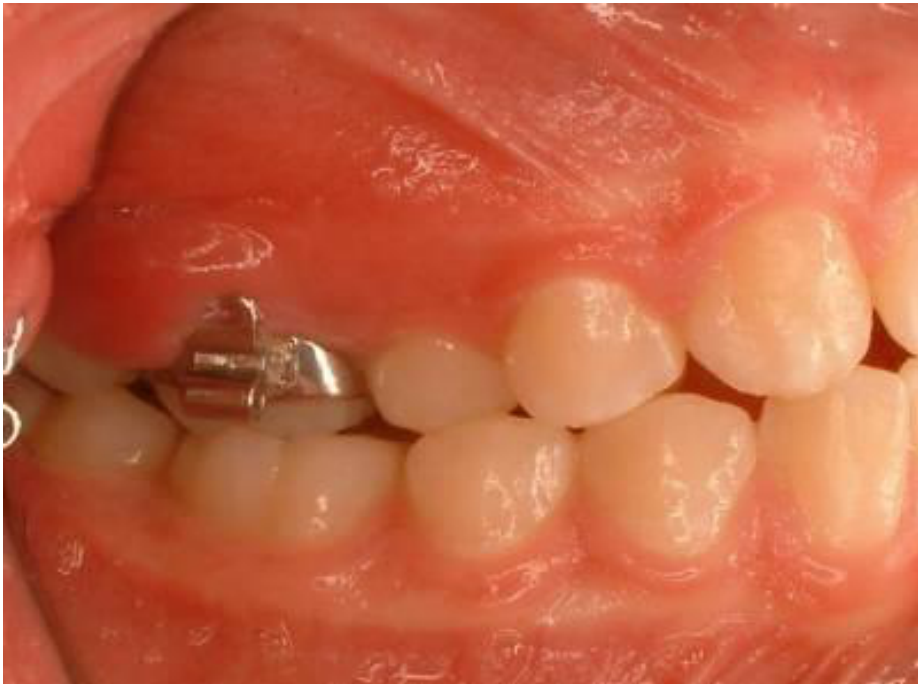
Periodontal Inflammation And Abscess35
- Periodontal Inflammation
- Periodontal Abscess
Treatment: Air water spray debridement and scale and clean as required and usually requires removal of offending bracket or band. Savocol rinses 3 times per day for no less than 1 minute.
Occasionally antibiotic coverage — extremely rarely required.
Lecturer — Periodontal Progression
Periodontal inflammation around an orthodontic appliance is usually a long-term problem with earlier signs such as red or puffy tissue around the band or bracket.
- Poor hygiene can cause tissue to grow over or around a band or hook, and progression may lead to bone loss and an abscess.
- If a molar band must be removed, a bondable tube may be considered, although severe inflammation or poor hygiene can prevent placement or increase the risk of breakage.
- Management may involve band removal, chlorhexidine treatment, improved oral hygiene and approximately two to four weeks for the inflammation to settle.
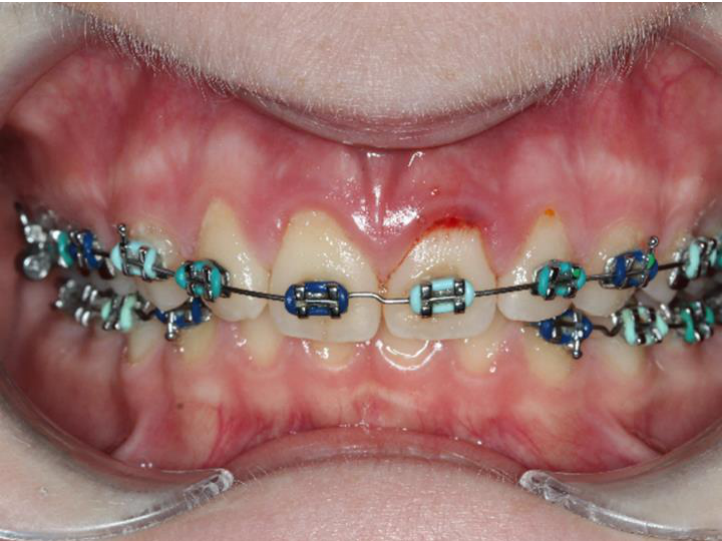
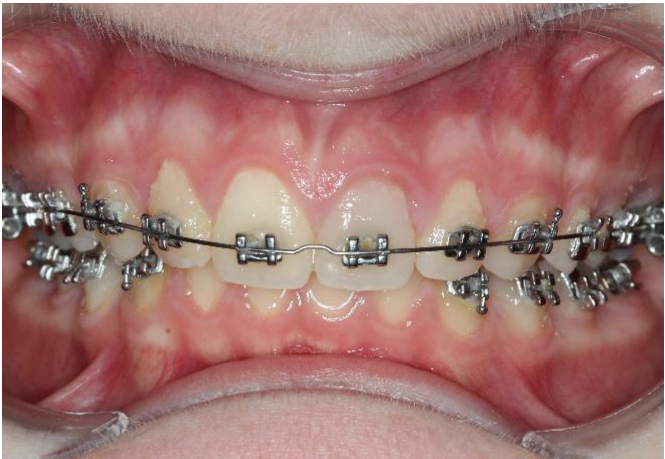
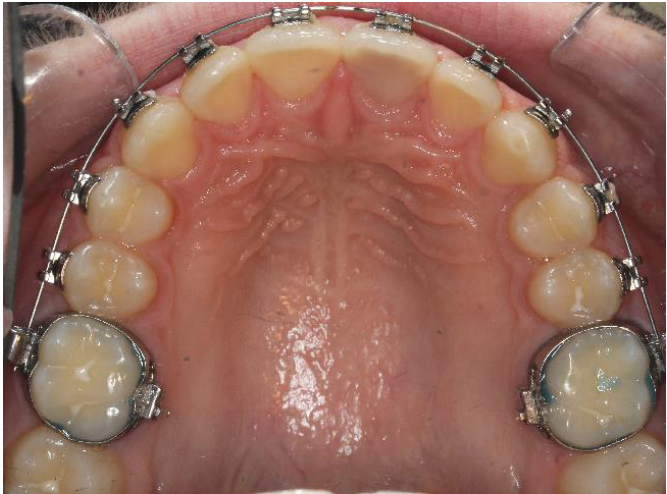
Dental Trauma36
Orthodontic patients have a ready made splint — we only need to re-bond any de-bonded brackets and change to a very light NiTi wire to construct a splint.
Lecturer — Trauma Management
After dental trauma, the arch wire should be kept passive rather than activated.
- Treatment activation should generally stop for approximately three months while the injury is monitored.
- Follow-up should assess the prognosis and whether root resorption develops, with endodontic involvement when required.
- Mouth guards are important because brackets can cause substantial soft-tissue injury and bleeding during an impact.
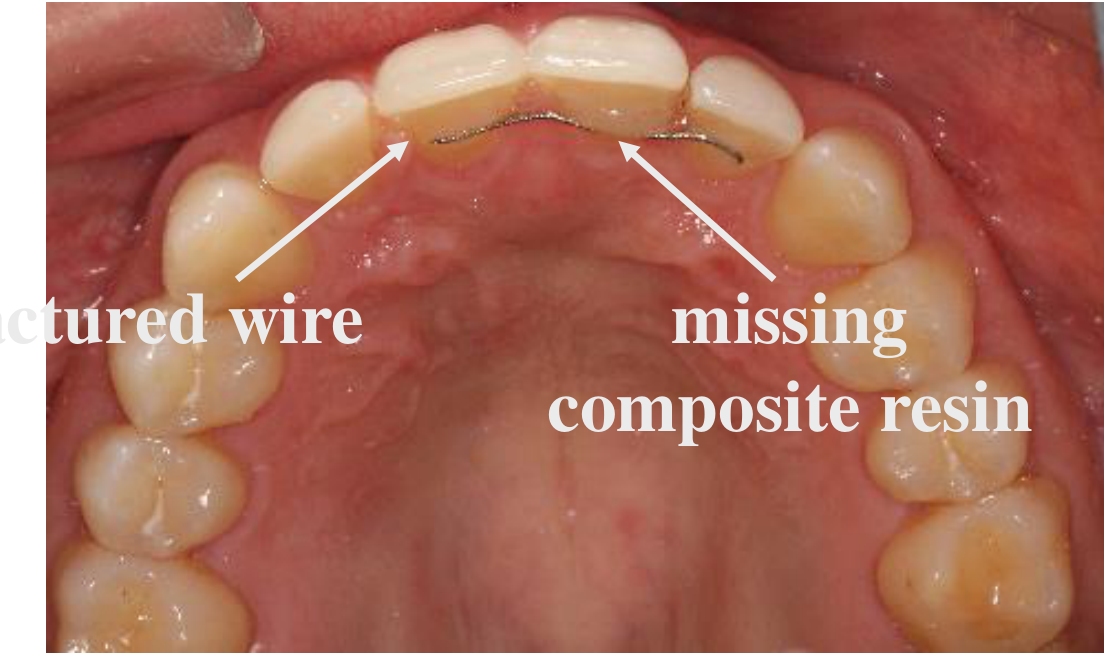
Debonded Lingual Or Palatal Retainer37
- Fractured wire
- Missing composite resin
Lecturer — Retainer Failure
A lingual or palatal retainer may break because of occlusal contact, such as a lower canine contacting the anterior retainer or its edge being bitten during function.
- Management commonly involves removing the broken retainer, scanning the teeth, sending the scan to the laboratory and rebonding the replacement.
- Rebonding requires assessment of the current occlusion, possible interferences and tooth movement during the period of failure.
- Stabilizing a rotated tooth in a traumatic position may contribute to further problems, including recession.
Most Orthodontists would prefer to complete their own repairs for their patients even many years after treatment.
Closing And Contact38
Thank you to Associate Professor Mike Razza
Questions???
Come find me in clinic or email Richard.lee@uwa.edu.au
Clinical Cases
Case: Protruding ligature wire causing soft tissue irritation
Question
Scenario: An orthodontic emergency is presented where a patient experiences significant discomfort due to a component of their fixed appliance.
What’s shown: A clinical exhibit showing a ligature wire protruding from the orthodontic tube and archwire, forming a sharp spur.
Consider: What is the mechanism behind this complication, why is it difficult for the patient to manage temporarily, and how should it be treated?
Answer
Observations:
- The ligature wire was tied inside the tube and engaged in the slot, but a portion of the tie is protruding outward like a spur.
- Orthodontic wax cannot adhere to the spur because there is insufficient retention.
Reasoning: When tying the wire and engaging it in the slot, the tie can come out like a spur if it is not bent underneath the wire or protected by the tube. This creates a sharp point that irritates the patient. Because the spur lacks retention, the patient’s attempt to use wax for relief fails, making it a significant emergency despite being a simple fix for the clinician.
Outcome: The clinician must bend the protruding wire down to a location that will not injure the patient. If the patient cannot immediately reach their orthodontist, wax can be provided temporarily. The patient should be seen as an emergency to resolve the issue.
Takeaway: Always ensure the ligature wire is tucked underneath the archwire or protected by the tube during engagement to prevent it from forming a painful spur.
Case: Broken orthodontic bracket remaining on the archwire
Question
Scenario: A patient presents with a broken bracket that has debonded from the tooth but remains attached to the archwire.
What’s shown: A clinical exhibit showing a bracket that has slid out of its correct position. It is no longer bonded to the tooth but is still held in place by the archwire and a yellow O-ring.
Consider: How does the duration of time since the breakage influence the clinical management and the overall treatment timeline?
Answer
Observations:
- The bracket is no longer bonded to the tooth surface.
- It remains suspended on the archwire, held in place by the O-ring.
Reasoning: If the patient is seen within a short timeframe (e.g., four weeks), the other teeth have not significantly changed, and the bracket can simply be rebonded in about seven minutes. However, if the patient delays presentation for a long period (e.g., two to three months), the adjacent teeth will have aligned and leveled, leaving the affected tooth behind. When attempting to rebond the bracket after this delay, the current archwire will no longer be able to engage the slot because the tooth’s position has lagged.
Outcome: A short-term breakage takes about five minutes to fix. A long-term breakage requires stepping back to a thinner, round archwire to realign the tooth, which wastes time and adds at least two months to the overall treatment duration.
Takeaway: Prompt repair of broken brackets is essential, as delayed presentation forces a regression in the archwire sequence and significantly prolongs orthodontic treatment.
Case: Retainer breakage, clinical photograph
Question
Scenario: A patient presents with an emergency regarding a broken orthodontic retainer.
What’s shown: A clinical photograph showing the lingual aspect of the anterior teeth with a wire retainer where the connection between the lateral incisors is separated.
Consider: What is the likely cause of this breakage, and how should it be managed?
Answer
Observations:
- The retainer wire is broken, not just debonded; the connection between both lateral incisors is separated.
- The breakage is likely due to occlusal interference, where the anterior edge of the lower canines bites against the retainer.
Reasoning:
- Because the retainer is fractured and occlusal changes may have occurred while it was broken, simply rebonding it is insufficient.
- The occlusion must be checked for any interference or changes (such as rotation of a lateral incisor causing trauma) before replacing the retainer, as stabilizing a traumatized position could lead to recession over time.
Outcome:
- The broken retainer is removed.
- A scan is taken and sent to the lab to prepare a new retainer.
- The patient is referred back to the original orthodontist to manage the repair and check the occlusion, as it remains their responsibility.
Takeaway:
- When managing a broken retainer, it is crucial to check for occlusal changes and interference before replacing it, and the original orthodontist should ideally handle the repair to ensure proper occlusal assessment.
Case: Dental trauma in a patient with fixed appliances (21 Days Later series)
Question
Scenario: An orthodontic patient with fixed appliances presents after dental trauma; the slide follows the patient to “21 Days Later”.
Consider: How can the patient’s fixed appliance be used to manage the injury, and how should the archwire and treatment be handled afterwards?
Answer
- Orthodontic patients have a ready made splint — we only need to re-bond any de-bonded brackets and change to a very light NiTi wire to construct a splint.
- After dental trauma, the arch wire should be kept passive rather than activated.
- Treatment activation should generally stop for approximately three months while the injury is monitored.
- Follow-up should assess the prognosis and whether root resorption develops, with endodontic involvement when required.
From the lecture slides
21 Days Later
 |  |
 |
Footnotes
-
Original PDF page 1: L7 Orthodontic Instruments and Emergencies, p.1 ↩
-
Original PDF page 2: L7 Orthodontic Instruments and Emergencies, p.2 ↩
-
Original PDF page 3: L7 Orthodontic Instruments and Emergencies, p.3 ↩
-
Original PDF page 4: L7 Orthodontic Instruments and Emergencies, p.4 ↩
-
Original PDF page 5: L7 Orthodontic Instruments and Emergencies, p.5 ↩
-
Original PDF page 6: L7 Orthodontic Instruments and Emergencies, p.6 ↩
-
Original PDF page 7: L7 Orthodontic Instruments and Emergencies, p.7 ↩
-
Original PDF page 8: L7 Orthodontic Instruments and Emergencies, p.8 ↩
-
Original PDF page 9: L7 Orthodontic Instruments and Emergencies, p.9 ↩
-
Original PDF page 10: L7 Orthodontic Instruments and Emergencies, p.10 ↩
-
Original PDF page 11: L7 Orthodontic Instruments and Emergencies, p.11 ↩
-
Original PDF page 12: L7 Orthodontic Instruments and Emergencies, p.12 ↩
-
Original PDF page 13: L7 Orthodontic Instruments and Emergencies, p.13 ↩
-
Original PDF page 14: L7 Orthodontic Instruments and Emergencies, p.14 ↩
-
Original PDF page 15: L7 Orthodontic Instruments and Emergencies, p.15 ↩
-
Original PDF page 16: L7 Orthodontic Instruments and Emergencies, p.16 ↩
-
Original PDF page 17: L7 Orthodontic Instruments and Emergencies, p.17 ↩
-
Original PDF page 18: L7 Orthodontic Instruments and Emergencies, p.18 ↩
-
Original PDF page 19: L7 Orthodontic Instruments and Emergencies, p.19 ↩
-
Original PDF page 20: L7 Orthodontic Instruments and Emergencies, p.20 ↩
-
Original PDF page 21: L7 Orthodontic Instruments and Emergencies, p.21 ↩
-
Original PDF page 22: L7 Orthodontic Instruments and Emergencies, p.22 ↩
-
Original PDF page 23: L7 Orthodontic Instruments and Emergencies, p.23 ↩
-
Original PDF page 24: L7 Orthodontic Instruments and Emergencies, p.24 ↩
-
Original PDF page 25: L7 Orthodontic Instruments and Emergencies, p.25 ↩
-
Original PDF page 26: L7 Orthodontic Instruments and Emergencies, p.26 ↩
-
Original PDF page 27: L7 Orthodontic Instruments and Emergencies, p.27 ↩
-
Original PDF page 30: L7 Orthodontic Instruments and Emergencies, p.30 ↩
-
Original PDF page 28: L7 Orthodontic Instruments and Emergencies, p.28 ↩
-
Original PDF page 29: L7 Orthodontic Instruments and Emergencies, p.29 ↩
-
Original PDF page 31: L7 Orthodontic Instruments and Emergencies, p.31 ↩
-
Original PDF page 32: L7 Orthodontic Instruments and Emergencies, p.32 ↩
-
Original PDF page 33: L7 Orthodontic Instruments and Emergencies, p.33 ↩
-
Original PDF page 34: L7 Orthodontic Instruments and Emergencies, p.34 ↩
-
Original PDF page 35: L7 Orthodontic Instruments and Emergencies, p.35 ↩
-
Original PDF page 36: L7 Orthodontic Instruments and Emergencies, p.36 ↩
-
Original PDF page 37: L7 Orthodontic Instruments and Emergencies, p.37 ↩
-
Original PDF page 38: L7 Orthodontic Instruments and Emergencies, p.38 ↩