Full-Metal Crown Template
Chairside Form 26 sheet for a full gold (full-metal) crown on [tooth __]. Posterior only — the OCHWA Crown Reduction Guidelines list the metal crown as a posterior restoration, and the vault’s one surviving full-gold contraindication is high aesthetic need, so this sheet has no anterior pathway. Material selection, the cement comparison and the impression comparison live on Crown Template and are not repeated here.
Two signatures required
Form 26 = reconstructive phase. You need 2 signatures — prosth specialist AND clinic coordinators. No aesthetic work on this form.
Design & material
Margin design: chamfer. Round-tipped tapered diamond. Conserves tooth structure, gives a distinct finish line the lab can read, and provides sufficient bulk for the metal without the aggressive reduction a ceramic shoulder needs (F1 FullMetalCrowns — “margin: chamfer > 0.5 mm”). No feather edge — contraindicated in most cases, inadequate marginal bulk and an indistinct finish line.
Taper. Total occlusal convergence 6–12° (TOC = 2 × taper; ideal taper 6°, clinically acceptable 6–20°; tapered burs cut about 3° per wall). The shorter the axial walls, the more parallel they must be (F5 Principles of tooth prep).
| Surface | Prepare to (OCHWA, posterior) |
|---|---|
| Occlusal — functional cusp | 1.5 mm |
| Occlusal — non-functional cusp | 1.0 mm |
| Axial | 1.0 mm, in two planes buccally and lingually |
| Margin | Chamfer 0.5–1 mm |
| Total occlusal convergence | 6–12° |
Functional (supporting) cusps = maxillary palatal, mandibular buccal — these take the deeper reduction and the functional cusp bevel. Non-functional (guiding) cusps = maxillary buccal, mandibular lingual.
Why gold is the pick here. This is the most conservative prep of the four materials: 1.0–1.5 mm occlusal against about 2.0 mm for ceramics, which is what preserves axial wall height on an already-short clinical crown and keeps retention and resistance form achievable (F1 FullMetalCrowns). It is also the best of the four for a heavy bruxer — cast gold wears at a rate similar to enamel and does not chip.
Margin placement. Supragingival wherever possible. If subgingival, intracrevicular only, maximum about 0.7 mm: sulcus 1.5 mm or less, go 0.5 mm below the gingival crest; sulcus over 1.5 mm, go half the probing depth; sulcus over 2 mm, consider gingivectomy to design a 1.5 mm sulcus. Biologic width is about 2–2.25 mm, and a margin within 2 mm of crestal bone causes inflammation then bone loss. If you plan to scan rather than impress, decide before you prep — beyond 0.5–1.0 mm subgingival a conventional impression is more reliable.
Appointment 1 — Prep and impression
Pre-operative. LA is required even on an endodontically treated tooth, for soft-tissue manipulation comfort. Take the opposing arch alginate while the anaesthetic takes effect. Take two silicone putty indices: one kept intact for the provisional, one sectioned buccolingually as a reduction guide.
Prep sequence (F1.1 Full Gold Crown Preparation Steps — the vault’s most complete): 1. putty index, 2. occlusal reduction, 3. buccal and lingual axial reduction, 4. interproximal reduction, 5. finishing, 6. auxiliary retentive features.
- Occlusal. Depth grooves with a 1 mm diameter diamond at the highest points (triangular ridges) and the lowest points (developmental grooves), following the anatomy — 1.5 mm on the functional cusp, 1.0 mm on the non-functional cusp. Their accuracy is critical, as they guide the entire occlusal reduction. Reduce half the occlusal surface, then use the other half as a guide. Adjust handpiece angulation on the inclines; the bur will not sit flat on all of them.
- The 80%-then-finish rule. Gross-reduce to about 80% of the final depth (0.8 mm for a 1.0 mm target), leaving the final 0.2 mm for the finishing step.
- Functional cusp bevel. Cut on the palatal cusps of uppers and the buccal cusps of lowers, following the incline of the opposing cusp, to give extra metal thickness in this high-stress area.
- Lingual axial, two planes. Occlusal third (supporting cusp) 1.5 mm; gingival two-thirds 1.0 mm with a 0.5 mm margin, parallel to the long axis. Place five vertical depth grooves (the lecturer’s preference over the textbook’s three) and connect them.
- Buccal axial, two planes. Occlusal two-thirds (non-supporting cusp) 1.0 mm; gingival third 1.0 mm, parallel to the long axis.
- Path of insertion parallel to the long axis of the tooth, not the clinical crown — mandibular molars are lingually tilted.
- Interproximal. Narrow tapered or needle bur with matrix-band protection. Favour occlusal reduction when cutting through the marginal ridge — it increases visibility of the bur tip and the contact area. Follow the natural interproximal curvature; do not cut a flat slice.
- Finishing. Fine-grit diamond (red or yellow band) or carbide, slow speed if it helps. Round all line angles. Avoid gutter margins — do not cut with the bur tip; approach from the side and plane the tooth down to the finish line.
- Auxiliary retention, short clinical crowns only. Vertical grooves or boxes 1 mm deep, 1 mm above the margin, mid-buccal, parallel to the path of insertion. F5 Principles of tooth prep cautions these are difficult to prepare without undercuts and are not generally recommended unless absolutely necessary.
 |  | 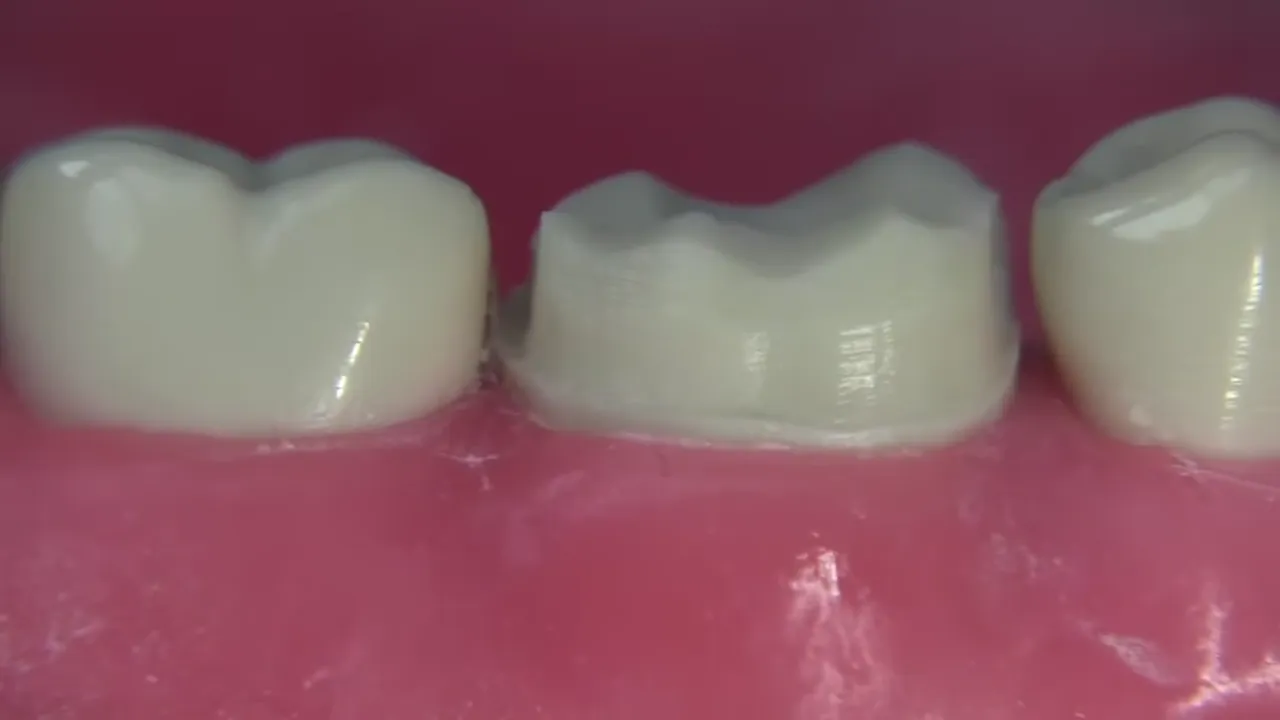 |
| Reduction per cusp, opposing teeth in section: 1.5 mm functional cusp, 1.0 mm non-functional, 1.0 mm axial, 0.5 mm chamfer — these are the OCHWA figures (F1 FullMetalCrowns, slide 6). | Finished prep, four views: buccal, occlusal, distal and mesial. Note the chamfer running right around, the preserved cuspal anatomy and the two-plane axial silhouette on the D and M views (F1 FullMetalCrowns, slide 28). | The same prep on a lower molar, buccal view — functional cusp bevel and a smooth continuous chamfer just above the gingiva. |
Prep check, before you go near the impression.
- Undercuts. View from directly above the occlusal with one eye closed — every part of the margin must be visible. “If both eyes are open when the preparation is viewed, undercuts may remain undetected.” In the mouth, view through the mouth mirror with one eye; on a cast, all margins visible at 30 cm.
- Over-taper. From the occlusal you should see only a small, uniform amount of axial wall. A large amount of visible axial wall means over-tapered. Judge mesiodistal taper from the buccal or lingual, and buccolingual taper from the mesial or distal in a mirror.
- Clearance. Check across the whole surface with the sectioned putty index, in centric and excursion.
- Margin. Run an explorer or periodontal probe — smooth, continuous, no ledges, no gutter. Keep occlusal contacts off the margin.
Then, in order: fabricate the provisional in the intact putty key before the impression (Luxatemp or Protemp), pack double cord (thin 000 or 00 stays in, larger 0 or 1 comes out just before injecting, both wet in astringent), take a dual-phase PVS with light body on the margins and heavy body in the tray (top cord out first, seat back to front), inspect it (all margins clear, 3–4 mm recorded beyond the margin, no bubbles, drags or tray showing through), take the Regisil bite registration at MIP for a conformative case, cement the provisional with TempoCem and check the occlusion, give post-op advice (the temp is weak — avoid sticky and hard foods, floss out sideways), then dispatch.
No shade step
Gold has no shade. Nothing to take, nothing to send. The lab slip needs the material and the design, not a Vita tab.
+1.5 — On receiving labwork (before Appt 2)
- Die and opposing model — check for pouring defects, over-trimming, fracture and wear.
- Internal surface — no blebs, contact on the die at the margins only, and slightly loose because of the die spacer rather than friction-tight.
- Margins — no open margins, no overhangs, no underextensions.
- External surface — contour and finish as requested; check the occlusion on the articulator.
- Confirm the lab sandblasted the intaglio, and confirm the Panavia kit is complete (Alloy Primer, ED PRIMER II, OXYGUARD II). Kit completeness is not documented anywhere in the vault.
Appointment 2 — Try-in and cementation
Try-in. LA if needed. Remove the provisional by wiggling it; section it buccolingually if retentive. Clean the cement off with ultrasonic and pumice. Seat in order — proximal contact, then internal fit, then marginal fit. Assess stability, then contour, then occlusion — 8 micron shim stock, blue for centric and red for eccentric. Patient approval before cementing.
Cement: Panavia F 2.0 + Alloy Primer
- Sandblast the metal intaglio, wash and dry. Usually lab-done — confirm it was.
- Apply ALLOY PRIMER to the internal surface of the precious-metal restoration.
- Mix equal amounts of ED PRIMER II A and B and apply to the TOOTH. Wait 30 seconds.
- Gently air dry.
- Dispense equal amounts of Paste A and B.
- Mix for 20 seconds.
- Apply the mixed paste inside the crown. Seat.
- Remove excess. For easy clean-up, partially light-cure the excess for 2–3 seconds, then remove it.
- Cure the margins, one of two ways: light cure 20 seconds per surface (conventional halogen or LED), or 5 seconds per surface with a plasma arc or fast halogen; or self cure — apply OXYGUARD II to the margins and wait 3 minutes.
- Post-cementation bitewing for subgingival cement remnants. Recheck the occlusion, re-polish anything adjusted, and give OHI and crown-care advice.
The ED PRIMER II trap
ED PRIMER II goes on the TOOTH, and it initiates the set of the cement. The mixed paste goes inside the crown, never on the tooth. Get this the wrong way round and the cement starts setting on the wrong surface.
Fallback — RelyX Unicem 2. If Alloy Primer is unavailable: self-adhesive, dual cure, setting time about 6 minutes, no separate etch, bond or primer step. Clean the tooth, rinse, dry with 2–3 bursts of air but do not overdry. Dispense into the crown with the standard thick tip (the thin tip is for post spaces). Seat, tack cure, remove all excess, final cure. Its known weakness is the bond to enamel — a selective enamel etch may be beneficial. Confirm the intaglio was sandblasted by the lab.
Where this cement recommendation comes from — read once
No vault source states outright “use cement X for a full gold crown at OCHWA.” The clinic availability list (Coals 3. Definitive (Reconstructive phase treatment)) names RelyX Unicem 2, Panavia F 2.0 and Variolink as the permanent cements, but does not break them down by restoration material. Panavia here is a derivation from three things: Panavia’s own indication line covers “cementation of precious and semi-precious metal crowns”; Heboyan et al. 2023 list resin cement as indicated for full metallic crowns, with retention rated High; and the F7 Cements indication table gives a cast crown no contraindicated cement class at all. 10-MDP is the right chemistry for cast metal, and Alloy Primer is the step that extends it to noble alloys, which do not form the oxide layer base metals do. Zinc phosphate is the textbook answer for full gold, and it is NOT on the OCHWA availability list — do not write it on the form. If a supervisor directs zinc phosphate, that is a clinic-stock question to settle at the chair, not a vault-supported default.
Review (about 1–2 weeks)
- Re-evaluate the occlusion — the patient was numb at insertion.
- Fine-tune the contacts, the shape and the height.
- Check function and gingival health.
Copy-pastable checklist
FULL-METAL (FULL GOLD) CROWN — [tooth __] — POSTERIOR ONLY

APPOINTMENT 1 — Prep and impression
- Give LA, using buccal plus palatal or lingual infiltration, with or without a block. Give it even on an endodontically treated tooth, for soft-tissue comfort.
- Take the opposing alginate while the LA takes effect.
- Take two putty keys. Keep one intact for the temp and section the other buccolingually to use as a reduction guide.
- Reduce the occlusal surface following the cusp and groove anatomy, to 1.5 mm on the functional cusp and 1.0 mm on the non-functional cusp.
- Apply the 80% rule during gross reduction. Cut to about 80% of the target depth and leave the last fraction for finishing.
- Cut the functional cusp bevel on the palatal cusps of uppers and the buccal cusps of lowers, following the incline of the opposing cusp. This step is NOT optional.
- Reduce the axial walls to 1.0 mm in TWO PLANES, buccally and lingually, keeping the gingival plane parallel to the long axis of the TOOTH. Aim for a total occlusal convergence of 6 to 12 degrees.
- Finish the margin as a chamfer at 0.5 to 1 mm and round all the line angles.
- Check the prep for undercuts by viewing from directly above with ONE EYE CLOSED. Every part of the margin must be visible.
- Check the clearance with the sectioned putty key across the whole surface, in centric and in excursion, then confirm the margin is smooth and continuous with a probe.
- Fabricate the provisional BEFORE the impression, using Luxatemp or Protemp in the intact putty key.
- Pack double cord. The thin 000 or 00 cord stays in, and the larger 0 or 1 cord is removed just before injecting. Wet the cords in astringent.
- Take a dual-phase PVS impression. Put light body on the margins and heavy body in the tray. Remove the top cord first, then seat back to front.
- Inspect the impression. All margins must be clear, with 3-4 mm recorded beyond the margin, no bubbles or drags, and no tray showing through.
- Take the bite registration with Regisil, recording at MIP for a conformative case.
- Cement the provisional with TempoCem. Check the occlusion afterwards.
- Give post-op advice. The temp is weak, so the patient should avoid sticky and hard foods, and should floss out sideways.
- Dispatch to the lab. Send the impression, the opposing model, the bite registration, the lab slip, and the material, which is full cast gold. There is NO SHADE to send, because gold has no shade.

+1.5 LAB CHECK (before Appt 2)
- Check the die and the opposing model for pouring defects, over-trimming, fracture, and wear.
- Check the internal surface. There should be no blebs, it should touch the die at the margins only, and it should be slightly loose because of the die spacer rather than friction-tight.
- Check the margins. There should be no open margins, no overhangs, and no underextensions.
- Check the external surface. The contour and finish should be as requested, and the occlusion should be checked on the articulator.
- Confirm that the lab sandblasted the intaglio, and confirm that the Panavia kit is complete, with Alloy Primer, ED PRIMER II, and OXYGUARD II all present.

APPOINTMENT 2 — Try-in and cementation with Panavia F 2.0
- Give LA if needed. Remove the provisional by wiggling it, and section it from buccal to lingual if it is retentive. Clean off the cement with an ultrasonic scaler and pumice.
- Seat IN ORDER: the proximal contact first, then the internal fit, then the marginal fit.
- Assess the seated crown in order. Check stability, then contour, then occlusion. For occlusion use an 8 micron shim, where blue marks centric and red marks eccentric.
- Get PATIENT APPROVAL before cementing.
- Sandblast the metal intaglio if the lab has not already done it, then wash and dry it.
- Apply ALLOY PRIMER to the internal surface of the crown.
- Mix equal amounts of ED PRIMER II A and B, and apply it to the TOOTH. Wait 30 seconds, then gently air dry. ED PRIMER II initiates the set, so it goes on the tooth and never inside the crown.
- Dispense equal amounts of Paste A and Paste B, and mix them for 20 seconds.
- Apply the mixed paste INSIDE THE CROWN, never on the tooth, then seat the crown.
- Remove the excess. For easier clean-up, partially light-cure the excess for 2-3 seconds first, then remove it.
- Cure the margins in one of two ways. Either light cure for 20 seconds per surface with a conventional halogen or LED light, or 5 seconds per surface with a plasma arc or fast halogen. Otherwise self cure, by applying OXYGUARD II to the margins and waiting 3 minutes.
- If Alloy Primer is unavailable, use RelyX Unicem 2 instead. It is self-adhesive and dual cure, and sets in about 6 minutes. Dry with 2-3 bursts of air but DO NOT OVERDRY, use the thick tip, seat, tack cure, remove all excess, then final cure.
- DO NOT use zinc phosphate. It is the textbook answer for gold, but it is not on the OCHWA availability list.
- Take a post-cementation bitewing to check for subgingival cement.
- Recheck the occlusion, and re-polish any adjusted surfaces.
- Give OHI and crown-care advice.

REVIEW (about 1-2 weeks)
- Re-evaluate the occlusion, because the patient was numb at insertion.
- Fine-tune the contacts, the shape, and the height.
- Check function and gingival health.
Clinical Stages and Authorisation
Each stage requires date, signature, and clinical code (2 signatures — prosth specialist + clinic coordinator).
- DISCUSSION (material, alloy, cement) — date / sign / code:
- FORM 26 signed – CC — date / sign / code:
- PREP and FINAL IMPRESSION — date / sign / code:
- LAB CHECK (die and crown on the model) — date / sign / code:
- INSERTION (cementation) — date / sign / code:
Authorisation
- Procedure Outline Authorised by:
- Clinician ID:
- Date: