Try-In12
Trial Insertion of Indirect Restorations
This section covers the clinical process and considerations for the trial insertion (try-in) of indirect dental restorations.
Special thanks to Dr. Matsubara for the contributions to this material.
The Critical Checkpoint
Once a crown or fixed partial denture (FPD) is cemented with permanent cement, there is no quick "undo" button for large modifications. Failure to properly evaluate the restoration before cementation risks debonding, recurrent caries, and patient dissatisfaction.
Learning Outcomes3
Upon completion of this module, students should be able to:
- Understand the features of an ideal fixed indirect restoration.
- Discuss the steps of a systematic try-in for indirect fixed restorations.
- Describe the necessary adjustments in the restoration before its cementation.
- Know how to assess the seating of a crown/bridge on the prepared tooth.
- Describe the steps of an occlusal adjustment.
Reading4
Recommended Literature
-
Crowns and other extra-coronal restorations: Try-in and cementation of crowns
- Authors: R. W. Wassell, D. Barker, and J. G. Steele
- Publication: *Practice
- This resource is particularly valuable as it covers both single crowns and fixed partial dentures (FPDs), offering guidance applicable to multi-unit restorations.
- Date: 13 July 2002
-
Safety: Warn the patient not to move suddenly to avoid aspiration of the uncemented crown; the assistant should hold the crown with a finger or ball burnisher.
-
Occlude Spray: Provides negative marking (high spots rub off the spray), which is often faster than articulating paper.
-
Adjustment Protocol: Adjust one side at a time and check frequently, as mobile adjacent teeth may affect the opposite contact.
-
CAD/CAM restorations: Modern all-ceramic restorations milled from pre-sintered blocks should theoretically contain no internal inconsistencies.
Timing
Evaluation on the master cast should occur 1–2 working days before the patient appointment to allow for laboratory corrections without wasting chair time.
Try-In Procedure5
An ideal crown should exhibit the following characteristics:
Ideal Crown6
- Easily seated
- Stable
- Accurate occlusal contact
- Adequate proximal contacts
- Accurate marginal fit
- Aesthetic
The evaluation process for seating, fitting, and contact points requires a systematic approach:
- Evaluation of the crown on the die
- Seating the crown on the prepared tooth
- Assessment of the seated crown
Evaluation of Crown on the Die789
Objectives of Die Evaluation
- Detection of fabrication errors (laboratory related) prior to the clinical appointment
- Save critical chair time
- Anticipation of problems before the clinical appointment
- Utilize good lighting and magnification during inspection
- Consult with the dental laboratory in case of identified problems
Visual inspection includes checking various restoration types and mounting methods, such as screw-retained (occlusal screw) components and the manual placement of the crown on the laboratory model.

Assess the Die and Opposing Model1011
Inspect the models for the following defects:
- Poor pouring
- Overtrimming
- Fracture
- Scratches
- Wear
- Over-trimming around proximal surfaces may result in over-contoured crowns.
- Wear on opposing models may indicate artificially high occlusion, necessitating more clinical adjustment.
- Sectioning and pinning: The die should be removable to allow visualization of interproximal margins from all angles.
Verify the integrity of the die and opposing model, checking for:
- Poor pouring
- Overtrimming
- Fracture
- Scratches
- Wear

Internal Surface12
Internal Surface Inspection
- Casting problems: Check for air bubbles.
- Surface irregularities: Identify casting nodules or blebs.
- Seating principles: Ideally, the casting should touch the die at the margins only.
- Die Spacer: Ensure appropriate application to accommodate the cement lute.

Overall Fit and Resistance13
Fit and Resistance
- Check for looseness or excessive gaps.
- Evaluate proximal contact areas.
Marginal Integrity
- Identify open margins.
- Check for overhangs or underextensions.
Laboratory Error Checklist
| Error | Cause | Remedy |
|---|---|---|
| Tight proximal contacts | Imprecise die location or abrasion of stone contact points | Check for die displacement; identify with articulating paper; grind and polish. |
| Casting blebs on fit surface | Air bubbles trapped during investment | Identify under magnification and remove with small round bur. |
| Over-extended margins | Poor impression, trimming, or surplus wax/porcelain | Trim from axial surface and polish; consider returning to lab. |
| Under-extended margins | Poor impression or difficulty identifying finish line | If obvious, have crown remade. Alternatively, retake impression. |
| Damaged dies | Chipped finish line or abrasion from reseating faulty castings | Determine cause of damage. If fit fails after adjusting blebs, return to lab. |
| No die spacer | Technician error or lack of awareness | Results in tight fit; crown may not seat or may ‘lift’ after cementation. |
External Surface
Evaluate the following external characteristics:
- Appearance and restoration design
- Contour
- Shade
- Surface texture (rough vs. polished)
Occlusion on Articulator14
Verify the following on the articulator:
- Centric contacts
- Eccentric contacts
- Interferences
Case Study: Screw-Retained Implant Crown
During a pre-appointment evaluation, a zirconia crown was found not cemented onto its metal abutment. This laboratory oversight was identified and corrected within 24 hours before the patient arrived, highlighting the need to check assembly components.
Case Study: Thin Temporary PMMA Crown
A laboratory-fabricated temporary crown for a cracked tooth was returned with an extremely thin occlusal surface despite 1.5mm reduction. The patient had to be rescheduled as the restoration lacked functional longevity, proving that even temporaries require rigorous evaluation.
Seating the Crown151617
The crown should seat on the prepared tooth without forcing. If resistance is encountered, investigate potential causes.
The crown should seat without forcing. Potential causes for seating failure include:
- Proximal contact issues
- Internal fit discrepancies
- Inaccurate margins or over-extensions
- Retained temporary cements
- Trapped gingival tissue
Troubleshooting Seating Issues
Single Crowns:
- Proximal contacts
- Internal fit
- Inaccurate margins / over-extensions
- Retained temporary cements
- Trapped gingival tissue
Fixed Partial Dentures (FPD):
- All factors listed for single crowns
- Tissue contact under pontics
- Location and shape of connectors

Removal of Provisional Restoration1819
Instruments for Removal
- Excavator, sickle probe
- Hemostat, Backhaus forceps, pliers
Crown Removers
- Back-action crown remover
- Automatic crown remover
- Richwill crown remover
The provisional restoration is removed using tools such as excavators, probes, hemostats, or specialized crown removers (back-action, automatic, or Richwill).
- Gauze and forceps: Apply a gentle rocking motion to break the temporary cement bond.
- Vertical Sectioning: If the preparation is too parallel, section the provisional vertically from buccal to lingual. Ensure cuts only penetrate the temporary material, identified by the white opaque cement layer.
- Cleaning: Use an ultrasonic scaler to remove all residual temporary cement from the prepared tooth.




Proximal Contacts202122
Assessment and Adjustment
- Assess tightness with dental floss; there should be some resistance but not excessive.
- Use articulating paper (20 μm), marking liquid (Accufilm), or sprays (Occlude) to identify contacts.
- Shim stock (8 μm): Should just pass through the contact.
- Perform minor adjustments incrementally.
- Open contacts: If contacts are missing, return the crown to the laboratory for material addition.
(Page intentionally left blank or contains no unique text content)
Contact Location
Proximal contacts should be positioned in the same location as the natural proximal contacts. Use marking media to visualize the contact point on the restoration.
Internal Fit2324
Internal Surface Evaluation
- The restoration must seat completely without interference from occlusal or axial surfaces.
- Detection Methods:
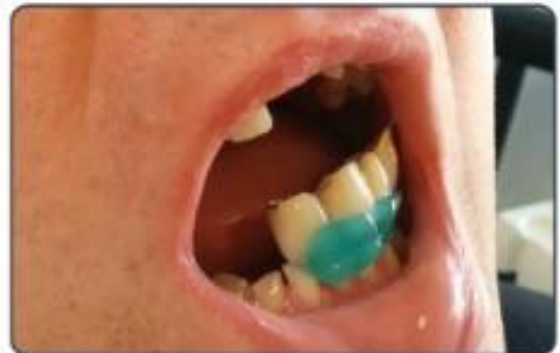
- Disclosing medium (Fit Checker, light-body impression material)
- Aerosol indicators (Occlude spray)
- Adjustment: High spots can be relieved using a diamond bur.
Fit Checker Application25
Interpreting Fit Checker
- Areas where the medium is penetrated (thinned out) indicate high spots or points of interference.
- These areas should be adjusted to ensure full seating.
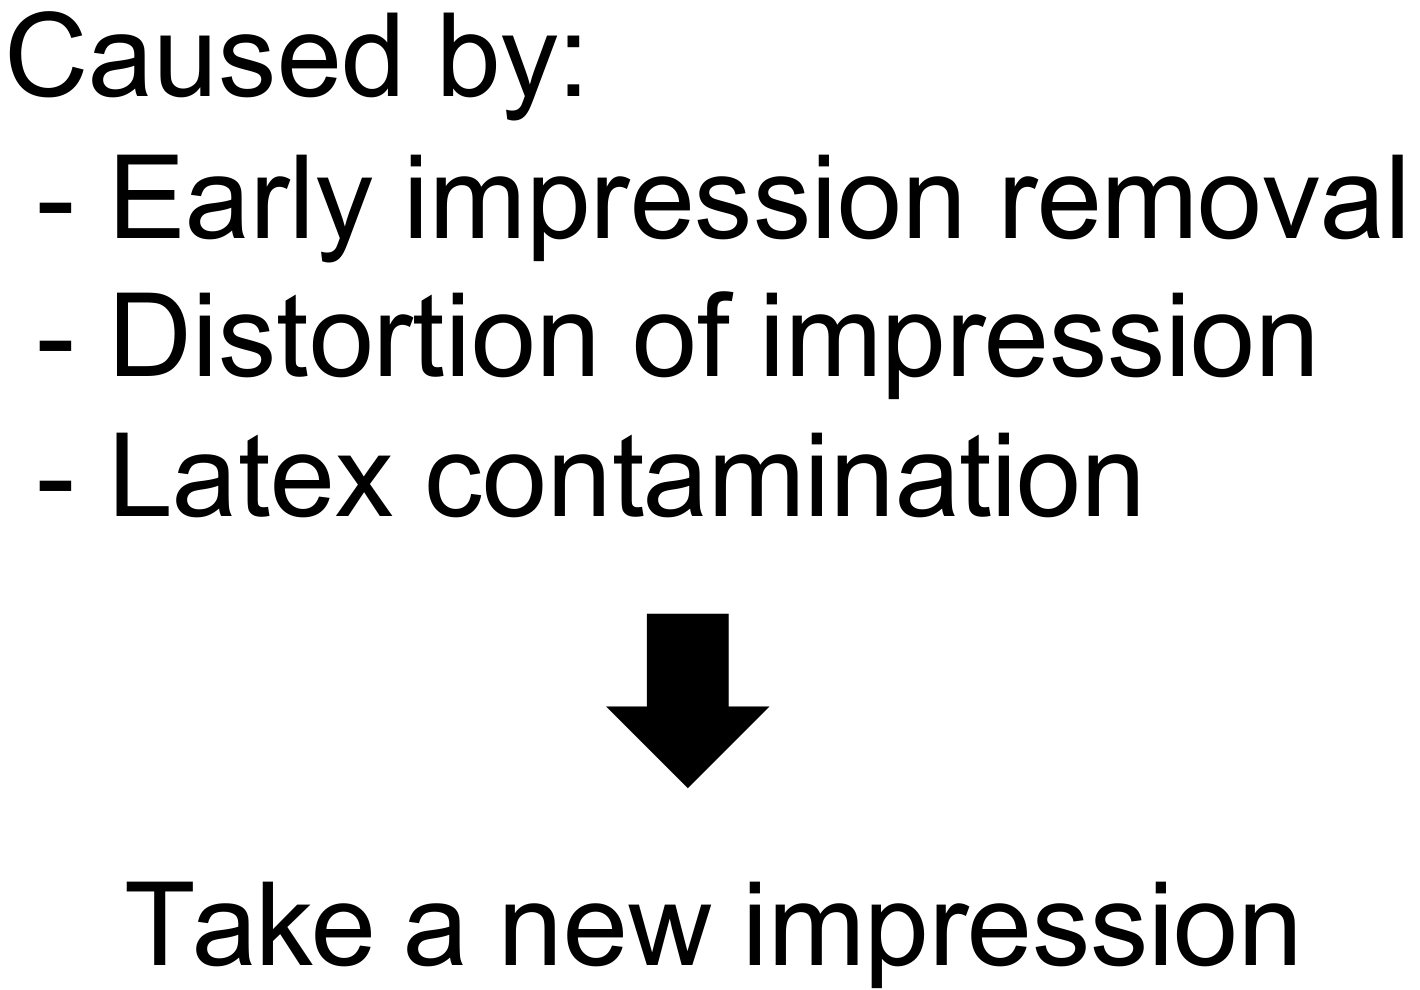
Clinical vs. Laboratory Fit Discrepancies
If the crown fits the model well but fails to seat in the mouth, consider impression-related issues:
- Early impression removal
- Distortion of the impression
- Latex contamination
Action: A new impression is required.
Marginal Fit26272829
Marginal Adaptation
Marginal fit should be as accurate as possible. Common poor adaptation issues include:
- Gap: A gap of 100 microns is the borderline for acceptability (detectable by probe).
- Overhang
- Under-extension
- Ledge
Visual Classification of Margins
- Ideal: Perfect adaptation to the finish line.
- Overextended: Material extends beyond the finish line.
- Underextended: Material stops short of the finish line.
- Overhang: Excess material creating a shelf.
- Open margin: A visible gap between the restoration and the tooth.

Effects of Open Margins30
Open margins can lead to several clinical complications:
- Sensitivity
- Dissolution of cement
- Plaque retention
- Secondary caries
- Gingival inflammation
Corrective Actions for Marginal Errors
Poor marginal fit often stems from the technician’s inability to clearly identify the finish line.
- Overhangs/Overextensions: Can typically be adjusted.
- Underextensions: Usually require a remake.
- Gaps: Require a remake.
Directional Assessment
Evaluate marginal fit in the:
- Gingivo-occlusal direction
- Occluso-gingival direction
- Both directions simultaneously
If fit is inadequate, a new impression is necessary.
Adjustment of Overextended Margins31
Adjust overextended margins or overhangs from the external surface only. Do not adjust the fitting (internal) surface, as this will compromise the seal.
Assessment of the Seated Crown323334
Once the crown is seated, it must be assessed for stability, contour, occlusion, and aesthetics to confirm suitability for cementation.
Evaluation Criteria
- Stability: Ensure no movement under force.
- Contour: Verify physiological and aesthetic shapes.
- Occlusion: Check contacts in all movements.
- Aesthetics: Confirm shade and form match.
- Final Goal: Confirm suitability for permanent cementation.
Stability35
Testing Stability
- The restoration should not rotate or rock when force is applied.
- Instability often leads to cementation failure.
- Causes: Internal surface misfit due to distortion in the impression or fabrication process.
Contour36
Gingival Health and Aesthetics
- Improper contour can impair gingival health and negatively affect natural appearance.
- Contours must be adjusted and polished before cementation.

Occlusion3738
Occlusal Principles
- The crown must be fully seated before checking occlusion.
- Major adjustments: Perform prior to cementation.
- Minor adjustments: Can be completed after cementation.
- Causes of inadequate contacts:
- Poor occlusal recording
- Poor articulation
Shim Stock Assessment39
Use of Shim Stock (8-10 μm)
- Shim stock determines if an occlusal contact is present.
- Procedure:
- Assess occlusion on all teeth without the prosthesis.
- Assess occlusion with the prosthesis in place.
- Specifically assess the contact on the crown itself.
- Interpretation: If adjacent teeth held shim stock before insertion but no longer do while the restoration holds it, the restoration is too high.
Articulating Paper Assessment4041
Locating Contacts
- Use articulating paper to mark heavy contacts or interferences.
- Evaluate both centric and eccentric movements.
- Utilize different colors of paper to distinguish between different mandibular movements.
Color Coding Movements
- Dark paper (e.g., Blue): Used for Centric Relation (CR) or Maximal Intercuspation Position (MIC).
- Lighter paper (e.g., Red): Used for eccentric positions (protrusion, lateroprotrusion).
(Page intentionally left blank or contains no unique text content)
(Page intentionally left blank or contains no unique text content)
Occlusal Adjustment Guidelines42
Adjustment Protocols
Premature Contact (Centric):
- Adjust grooves or cusp inclines.
- Constraint: Never adjust the tip of a functional cusp.
Interferences (Eccentric):
- Adjust cusp inclines.
- Adjust the tip of cusps only if absolutely necessary.
- Anesthesia: Numb patients have unreliable proprioception; schedule a review appointment in 1–2 weeks for fine-tuning.
- Opposing Tooth: If a cusp tip must be modified to preserve a scheme like canine guidance, consider adjusting the opposing tooth slightly instead of the new restoration.

Completed Occlusal Adjustment43
- Well distributed occlusal contacts
- Posterior teeth; the prosthesis and the remaining dentition should have the same occlusal contact and shim stock
- Anterior teeth; the prosthesis should lightly hold shim stock if other anterior teeth do
Aesthetics
- Patient approval should be obtained prior to cementation
- Shade and morephology
- Lighter shade: can be stained and glazed
- Darker shade: should be cut back and followed by new ceramic application
- Modify the morphology with diamond burs and soflex discs
- then send back for glazing
- Consider temporary cementation
Finishing and polishing
- Metal: rubber polishing wheels and joints
- Ceramic: Rough ceramic will wear the opposing teeth
- composite finishing rubber burs
- Rubber cup and diamond polishing paste
- or send to laboratory for reglazing
The full systematic approach to the try in procedure
- Evaluation of the restoration on the die
- Die and opposing model
- internal surface of the restoration
- Restoration on the model (die)
- Seating the crown on the prepared tooth
- Proximal contact
- Internal fit
- Marginal fit
- Assessment of the seated crown
- Stability
- Contour
- Occlusion
- Aesthetics

Footnotes
-
Original PDF page 1: L4 Try in, p.1 ↩
-
Original PDF page 4: L4 Try in, p.4 ↩
-
Original PDF page 2: L4 Try in, p.2 ↩
-
Original PDF page 3: L4 Try in, p.3 ↩
-
Original PDF page 6: L4 Try in, p.6 ↩
-
Original PDF page 5: L4 Try in, p.5 ↩
-
Original PDF page 7: L4 Try in, p.7 ↩
-
Original PDF page 8: L4 Try in, p.8 ↩
-
Original PDF page 13: L4 Try in, p.13 ↩
-
Original PDF page 9: L4 Try in, p.9 ↩
-
Original PDF page 10: L4 Try in, p.10 ↩
-
Original PDF page 11: L4 Try in, p.11 ↩
-
Original PDF page 12: L4 Try in, p.12 ↩
-
Original PDF page 14: L4 Try in, p.14 ↩
-
Original PDF page 15: L4 Try in, p.15 ↩
-
Original PDF page 16: L4 Try in, p.16 ↩
-
Original PDF page 17: L4 Try in, p.17 ↩
-
Original PDF page 18: L4 Try in, p.18 ↩
-
Original PDF page 19: L4 Try in, p.19 ↩
-
Original PDF page 20: L4 Try in, p.20 ↩
-
Original PDF page 21: L4 Try in, p.21 ↩
-
Original PDF page 22: L4 Try in, p.22 ↩
-
Original PDF page 23: L4 Try in, p.23 ↩
-
Original PDF page 25: L4 Try in, p.25 ↩
-
Original PDF page 24: L4 Try in, p.24 ↩
-
Original PDF page 26: L4 Try in, p.26 ↩
-
Original PDF page 27: L4 Try in, p.27 ↩
-
Original PDF page 29: L4 Try in, p.29 ↩
-
Original PDF page 30: L4 Try in, p.30 ↩
-
Original PDF page 28: L4 Try in, p.28 ↩
-
Original PDF page 31: L4 Try in, p.31 ↩
-
Original PDF page 32: L4 Try in, p.32 ↩
-
Original PDF page 33: L4 Try in, p.33 ↩
-
Original PDF page 41: L4 Try in, p.41 ↩
-
Original PDF page 34: L4 Try in, p.34 ↩
-
Original PDF page 35: L4 Try in, p.35 ↩
-
Original PDF page 36: L4 Try in, p.36 ↩
-
Original PDF page 40: L4 Try in, p.40 ↩
-
Original PDF page 37: L4 Try in, p.37 ↩
-
Original PDF page 38: L4 Try in, p.38 ↩
-
Original PDF page 39: L4 Try in, p.39 ↩
-
Original PDF page 42: L4 Try in, p.42 ↩
-
Original PDF page 43: L4 Try in, p.43 ↩