Molar Crown and Bridge Preparation Tips
A consolidated, source-attributed reference for full-coverage molar crown and FDP abutment preparations. Every claim links back to its lecture, video, or personal-journal source. Personal lessons appear in > [!tip] From my journal callouts so hard-earned mistakes stay visible.
Pre-prep planning
Before the bur touches the tooth, decide:
- Abutment selection — favour broad labiolingual roots, multi-rooted teeth, divergent/curved roots; avoid conical. “The more difficult a tooth is to extract, the better it functions as an abutment.” Optimal crown:root 2:3, minimum 1:1. See L2 Classification and Clinical rationale_integrated.
- Root surface area (Ante’s law) — total root SA of abutments must equal or exceed the SA of teeth being replaced.
| Tooth | Mandibular SA (mm²) | Maxillary SA (mm²) |
|---|---|---|
| First premolar | 180 | 234 |
| Second premolar | 207 | 220 |
| First molar | 431 | 433 |
| Second molar | 426 | 431 |
Source: Jepsen 1963, via L2 Classification and Clinical rationale_integrated.
- Span mechanics — doubling span length increases deflection by a factor of 8. Porcelain is brittle and cannot flex, so longer spans dramatically raise veneer fracture risk. See L2 Classification and Clinical rationale_integrated.
- Common path of insertion (FDP) — the long axes of all abutments must converge to one path. Visually average them across the arch before committing to any axial reduction. See L1 fixed dentl prosthesis_integrated and Fixed Dental Prosthesis Preparation 3 -5 Acadental.
- Connector dimensions — height is the most critical dimension; doubling height reduces deflection to one-eighth (Law of Beams). For resin-bonded bridges: ≥2 mm horizontal × 3 mm vertical, plus interproximal wrap-around (failure to wrap → ~50% failure at 3 years). See L1 fixed dentl prosthesis_integrated and L2 Classification and Clinical rationale_integrated.
- Maximum porcelain thickness ≈ 1.2 mm; the framework must support — bulk porcelain fractures otherwise. See L1 fixed dentl prosthesis_integrated.
- Cantilever placement — anterior preferred (lower occlusal load) or in patients with an open bite. Distal cantilevers in the posterior are highly undesirable. See L1 fixed dentl prosthesis_integrated.
- Biologic width and crest type — bone sounding before deciding margin depth. Biologic width violation = sound-to-bone − sulcus depth < 2 mm.
| Crest type | Frequency | Sound-to-bone | Margin guidance |
|---|---|---|---|
| Normal crest | 85% | 3–4.5 mm | Tolerates 0.5 mm subgingival |
| High crest | 2% | <3 mm | Subgingival almost always violates BW → chronic inflammation |
| Low crest | 13% | >4.5 mm | Fragile attachment; cord trauma → recession |
See L3 Impressions and Soft Tissue Management.
From my journal — Excercise 4 21-23 Full Ceramic
“To get the path of insertion every single side has got to be parallel… each site should match the other 3 sites AT LEAST.” (Anterior context, but the principle is identical on molars.)
Reduction targets by material
5x5x5 reference table from All Ceramic Crown Prep in 5 minutes, The 5x5x5 Technique:

Reduction proceeds along the three anatomical occlusal planes (A, B, C). A-plane = functional cusp bevel; B-plane = facial incline of the lingual cusp (uppers) / lingual incline of the buccal cusp (lowers); C-plane = non-functional cusp inclines:

Verify with putty matrix and an RGS3/RGS4 probe — a periodontal probe with 0.5 mm markings works for occlusal depth grooves. Aim for total occlusal convergence (taper) of 6–10°:

Bur sequence by material
Pre-assembled bur block (Stevenson Dental Solutions FGC kit, Full gold Crown in 7 Steps , Technique for Preparing the FGC on a Mandibular Molar):

- All-ceramic — 330 carbide pilot holes (1.5 mm depth) → coarse green-stripe diamond (6856-016 / KS0) for axial taper + fillet → 6856-012 thin diamond for interproximal break-through → 6856-016 again to blend → fine diamond (KS0F, 30 µm) → Jiffy polish. See All Ceramic Crown Prep in 5 minutes, The 5x5x5 Technique, All Ceramic Crown Prepartion for Lithium Disilicate 4 Kilgore.
- Full gold — parallel cylinder (837-012 / 57-010) for B and C planes (use the 1 mm diameter as a 1.5 mm clearance gauge) → 56 bur for functional cusp bevel → 878K-012 tapered for axial → 859-010 needle for interproximal → 8877-009 chamfer (skid technique, 60° declination) → 7102 carbide finish → hand chisels (44s/45s) for final polish. See Full gold Crown in 7 Steps , Technique for Preparing the FGC on a Mandibular Molar.
- PFM — 847KR-016 coarse flat-end for occlusal/shoulder → 878K-012 tapered for axial → 859-010 needle for interproximal → shoulder bur for facial butt joint → 8877 chamfer for lingual collar → 847KR-016 fine (30 µm) and KS0F for refinement. See Molar Ceramo-Metal Preparation ; How to Prepare a PFM on a Maxillary Molar and PFM Preparation on The Maxillary First Molar.
From my journal — Last Session 35-37
“Get sharp burrs… session went pretty poorly, mostly a combination of dull burrs and a bad putty key.” Burr sharpness is the recurring failure mode — replace before you start, not mid-prep.
Step-by-step molar prep
1. Putty matrix and patient positioning
Take the putty key before the first cut. Make sure it extends past the third molar so the key has a stable rest point and works as a reduction guide. Rest the opposite end on the model border for repeatable seating.
For intra-oral preps, seat the putty by applying it to the occlusal surface first to prevent air bubbles, then trim closely to the teeth and section through the deepest occlusal anatomy:
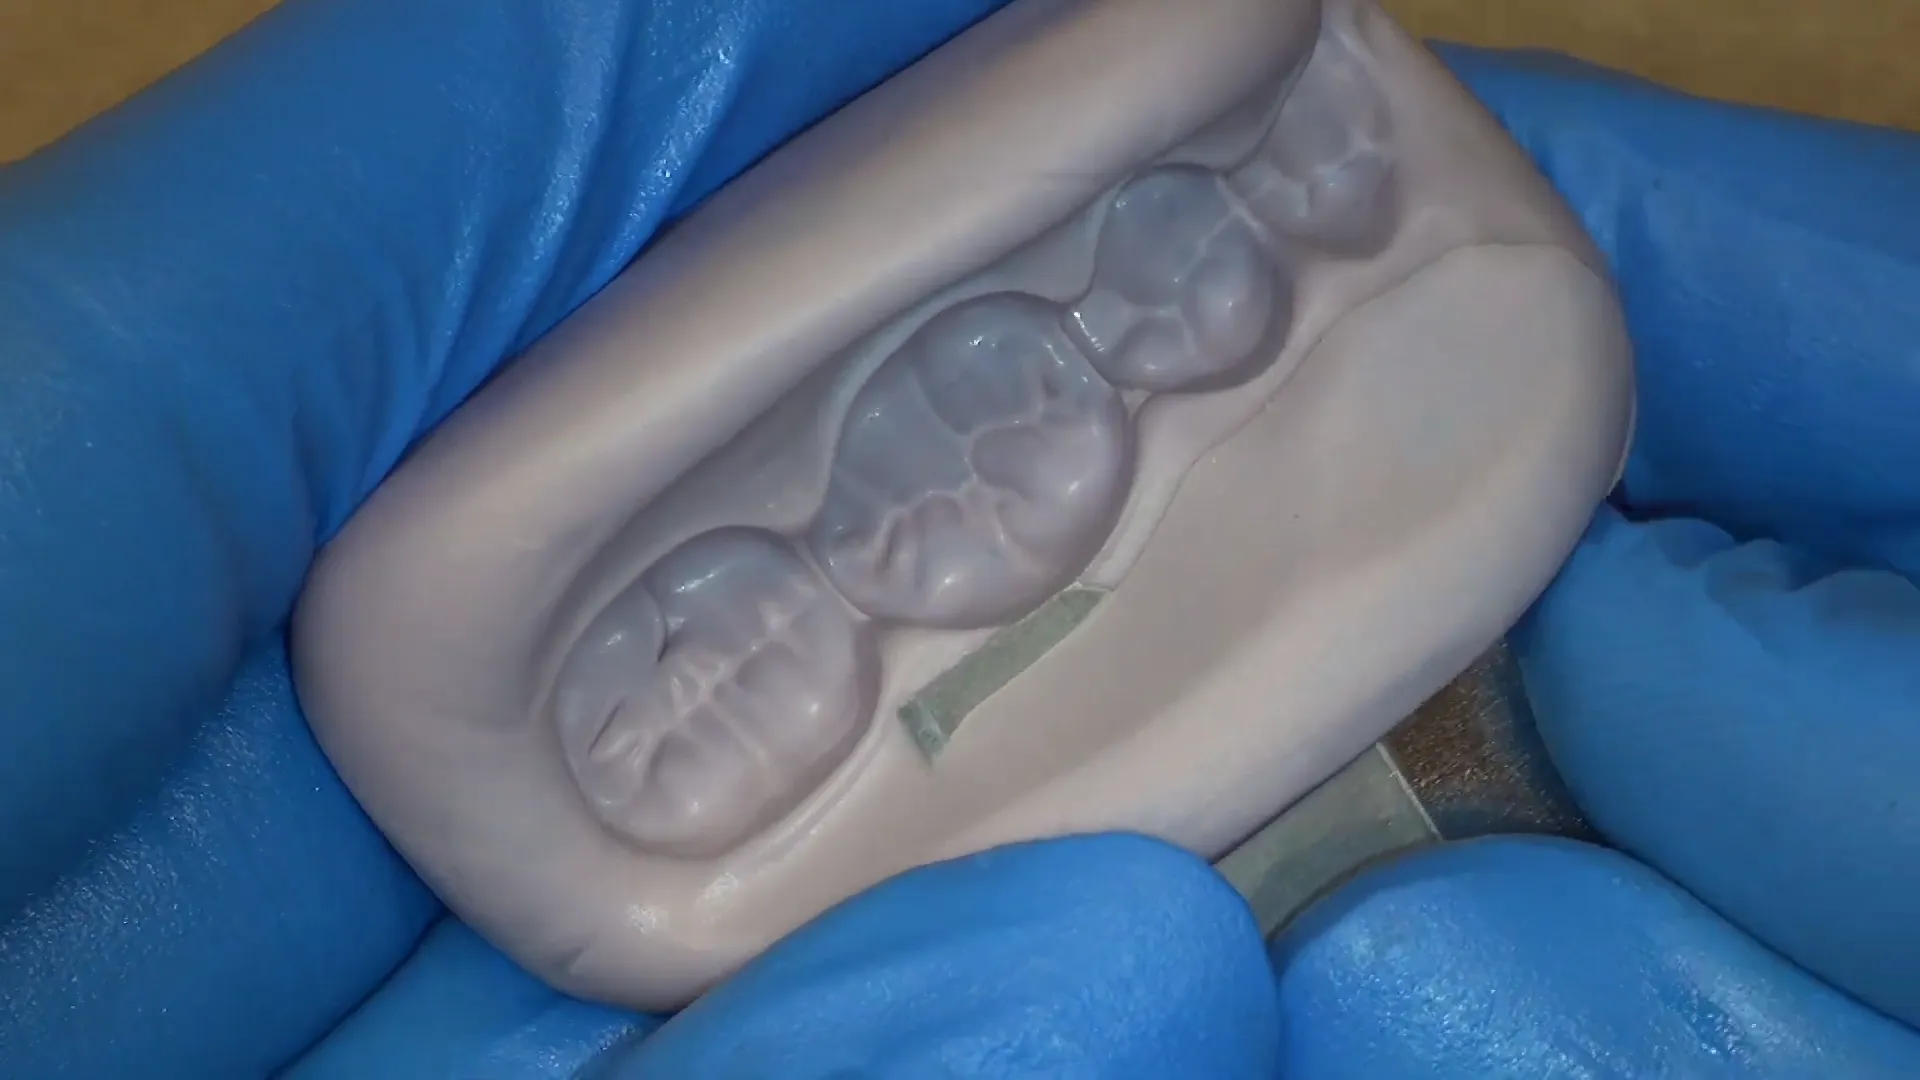
If putty doesn’t seat or the anatomy isn’t well-defined, remake the guide rather than working with a poor reference. See Lower Molar Crown Prep ACC 30 First Person Perspective.
Patient head rotation > dental mirror. For each working view on a lower molar, rotate the patient’s head rather than reaching for the mirror:
| View | Patient head |
|---|---|
| Buccal | rotated to the left |
| Lingual | rotated to the right |
| Occlusal / TOC | looking straight ahead |
See Lower Molar Crown Prep ACC 30 First Person Perspective.
From my journal — Last Session 35-37
“Make sure the putty key extends past the third molar — this gives it stability, especially for reduction guide; put the other side of the key on the border of the model for easy placement.”
From my journal — Exercise 3 15-17 Full Ceramic
“When trying to get the lingual for tooth 15 you can just move to the side and use direct vision (as per Dr. Bol). It’s not elegant but works well.” Indirect vision is ideal but moving for direct vision beats fumbling.
2. Occlusal depth cuts and reduction by anatomical planes
Use depth grooves or 330-carbide vertical pilot holes (1.5 mm length on functional cusp, central groove, non-functional cusp) to prevent under-reduction. Reduce by anatomical planes — not as a flat slab — to preserve the triangular ridge morphology.
The 1 mm bur diameter, visualised against the unprepared structure, doubles as a 1.5 mm clearance gauge:

Sequence on a lower molar: lingual cusps (distal-lingual → mesial-lingual), then B-plane between the functional and non-functional cusps, then small distal cusp, then functional cusp bevel:
Maintain the oblique ridge on maxillary first molars where present. See PFM Preparation on The Maxillary First Molar and Full gold Crown in 7 Steps , Technique for Preparing the FGC on a Mandibular Molar.
3. Functional cusp bevel (A plane) — early, not late
Establish the A-plane early in the prep, not as a finishing touch. It must parallel the lingual incline of the opposing maxillary cusp (or buccal incline of the opposing mandibular cusp). Without enough taper here you’ll never get the ceramic thickness the lab needs for structural durability. The 56 bur held parallel to the lingual cusps creates a crescent-shaped bevel:

Ensure the new cusp tips align with adjacent teeth. See Full Gold Crown 36 Kilgore ; Full Metal Crown Preparation.
From my journal — Last Session 35-37
“Make sure to taper the functional cusp bevel enough (flatter than you think).“
4. Axial reduction
Two zones:
- Gingival 1/3 — retention zone, 3°/side (6° total occlusal convergence).
- Occlusal 1/3 — secondary plane that gives the ceramic uniform thickness over the contour. A single flat axial wall does not work for PFM or all-ceramic.
Bur control trick. When taking off bulk axial structure, move the handpiece against the direction of the bur’s rotation (e.g., bur rotates right → move handpiece left). This dramatically improves control:
Watch the distolingual on mandibular molars — it’s the classic undercut zone. See PFM Preparation - Acadental Tooth 30 and Lower Molar Crown Prep ACC 30 First Person Perspective.
From my journal — Last Session 35-37
“Watch out for the distolingual on both teeth, this area tends to be pretty undercut.”
From my journal — E1 prep 34 36
“The reduction of the ‘A’ plane on the cusps was really good for getting the axial reduction in that area while maintaining the anatomy.” Use the A-plane reduction to feed cleanly into axial reduction.
5. Interproximal break-through
859-010 needle bur with an “uphill” walking-stairs motion. Leave a thin shell to protect the adjacent tooth, then break through; remove the remaining shell with a hand instrument:
Lift the bur intermittently for water access — needle burs heat up fast. Aim for ~0.5 mm gap so retraction cord fits and the optical scanner can see the margin. See Fixed Dental Prosthesis Preparation 3 -5 Acadental and Full gold Crown in 7 Steps , Technique for Preparing the FGC on a Mandibular Molar.
6. Margin refinement
End-cutting burr lined up perpendicular to the margin produces dramatically smoother margins than running a tapered diamond along it. Follow with a white-stone for modified shoulders. Round all sharp internal line angles — they’re crack-initiation points in ceramic and high spots that prevent seating. Switch to 30 µm fine diamonds (KS0F, 8847KR-016 fine) for final smoothing.

From my journal — Excercise 4 21-23 Full Ceramic / End-Cutting burr usage
“Line up the end cutting burr perpendicular to the margin and it makes the margins unreal smooth. Later you can use the white stone burr as well for modified shoulders.”
7. Finishing pass — the .25 to .5 rule
Stop the coarse diamond when ~0.25–0.5 mm of reduction remains, then take the rest with a red finishing bur at medium speed. Cleaner surface, less risk of overshoot.
From my journal — E1 prep 34 36
“Take away until .5 – .25 of required reduction then do the rest with red finishing bur. You can use the finishing bur at medium speed and still be alright.”
Bridge / FDP-specific additions
Everything from the single-crown sequence applies, plus:
- Common path — already covered in pre-prep, but check it again during axial reduction. Each abutment side has to be parallel to the other three on its own tooth and to the corresponding sides on every other abutment. See Fixed Dental Prosthesis Preparation 3 -5 Acadental.
- Connector position — the connector itself sits near the gingival level for maximum occluso-gingival height (= maximum strength). See L1 fixed dentl prosthesis_integrated.
- Resin-bonded bridge survival — ~87% at 5 years, with debonding ~12% and connector fracture ~5%. Wrap the connector interproximally; failing to do so can drive failure to ~50% at 3 years. See L2 Classification and Clinical rationale_integrated.
- Secondary abutments — secondary retainers must be equally or more retentive than primary; otherwise tensile forces from pontic deflection debond the secondary first and caries goes undetected. See L2 Classification and Clinical rationale_integrated.
From my journal — E1 prep 34 36
“Make sure that the point where your bridge actually is is almost equigingival — we have to make sure it’s that way to make it as strong as possible!”
Soft tissue management and impression
Cord packing
- Length — cut ~1.5× the tooth circumference for overlap.
- Motion — rotational tucking toward the tooth and slightly toward the already-packed cord. Not a straight up-and-down push.
- Cord ends — leave them buccally or lingually accessible, not interproximally.
- Knitted cords (e.g., Ultrapak) are common; sizes 000–2 cover all biotypes.
- Time in sulcus — 3–5 minutes per manufacturer; remove the top cord just before injecting wash.
See L3 Impressions and Soft Tissue Management.
Single vs. double cord
| Single | Double | |
|---|---|---|
| Indication | Shallow sulcus, thin perio | Deeper sulcus, bleeding/fluid control needed |
| Advantage | Least traumatic, low recession risk | Excellent lateral displacement, superior fluid control |
| Disadvantage | Haemorrhage, exudate | Time, more tissue trauma, unpredictable in high/low crest |
Double-cord protocol: 000/00 packed deep first (vertical displacement, stays in for impression); 0/1 on top (horizontal displacement, removed before wash injection). See L2 Classification and Clinical rationale_integrated and L3 Impressions and Soft Tissue Management.
Margin placement
- Sulcus ≤ 1.5 mm → margin can sit 0.5 mm subgingival (normal crest only).
- Sulcus > 1.5 mm → margin at half the probing depth.
- Sulcus > 2 mm → consider gingivectomy to redesign a 1.5 mm sulcus.
See L3 Impressions and Soft Tissue Management.
Impression material and technique
- Recommended single-stage — PVS dual-phase (light body around prep + heavy body in tray). The two materials bond and set together.
- Best for fine detail — two-step putty-wash with a deliberate cut-out (or spacer) so wash thickness is uniform.
- Avoid monophase — lower definition; not recommended.
- Avoid triple trays — distortion risk; only useful for a single crown in patients with very limited opening.
- Latex inhibits PVS set — use nitrile, or bleed the cartridge first.
- Tray adhesive — apply 15 min before impression and extend over the tray edge so material doesn’t separate on removal.
Injection and tray seating
- Keep the syringe tip submerged in the material the whole time — lifting it is how bubbles get in.
- Inject in one continuous direction, starting at the hardest area (interproximals).
- Cover the prep + part of the adjacent teeth.
- Seat the tray with a slow, continuous, back-to-front motion so excess material moves forward away from the throat.
- Hold steady for the full set time.
- Tray removal — upper: loosen on opposite side first; lower: loosen on prep side first.
Inspection — the impression is good if
- Cusps are sharp; tray doesn’t show through.
- More than half of each molar’s distal surface is captured.
- Gingival margins clearly defined with 3–4 mm of buccal/lingual surface beyond the margin.
- No bubbles, voids, drag lines, or layer separation.
If you can’t see the margin, the lab can’t either. See L3 Impressions and Soft Tissue Management.
Timing
- Never impress inflamed tissue. Wait 3–4 weeks with a well-fitting provisional first.
- After healing the tissue will recede toward normal-crest position — capturing inflamed tissue means the final margin will be exposed after the patient is in the chair for cementation.
From my journal — Exercise 3 15-17 Full Ceramic
“The 100s wait time is ideal. Make sure to always keep the tip submerged and go in one big line from mesial to distal, make sure to get the tip of the luxatemp inside all the little occlusal details or else there WILL be bubbles.”
Provisional management
- Luxatemp injection — keep tip submerged, lay one continuous mesial-to-distal line, work the tip into every occlusal feature so air bubbles don’t form. Wait the full 100 s. See Exercise 3 15-17 Full Ceramic.
- Removal pattern — work MB → DB → ML → DL. Apply vaseline to suspected catch points to keep the temp from binding. Five-attempt removal sessions teach this fast. See Excercise 2 44-46 Full Ceramic with temporary.
- Stuck temp on a parallel prep — section the temp vertically buccal-to-lingual. Cut only into the temp material; the white opaque cement layer marks where to stop. See L4 Try in.
- Residual cement — clear with an ultrasonic scaler before any try-in. See L4 Try in.
- Patient flossing instructions — pull the floss through the side, not back up through the contact. Back-up motion dislodges temporaries.
Try-in and adjustment
Inspect the master die 1–2 working days before the patient arrives — catches lab errors without burning chair time:

Check internal surface for casting nodules, blebs, and proper die spacer:

Lab-error troubleshooting (pre-appointment)
| Error | Likely cause | Action |
|---|---|---|
| Tight proximal contacts | Imprecise die location, abrasion at stone contact | Articulating paper → grind & polish |
| Casting blebs on fit surface | Air bubbles in invest | Identify under magnification, remove with small round bur |
| Over-extended margin | Poor impression / trim / surplus wax | Trim from axial surface only, polish; consider returning to lab |
| Under-extended margin | Poor impression / unclear finish line | Remake (or retake impression) |
| No die spacer | Tech error | Crown won’t seat, may “lift” after cementation |
See L4 Try in.
Seating
The crown should seat without forcing. If it doesn’t, suspect: proximal contacts, internal fit, over-extended margins, retained temp cement, or trapped gingival tissue. For an FPD, also: tissue contact under pontics, connector shape/location:

Proximal contacts
- Floss should pass with some resistance.
- Shim stock (8 µm) should just pass.
- Mark with articulating paper (20 µm) or Accufilm; adjust incrementally; one side at a time.
- Open contact → return for material addition.
Internal fit
Fit checker (or light-body PVS) reveals high spots — the medium thins out where it’s pinched. Relieve those spots only:
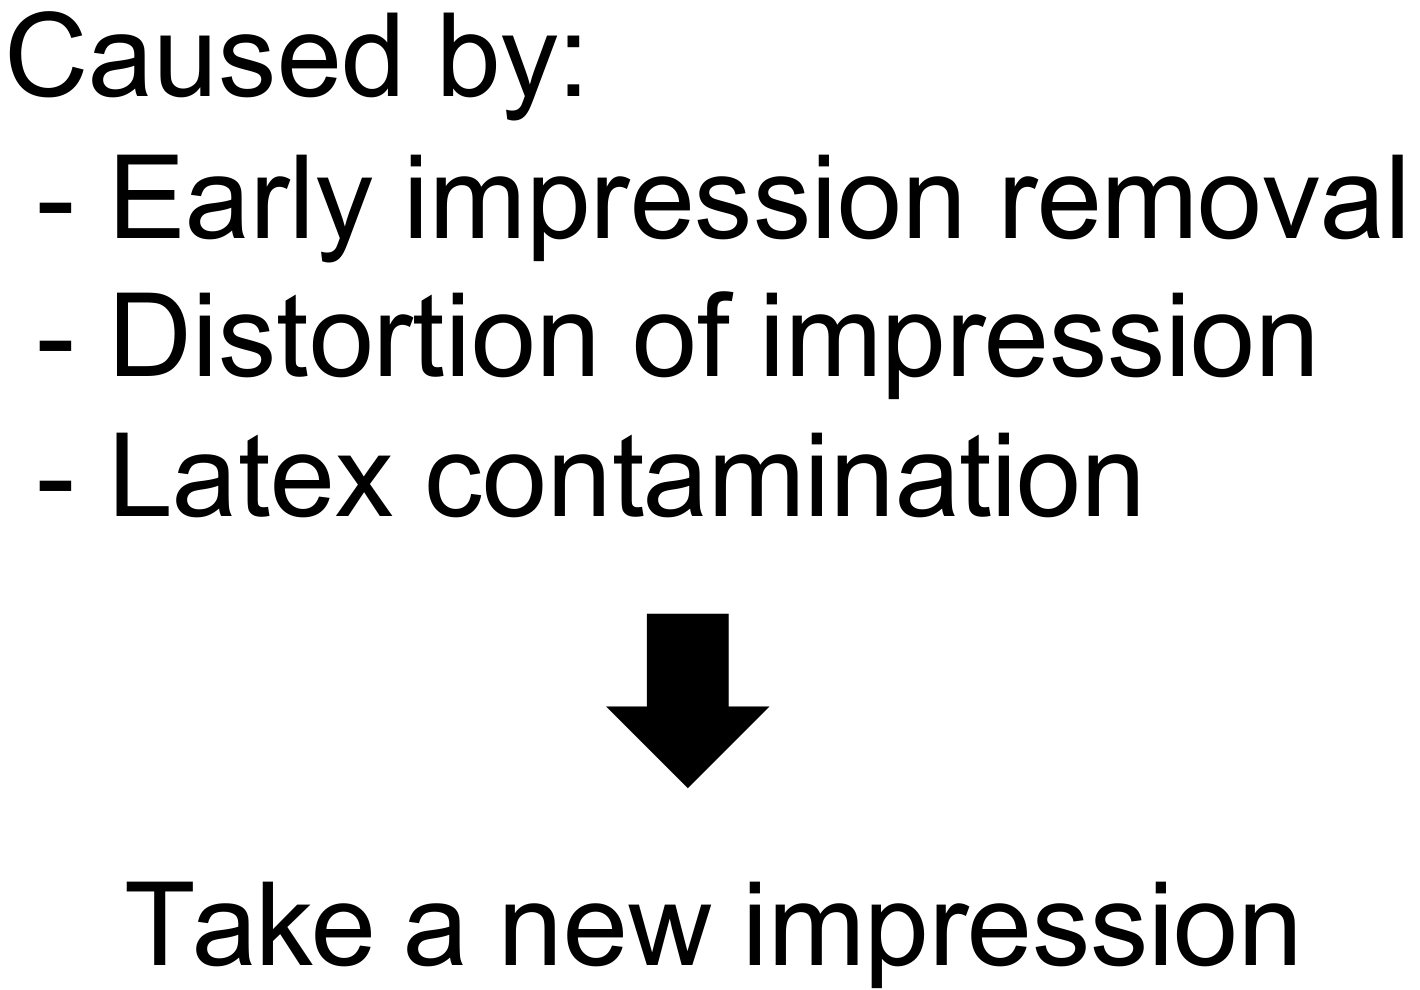
If fit is good on the model but bad in the mouth → impression problem (early removal, distortion, latex contamination) → new impression.
Marginal fit
- 100 µm gap is borderline (probe-detectable).
- Larger gap → remake.
- Open margins lead to sensitivity, cement washout, plaque retention, secondary caries, gingival inflammation.
- Adjust over-extended margins externally only — never relieve the internal surface, you’ll break the seal.
- Under-extended margins → remake.

Stability and contour
The restoration must not rock under finger pressure. Contour matters for gingival health and aesthetics; adjust and polish before cementation:

Occlusion
- Crown must be fully seated before checking occlusion.
- Major adjustments before cementation; minor after.
- Articulating paper colour code: dark (blue) for centric (CR / MIP); light (red) for eccentric (protrusion, lateroprotrusion).
- Occlude spray gives negative marking — high spots wipe the spray off and are often faster to find than with paper.
- Shim stock test (8–10 µm) — assess all teeth without the prosthesis, then with it in. If the adjacent teeth held shim before insertion but don’t anymore while the restoration does, the restoration is too high.
- Premature centric → adjust grooves or cusp inclines, never the tip of a functional cusp.
- Eccentric interferences → adjust cusp inclines; only adjust cusp tip if absolutely necessary.
- To preserve canine guidance, sometimes it’s better to adjust the opposing tooth than the new restoration.
- Numb patients have unreliable proprioception → schedule a 1–2 week occlusal review.

Full systematic approach
1. Restoration on the die        2. Crown on the prep         3. Seated crown
   – die / opposing model           – proximal contacts          – stability
   – internal surface               – internal fit               – contour
   – external surface / occlusion   – marginal fit               – occlusion
                                                                 – aesthetics

See L4 Try in.
Top mistakes to avoid
- Under-reduction — the single biggest time-sink in every journal session. Reduce aggressively early; finishing time scales with how much material you didn’t take in stage one.
- Single flat axial wall on PFM/all-ceramic — secondary occlusal-third plane is non-negotiable.
- Distolingual undercuts on mandibular molars (especially second molars).
- Functional cusp bevel left too steep.
- Sharp internal line angles — won’t seat the casting and crack ceramic.
- Coarse-bur work after refinement — switch to 30 µm fine diamonds for any post-shoulder smoothing.
- Impressing inflamed gingiva. Wait it out.
- Forgetting to recheck the path of insertion across all abutments mid-prep on a bridge.
- Adjusting an over-extended margin from the internal surface — kills the seal.
- Adjusting the tip of a functional cusp.
- Trusting a numb patient’s proprioception — book the 1–2 week occlusal review.
From my journal — Excercise 4 21-23 Full Ceramic
“REDUCE REDUCE REDUCE… the prep today took an hour, then another 1:30 to finish, almost solely because it wasn’t reduced enough.” Anterior context, same lesson — under-reduction is the time sink.
Lessons from my own preps (index)
Each entry links back to the original session reflection.
- E1 prep 34 36 — A-plane axial reduction; .25–.5 finishing-bur rule; bridge connector equigingival for strength.
- Excercise 2 44-46 Full Ceramic with temporary — temp removal pattern (MB→DB→ML→DL) with vaseline at catch points; flat fissure vs. crown-prep bur for occlusal.
- Exercise 3 15-17 Full Ceramic — long tapered fissure beats flat fissure for occlusal; indirect vision (or move for direct); Luxatemp injection technique.
- Excercise 4 21-23 Full Ceramic — path of insertion parallelism across all four sides; end-cutting burr perpendicular for unreal-smooth margins; under-reduction = wasted time.
- Last Session 35-37 — sharp burrs; putty-key extension past the third molar; mesial tilt watch; distolingual undercut watch; functional cusp bevel flatter than you think.
- End-Cutting burr usage — perpendicular end-cutting bur technique walkthrough.
Sources
Lectures (DMD3S1 Multiple Indirect Restorations)
- L1 fixed dentl prosthesis_integrated — FDP components, path of insertion, connector mechanics, cantilever design, pontic classification.
- L2 Classification and Clinical rationale_integrated — Ante’s law, root surface area data, span mechanics, resin-bonded bridge design, double-cord retraction.
- L3 Impressions and Soft Tissue Management — biologic width, crest types, cord packing technique, PVS materials, impression inspection.
- L4 Try in — die evaluation, lab error checklist, fit checker, marginal classification, occlusal adjustment, shim stock test.
Resource videos (Reference / Prosthodontics / Resources / Crowns / Molar)
- All Ceramic Crown Prep in 5 minutes, The 5x5x5 Technique — Stevenson Dental Solutions, all-ceramic 5-bur protocol.
- All Ceramic Crown Prepartion for Lithium Disilicate 4 Kilgore — Stevenson, e.max specifics, fillet margin detail.
- All Ceramic prep 5 Kilgore — putty reduction guide, internal undercut detection.
- Full Gold Crown 36 Kilgore ; Full Metal Crown Preparation — Stevenson, FGC depth-plane technique with secondary facial plane.
- Full gold Crown in 7 Steps , Technique for Preparing the FGC on a Mandibular Molar — Stevenson, full bur block walkthrough with “uphill” interproximal motion.
- Lower Molar Crown Prep ACC 30 First Person Perspective — Fritz Mora DDS, monolithic e.max clinical first-person view; head rotation and against-rotation handpiece control.
- Fixed Dental Prosthesis Preparation 3 -5 Acadental — Stevenson, three-unit FDP exam standard.
- Monolithic Zirconia FDP on 34 - 36 — student-style journal of zirconia FDP prep with putty-key labelling.
- Molar Ceramo-Metal Preparation ; How to Prepare a PFM on a Maxillary Molar — Stevenson, PFM reduction-plane technique.
- PFM Preparation - Acadental Tooth 30 — Stevenson, mandibular first molar PFM, RGS-probe verification.
- PFM Preparation on The Maxillary First Molar — Stevenson, tooth 3 PFM with 330-carbide pilot-hole depth-cut technique.
- PFM Premolar Using T-Prep Technique - Acadental Tooth 4 — Stevenson, tenon technique (transferable to molars).