Fixed Dental Prosthesis Preparation - 3-5 Acadental | WREB-ADEX-CDCA
Clinical Guide: Fixed Dental Prosthesis Preparation (#3 to #5)

This document outlines the clinical protocol for preparing a three-unit fixed dental prosthesis (bridge) from tooth #3 (molar) to tooth #5 (premolar). This guide is specifically tailored for practitioners and students preparing for clinical examinations such as the WREB, ADEX, and CDCA.
1. Equipment and Instrumentation
Successful preparation relies on precise measurement and high-quality burs. The following tools are recommended:
Recommended Bur Kit (Stevenson Dental Solutions)

| Bur Reference | Primary Application |
|---|---|
| 847KR 016 | Initial occlusal reduction (1.1mm tip, 1.6mm top) |
| 8847KR | PFM facial cut-back and refinement |
| 878K / 856 | Axial wall preparation |
| 859 010 | Interproximal clearance (Needle bur) |
| 877 / 8877 | Chamfer enhancement |
| KS0 / 0F | All-ceramic preparations |
| 7404 | Finishing and beveling sharp edges |
Measuring Instruments
- RGS3: 1.0 mm width for verifying minimum clearance.
- RGS4: 1.5 mm width for verifying standard clearance.

2. Pre-Preparation Assessment
Before beginning, evaluate the following factors to ensure a successful outcome:
- Line of Draw: Assess the angulation of the abutment teeth.
 If the premolar leans mesially while the molar is vertical, you must “split the difference” in the mesio-distal direction to ensure a common path of insertion.
- Anatomical Planes: Every reduction must respect three distinct planes:
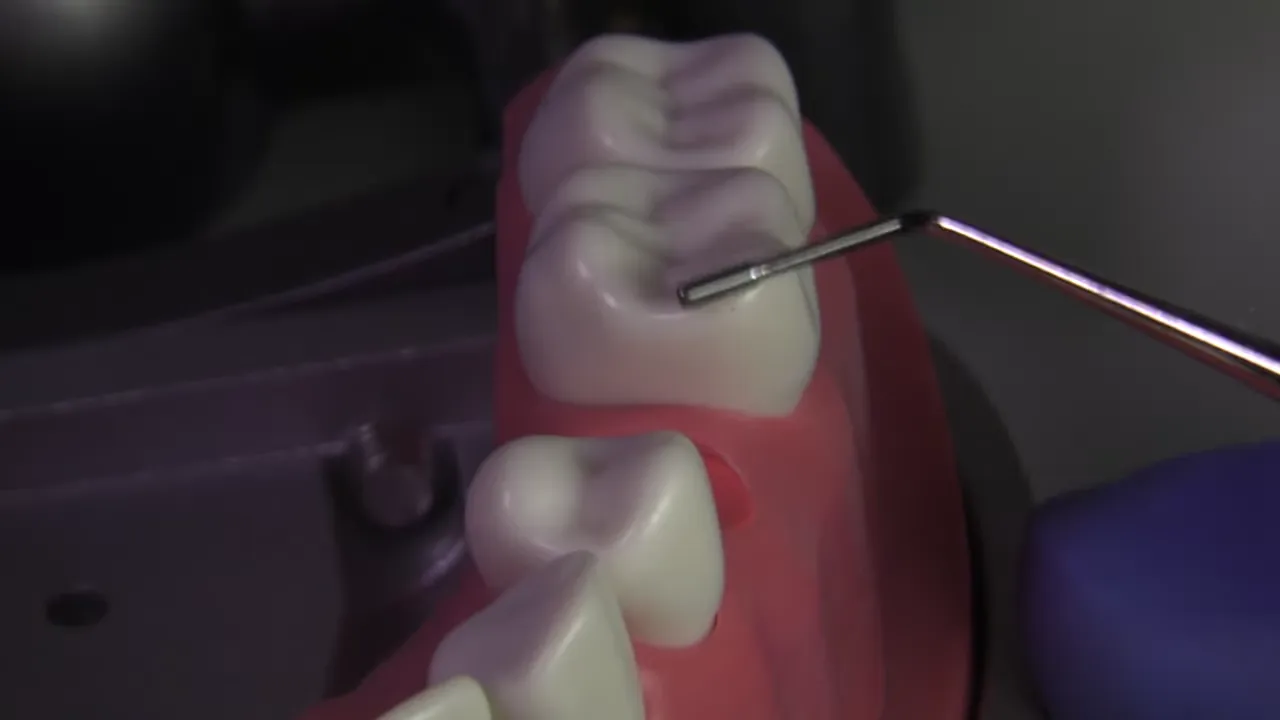
*   **C Plane:** Follows the cusp inclines on non-functional cusps.
*   **A Plane (Functional Cusp Bevel):** Parallel to the C plane; critical for structural durability.
*   **B Plane:** The transitional plane between the facial wall and the functional cusp.
- Retention vs. Contour: Aim for a 2–3 mm “retention zone”
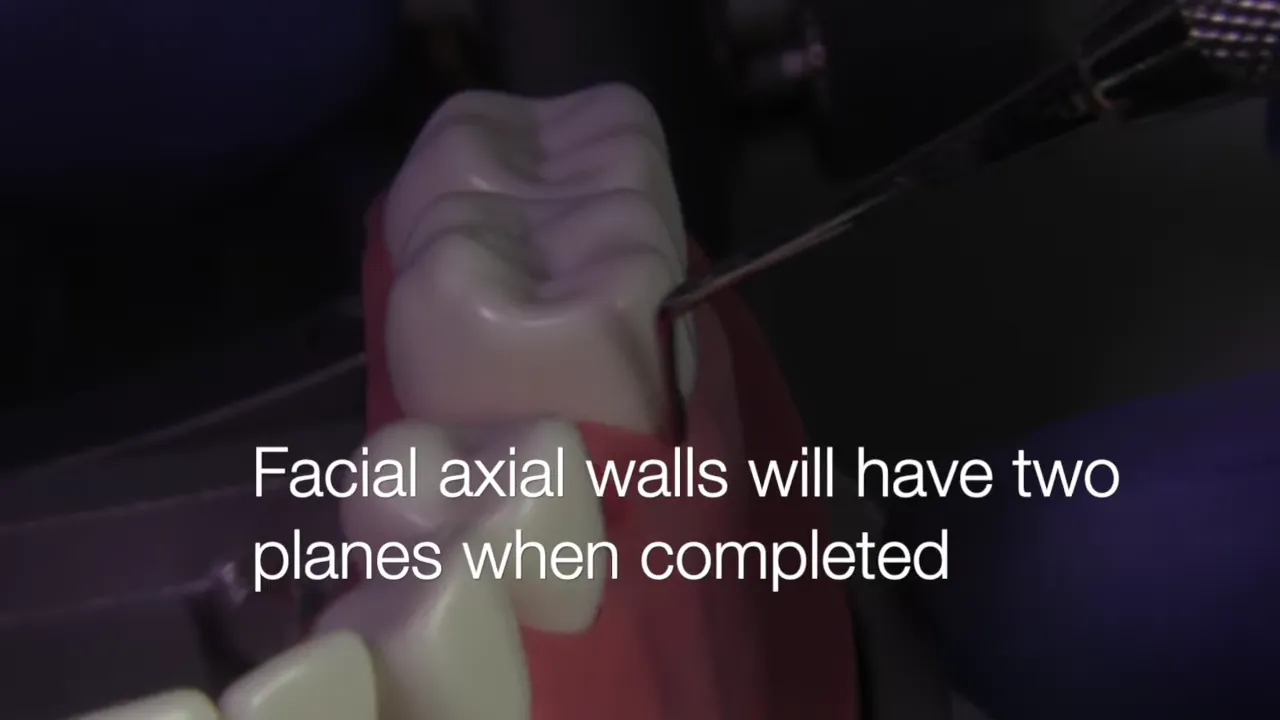 (vertical belt) near the gingival margin, with a secondary “contour zone” above it to accommodate aesthetic and morphological requirements.
3. Step-by-Step Preparation Protocol
Step 1: Occlusal Reduction
Instead of traditional depth cuts—which can be difficult to smooth and often lead to over-reduction—utilize a planar reduction technique.
- Technique: Use the 847KR 016 bur to create smooth planes.
- Clearance Requirements:
- Full Gold Crown (FGC) on Molar: 1.5 mm clearance.
- PFM on Premolar: 2.0 mm clearance.
- Verification: Use the RGS4 (1.5 mm) probe.
It should fit tightly on the FGC preparation and loosely on the PFM preparation.

Step 2: Axial Reduction and Line of Draw
- Orientation: Maintain a finger rest aligned with the established line of draw. Avoid leaning the bur, as this destroys the taper on the distal of the molar
or the mesial of the premolar.
- Interproximal Breakthrough: Use the 859 010 needle bur in an “uphill” motion to break through contacts
without damaging adjacent teeth.
- Secondary Facial Plane: Apply a secondary plane on the occlusal third of the facial wall.
This is critical for aesthetics and material strength, particularly for PFM or all-ceramic restorations.
Step 3: Margin Refinement
- Chamfer: Use the 8877 010 bur to create a clear 0.5 mm chamfer margin.
- Shoulder (for PFM): Convert the facial aspect of the premolar abutment using the 8847KR 016
to create a 1.0–1.2 mm shoulder.
- Positioning: Keep margins supragingival (0.5 mm to 1.0 mm above the tissue) for examination purposes to allow for better evaluation.
Step 4: Finishing and Beveling
- Tool: 7404 finishing bur at slow speed.
- Action: Round off all sharp internal line angles
and place a 0.5 mm bevel on the junction between the occlusal and facial surfaces.
- Benefit: Smoothing these edges facilitates easier laboratory fabrication and reduces stress concentrations in the final restoration.
4. Final Evaluation Criteria
A successful bridge preparation should demonstrate:
- Symmetry: Cusp tips of the preparations should line up
 with the original cusp positions of adjacent teeth.
2. Path of Insertion: Verified by viewing the preparations from 12 inches away
with the original cusp positions of adjacent teeth.
2. Path of Insertion: Verified by viewing the preparations from 12 inches away
 with one eye closed to ensure no undercuts exist.
3. Structural Integrity: Preservation of the oblique ridge
with one eye closed to ensure no undercuts exist.
3. Structural Integrity: Preservation of the oblique ridge
 (where applicable) and distinct functional cusp bevels.
4. Clearance: Adequate space for the chosen restorative materials (FGC vs. PFM).
(where applicable) and distinct functional cusp bevels.
4. Clearance: Adequate space for the chosen restorative materials (FGC vs. PFM).
