Introduction to Dental Surveying for Removable Partial Dentures (RPDs)
This document outlines the principles and procedures for surveying dental casts, specifically focusing on Kennedy Class I mandibular cases. Surveying is a critical step in the design and fabrication of cast partial dentures to ensure proper fit, function, and aesthetics.
1. Professional Responsibility in Surveying
Historically, the dentist held the sole responsibility for surveying. In modern practice, this responsibility is often shared or shifted:
- Laboratories: Often develop the treatment plan, survey the models, and dictate the path of placement.
- Communication: It is vital for the laboratory to communicate the design clearly to the practitioner.
- Third-Party Outsourcing: When frameworks are outsourced, there is a risk of the designer being too far removed from the clinical treatment plan. Maintaining responsibility for the survey ensures the framework fits the patient’s specific needs.
2. Components of the Dental Surveyor
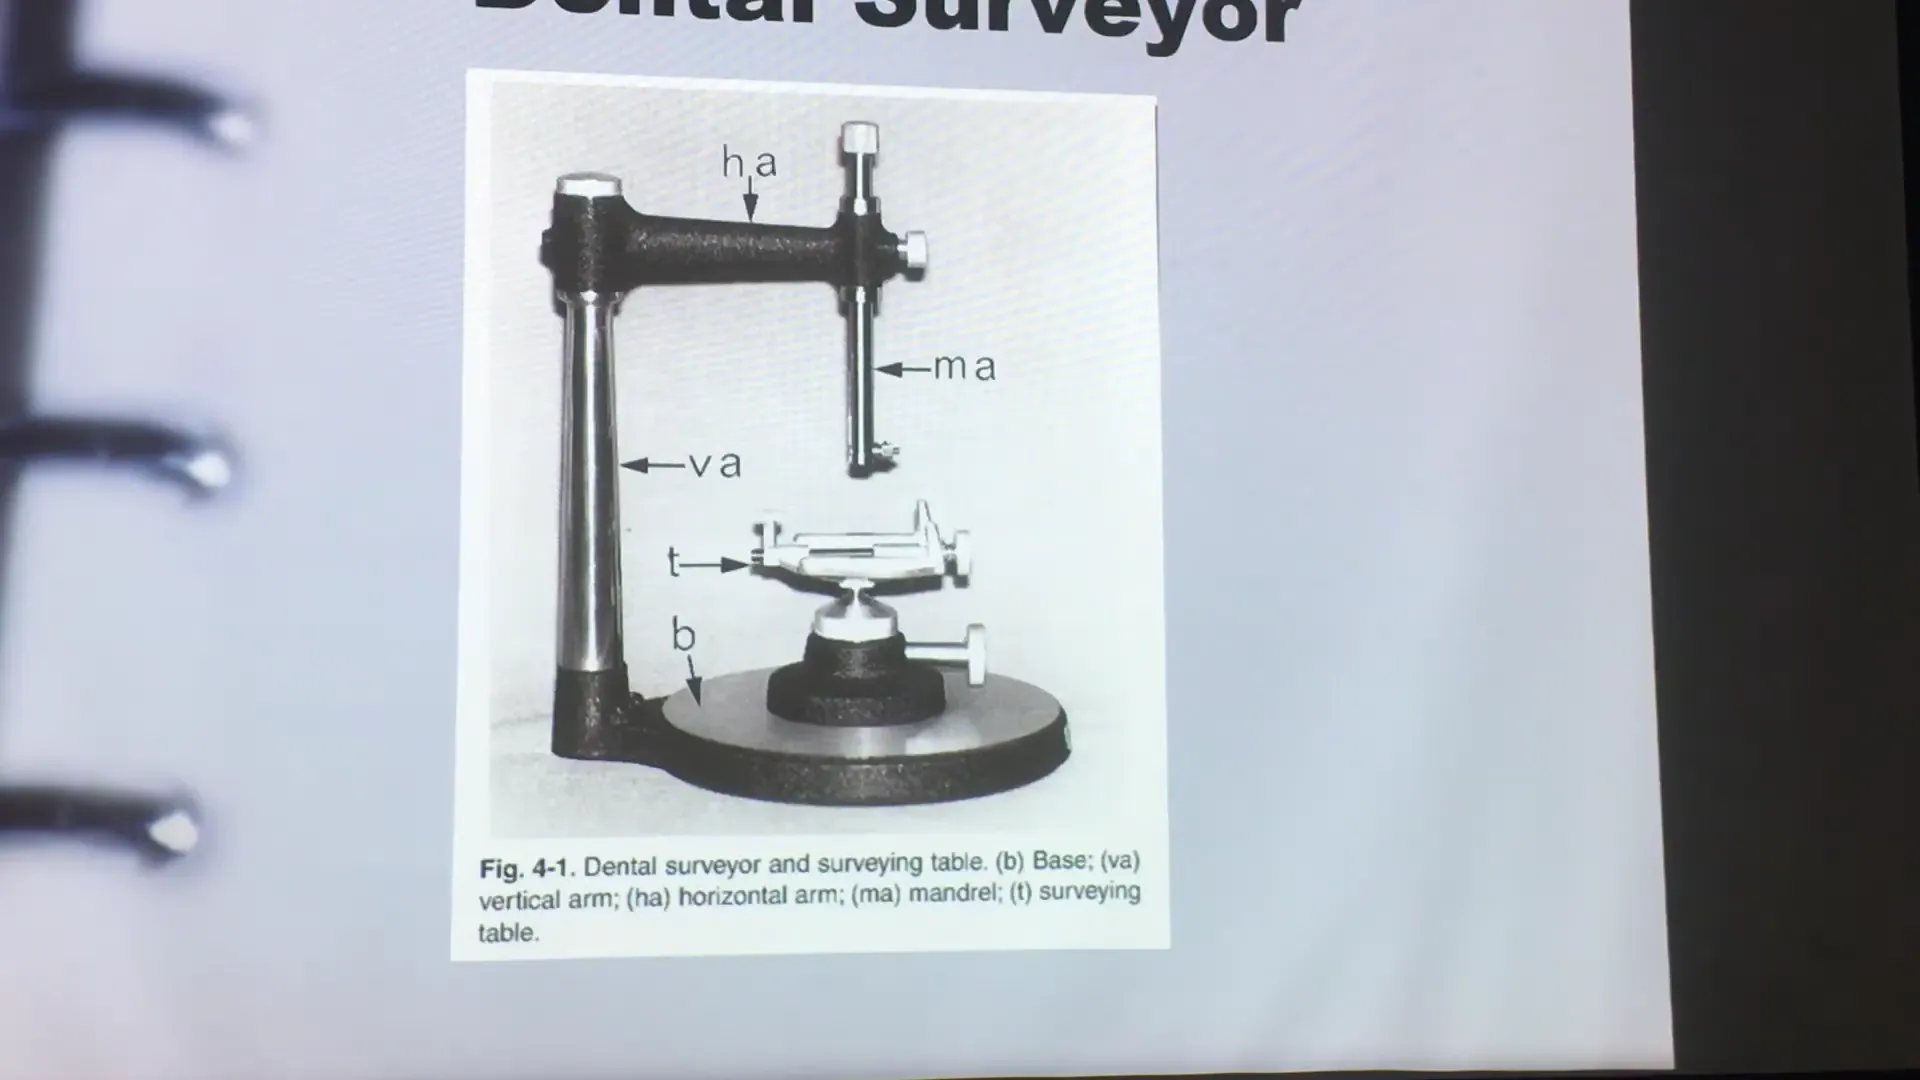
The standard instrument used is the Ney Dental Surveyor. Key components include:
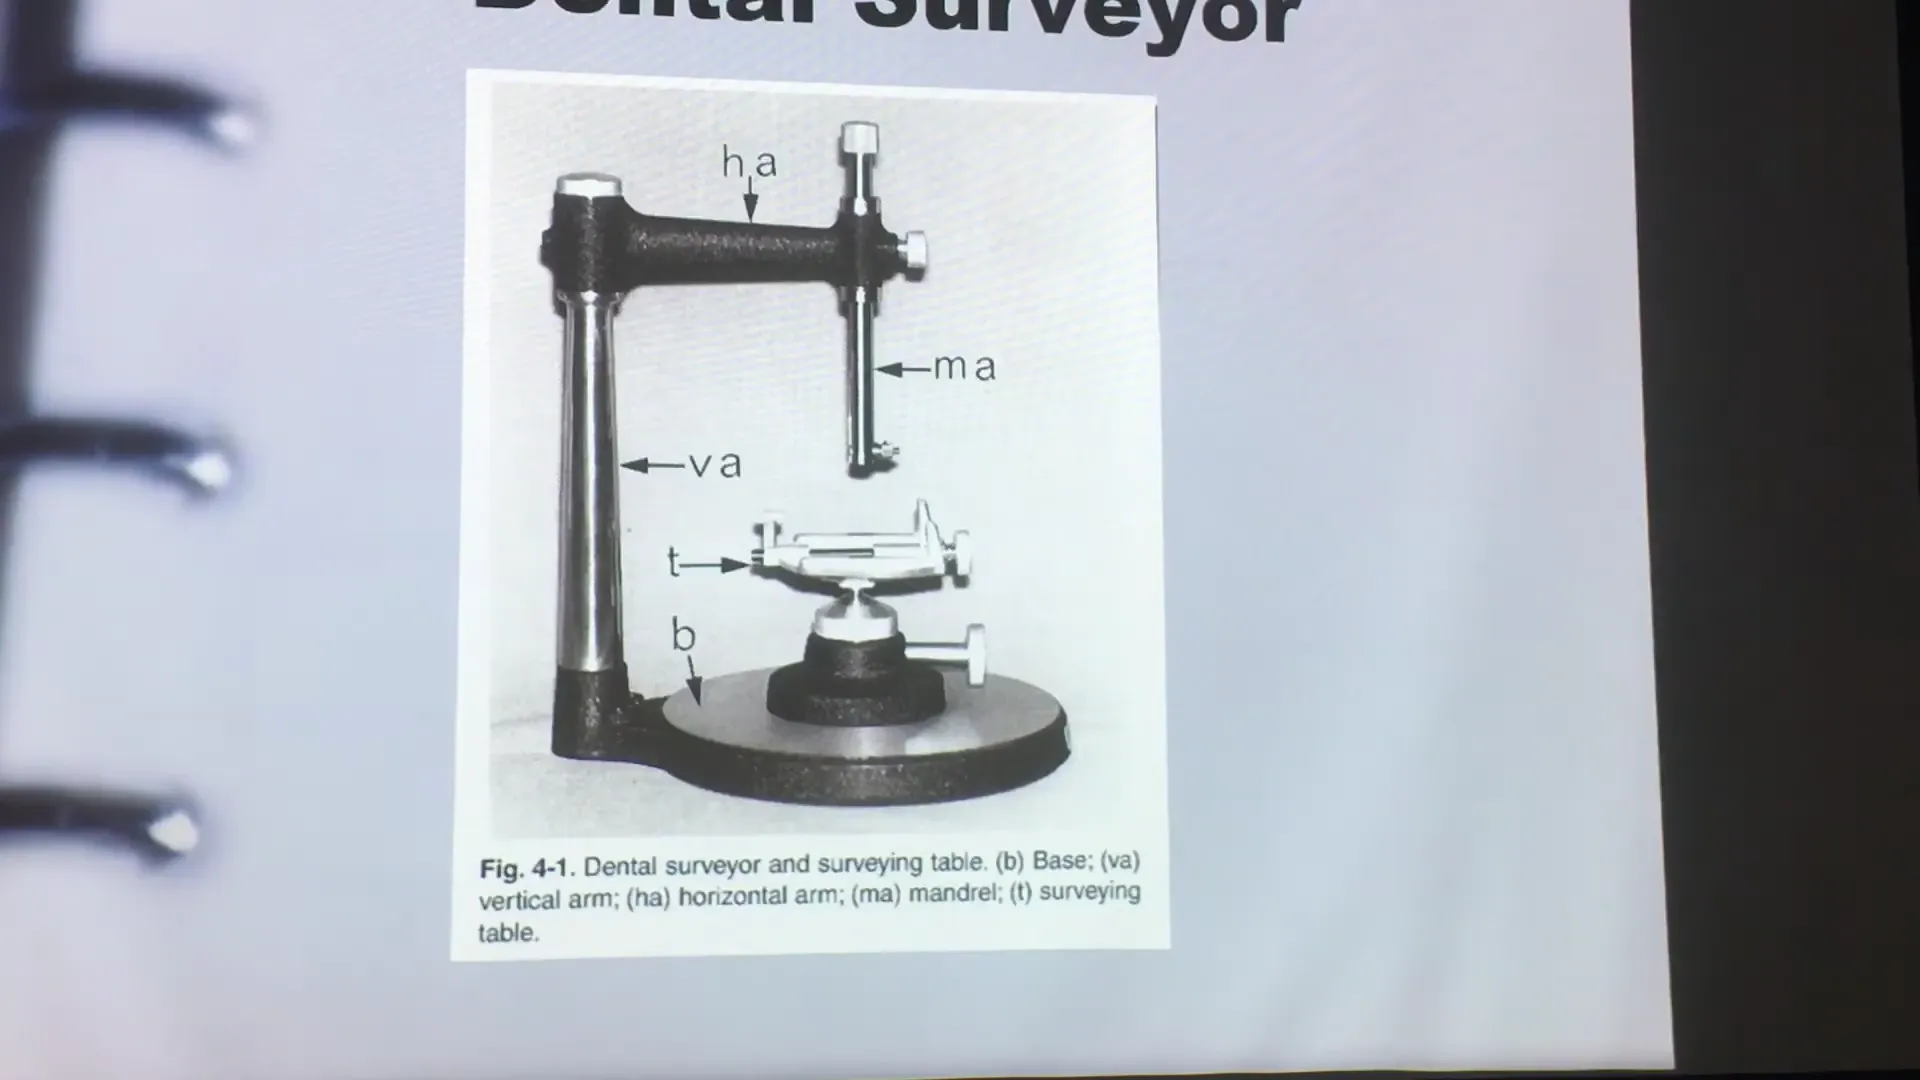
- Base and Vertical Arm: Provide stability and a fixed vertical reference.
- Horizontal Arm and Mandrel: Holds the surveying tools.
- Surveying Table: An adjustable platform that holds the cast and allows for tilting to determine the optimal path of insertion.
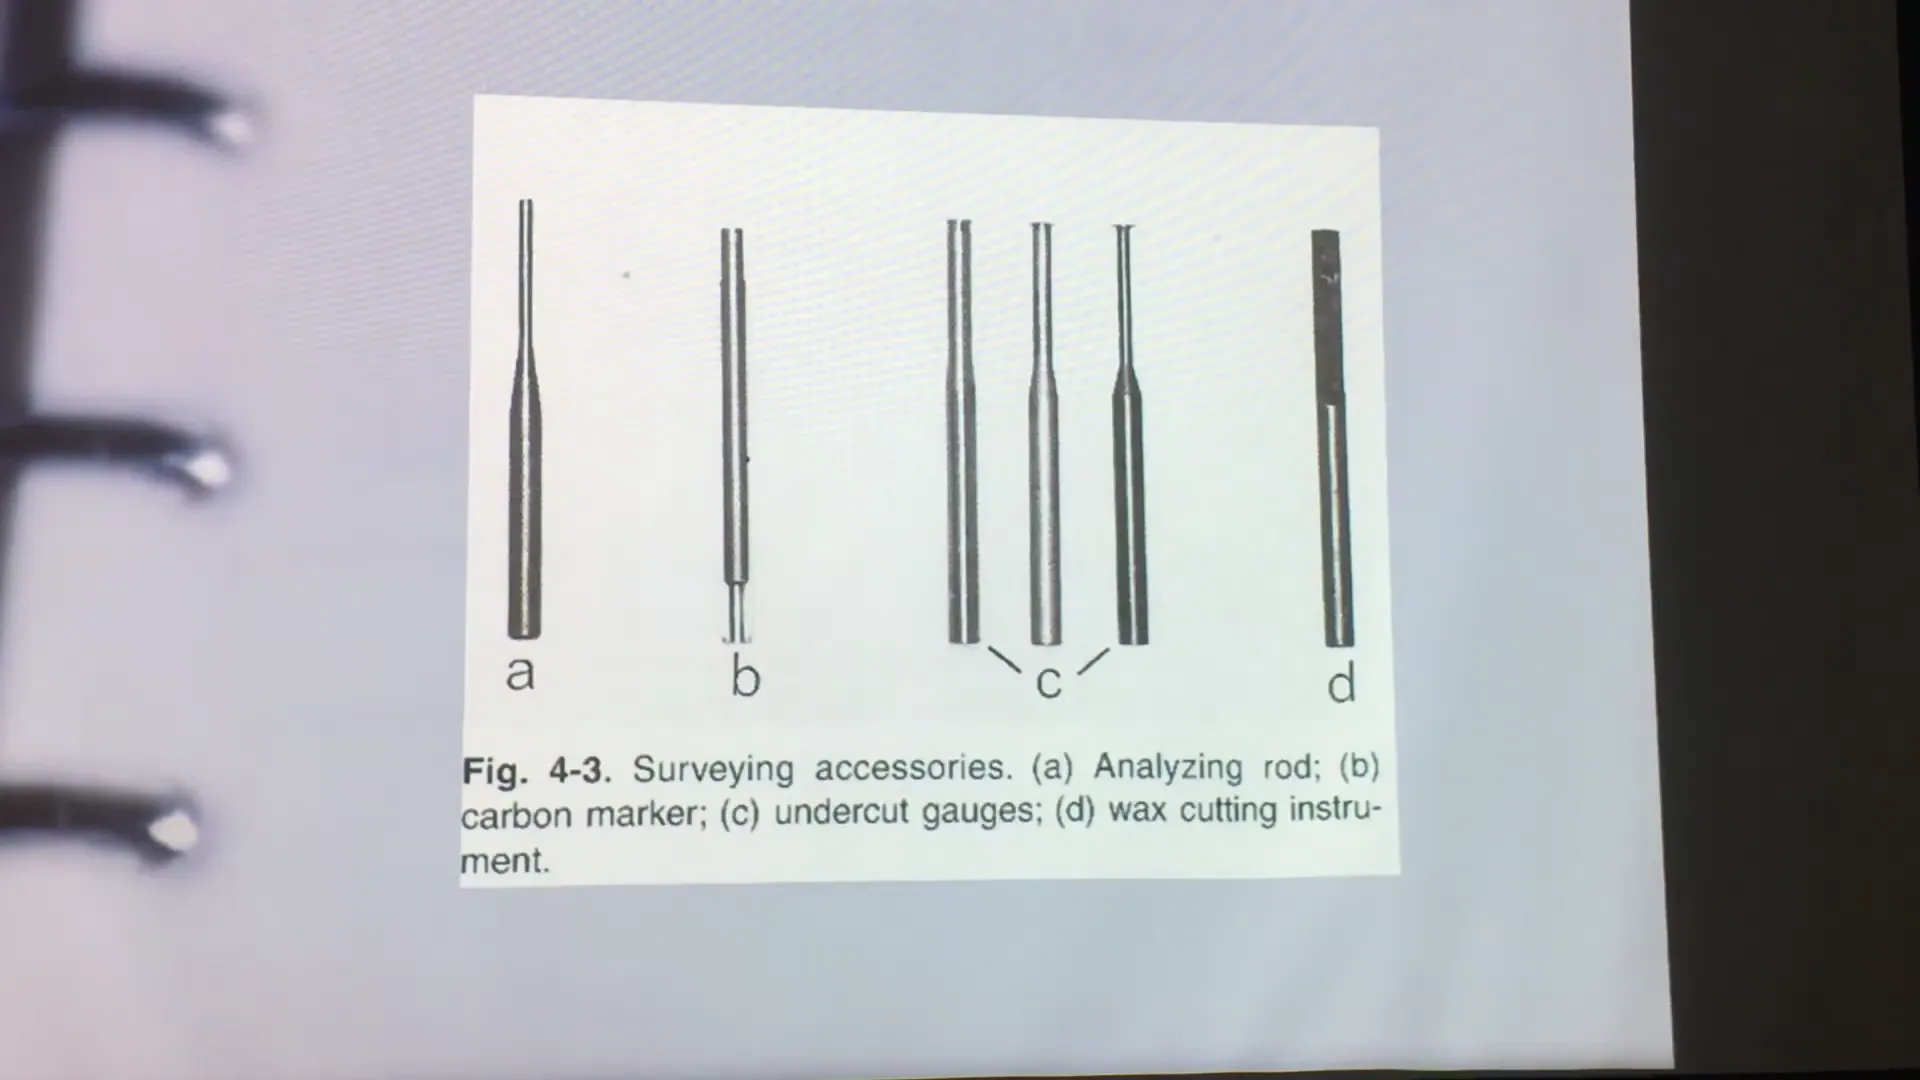
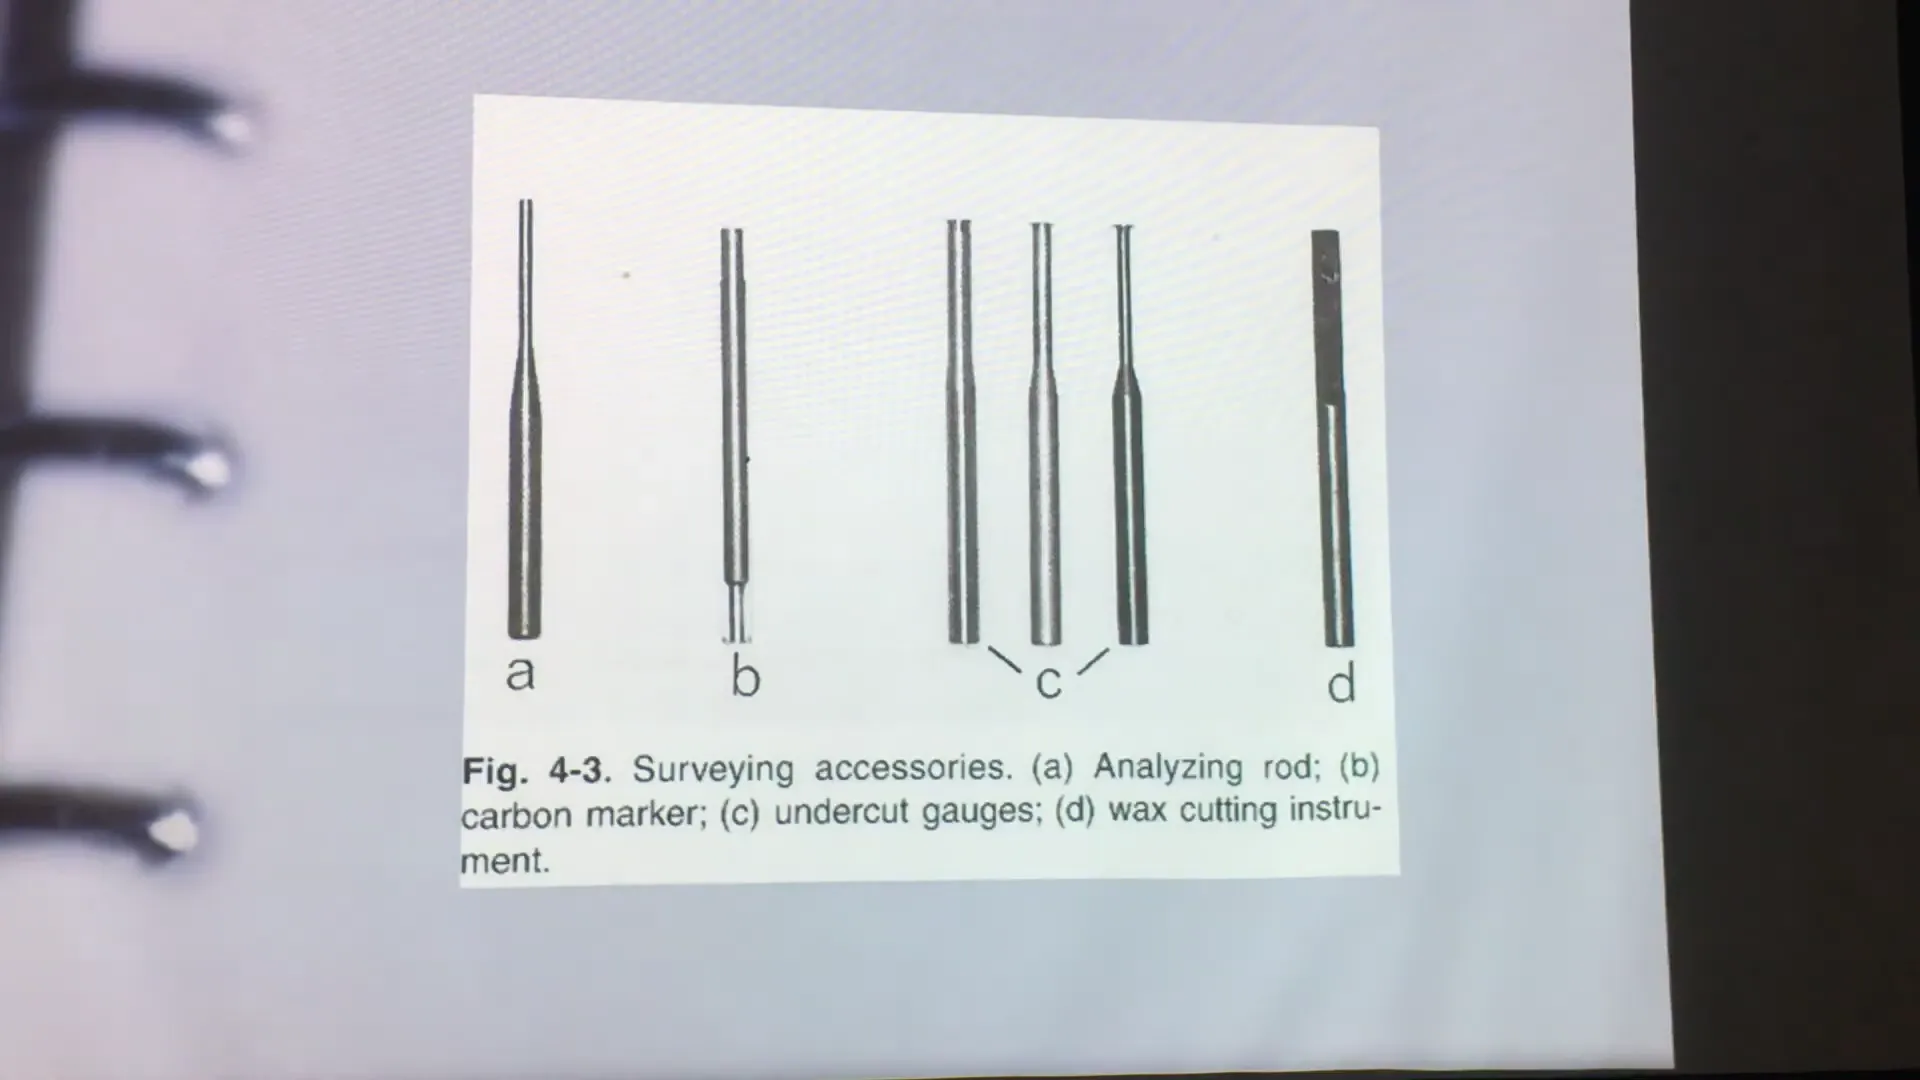
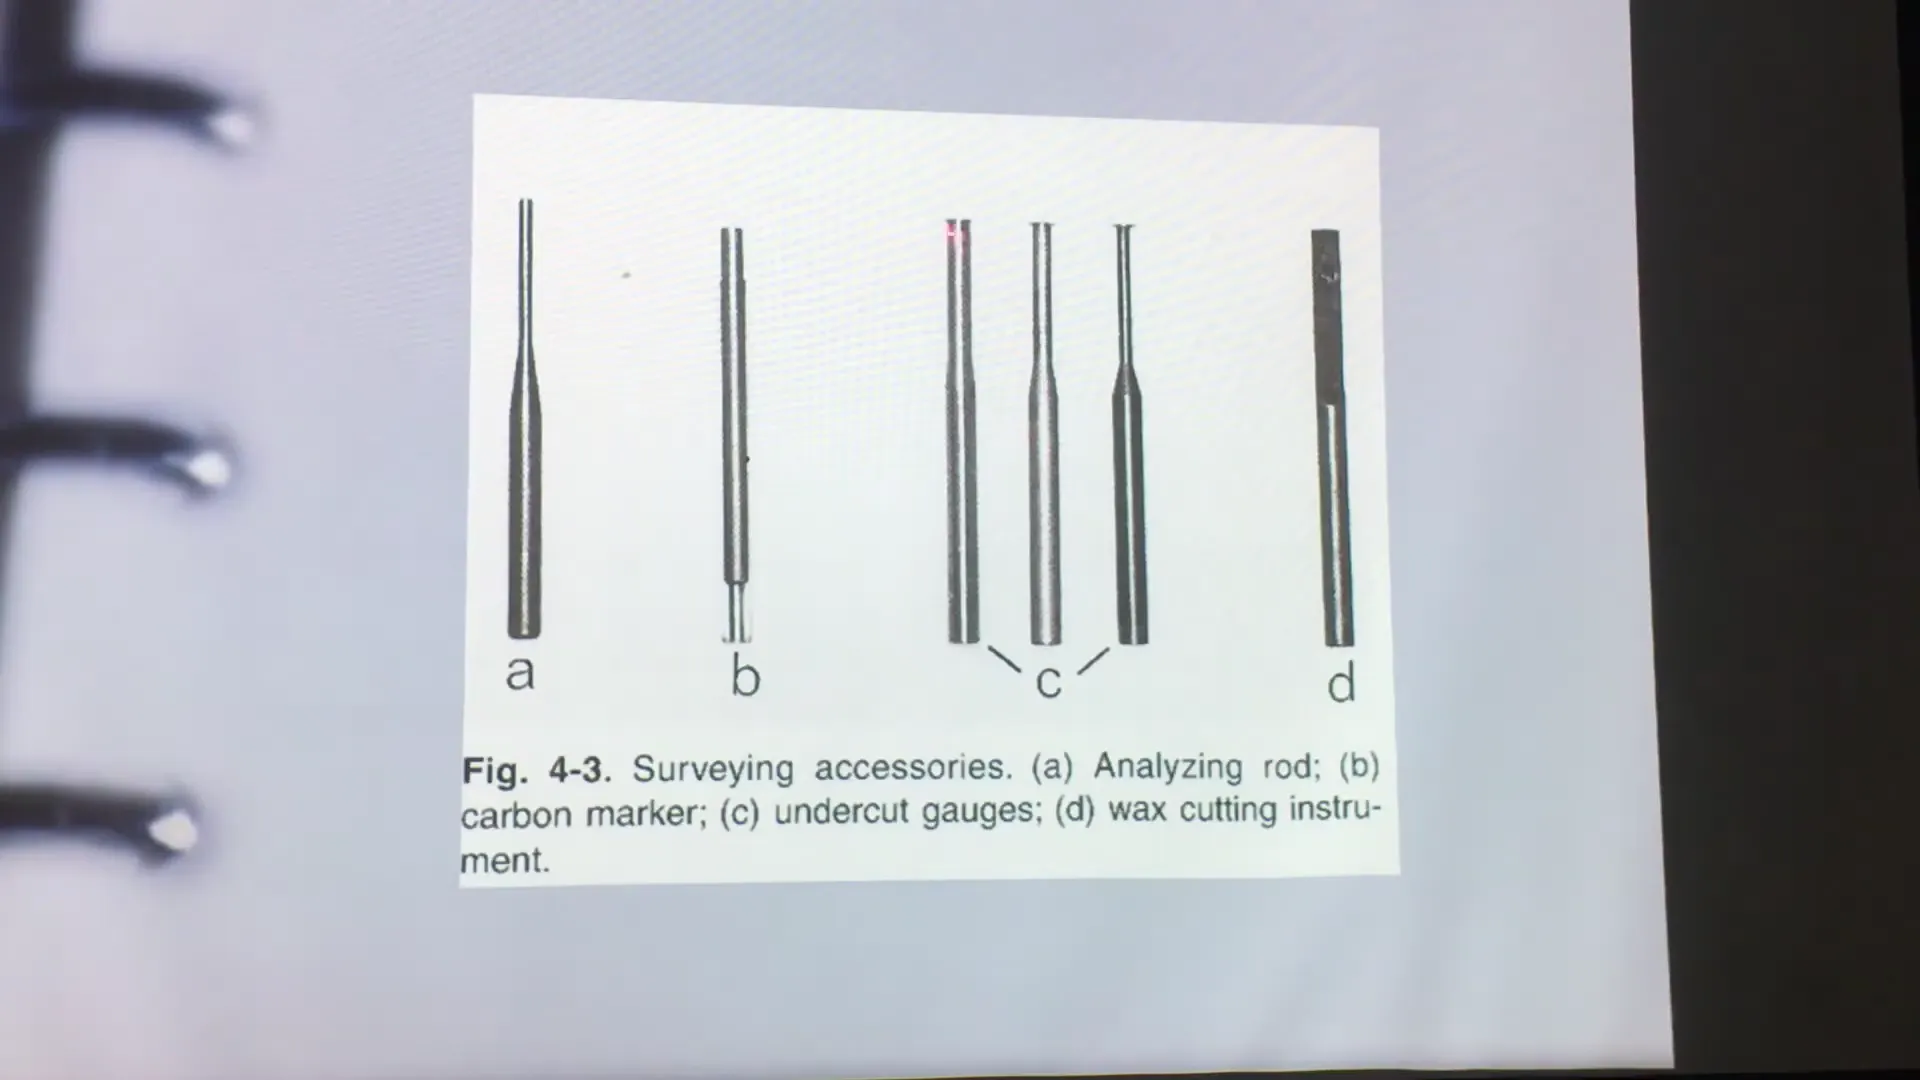
Surveying Tools and Gauges
| Tool | Function |
|---|---|
| Analyzing Rod | A straight metal rod used to check for parallelism and identify undercuts without marking the tooth. |
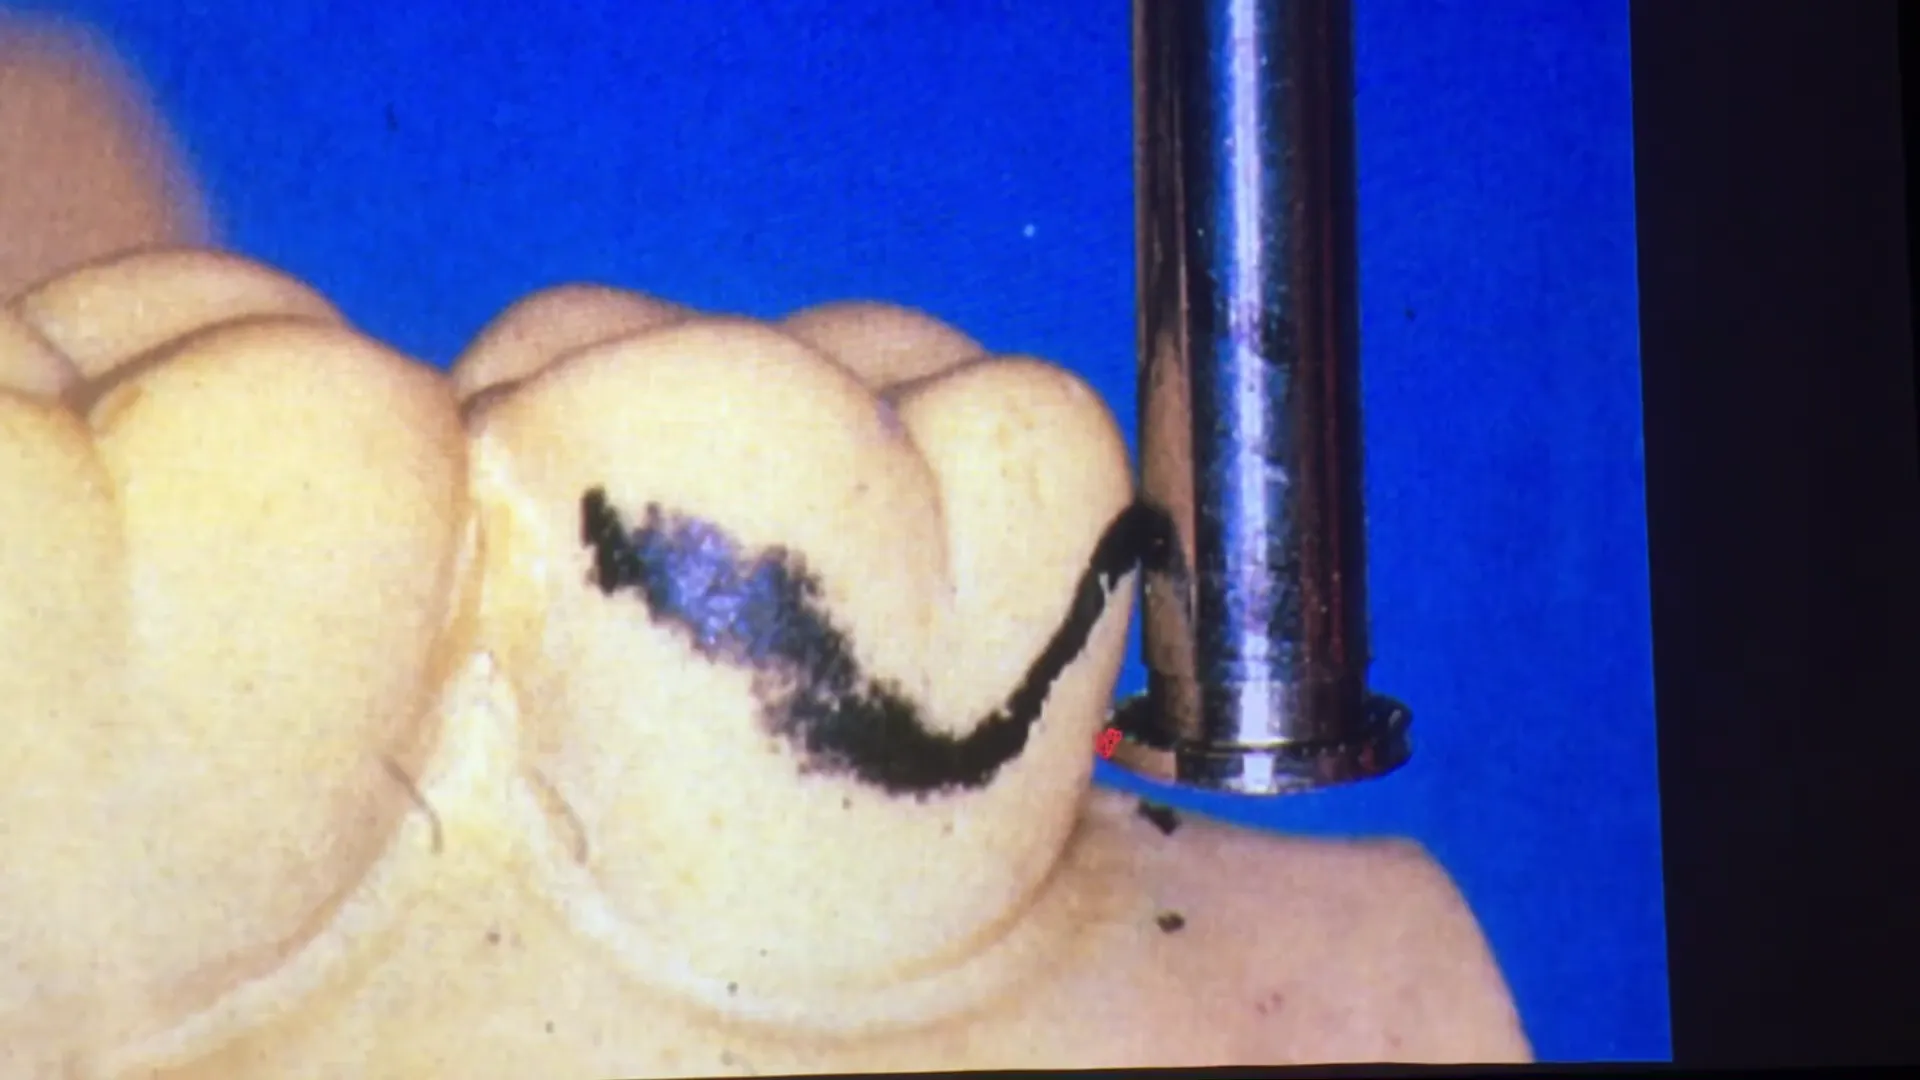
| Carbon Marker | Used to delineate the height of contour (survey line) on the teeth and soft tissue. |
| Undercut Gauges | Used to measure the depth of an undercut. Available in three sizes: 0.25mm (1 line), 0.50mm (2 lines), and 0.75mm (3 lines). |
| Wax Trimmer | A blade used to contour wax during the block-out process. |
- ==each clasp has a different type of indicated undercut
3. The Nine Purposes of Surveying
Understanding these nine objectives is essential for successful RPD design:
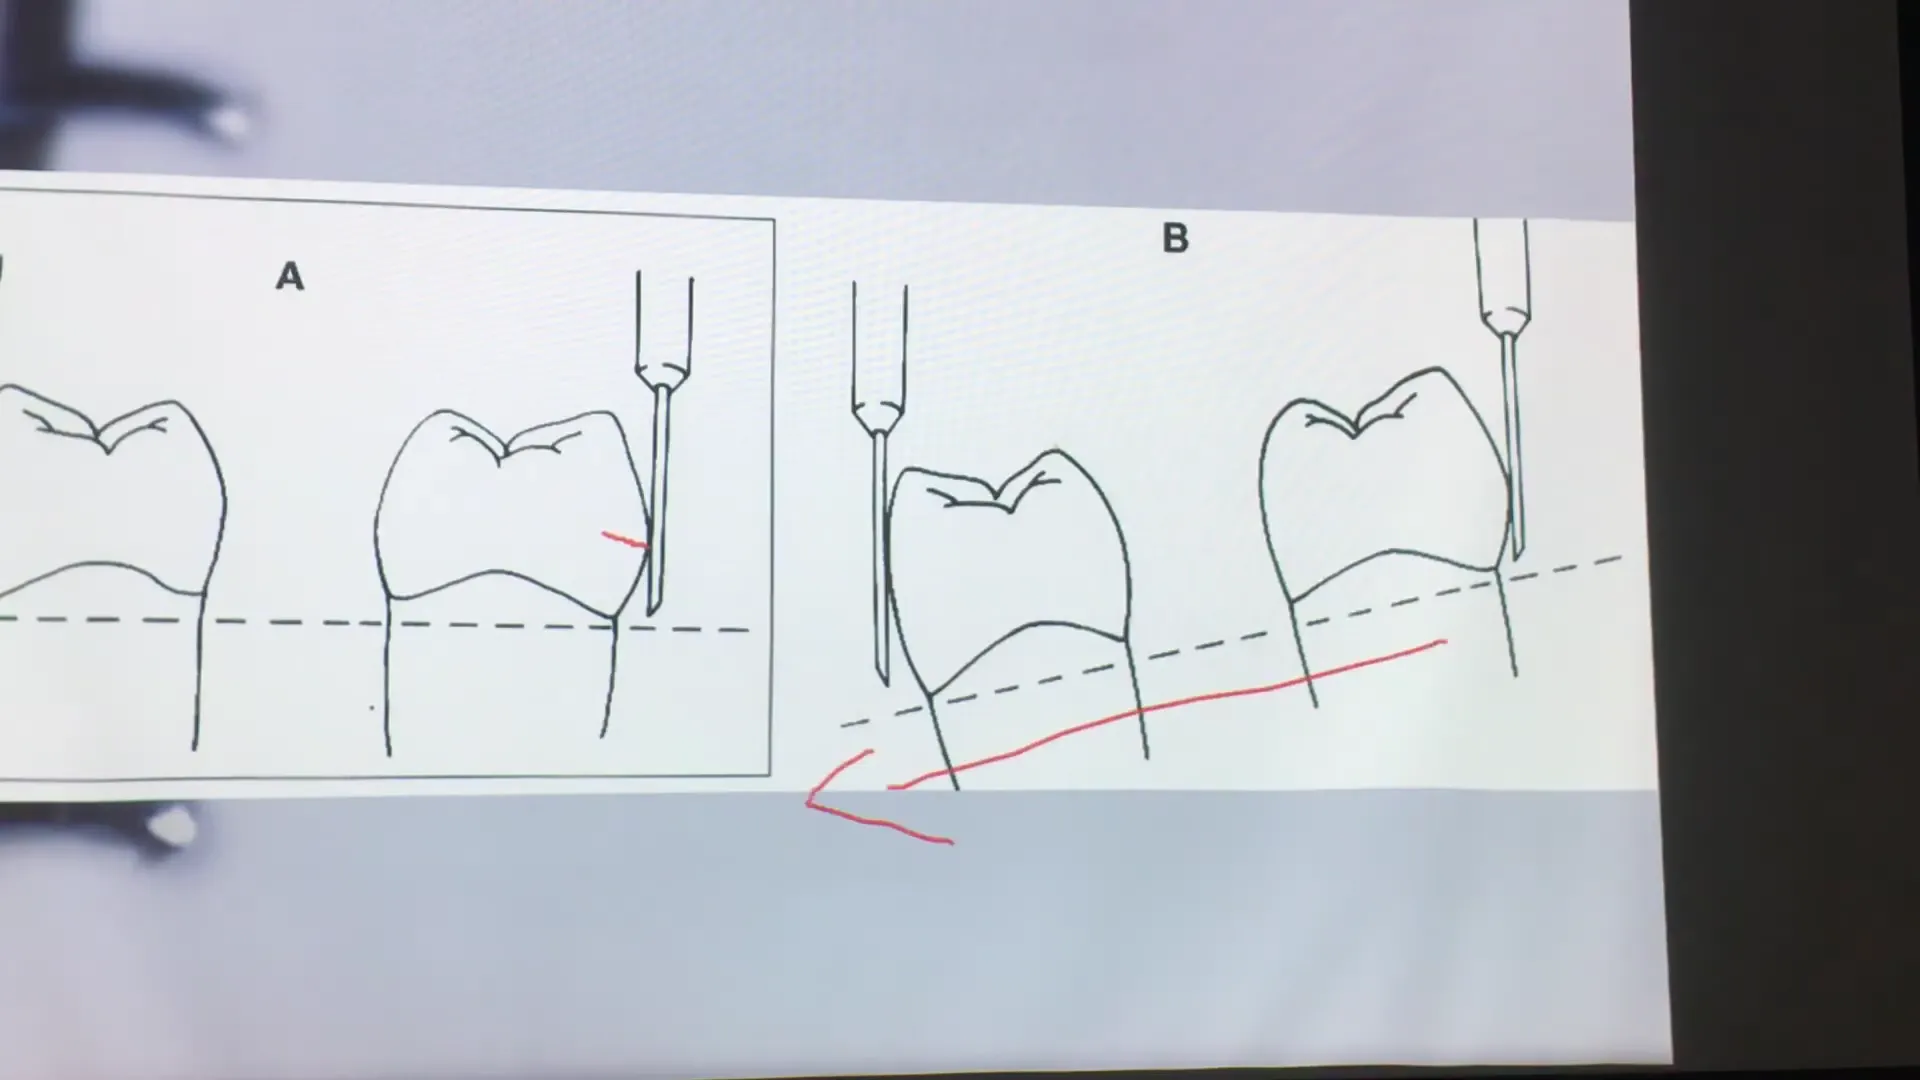
- Determine the Path of Placement: Identifying the most acceptable direction for the denture to be inserted and removed.
- Identify Guide Planes: Locating parallel proximal tooth surfaces that direct the path of insertion.
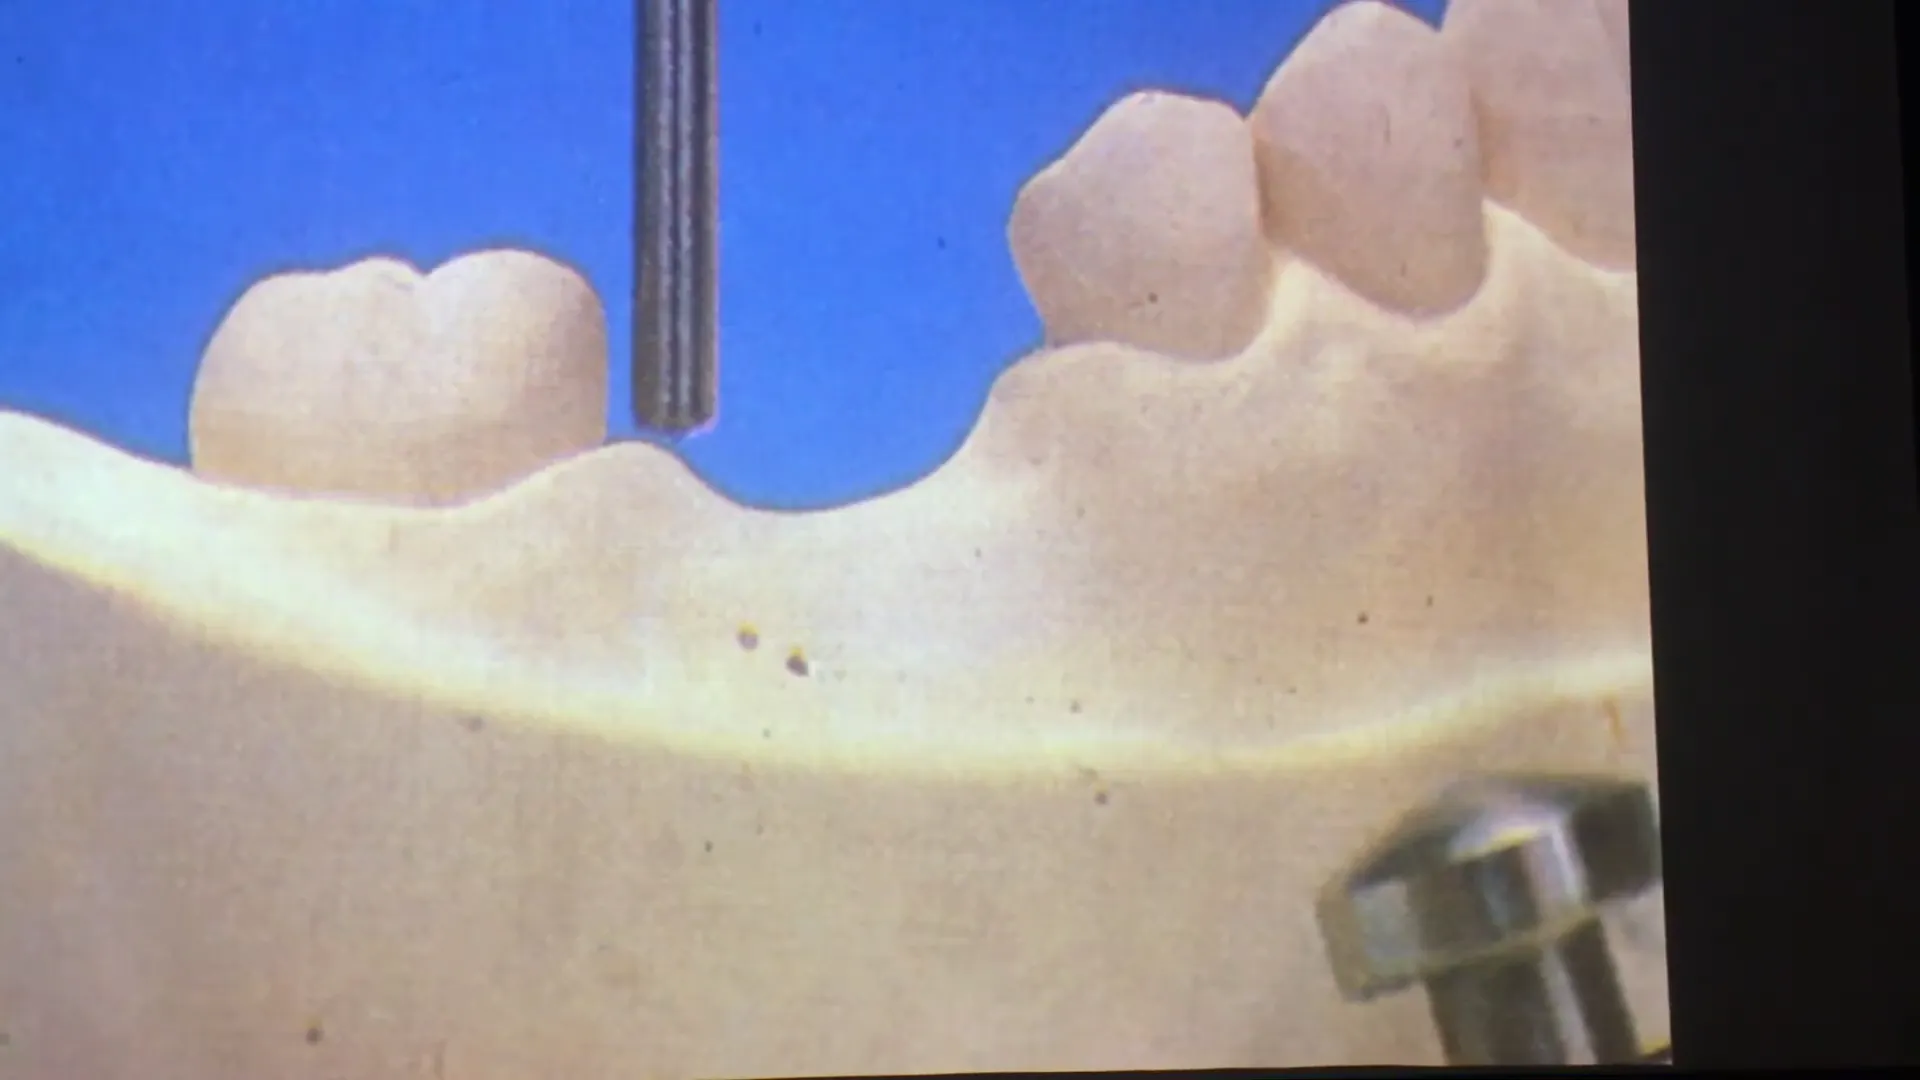
- Identify Undercut Areas: Finding areas of the teeth that can provide retention for clasps.
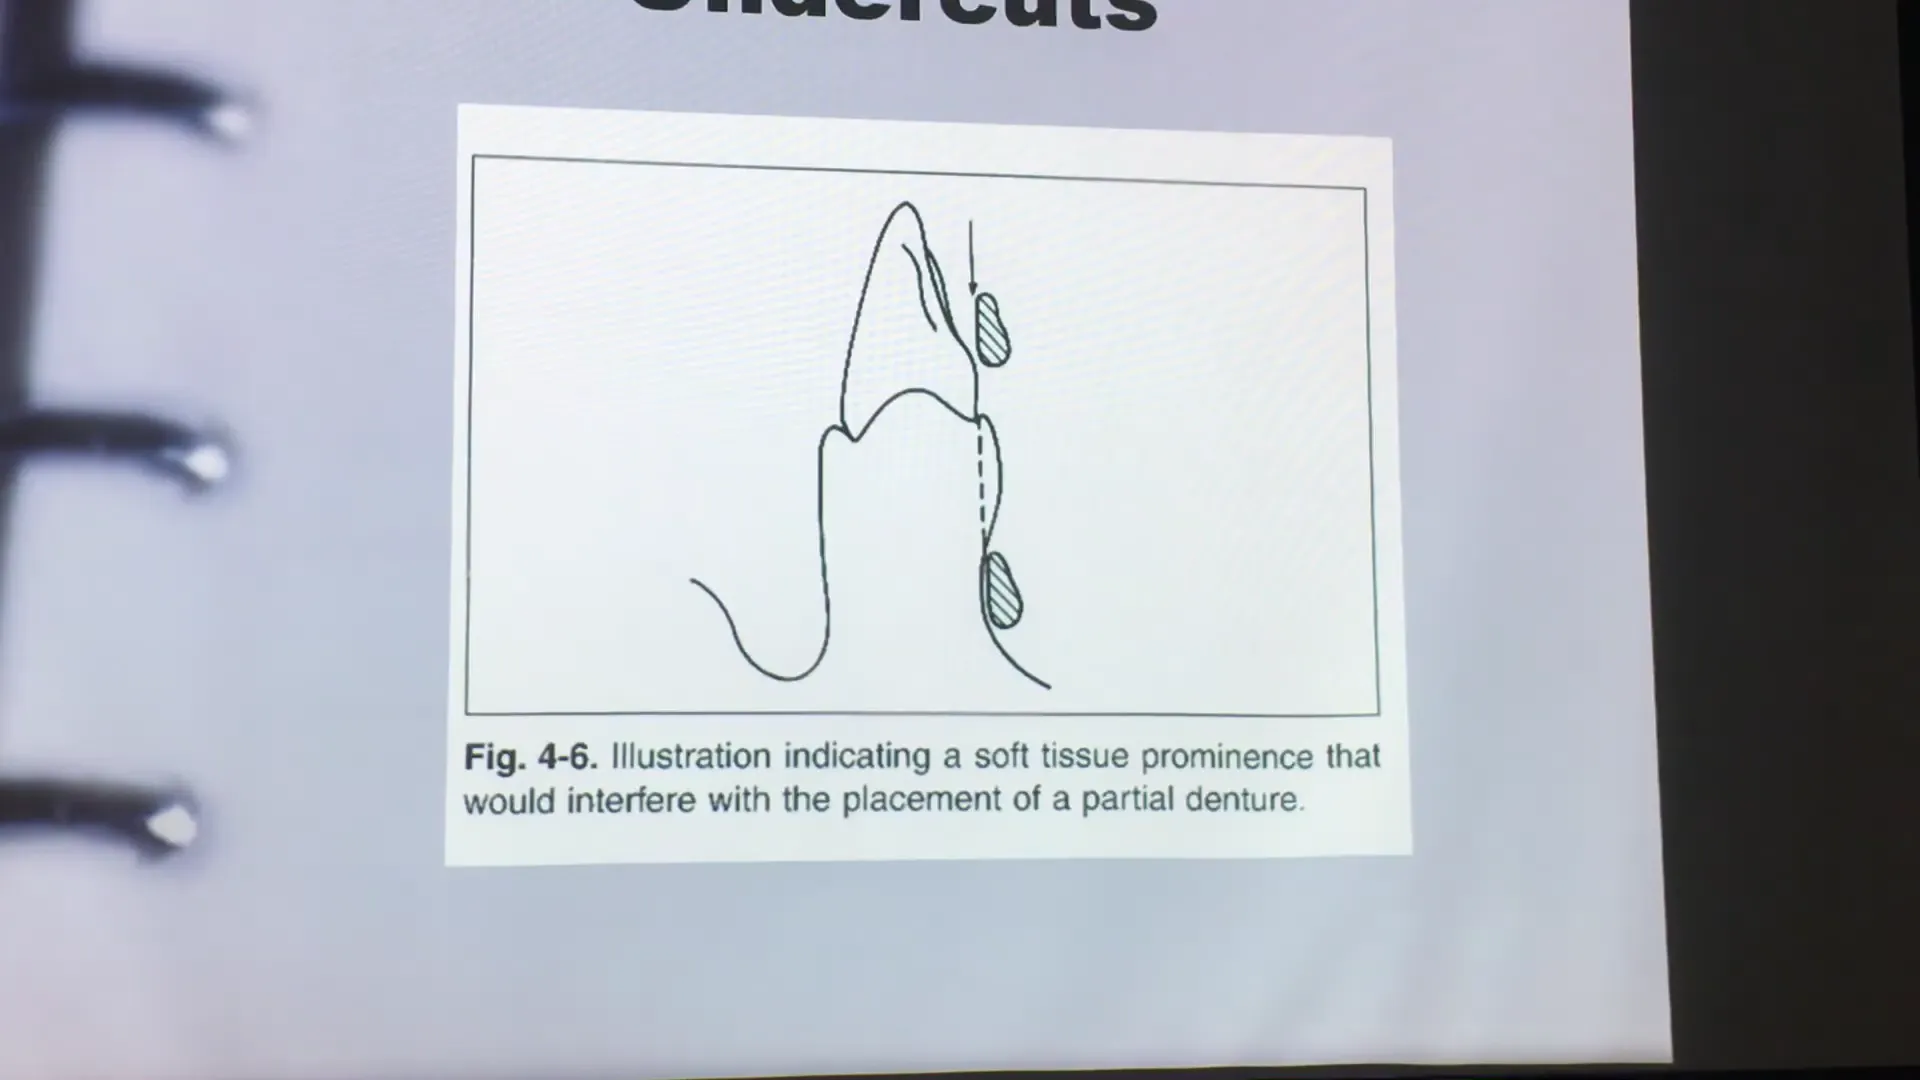
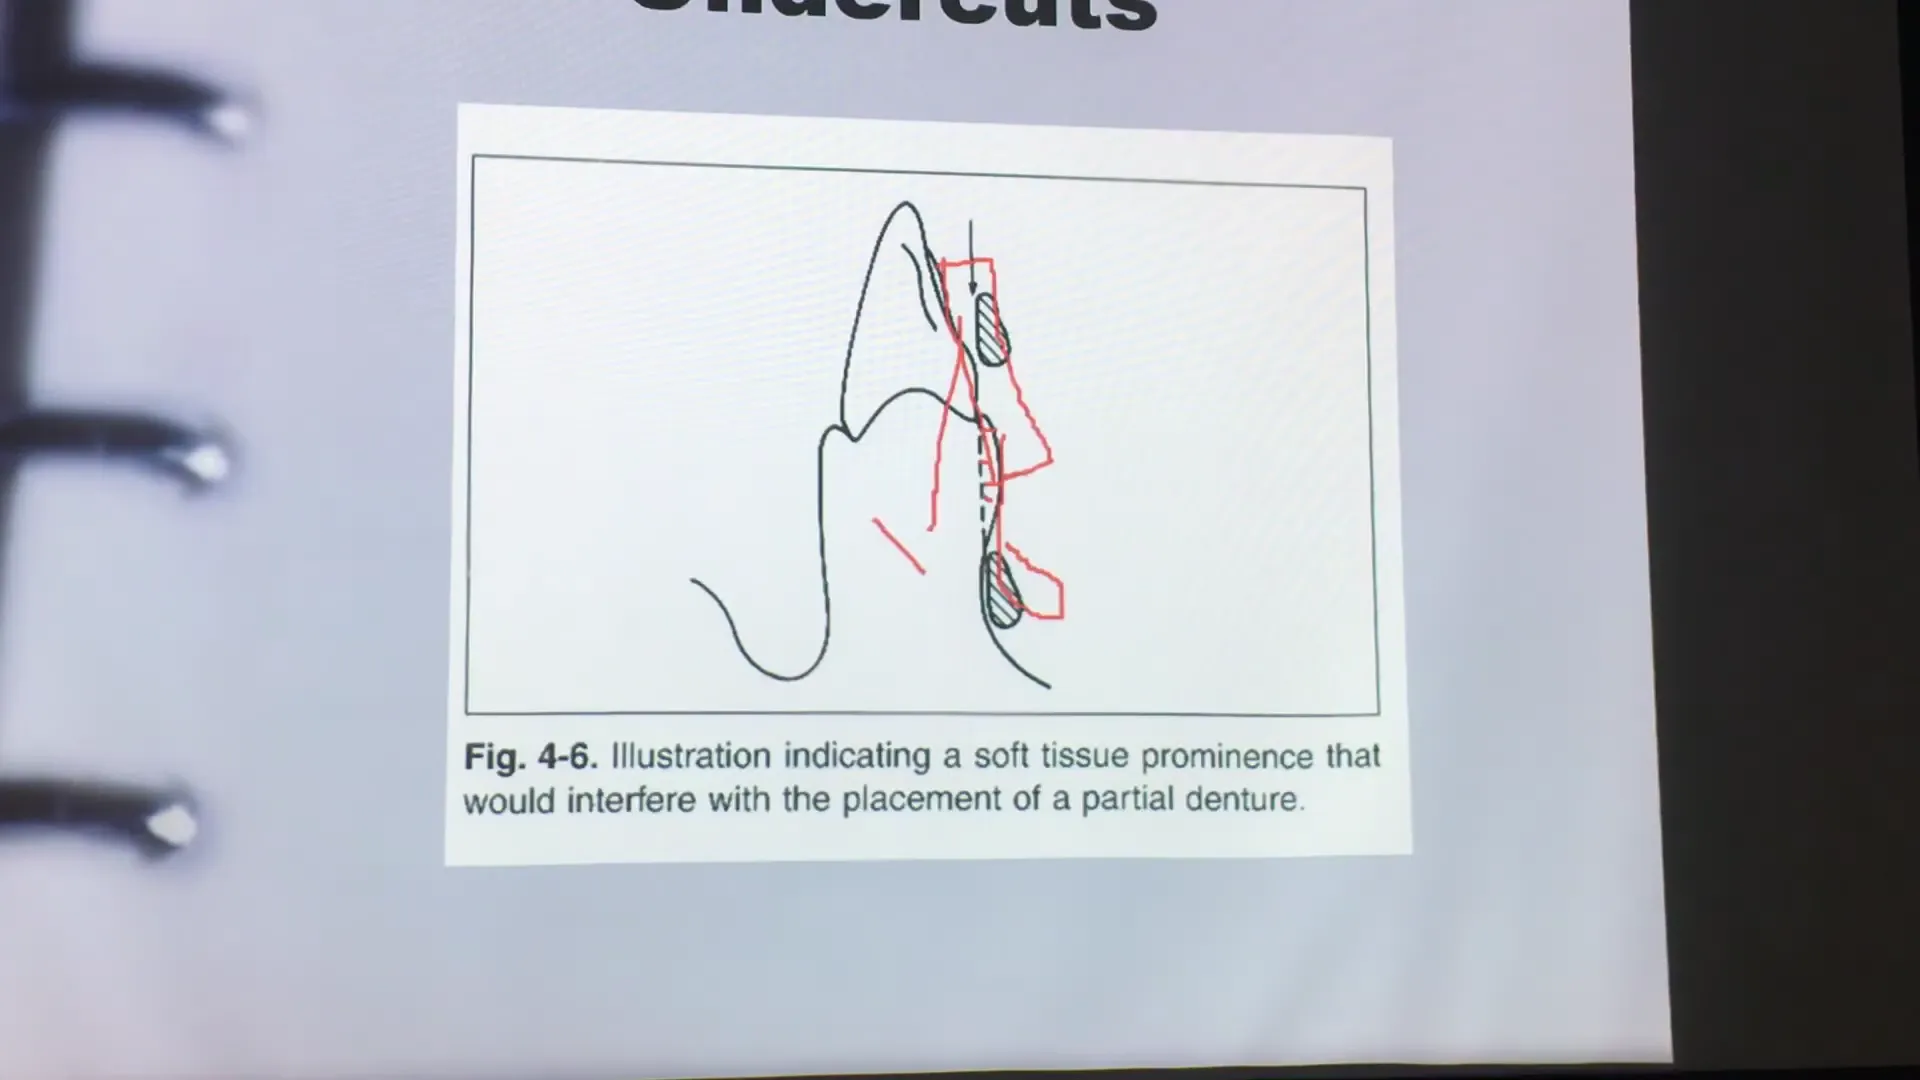
- Evaluate Soft Tissue Undercuts: Checking for interference in the vestibules or lingual areas that might impede the major connector.
- Evaluate Aesthetics: Minimizing unsightly metal display or “black holes” (gaps) between the denture and natural teeth.
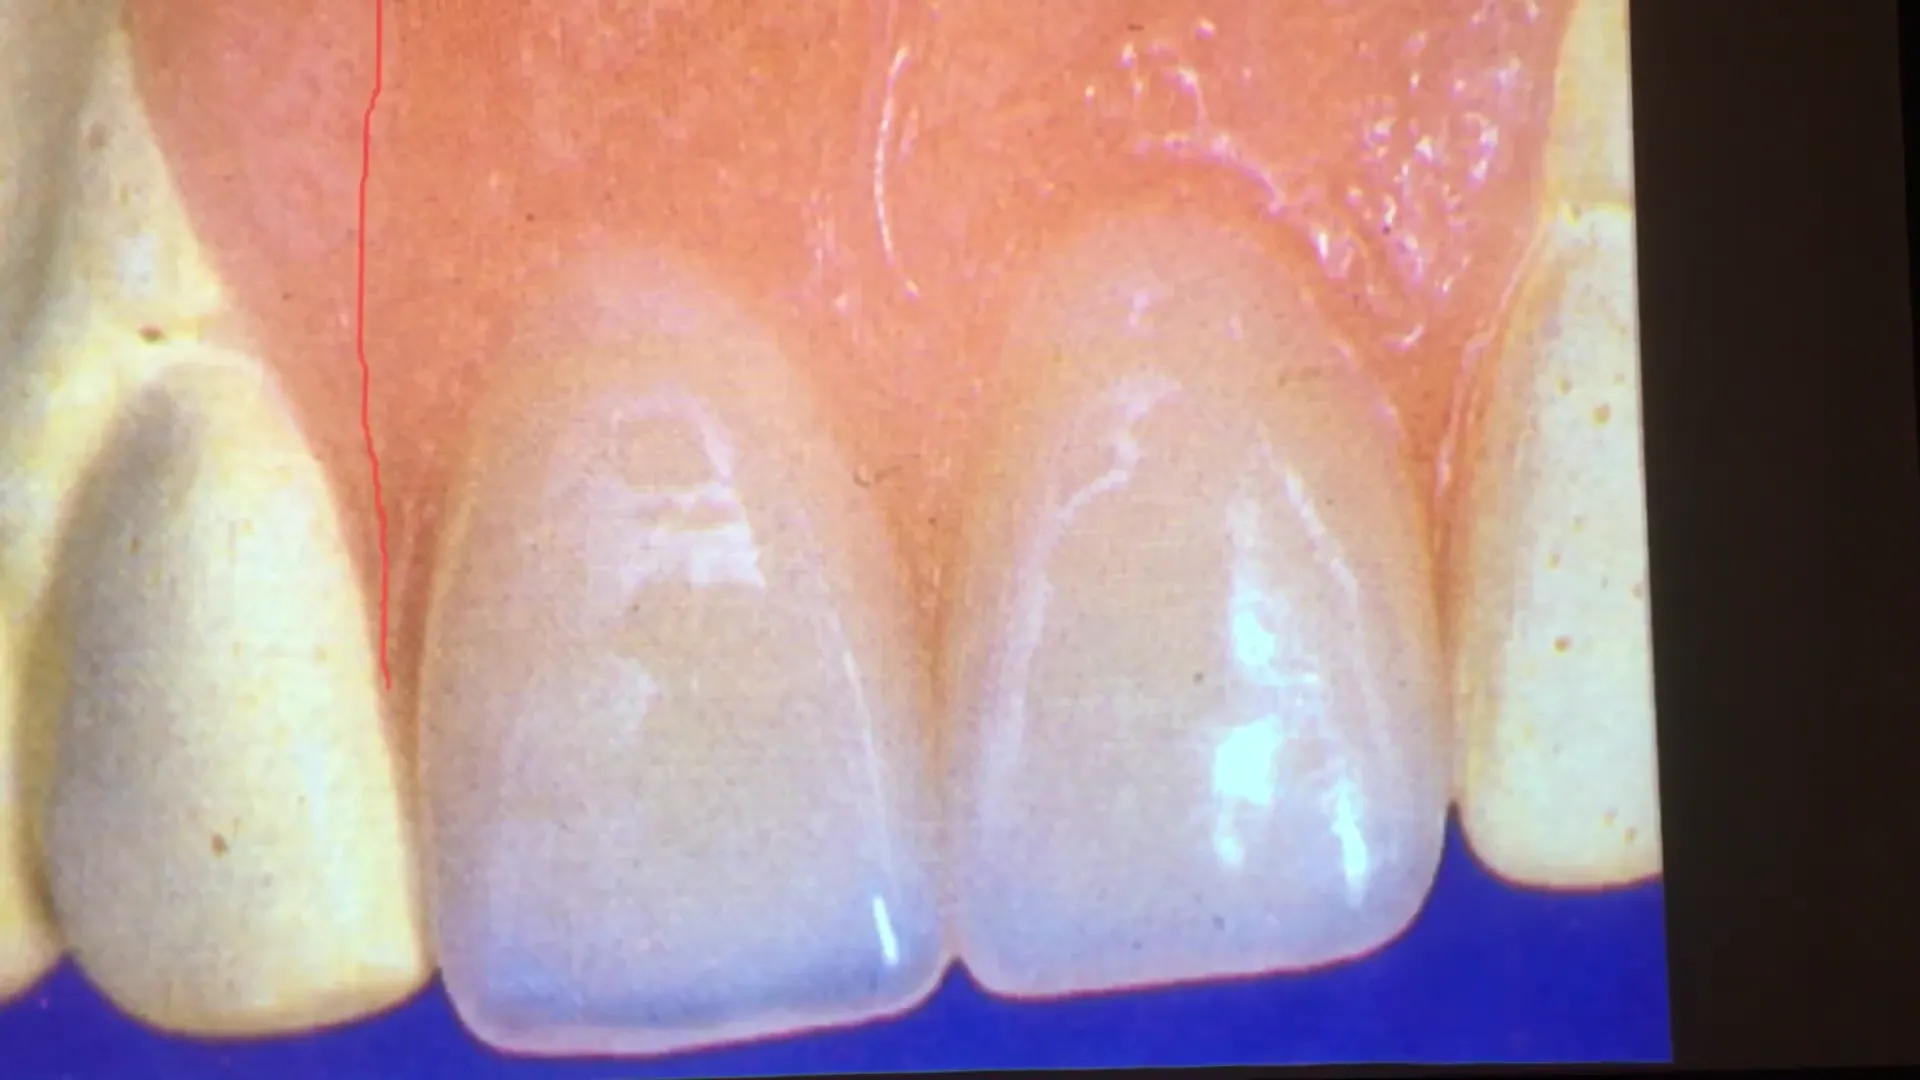
- Determine Restorative Procedures: Identifying if teeth need to be reshaped or crowned to create better guide planes or undercuts.
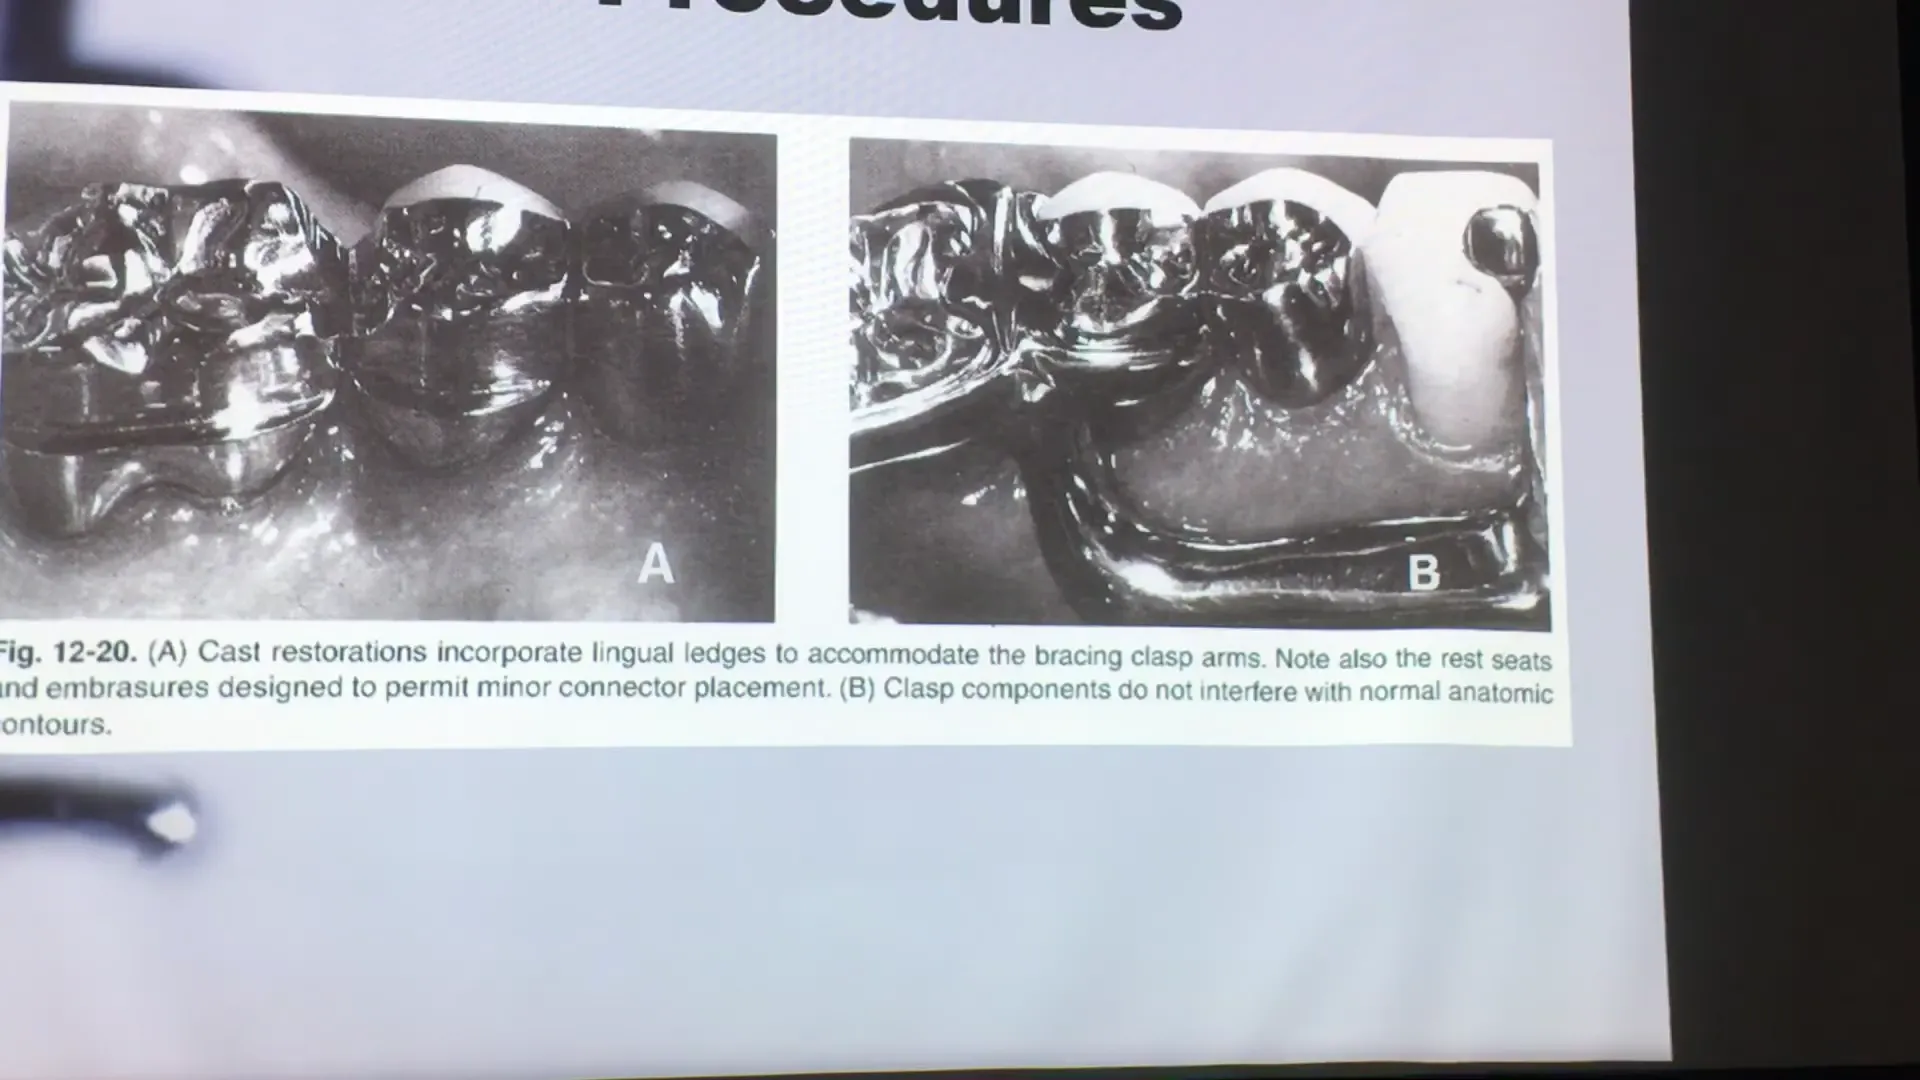
- Delineate Survey Lines: Marking the height of contour to guide clasp placement.
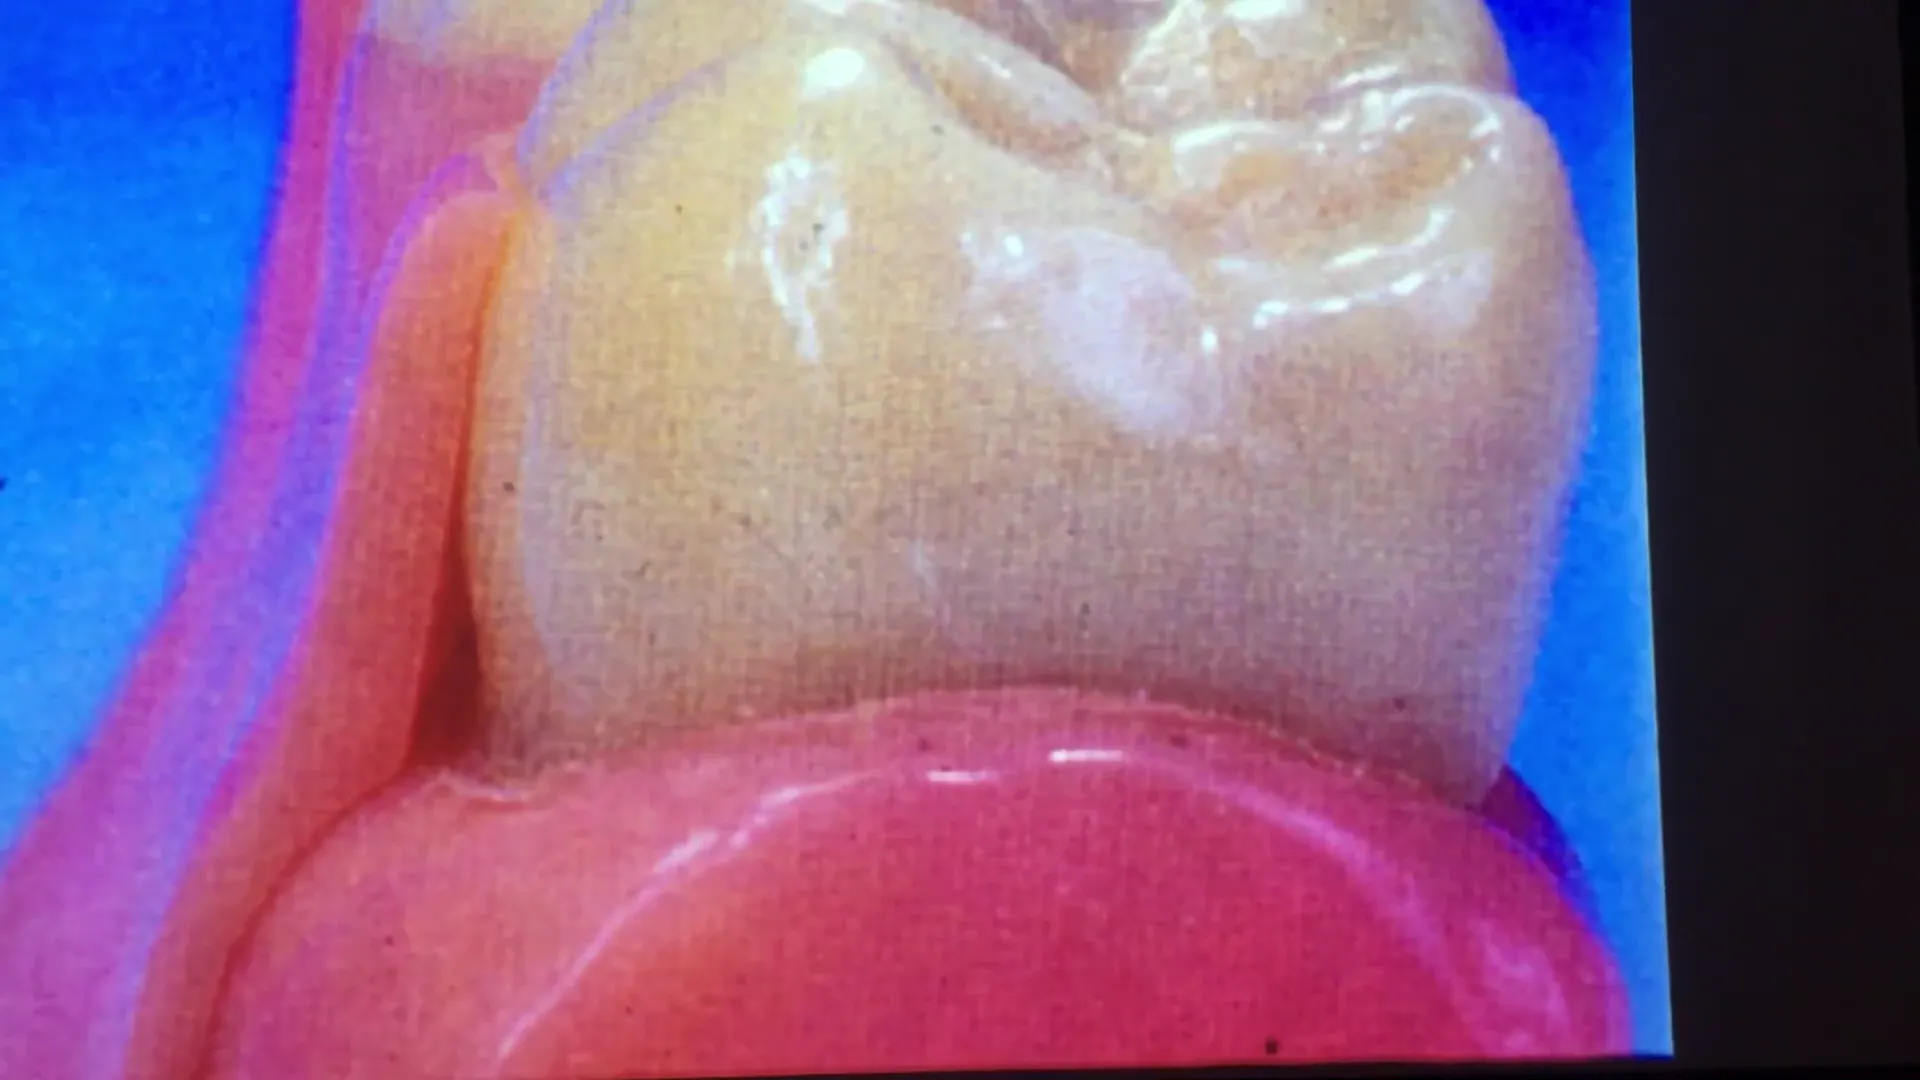
- Locate Undesirable Undercuts: Identifying areas that must be blocked out so the rigid framework does not bind.
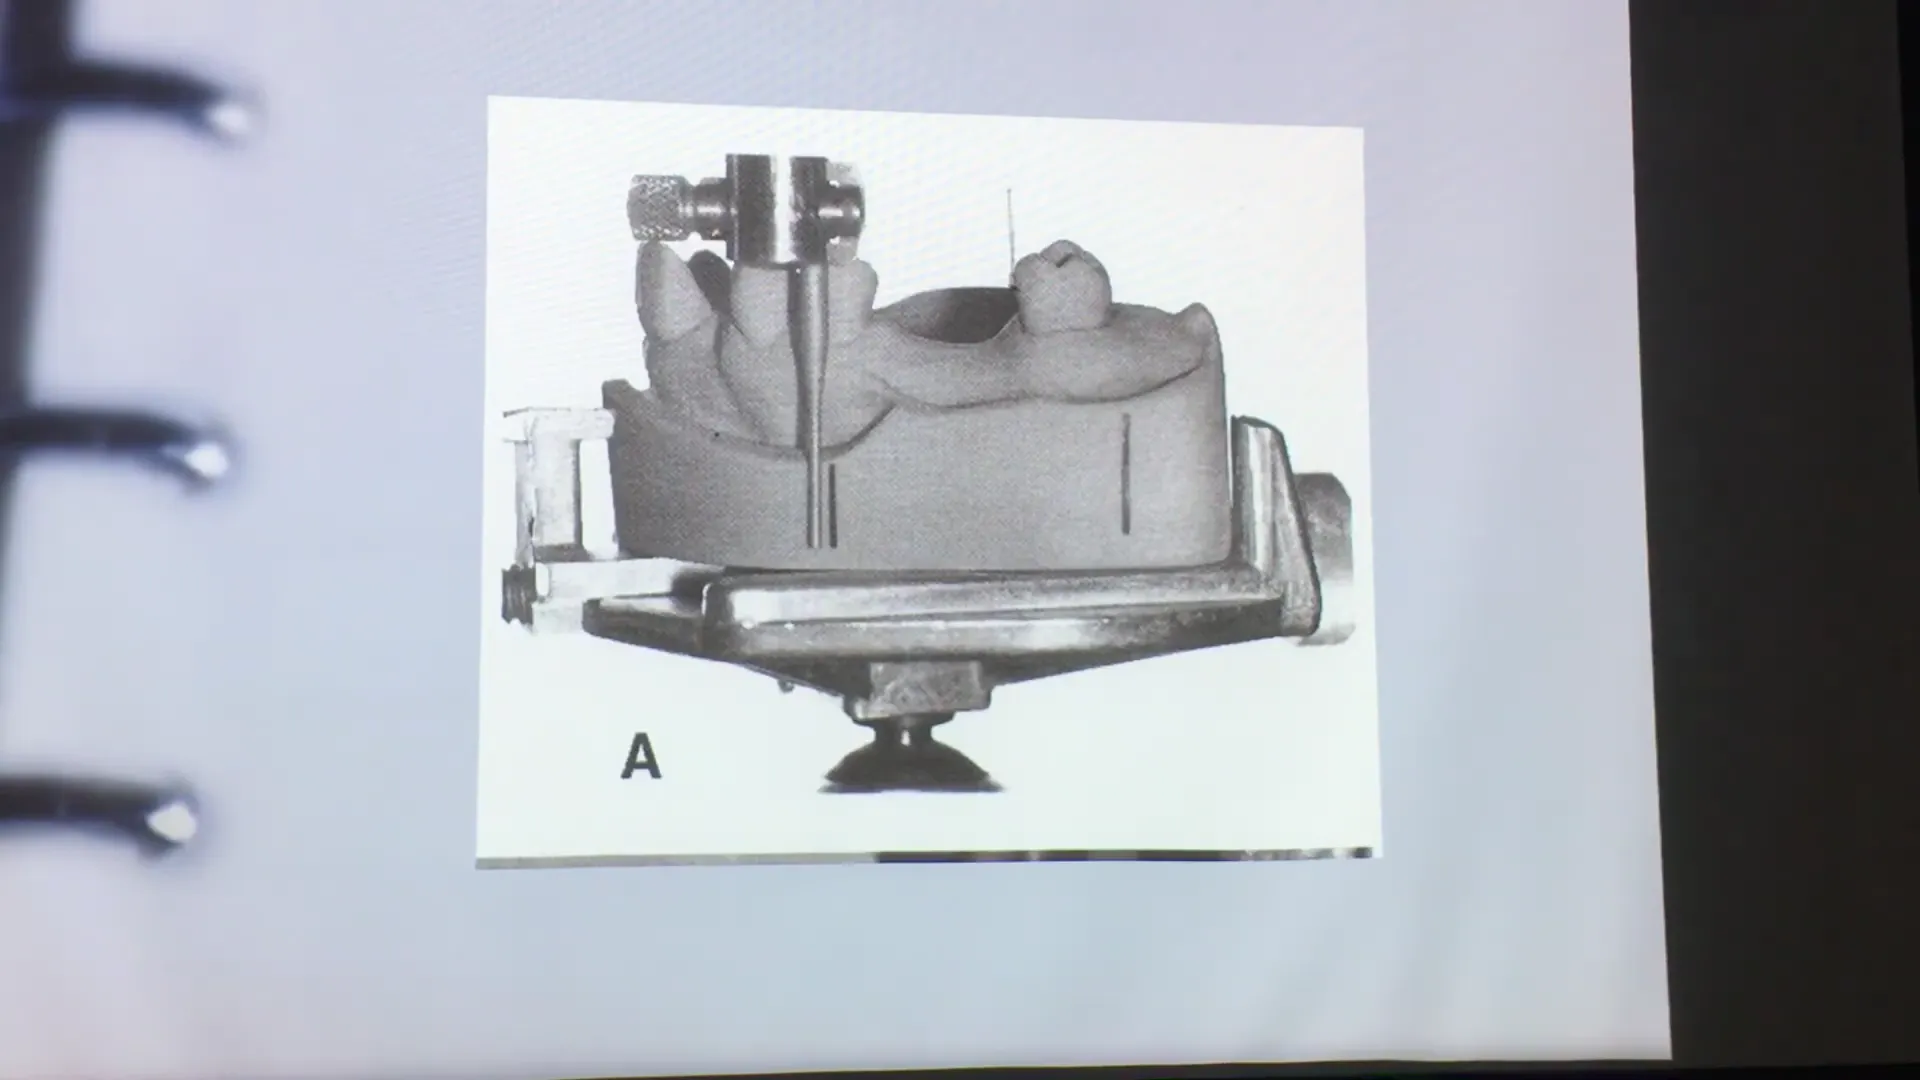
- Tripoding the Cast: Marking the cast so it can be removed and returned to the surveyor at the exact same tilt.
4. Path of Placement and Guide Planes
The path of placement is the specific direction in which the prosthesis moves from the first point of contact to its final seated position.
- Initial Tilt: Generally, surveying begins with the occlusal plane parallel to the base of the surveyor (zero tilt).
- Equalizing Undercuts: By tilting the table, you can balance undercuts between different abutment teeth.
- Frictional Retention: Guide planes should be parallel to each other to provide stability and predictable insertion.
5. Clasp Design and Retention
For cast chromium-cobalt (Cr-Co) frameworks, precision is vital because the metal is rigid and has a low modulus of elasticity compared to wrought wire.
- The 0.25mm Rule: For most Cr-Co clasps (like the Akers or E-clasp), the terminal third of the retentive arm should engage a 0.25mm undercut.
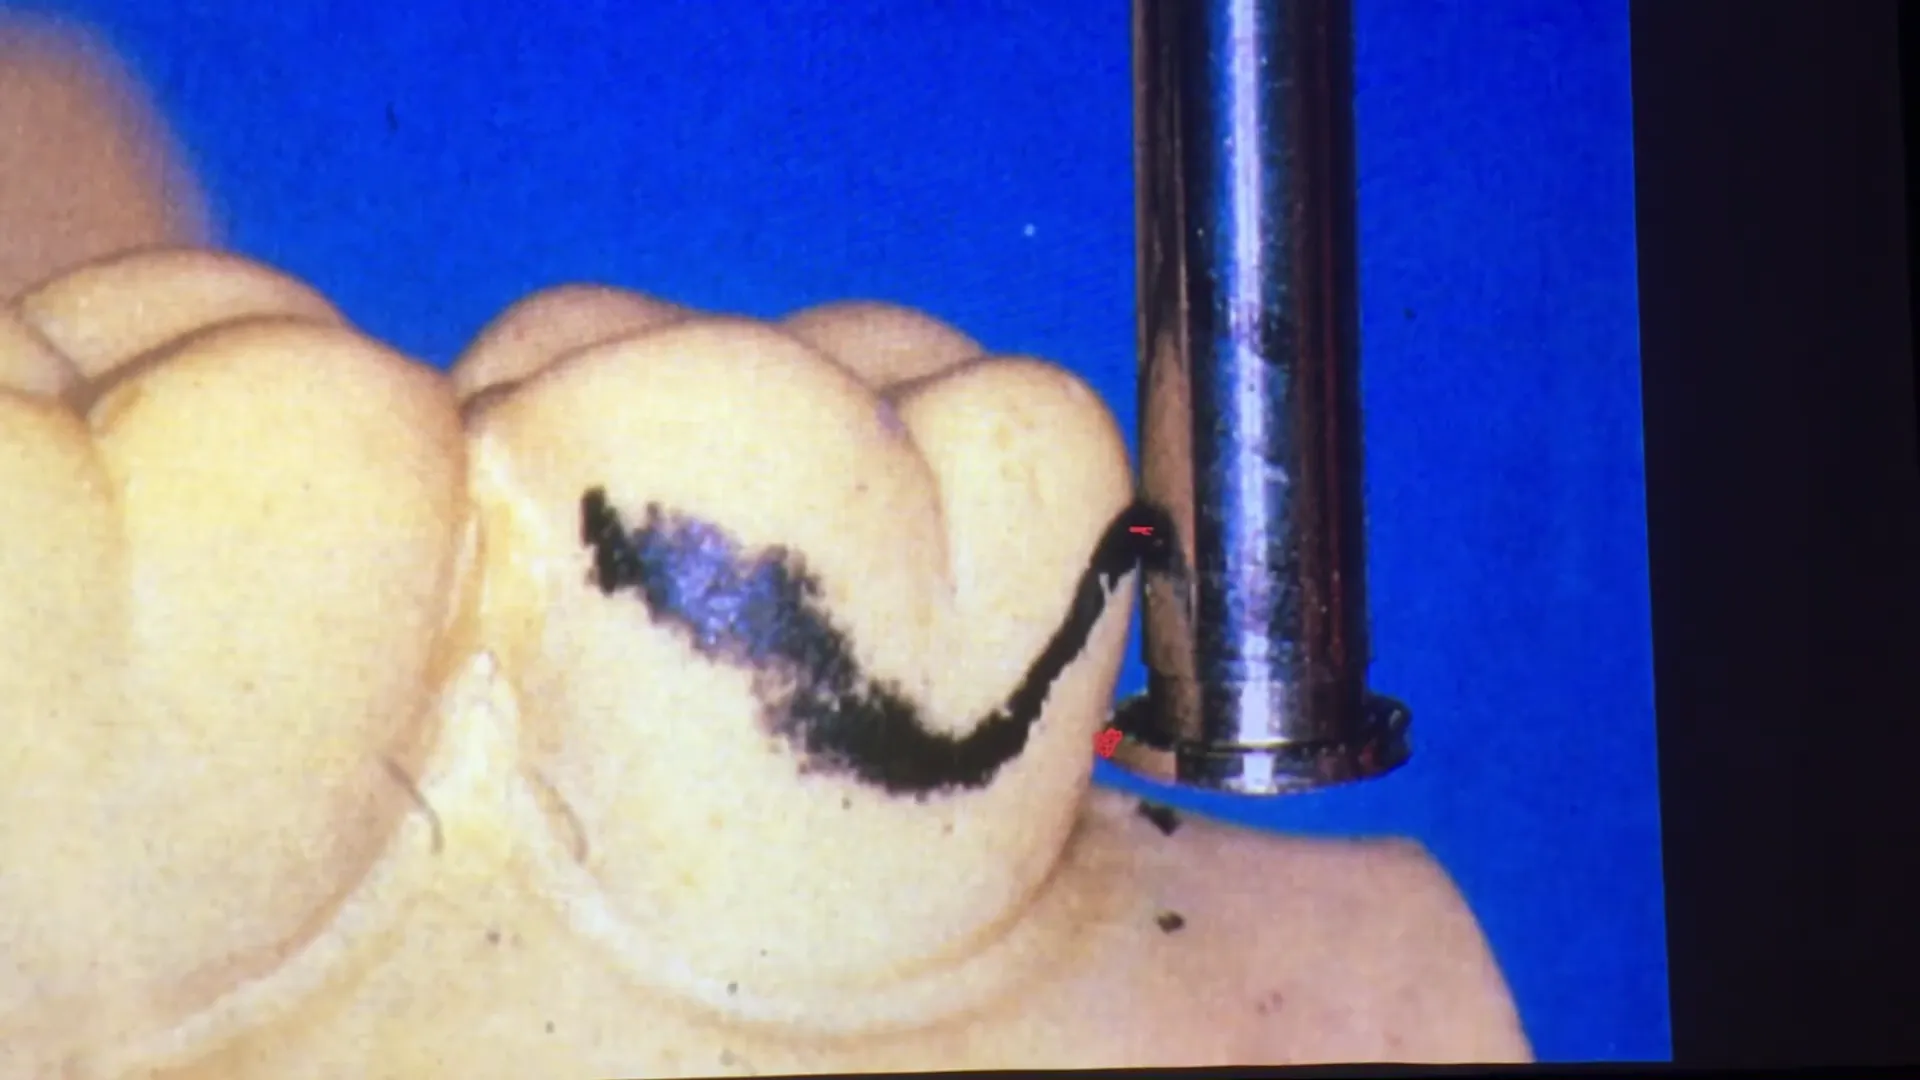
- Clasp Placement: The first two-thirds of the clasp must remain above the height of contour (passive). Only the terminal tip dips below the line into the undercut (active).

- Avoidance of Over-retention: Placing a rigid cast clasp into a deep undercut (e.g., 0.75mm) will cause the metal to fracture or damage the abutment tooth.

6. Soft Tissue Considerations
Surveying is not limited to teeth. It is used to evaluate:
- Major Connector Clearance: Ensuring a lingual bar has 0.3mm to 0.5mm of clearance from the tissue.
- Interferences: If a deep soft tissue undercut exists, a lingual bar may create a food trap or speech impediment. In such cases, a lingual plate may be a better design choice to avoid the undercut.
7. Tripoding the Cast
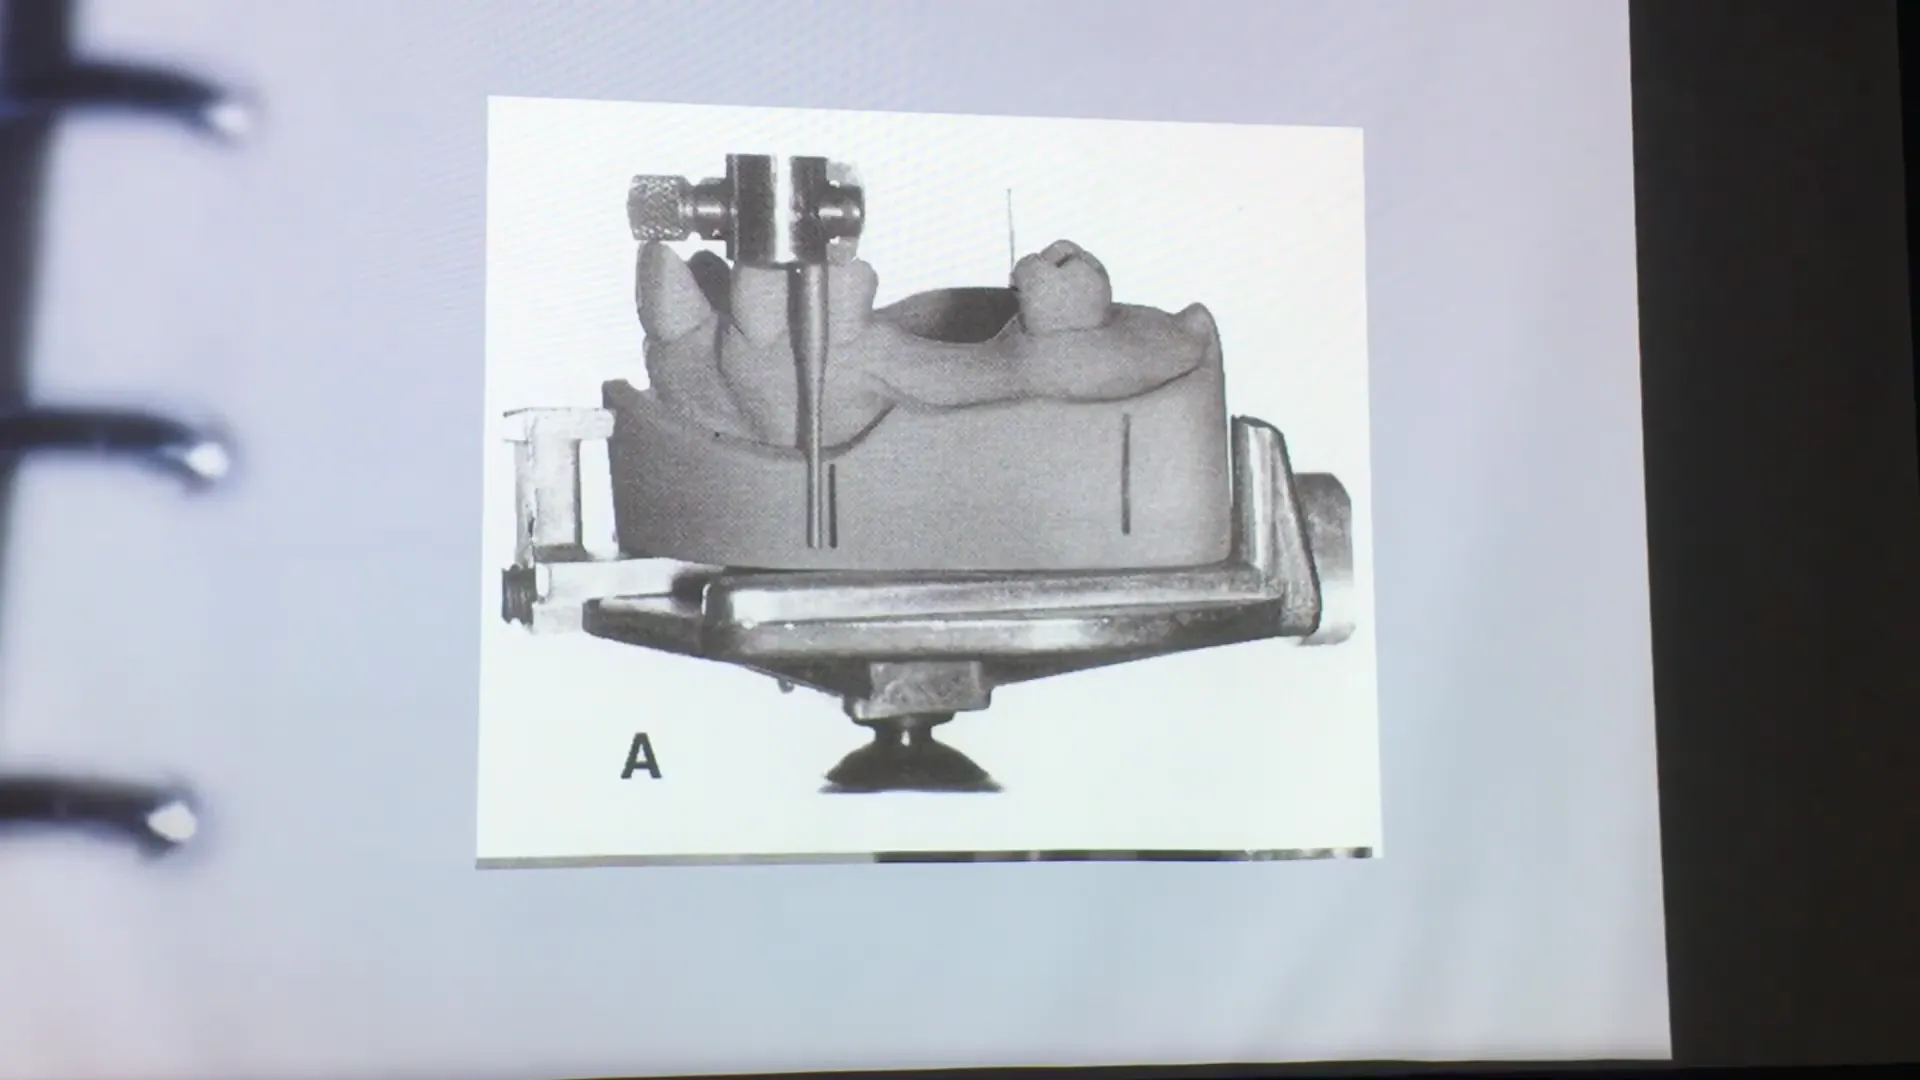
Tripoding is a “memory device” used to re-establish the chosen path of insertion if the model is removed from the surveyor.
- Method A: Marking three widely spaced dots on the tissue surface of the cast at a fixed vertical height. These are circled and marked with an “X.”

- Method B: Scoring three vertical lines on the sides (base) of the cast parallel to the analyzing rod.
8. Clinical Application: Kennedy Class I Project
For the upcoming practical exercise, students will:
- Align the distal guide planes of the bicuspids (34 and 44).
- Balance the buccal undercuts for aesthetic clasp placement.
- Delineate the height of contour on all teeth using the carbon marker.
- Measure and mark the 0.25mm retentive point.
- Tripod the cast to preserve the established path of insertion.